Emails » Send Newsletter » New Email Newsletter
In this guide, the process of crafting a fresh email newsletter campaign from start to finish will be explored.
Where to Create a New Newsletter Campaign
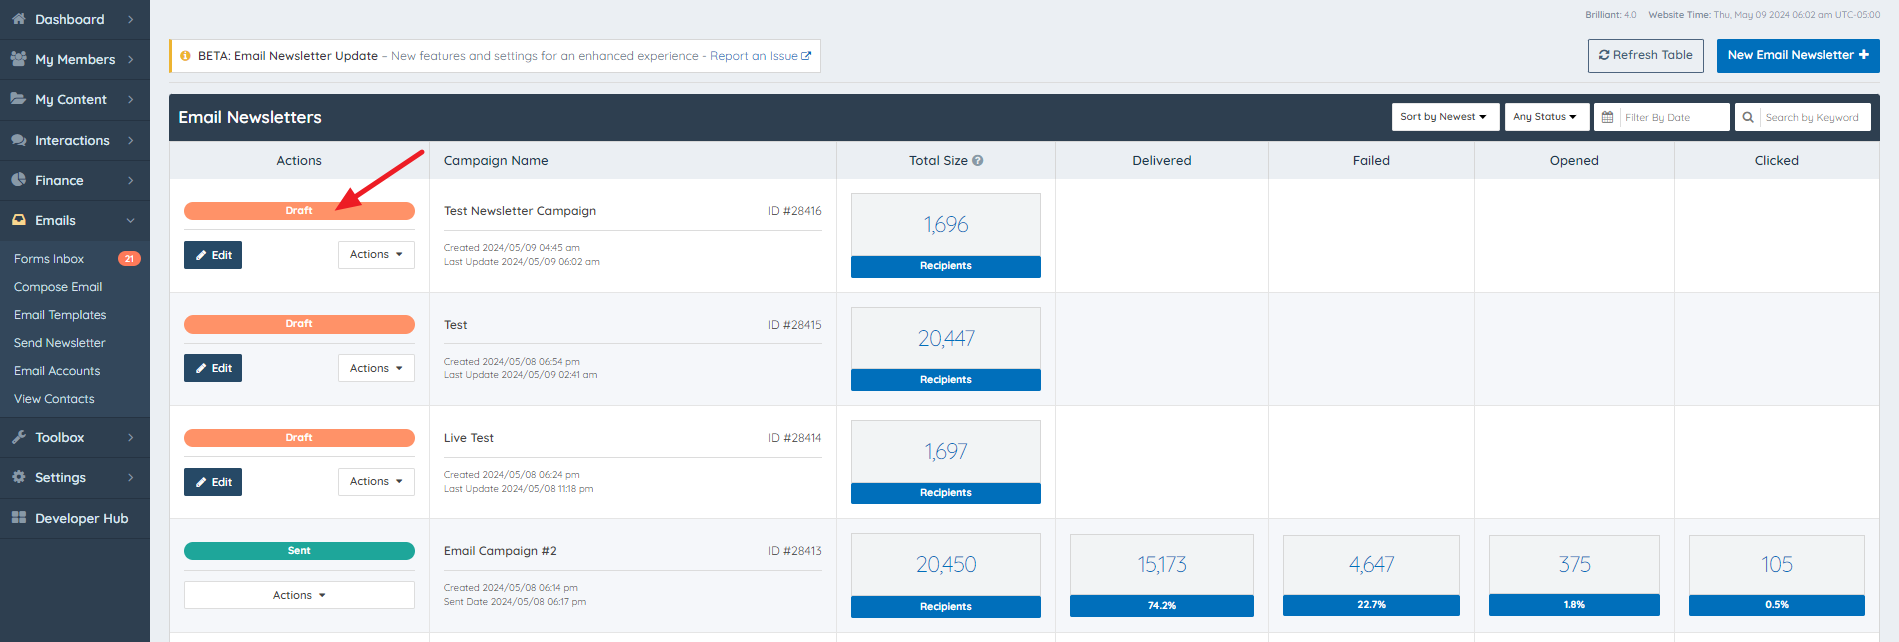
The option to create a new newsletter campaign can be found under Emails >> Send Newsletter >> New Email Newsletter:

Pressing this button will reveal a module where the name of the newsletter campaign can be inputted, and the email template to utilize can be chosen.

It is also possible to create a new newsletter email template from scratch, by selecting the "Start As Blank Template" option. More information about this can be found in this article:

Editing the Newsletter Draft
Upon naming the newsletter campaign and selecting the email template, the campaign can be edited in draft mode.

Edit Email
In this section, necessary adjustments can be made to the From Name (The name recipients will see), From Address (The email address recipients will see), Template Subject Line, and Template Content.

In the sidebar area, some additional settings and functionality can be found.
 |  |
Include Default Template w/Logo: This setting will decide if the Email Template Logo added under Brand Images should be included in the template.
Include Unsubscribe Link: This setting will decide if an unsubscribe link should be included in the template.
Draggable Content Blocks: These content blocks can be added to the email template if needed by dragging and dropping.

Email Variables: This displays the available email variables that can be utilized in the email template to pre-populate information like member name, URL, company name, etc.
Preview Email
In this section, the selected email template can be previewed before sending.

If an email template incorporates member-related variables, such as a member's first name, you can preview the template to visualize how these variables will appear by specifying an existing member ID#.

Also, the member ID# numbers can be easily adjusted by clicking on the available up and down arrows.

Select Recipients
In this section, smart lists for inclusion and exclusion can be chosen and the total recipient number will be displayed.

Consider the following scenario: the email campaign needs to target all website members except those located in the United States and those subscribed to membership plan ID#3.
To achieve this, create two distinct smart lists in the Members >> Search Members section. One list should filter members based on location for those in the United States, while the other should filter based on membership plan ID#3.
Once these lists are prepared, add the "All Members" smart list by clicking "Include".

Similarly, exclude the smart lists for United States members and those subscribed to membership plan ID#3 by clicking "Exclude".
 |  |
The end result would look like this:

Schedule Email
In this section, the timing for the email campaign can be specified, and the current monthly limit is displayed.

Sending Campaign Immediately
To initiate the immediate sending of the email template, choose the "Send Now" option and click the "Click to Send Email Now" button.

Clicking this button will prompt the display of two distinct confirmation modules; proceed by clicking "Click to Confirm" and "Yes, Continue" respectively.
 |  |
Following the confirmation, the system will commence sending out the email campaign within 2 minutes, and the campaign statistics will begin to appear.

Schedule Campaign for Later
Should the sending of the email template be scheduled for a future time, choose the "Schedule for Later" option, set the date and time accordingly, and then click the "Click to Schedule Email" button.

The scheduled email campaign will appear under the Send Newsletter section with the Draft status:
To learn more about the statuses of the email campaigns and the statistics shown above, please refer to the article below:
Important Note: If the Monthly Limit to Send Email has been reached, the option to increase the limit on the site is available by clicking on the "Increase Limit Now" link.

