
Default Lead Action & Creating New Lead Actions
Link: https://support.brilliantdirectories.com/support/solutions/articles/12000009583
This documentation is for the Automatic Lead Matching add-on.
Lead rules (called lead actions before the Member Leads page was redesigned) decide how leads are handled for each membership plan: the lead form settings, whether members receive direct and indirect leads, the match status and the emails sent. Every website has a default rule, the Main Rule, and more rules can be created for specific membership plans. To learn more about how rules work, see Understanding Actions / Data Flows.
Open the Lead Rules
- Navigate to Interactions » Member Leads (1).
- Click Lead Settings (2) at the top of the page.
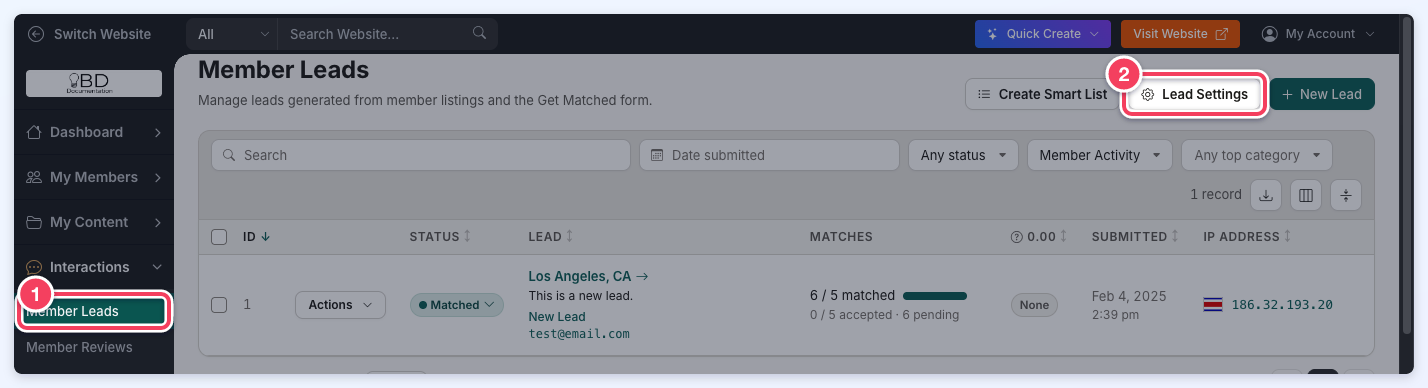
- In the Lead Settings drawer, open the Lead Rules tab.
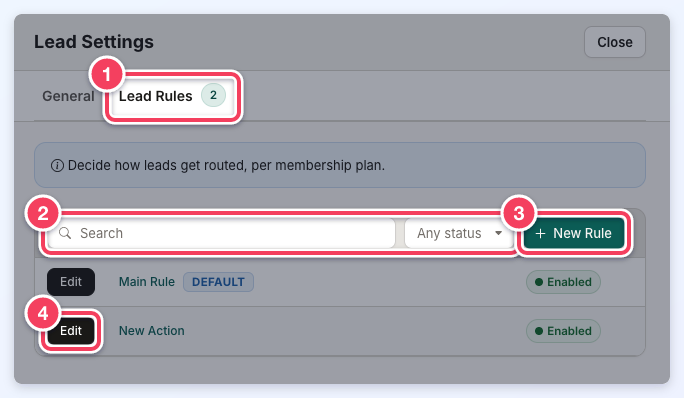
- Lead Rules: the tab, with the number of rules beside it.
- Search and the Any status filter (Enabled or Disabled) narrow the list.
- New Rule: creates a rule (explained below).
- Edit: opens a rule's settings. Each rule shows whether it is Enabled or Disabled.
The Main Rule
Every website starts with the Main Rule, marked Default. It cannot be deleted or renamed, and it applies to every membership plan that has no enabled rule of its own. The site-wide settings, Enable Automatic Lead Matching to Members and Maximum Leads per Visitor in 24 Hours, are on the drawer's General tab (see How Does Auto-Matching Work? (Lead Settings » General)).
Click Edit beside the Main Rule to change its settings, then click Save at the top of the drawer. Back to Lead Rules returns to the list.
Create a Lead Rule
A rule of its own lets specific membership plans handle leads differently from the Main Rule.
- On the Lead Rules tab, click New Rule.
- Fill in the Rule Settings:
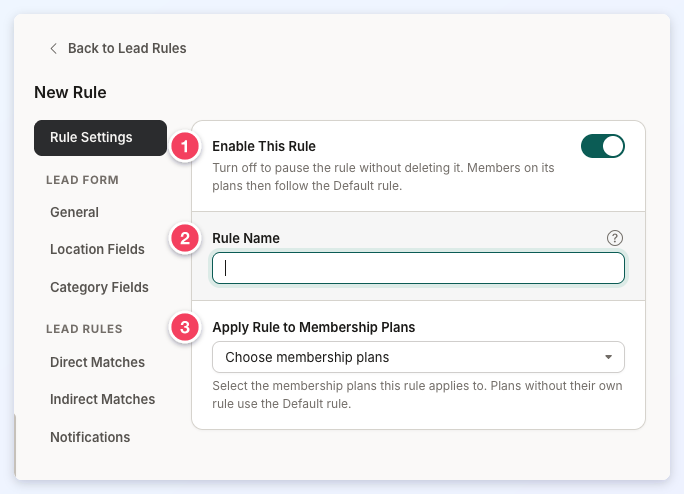
- Enable This Rule: Turn this off to pause the rule without deleting it. Members on its plans then follow the Main Rule.
- Rule Name: A name to find the rule in the list. Only admins see it, and it is required.
- Apply Rule to Membership Plans: The membership plans the rule applies to. Plans without their own rule use the Main Rule.
- Set up the rule's other sections from its side menu (each is explained in its own article, listed below).
- Click Save at the top of the drawer. The new rule appears in the Lead Rules list.
Delete a Lead Rule
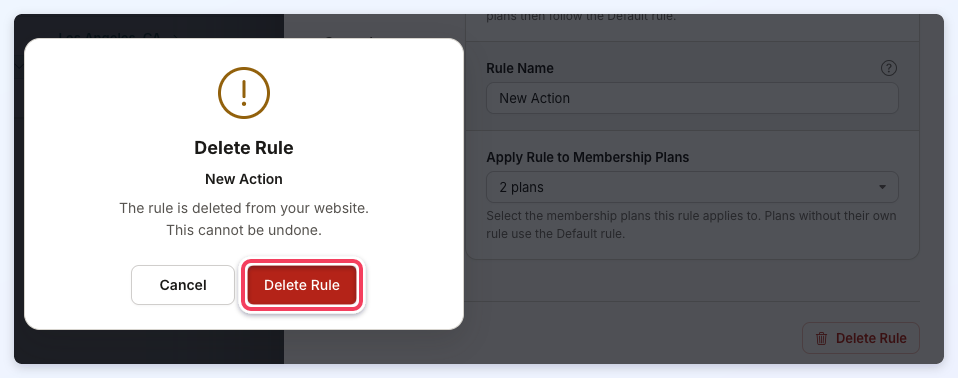
Open the rule with Edit and click Delete Rule at the bottom of its settings, or hover over the rule in the list and click its trash icon. Confirm with Delete Rule. Deleting cannot be undone, and members on its plans then follow the Main Rule. The Main Rule cannot be deleted.
Available Settings within Each Rule
The Main Rule and additional rules have the same sections in their side menu:
- Lead Form (General, Location Fields and Category Fields): Member Leads » Lead Settings » Lead Form. When Same Form Settings on Profile & Website Pages is off, a Website Pages group with its own form settings appears below it.
- Direct Matches: Member Leads » Lead Settings » Direct Matches
- Indirect Matches: Lead Settings » Receiving Indirect Leads (Automatic Lead Matching)
- Notifications: Auto-Match Workflows » Additional Notifications Settings
