How to Verify a Listing
Link: https://support.brilliantdirectories.com/support/solutions/articles/12000021982
Overview
The Verified Listing feature allows administrators to manually verify member listings. Once verified, a badge appears on the member's public profile, indicating to site visitors that the listing has been reviewed and verified by the site administrator.
A default checkmark badge is displayed on verified profiles. When a site visitor hovers over the badge, a message confirms that the listing is verified.

⚠ NOTE — Verification Is Always Manual: The system does not verify members automatically. Regardless of whether a member submits a verification form, the verified status is only applied when an administrator manually sets the member to Verified via the Quick Edit module. The form submission is a request, it does not trigger automatic verification.
Part 1 — Enable the Verify Listing Option on a Membership Plan
The Verify Listing option must be enabled on a Membership Plan before members on that plan can see or submit a verification request from their dashboard.
Navigation Path: Admin Dashboard » Finance » Membership Plans » Member's Dashboard
To enable the setting:
- Navigate to Finance » Membership Plans in the admin dashboard.
- Click Edit on the target Membership Plan.
- Search for "Verify Listing" within the plan settings.
- Enable the option and save the plan.
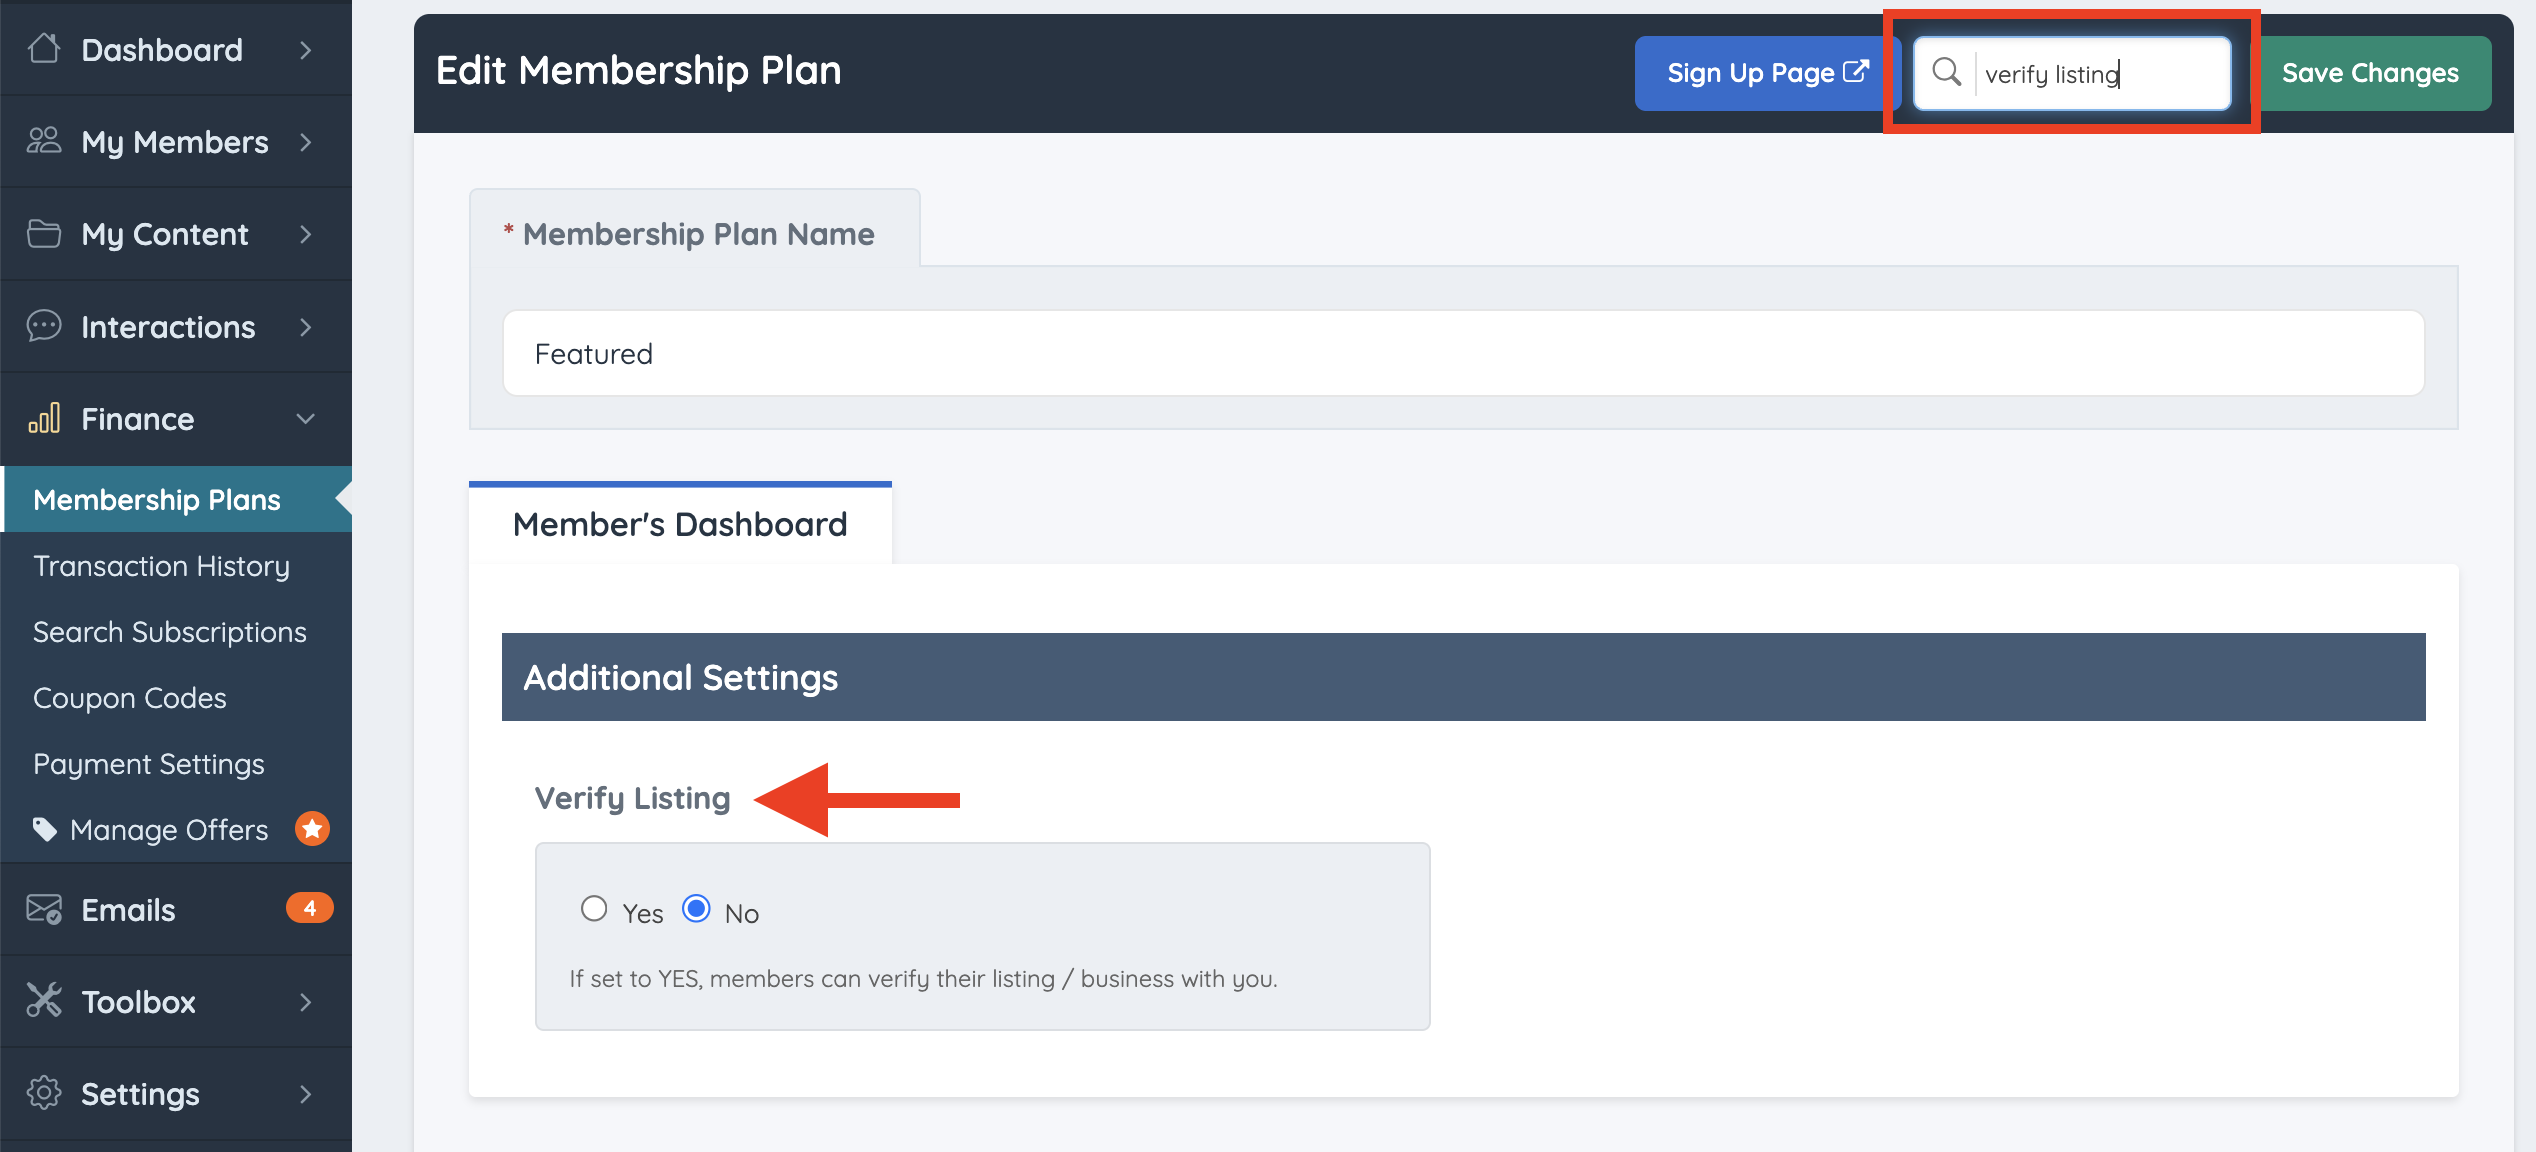
Once enabled, members on that plan will see the verification link and form within their member dashboard.

⚠ NOTE — Setting Is Per Membership Plan: The Verify Listing option must be enabled independently on each Membership Plan where it is required. Enabling it on one plan does not affect any other plans.
Part 2 — Member Form Submission
After the Verify Listing option is enabled on their plan, the member can access the Listing - Verify Account form from their member dashboard and submit it to request verification.
Once submitted, a confirmation message is displayed in the member dashboard.

Editing the Form Submission Text Labels
The text displayed in the post-submission confirmation message can be edited under Settings » Text Labels. The following three labels control this message:
| Label Name | Description |
|---|---|
| Verification Info Submitted | The title or heading displayed after the form is submitted. |
| Verification Paragraph 1 | The first paragraph of the post-submission message. |
| Verification Paragraph 2 | The second paragraph of the post-submission message. |
Reference: Settings » Text Labels:
- Verification Info Submitted:

- Verification Paragraph 1:

- Verification Paragraph 2:

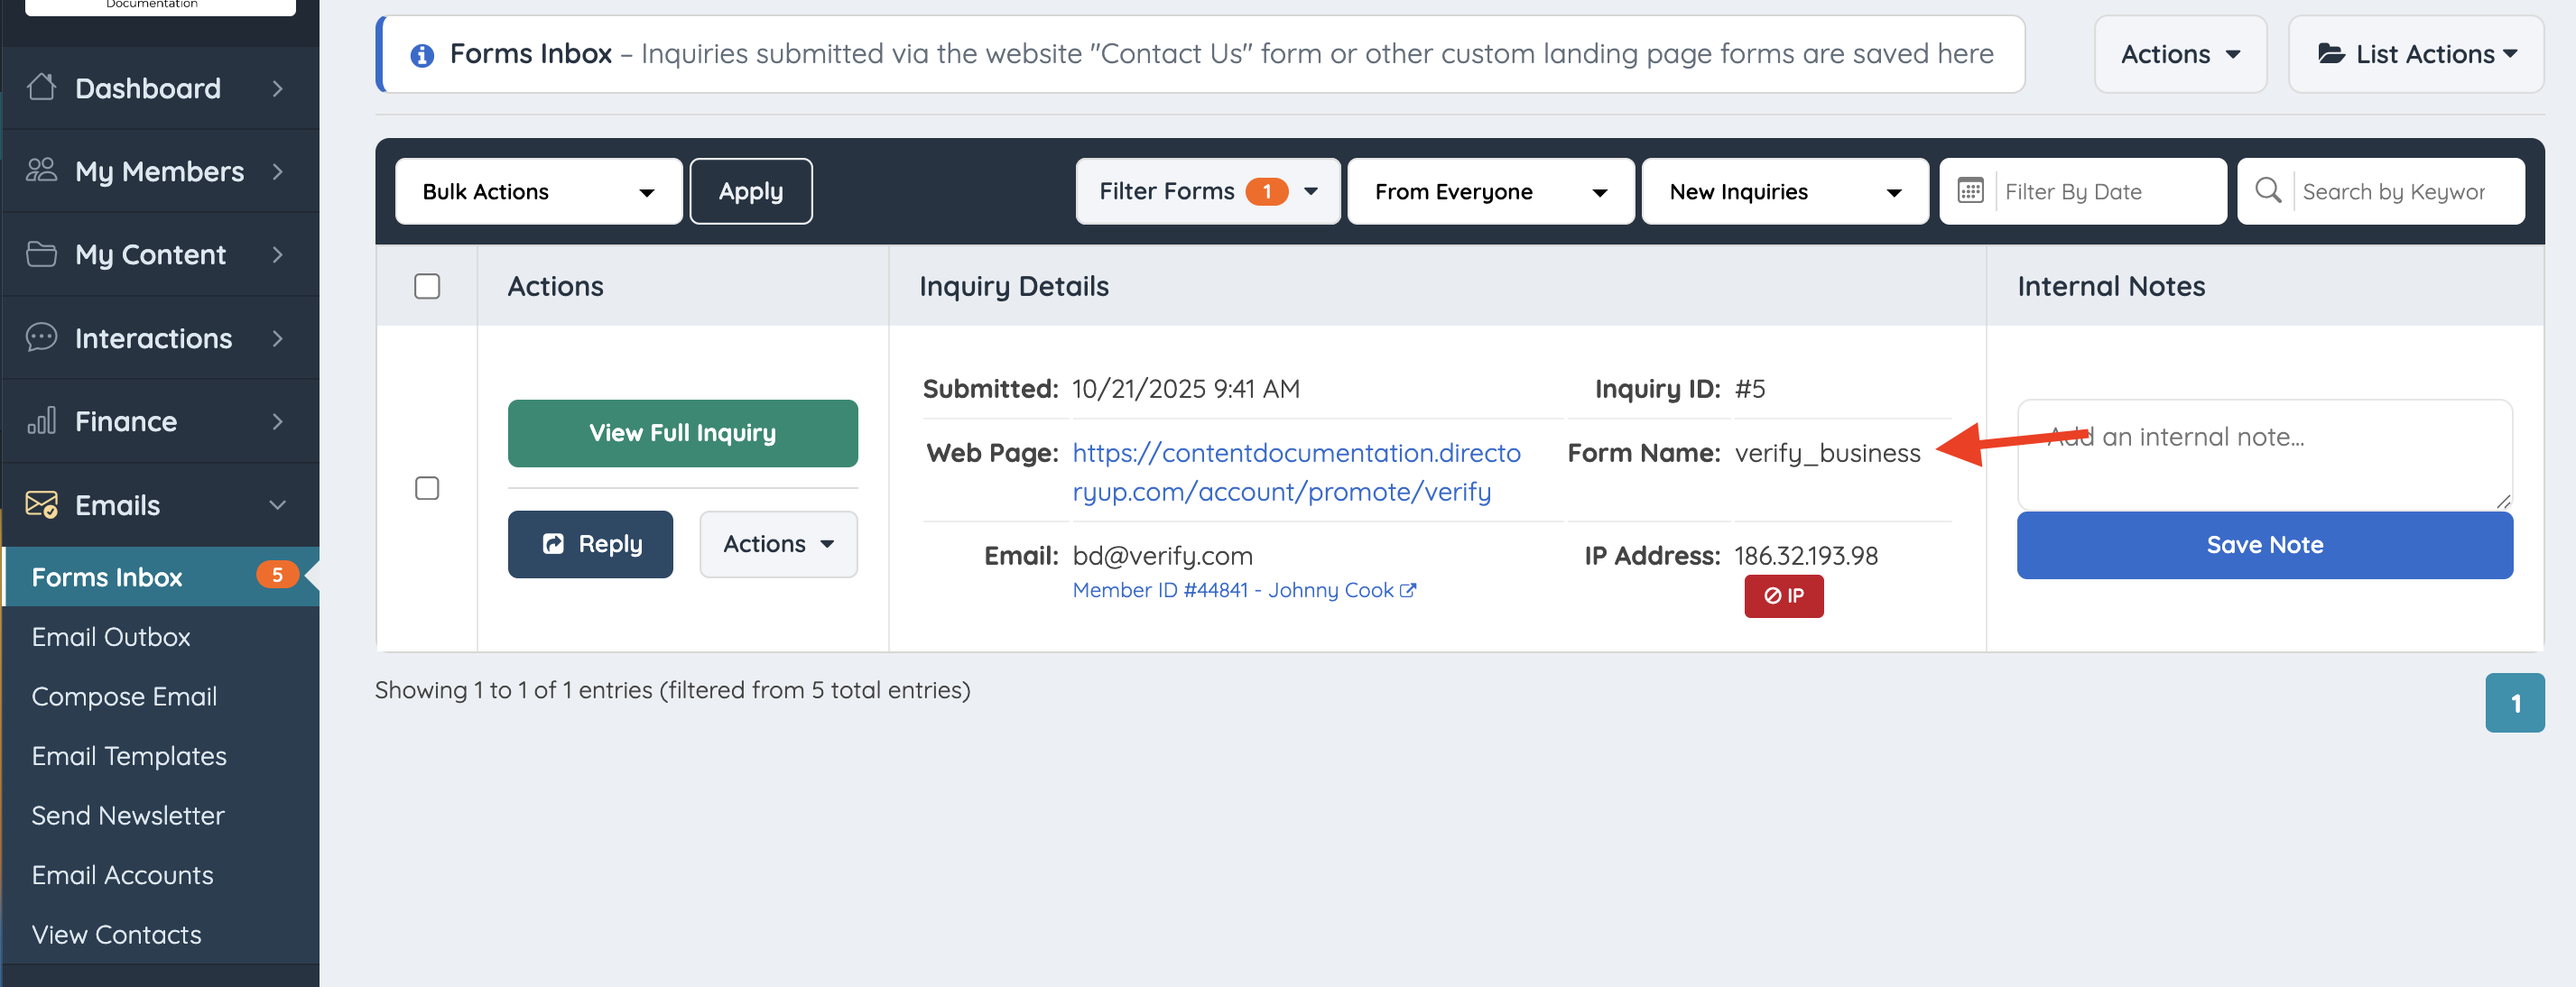
Viewing Form Submissions
Submitted verification requests are stored in the Forms Inbox and can be reviewed by the administrator before a verification decision is made.
Reference: Emails » Forms Inbox
Customizing the Verification Form Fields
The default fields on the Listing - Verify Account form can be edited or extended through the Form Manager.

To customize the form:
- Navigate to Toolbox » Form Manager.
- Locate the Listing - Verify Account form.
- Click Actions » Customize.
- Edit existing fields or add new ones as required.

Part 3 — Apply Verified Status to a Member
After reviewing a member's form submission, the administrator manually applies the verified status to the member's listing.
Navigation Path: Admin Dashboard » My Members » Search Members » Actions » Quick Edit » Listing Settings Tab
To verify a member listing:
- Navigate to My Members » Search Members.
- Locate the target member in the results table.
- Click Actions » Quick Edit for that member's record.
- Navigate to the Listing Settings tab within the Quick Edit module.
- Locate the Verified Member? setting.
- Set the value to Verified.
- Save the change.


Post-Verification Message Displayed to the Member
Once the administrator has set the member to Verified, a confirmation message is displayed to the member within their dashboard.

The text displayed in the post-verification confirmation message can be edited under Settings » Text Labels. The following three labels control this message:
| Label Name | Description |
|---|---|
| Verified Title Label | The heading displayed in the verified confirmation message. |
| Verified Paragraph 1 Label | The first paragraph of the verified confirmation message. |
| Verified Paragraph 2 Label | The second paragraph of the verified confirmation message. |
Reference: Settings » Text Labels:
- Verified Title Label:

- Verified Paragraph 1 Label:

- Verified Paragraph 2 Label:

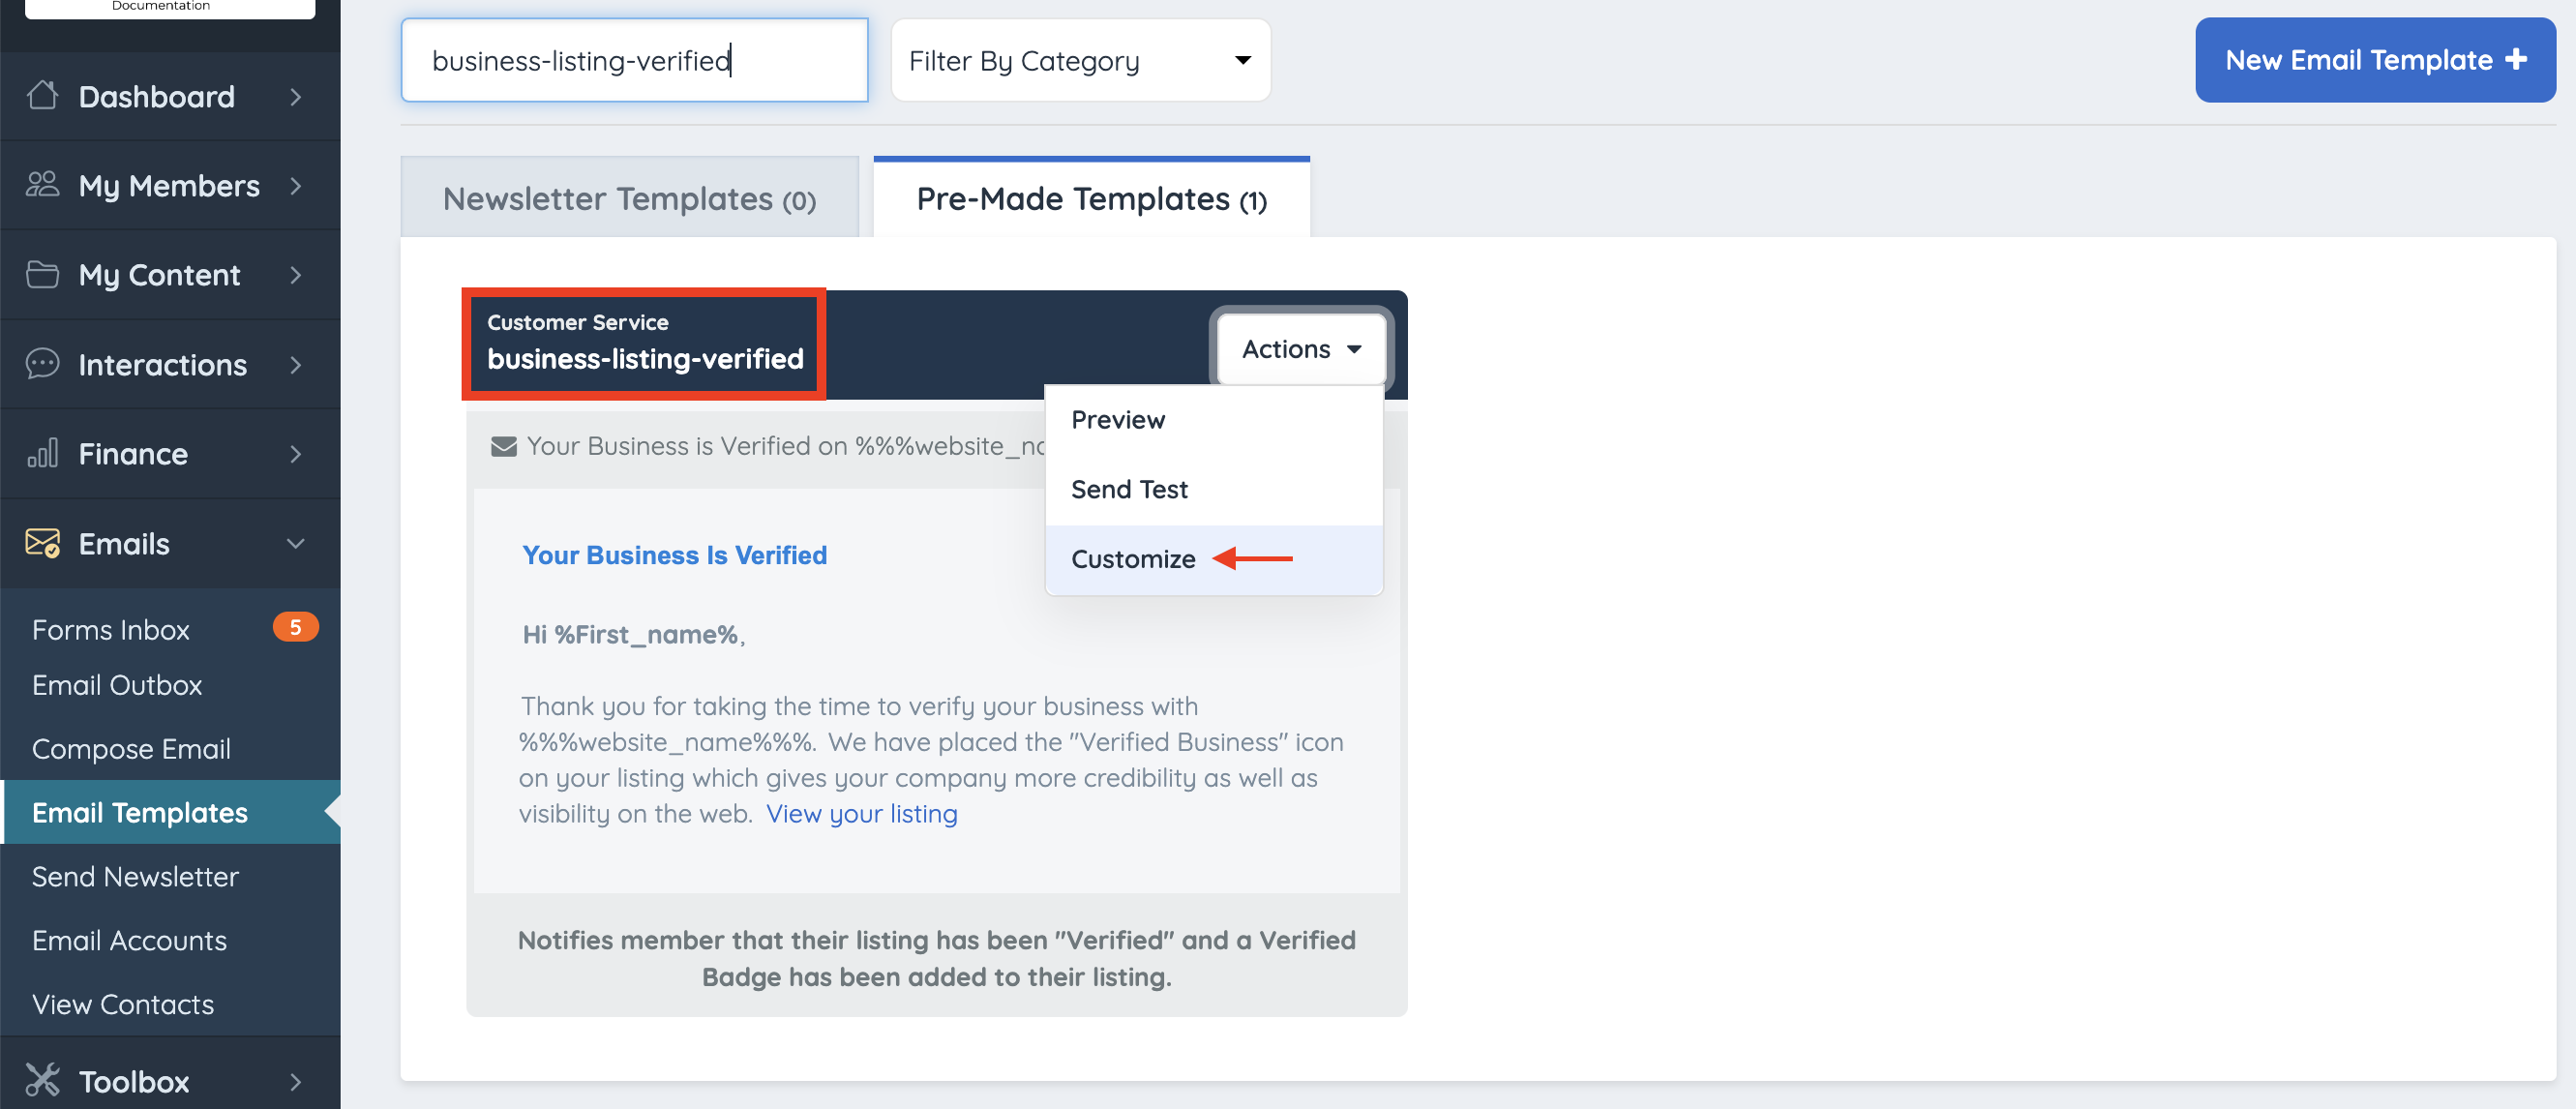
Part 4 — Send the Verified Confirmation Email
Once the member has been set to Verified in the Quick Edit module, the administrator can notify the member by sending the built-in verified confirmation email.
The email template to use is: business-listing-verified
This template can be customized within the email templates settings before sending.
Part 5 — Customization Options
Custom Verified Badges
The default verified checkmark badge can be replaced with a custom icon to match the visual style of the site.
Navigation Path: Admin Dashboard » Settings » General Settings » Brand Images » Verified Member Icon
Upload the replacement icon at the path above.

Customize the Verify Form URL
The URL path where members access the verification form can be changed from its default value.
Navigation Path: Admin Dashboard » Settings » Advanced Settings
The setting name is Member Verify URL. System variable: default_verify_url
The value entered in this field controls the portion of the URL that appears when a member navigates to the verification form from within their dashboard. The default value is promote/verify.


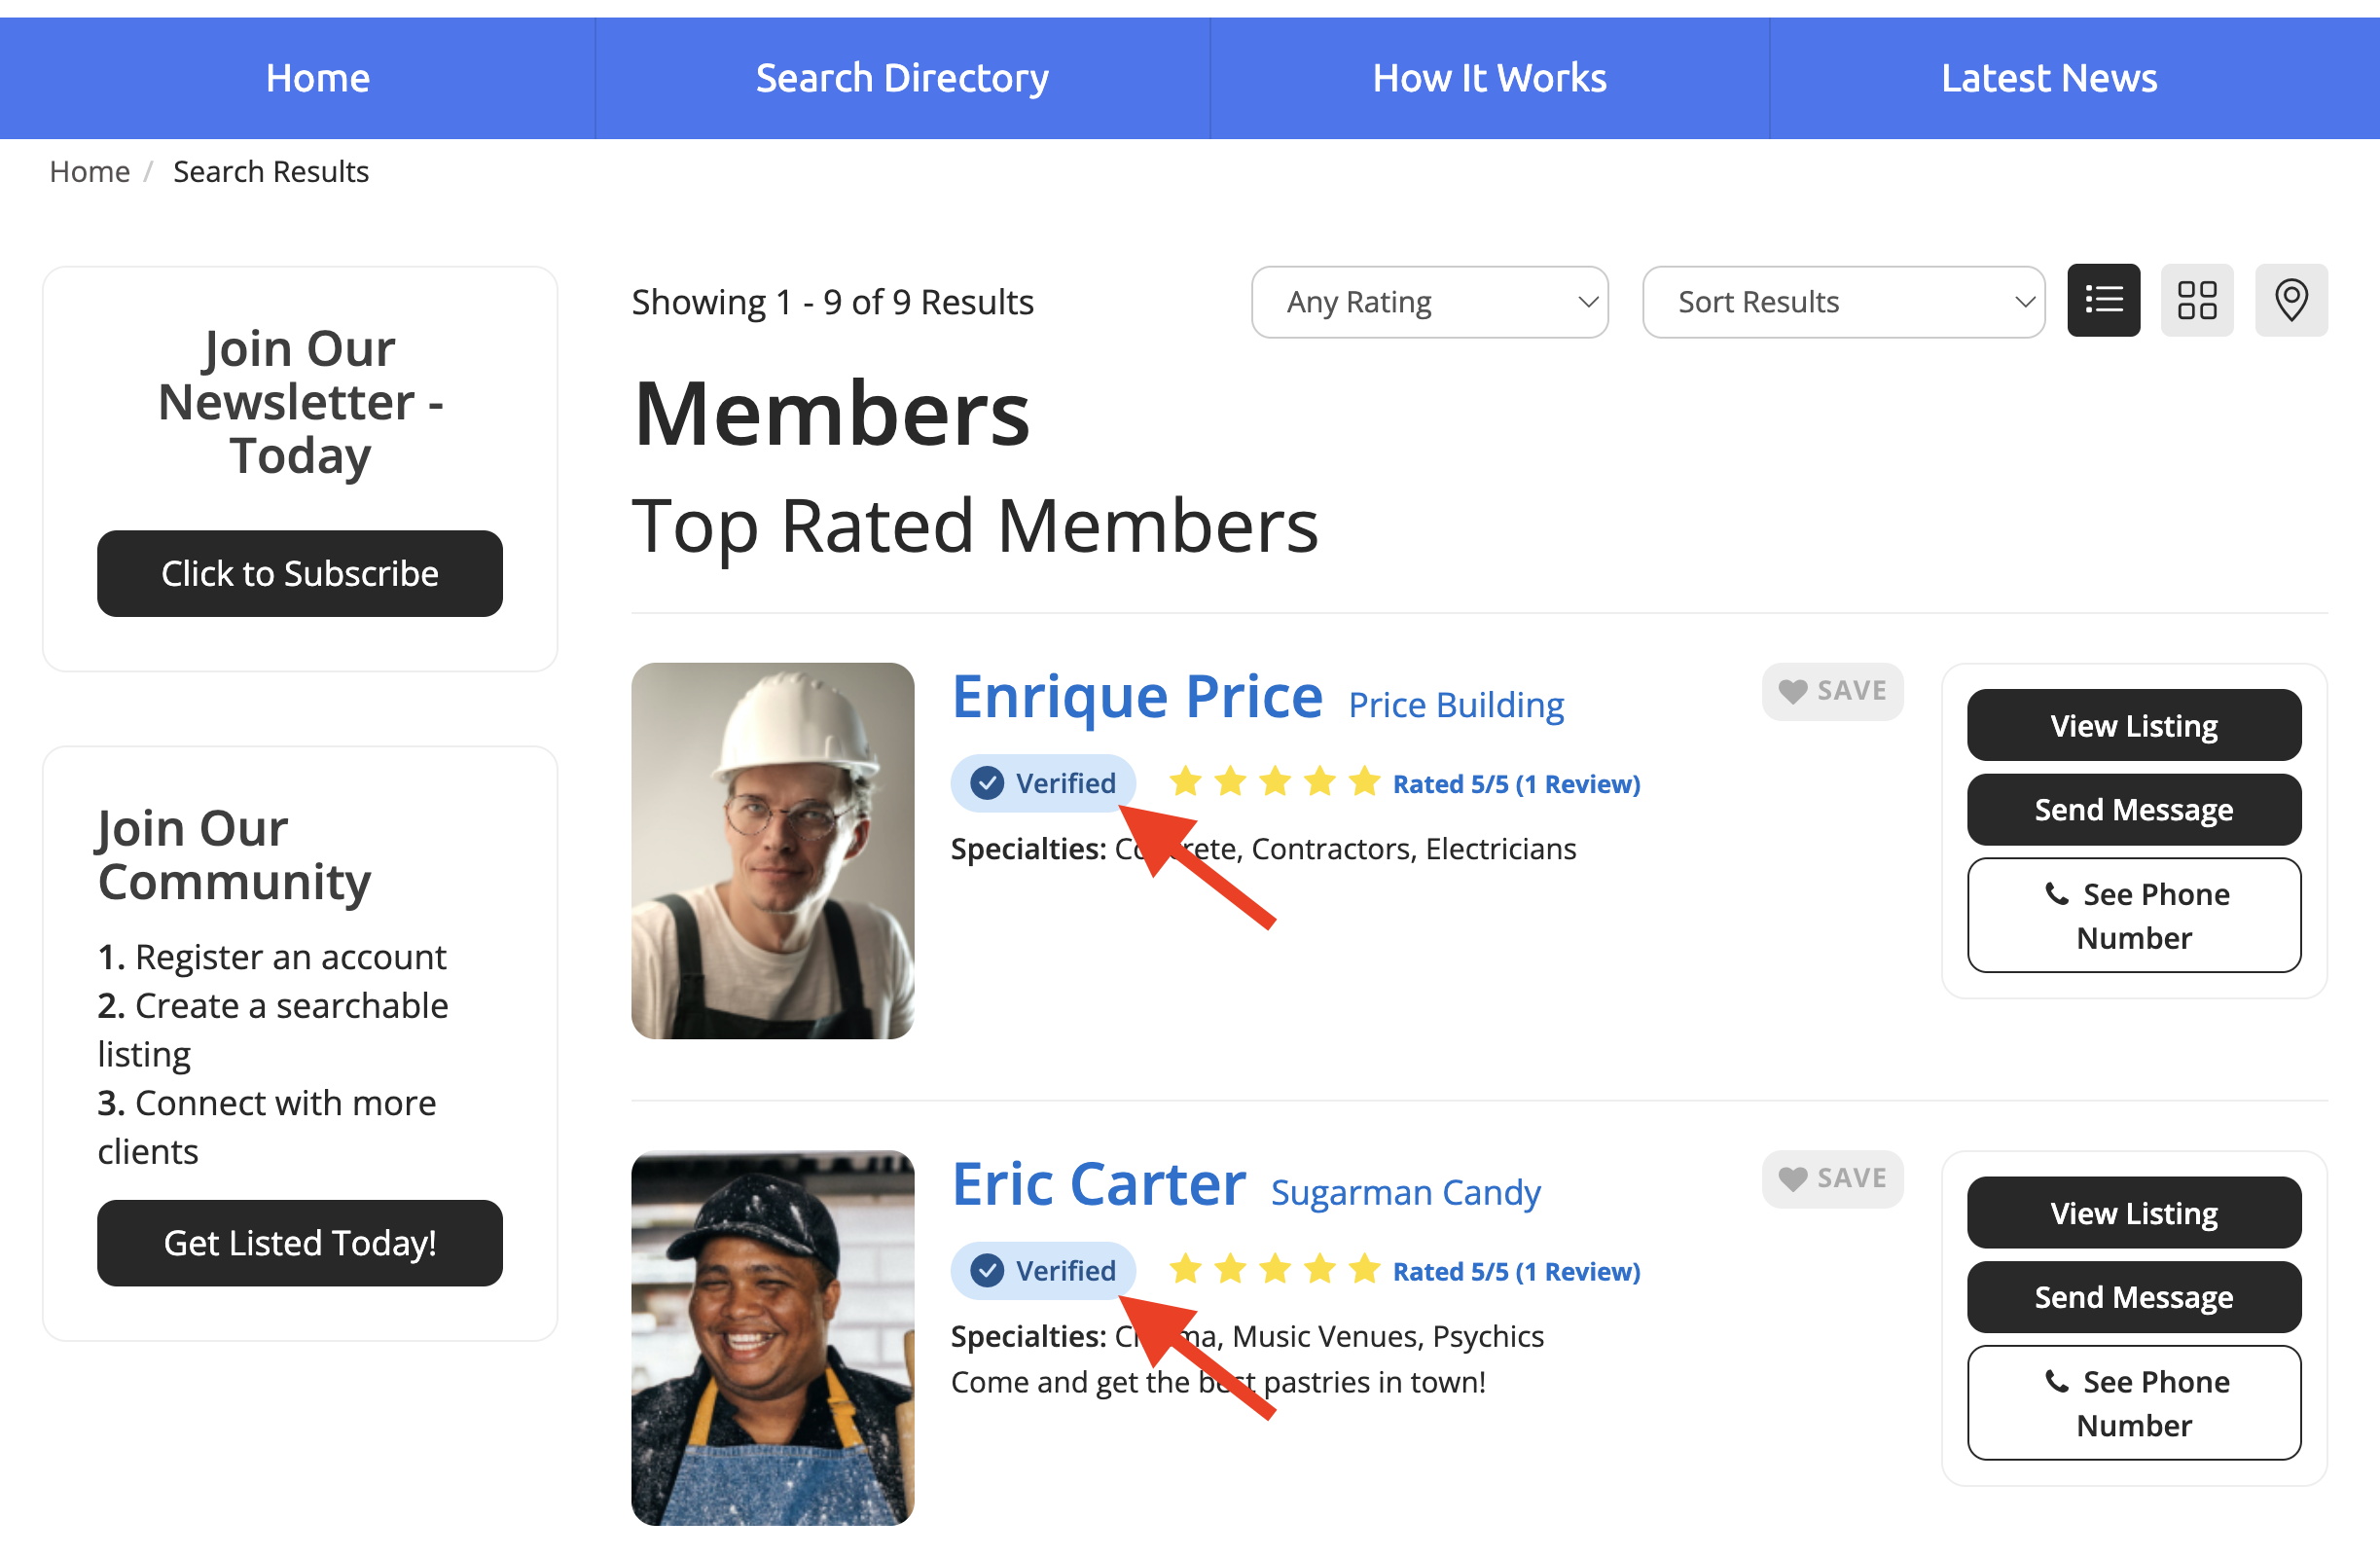
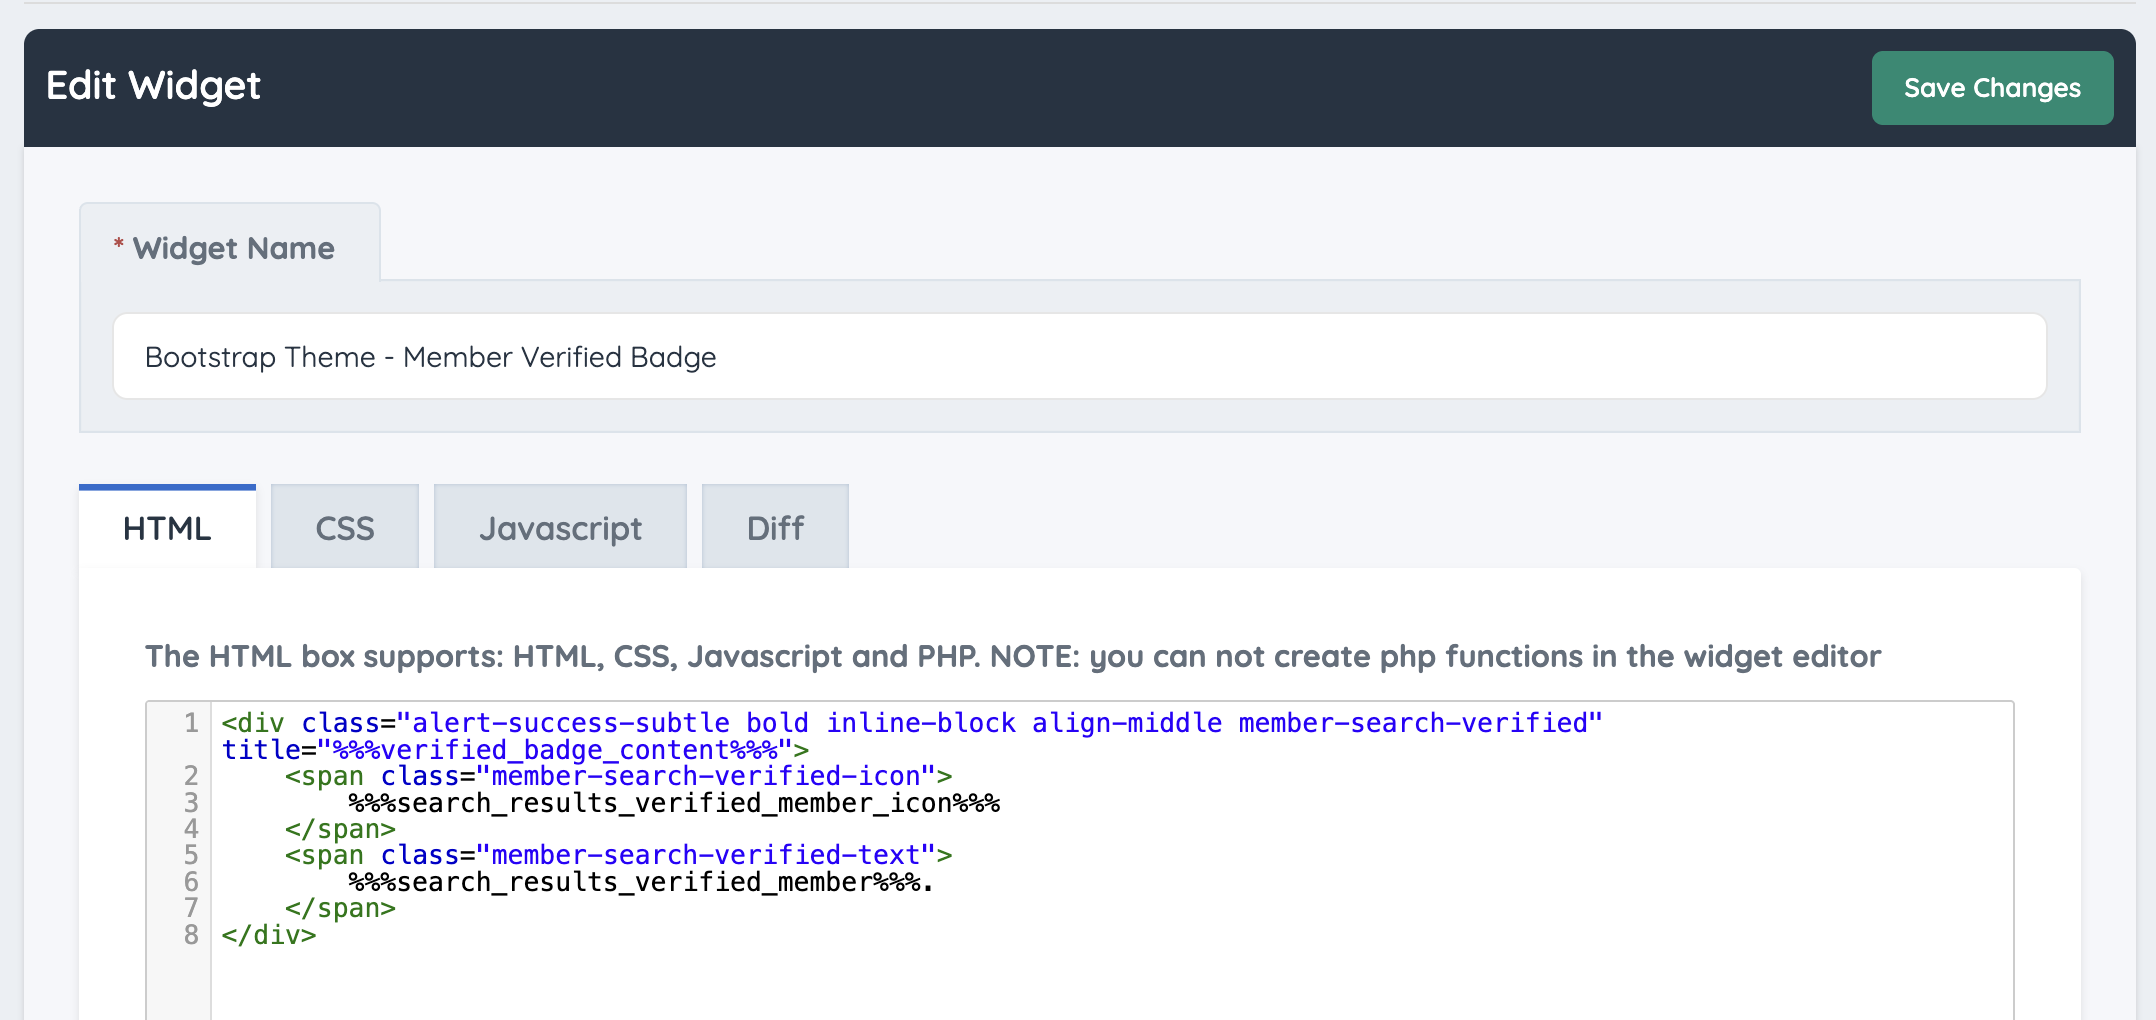
Verified Badge Widget — Search Results
The verified badge displayed in member search results is controlled by the Bootstrap Theme - Member Verified Badge widget. The badge layout, icon, and text are all editable through this widget and its associated text labels.

Reference: How To Customize a Widget
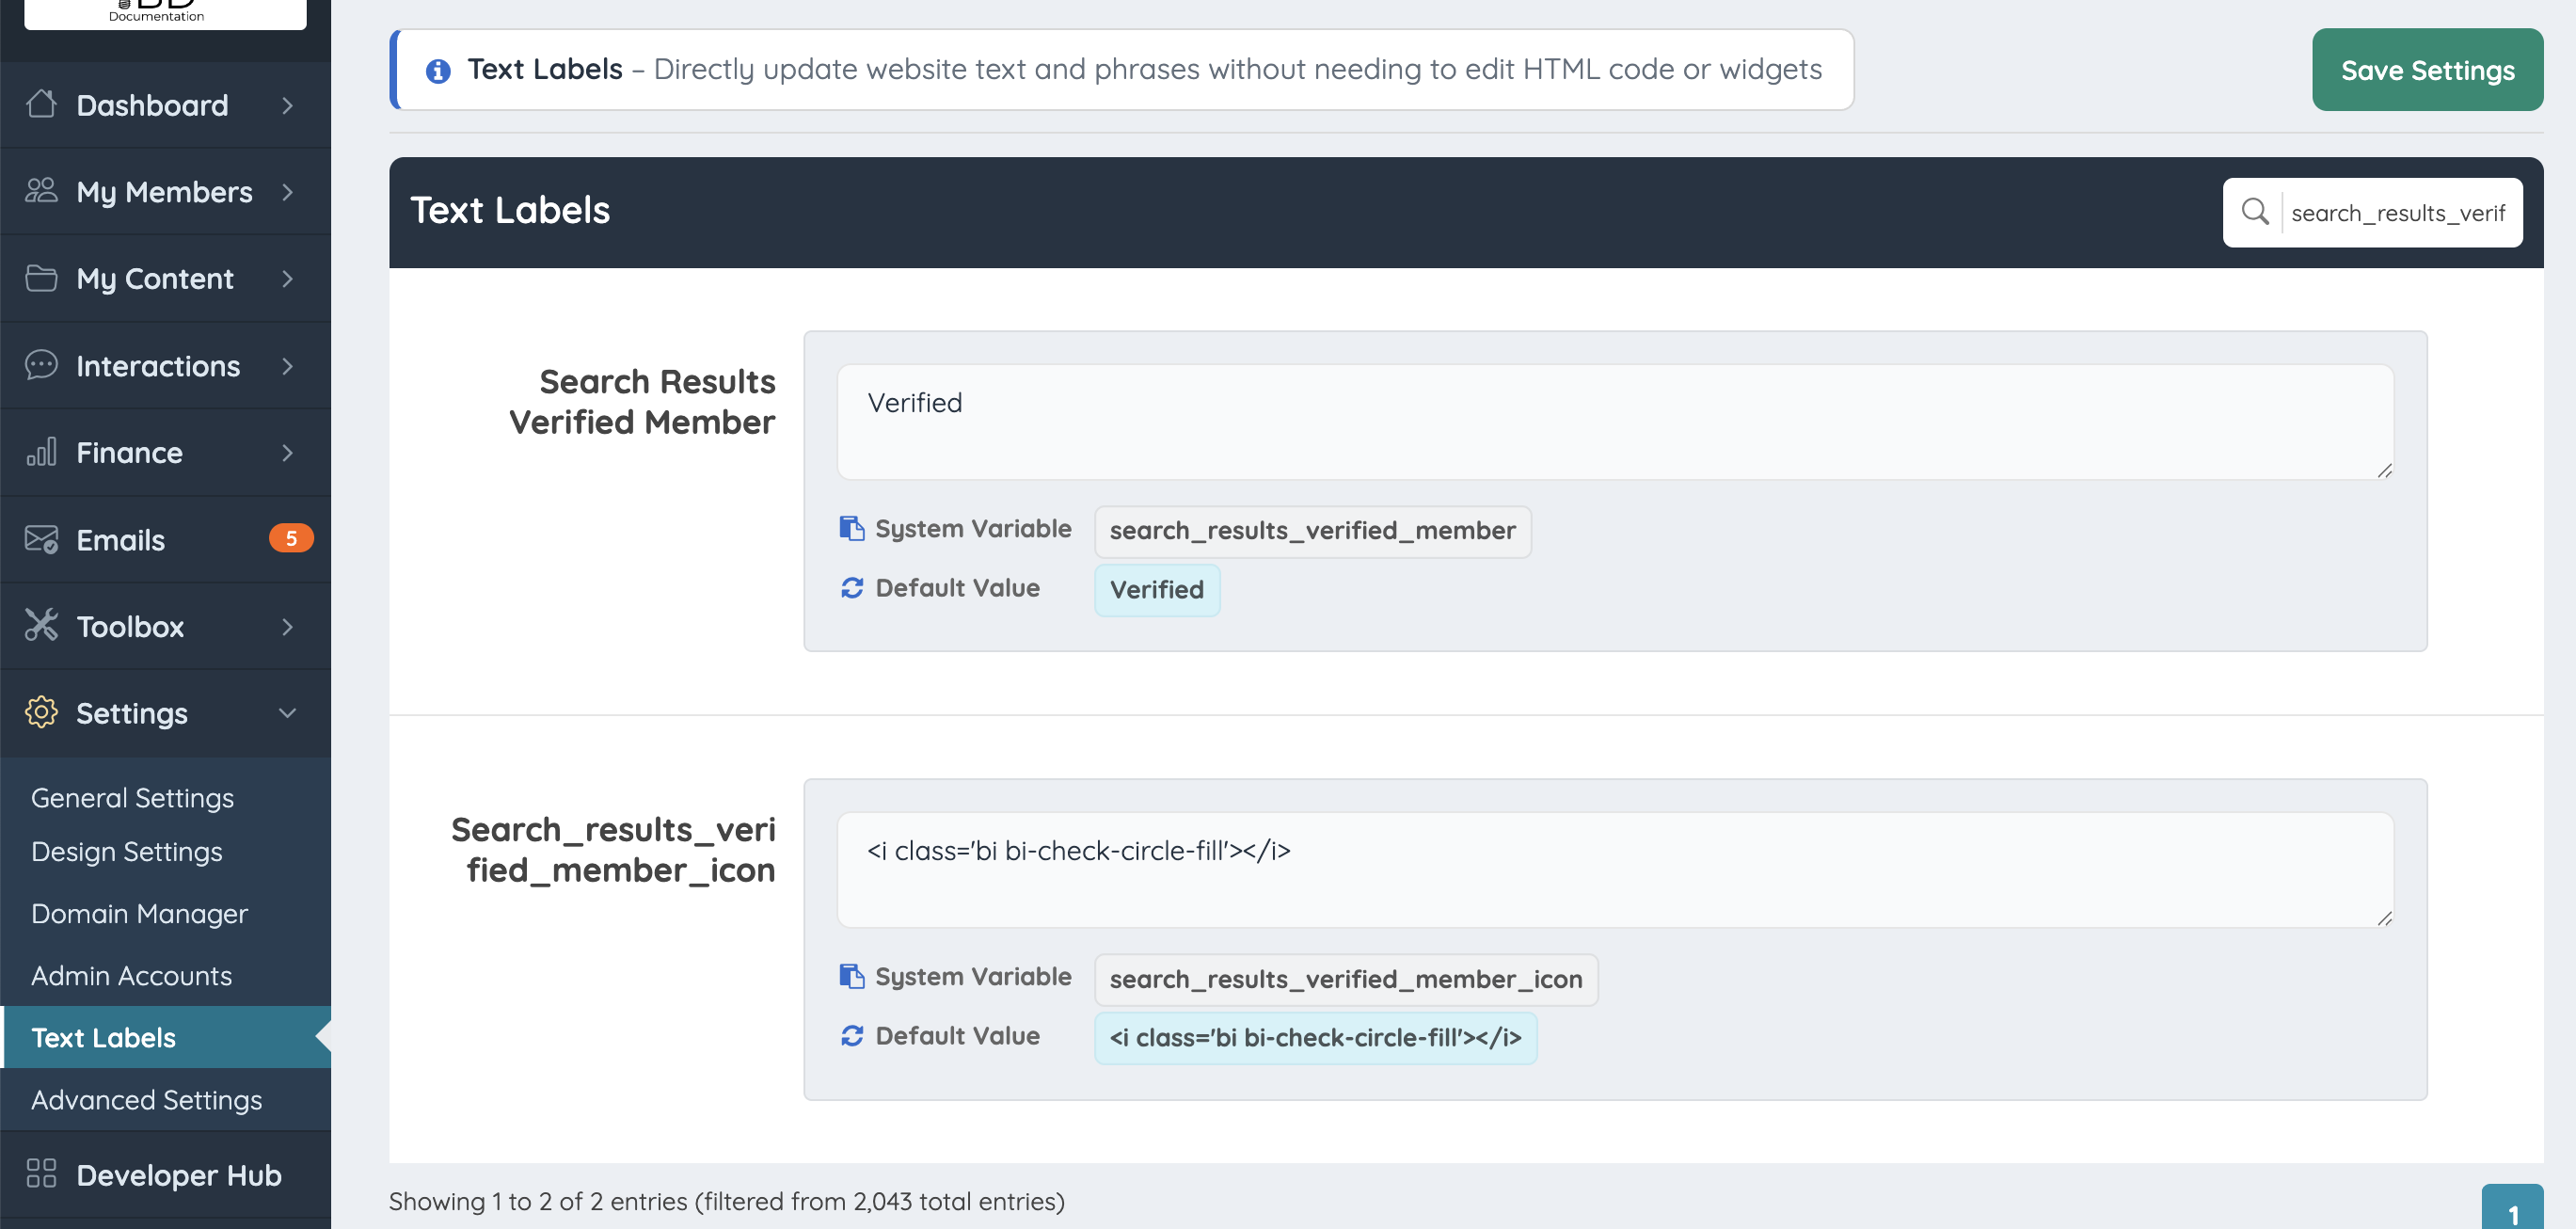
Text Labels Controlling the Search Results Badge
Two text labels control the content of the verified badge in search results:
| # | Label Name | System Variable | Controls |
|---|---|---|---|
| 1 | Search Results Verified Member Icon | search_results_verified_member_icon | The icon displayed in the badge. |
| 2 | Search Results Verified Member | search_results_verified_member | The text displayed in the badge. |