
Manage Add-ons
Link: https://support.brilliantdirectories.com/support/solutions/articles/12000057921
The Manage Add-Ons page is a library of every add-on available for the website. Each add-on has its own card, active add-ons are marked so they stand out, and any add-on that is not on the site yet can be added from its card.
Go to Dashboard > Manage Add-Ons:
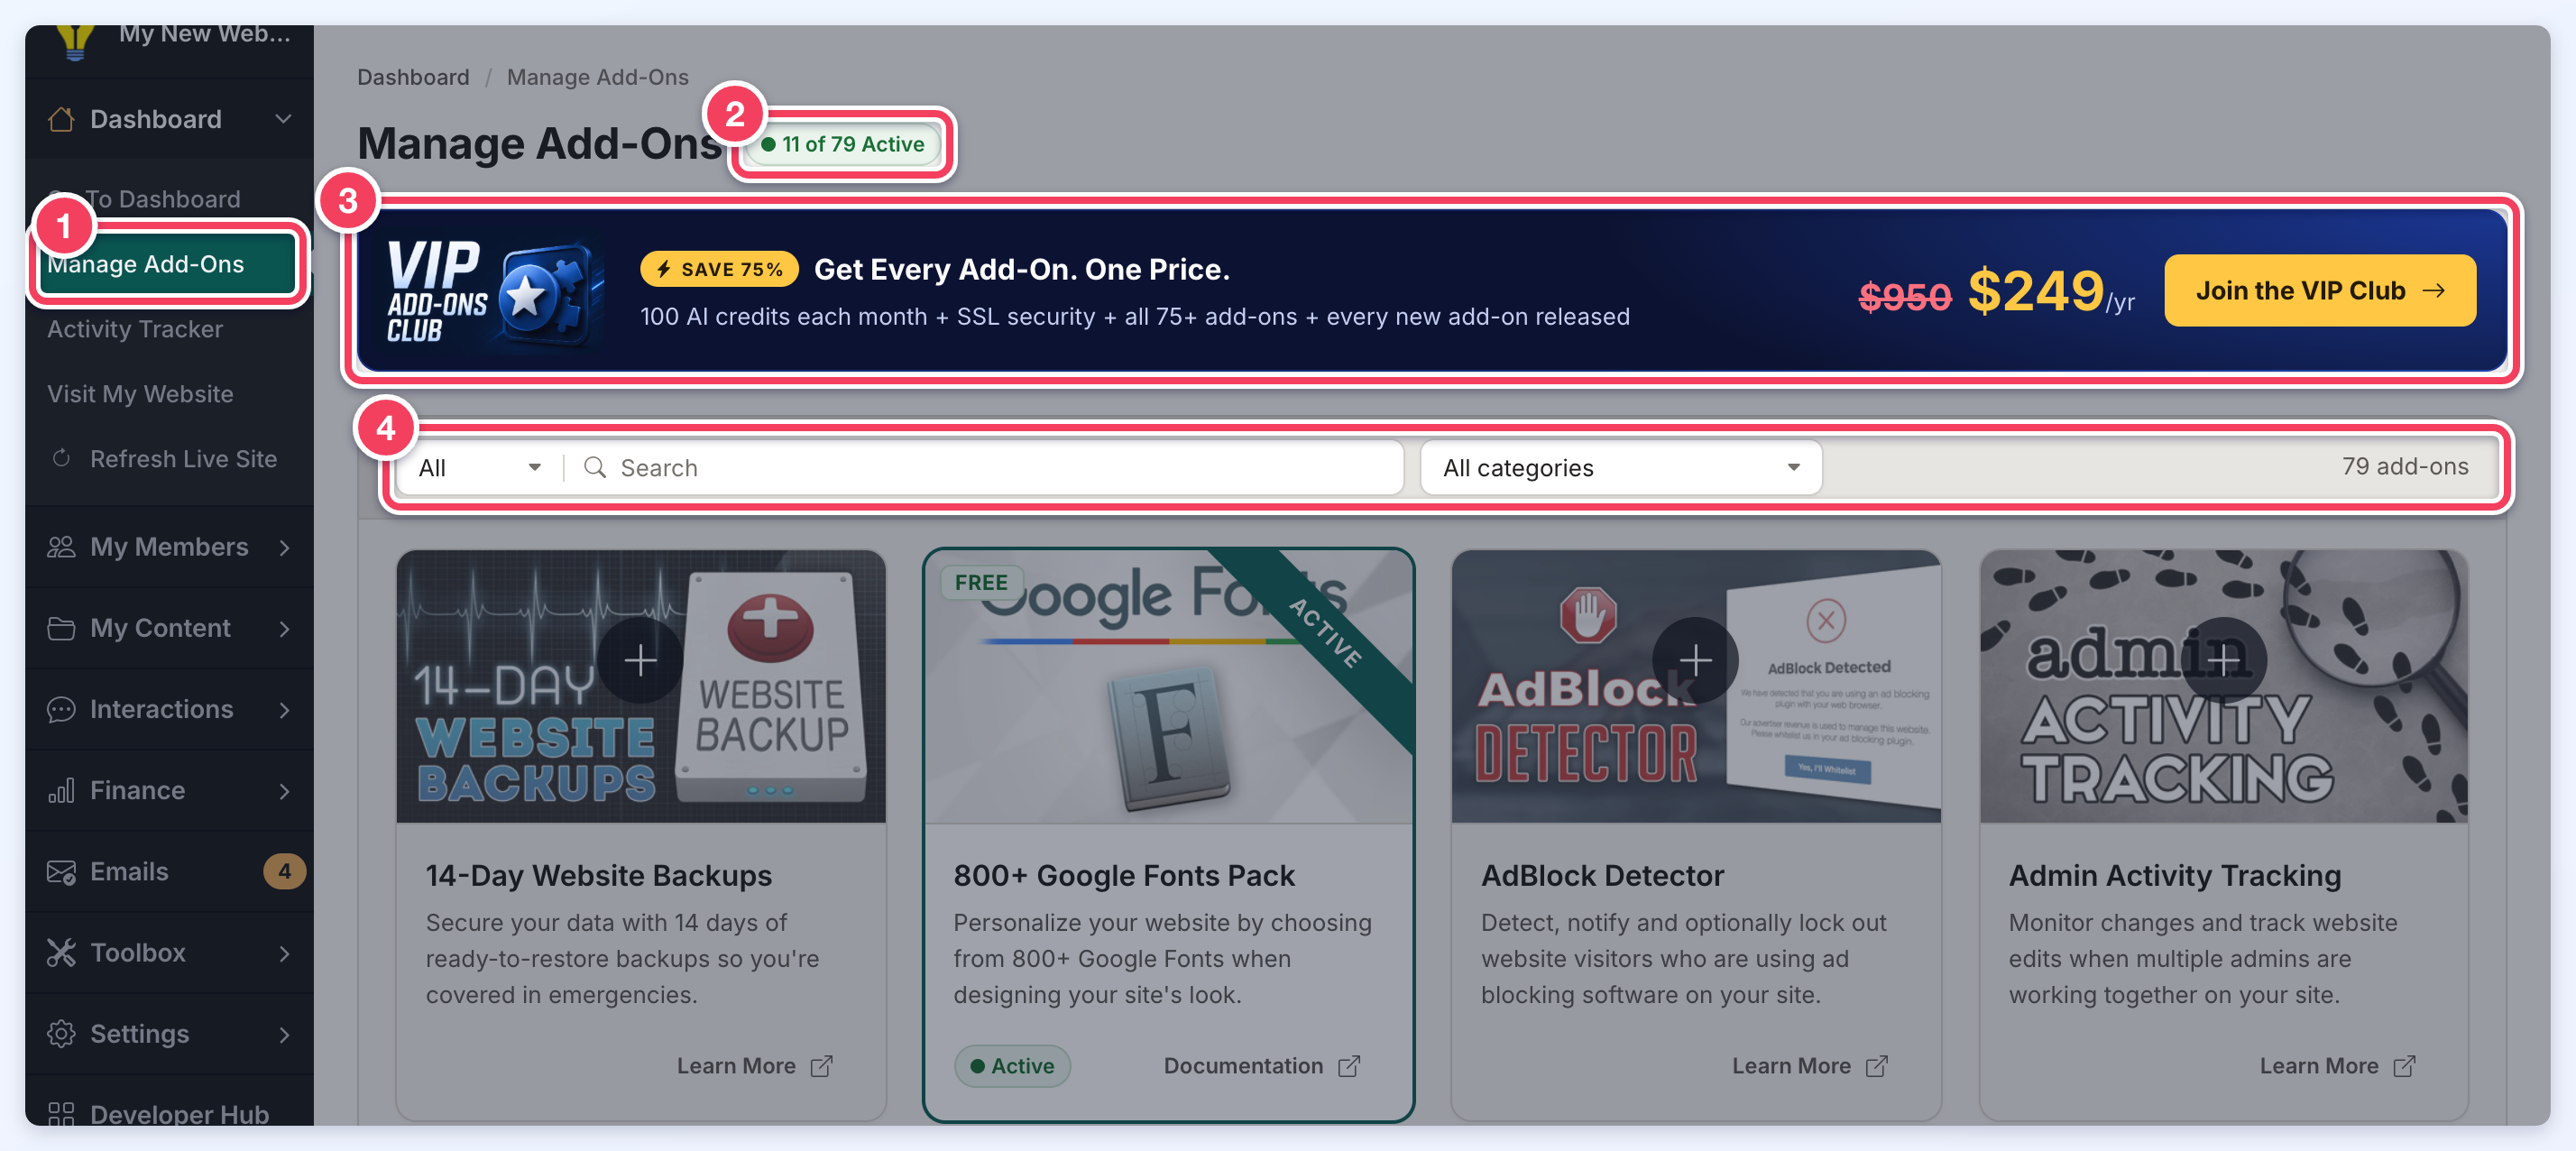
- Manage Add-Ons: the page is in the Dashboard menu.
- Active count: how many add-ons are active on the site out of the total available, EG 11 of 79 Active.
- VIP Add-Ons Club: sites that do not have the VIP Add-Ons Club see this banner, which includes every add-on for one yearly price. Join the VIP Club opens the purchase window. The banner no longer shows once the site has the VIP Add-Ons Club.
- Filter bar: the status filter, Search, the category filter and the number of add-ons that match (see Filtering and Searching below).
Add-On Cards
Each card shows the add-on's picture, name and a short description. Some pictures also carry a FREE or NEW tag.
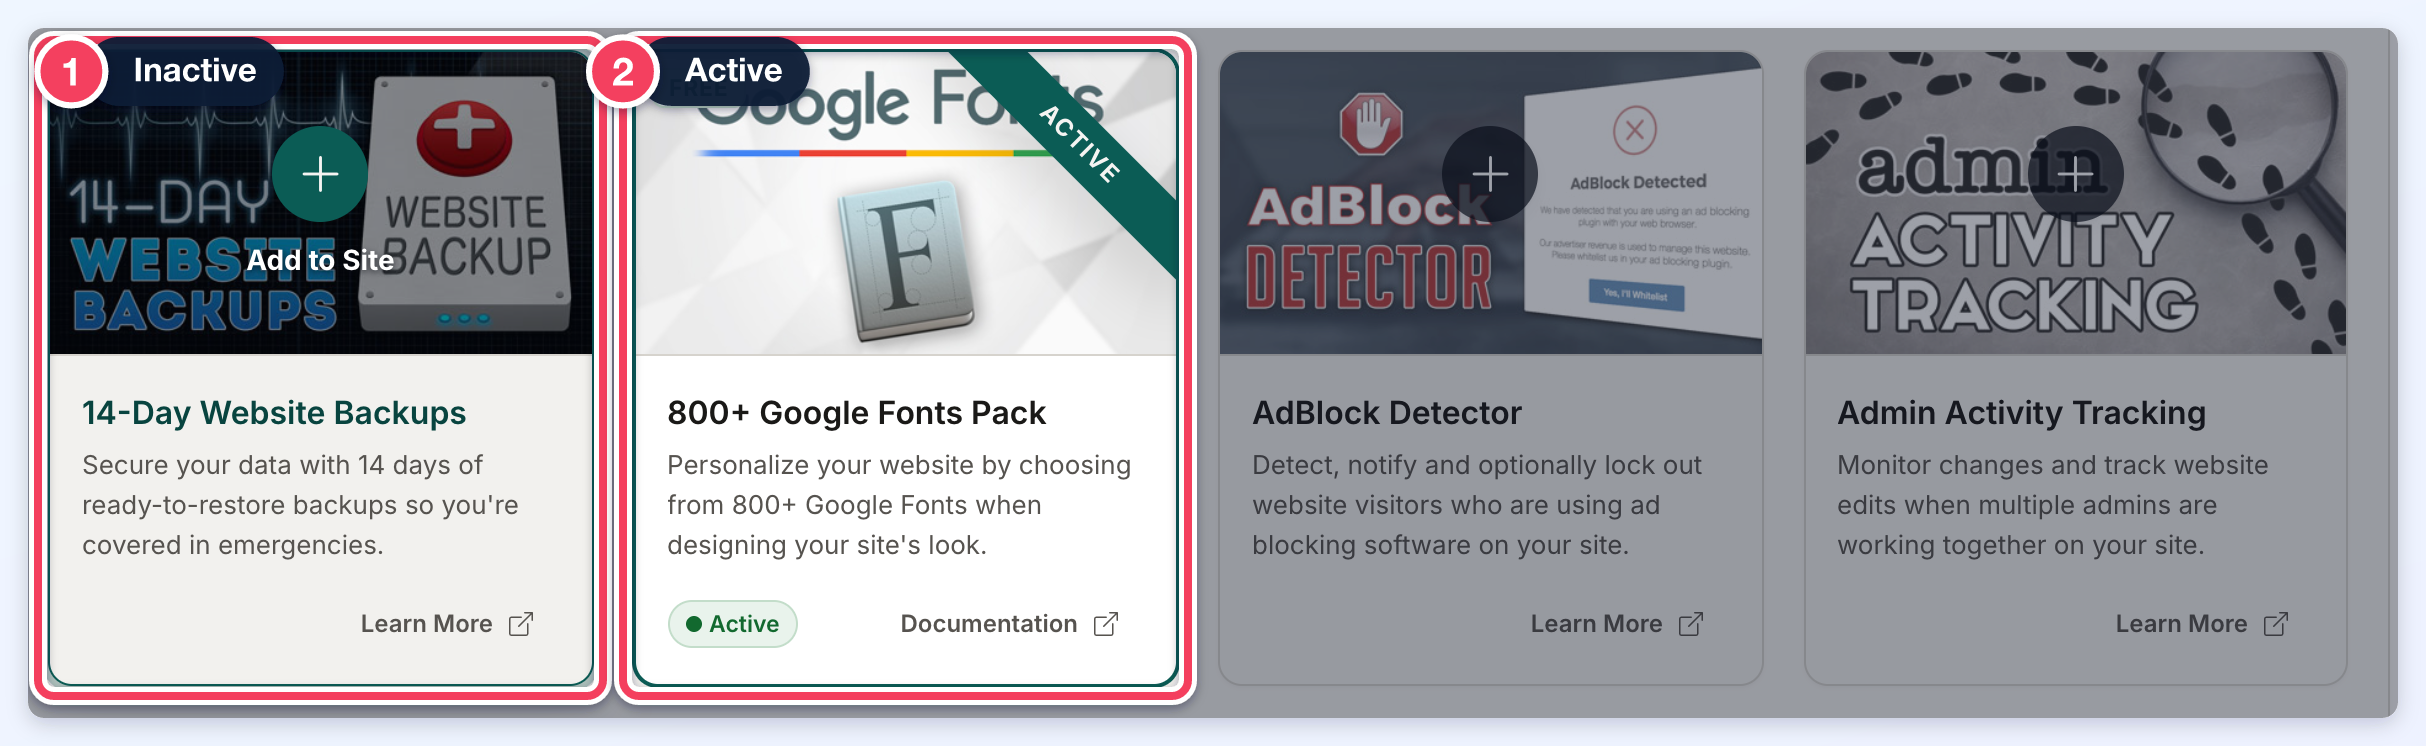
- Inactive: the add-on is not on the site yet. Pointing at the picture shows Add to Site; clicking the plus button or the add-on's name opens the purchase window. Learn More opens the add-on's page on the Brilliant Directories website in a new tab.
- Active: the card has a green outline, an Active ribbon on the picture and an Active label. Documentation opens the add-on's support article in a new tab.
An active add-on that still needs a setup step on the site shows a Needs Install label with an Install button instead. Clicking Install runs the setup, shows the result and reloads the page.
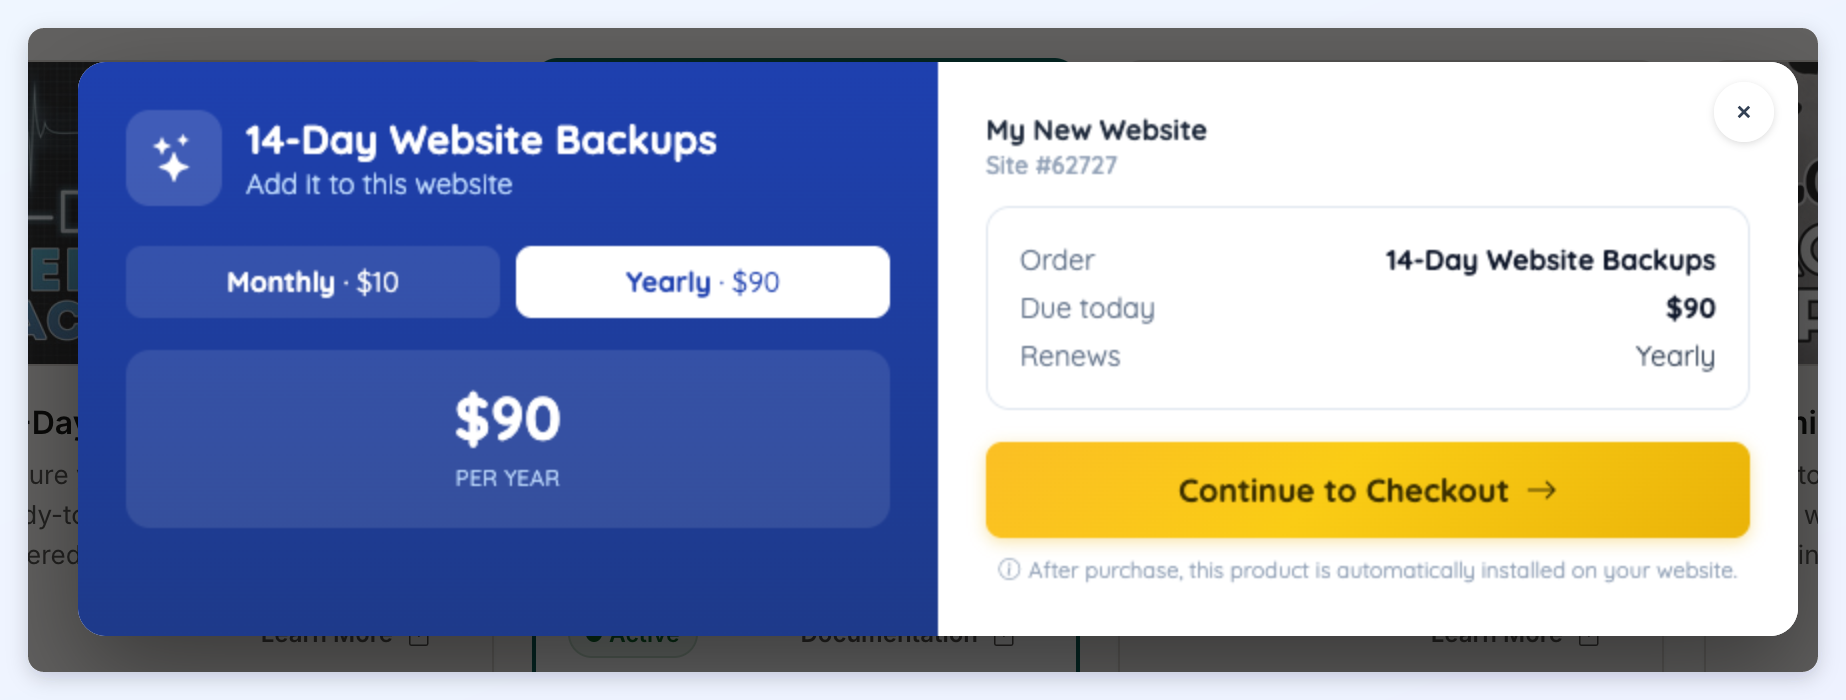
The purchase window shows the add-on, the billing options and the amount due. Continue to Checkout goes on to the checkout. As the window notes, the add-on is installed on the website automatically after purchase.
Filtering and Searching
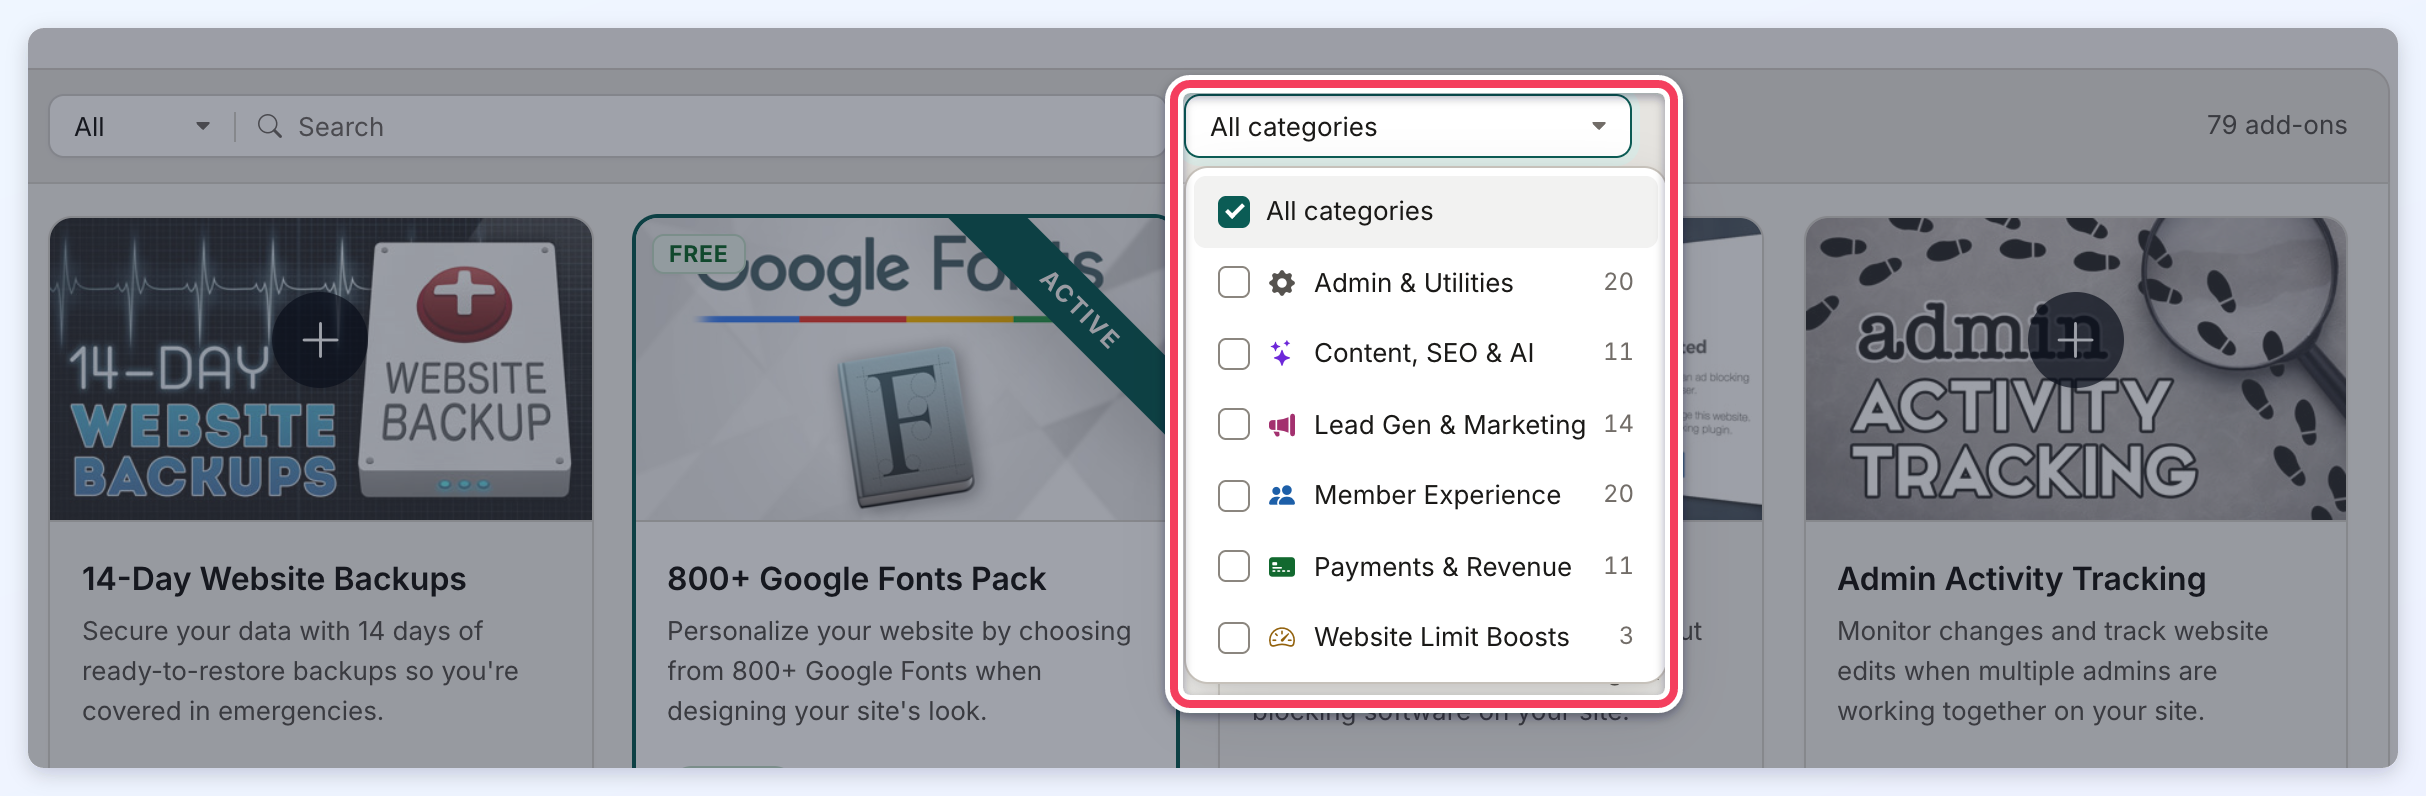
The filter bar narrows the cards as soon as a choice is made or a word is typed:
- Status: the menu at the left of the search box shows All, Active or Inactive add-ons.
- Search: matches words in the add-on's name, its description and its category.
- Category: All categories, or one or more of Admin & Utilities, Content, SEO & AI, Lead Gen & Marketing, Member Experience, Payments & Revenue and Website Limit Boosts. Each category shows how many add-ons it holds.
- Count: the number at the right, EG 79 add-ons, shows how many cards match the current filters.
When nothing matches, the page shows No Matches Found with a Clear Filters button that resets the status, search and category filters.
Activating Purchased Add-Ons
Add-ons that have been purchased but not yet assigned to a website are listed in the Account Dashboard, on the Add-Ons to Install tab. That tab only appears while at least one add-on is waiting. Click Activate Add-On to assign the add-on to one of the available website licenses.
