Member Profile Analytics
Link: https://support.brilliantdirectories.com/support/solutions/articles/5000619186
The Member Profile Analytics add-on is a click tracking tool, provides insights for admins and members with valuable data such as profile views, clicks to their website, visits to their social media profiles and member posts – all broken down by day, month and year.
Use these statistics to show the members how they are analytically benefiting from the website.
How To Get This Add-On
- Websites with the VIP Add-Ons Club automatically have this add-on available: Join The VIP Add-Ons Club
- Purchase Individually: Member Profile Analytics Add-On
Enabling the Add-On
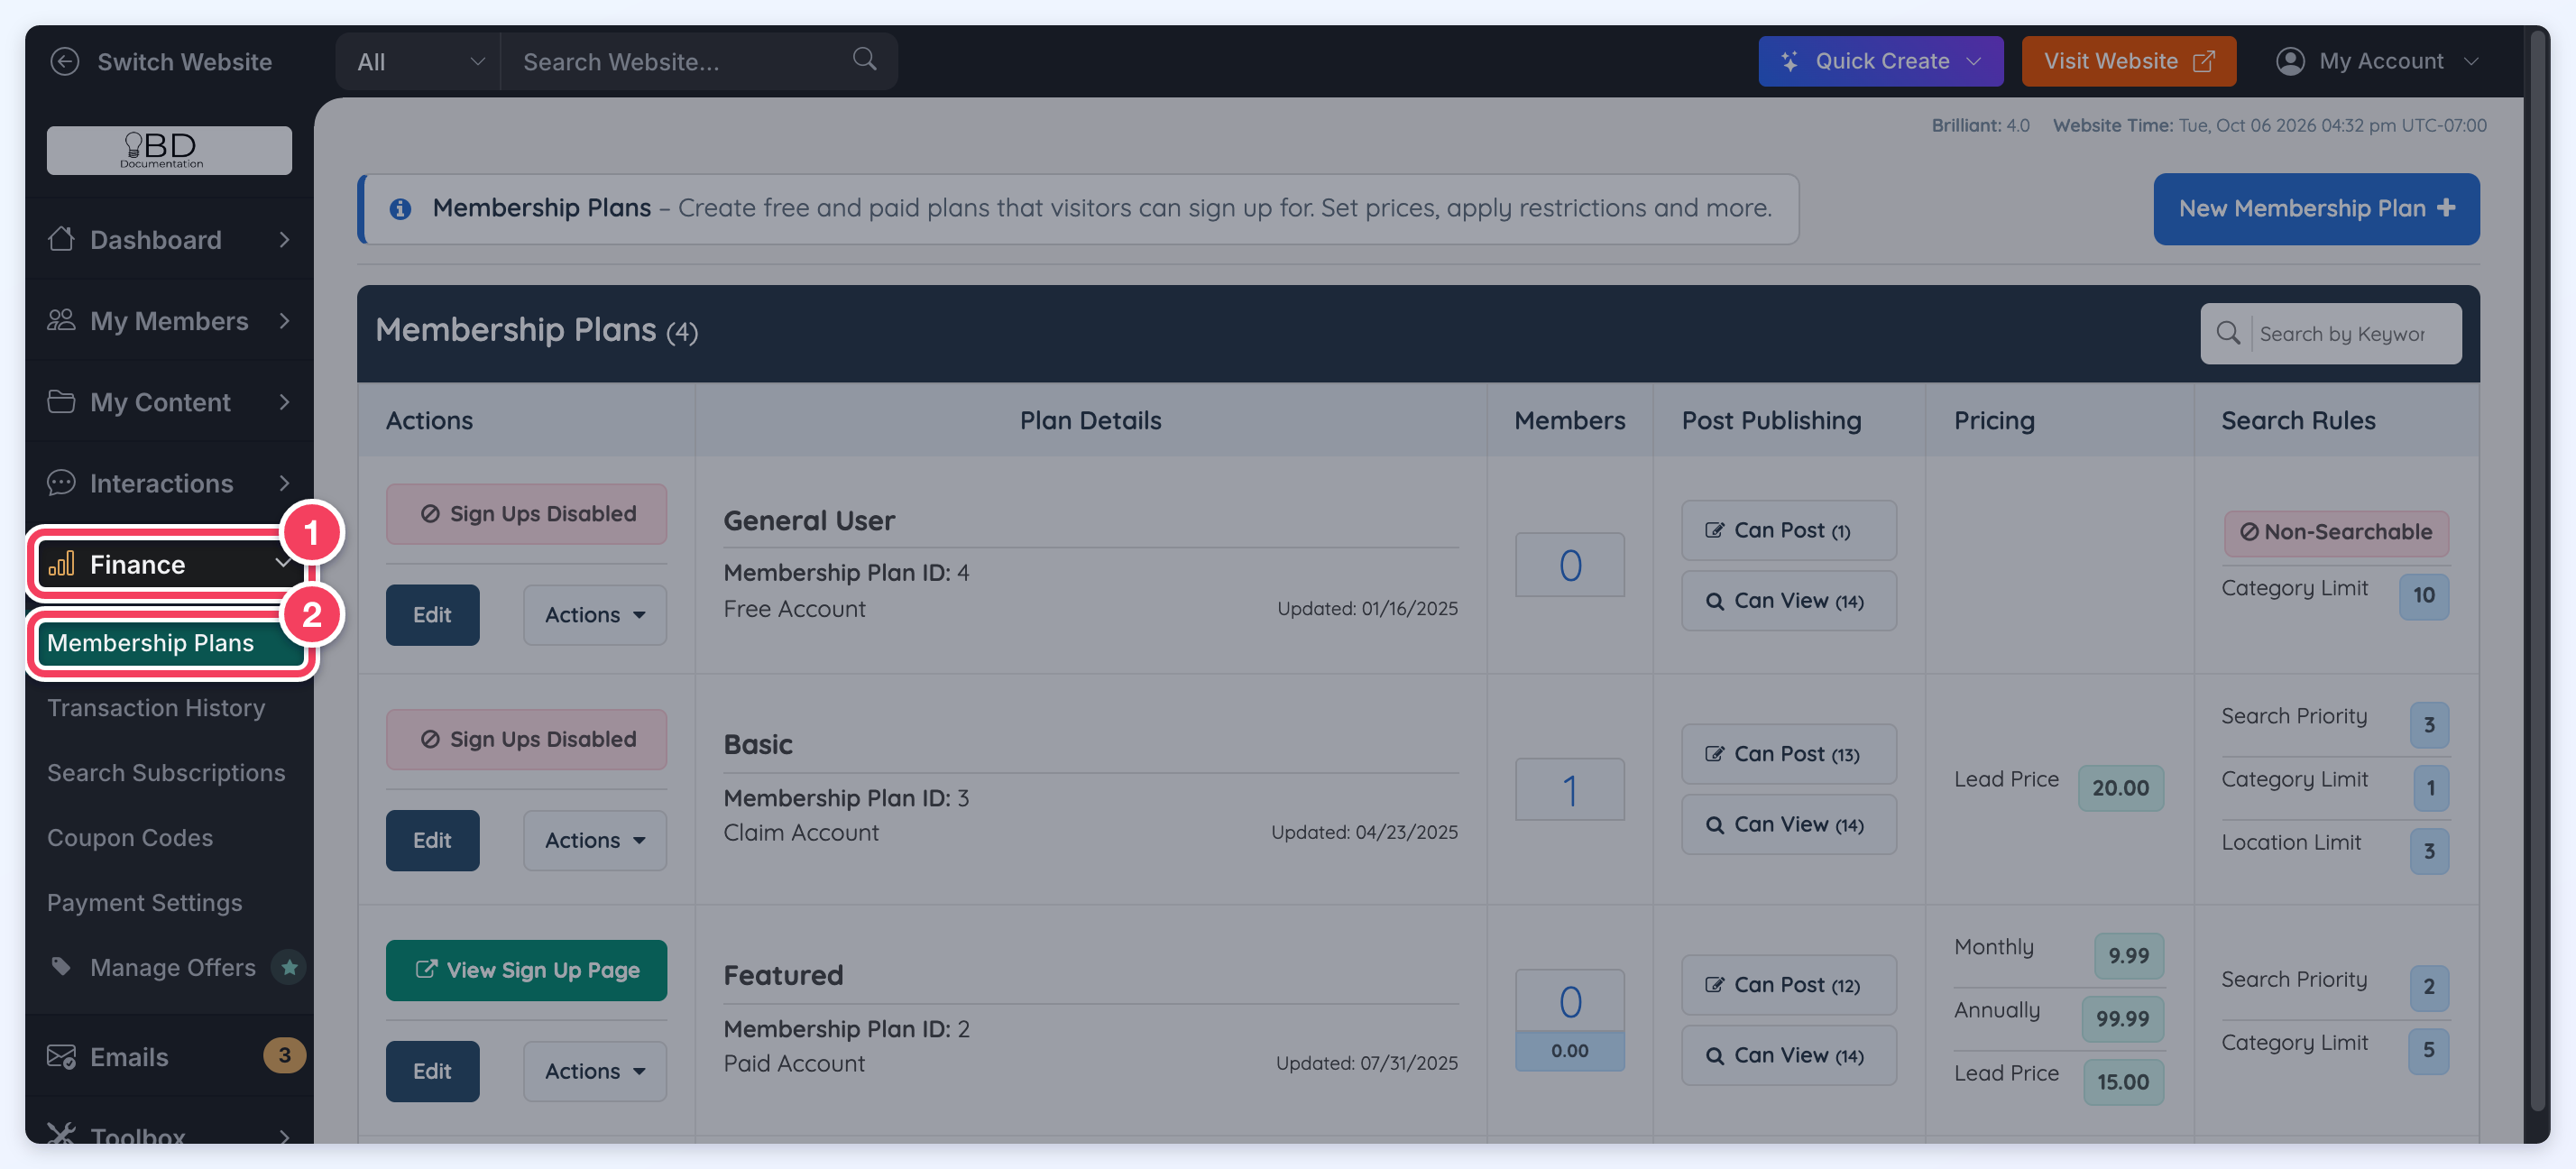
Select which membership plan is allowed to view Profile Stats in Finance > Membership Plans:
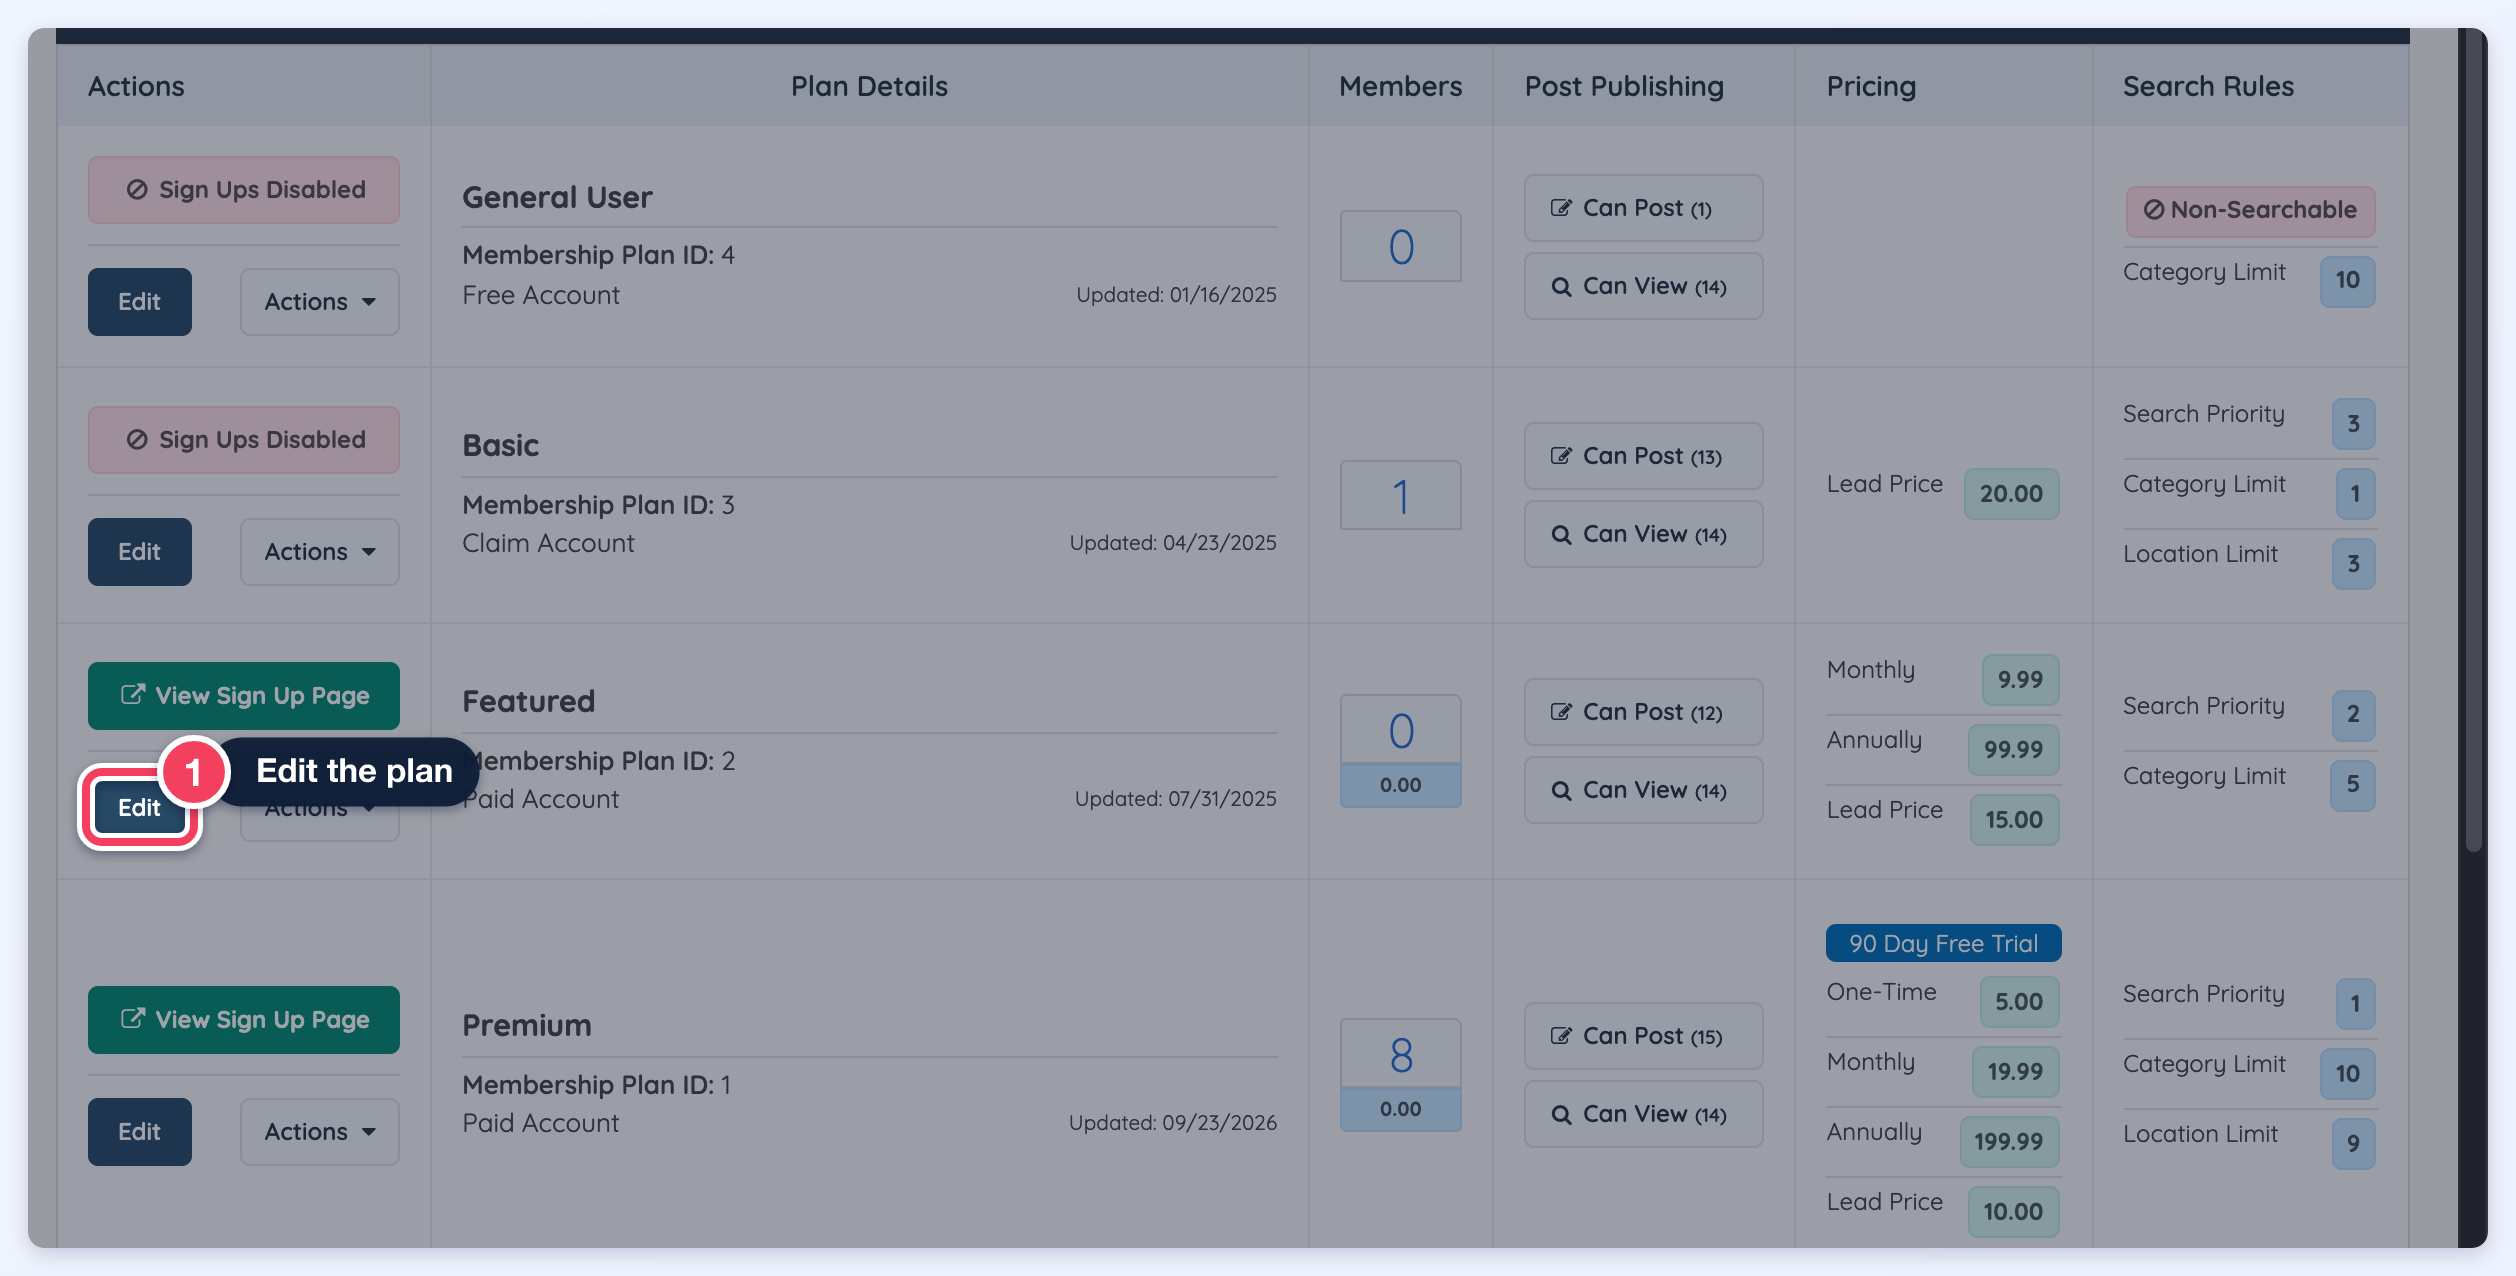
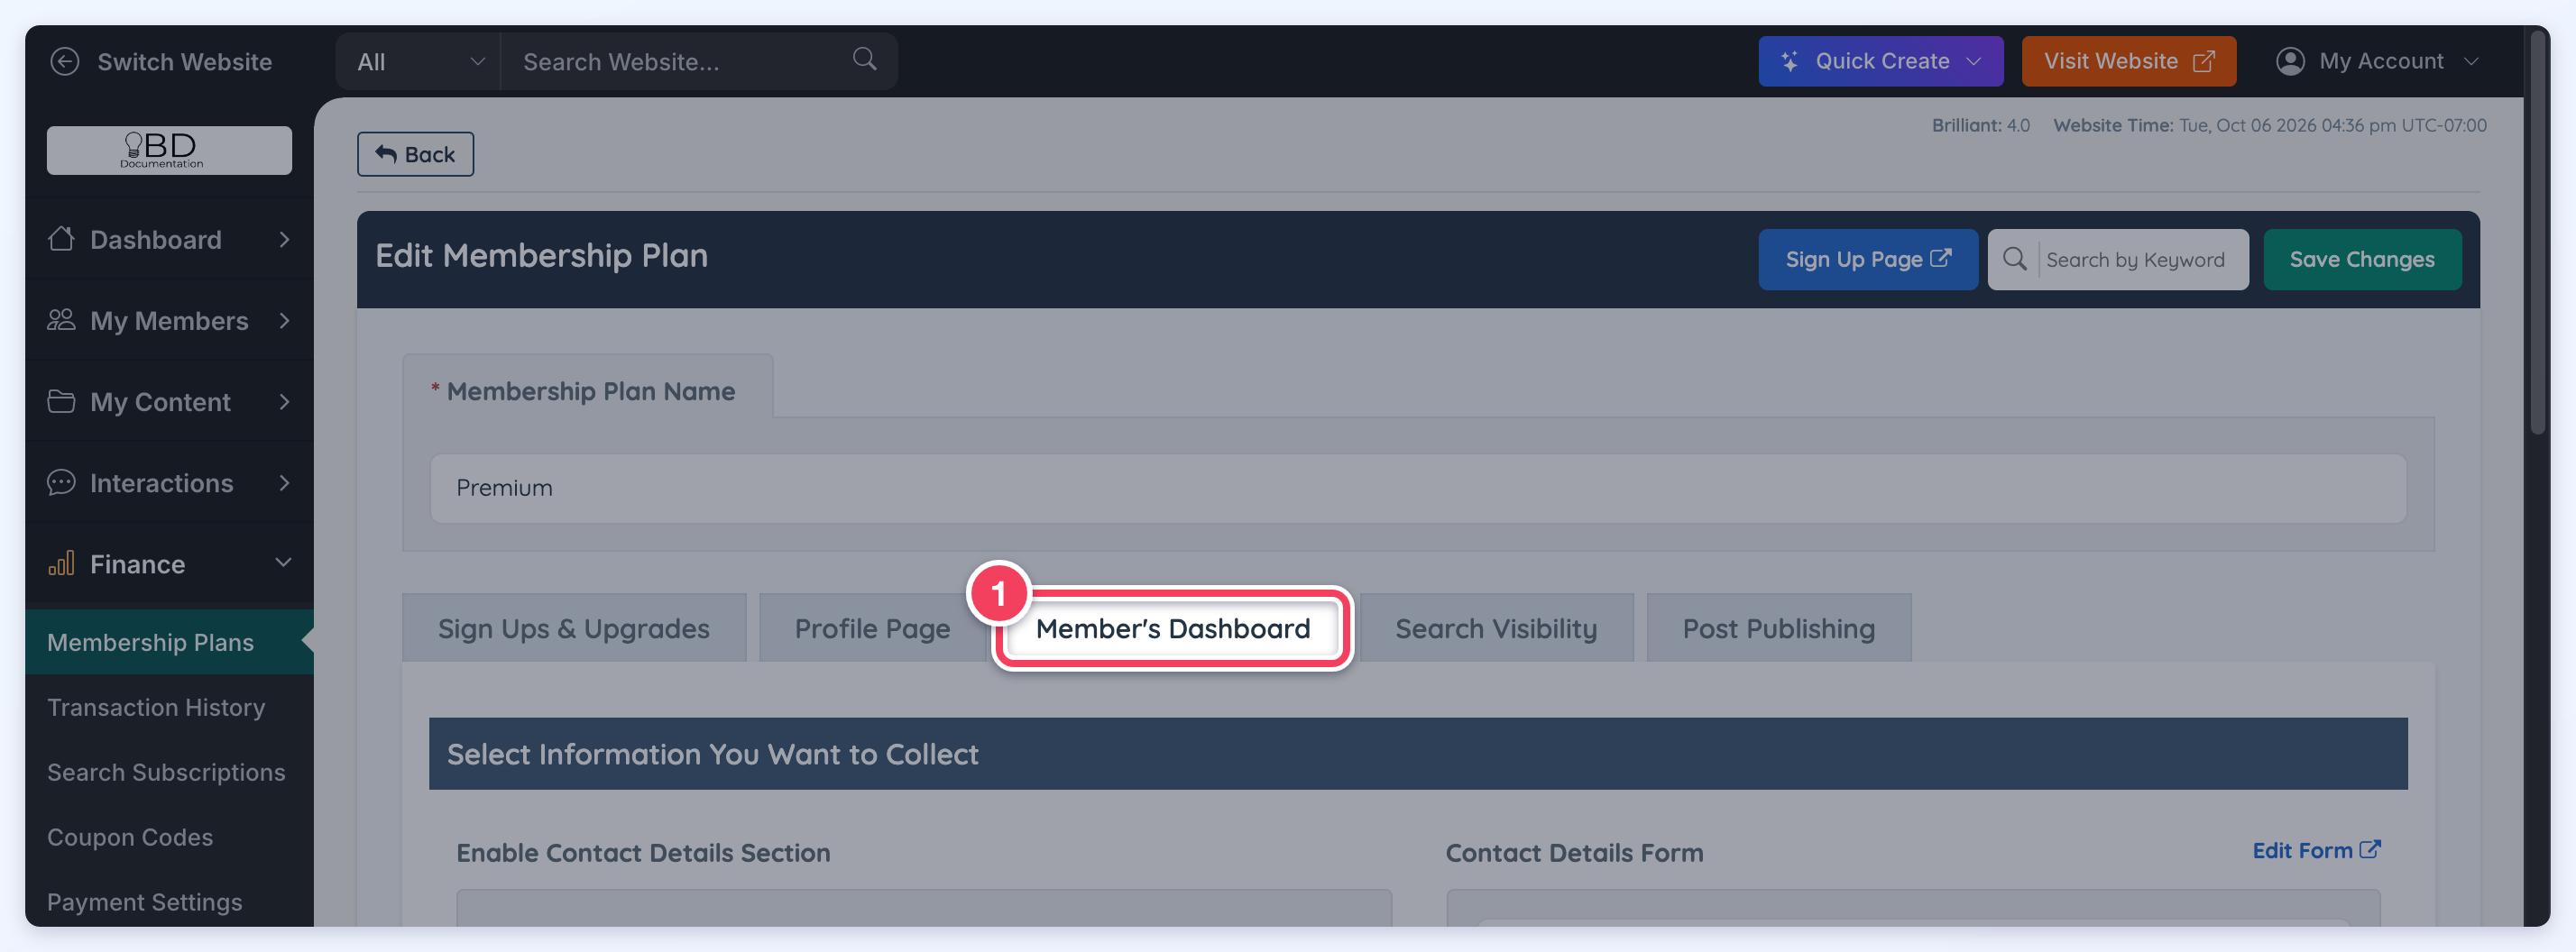
Open the Member's Dashboard tab:
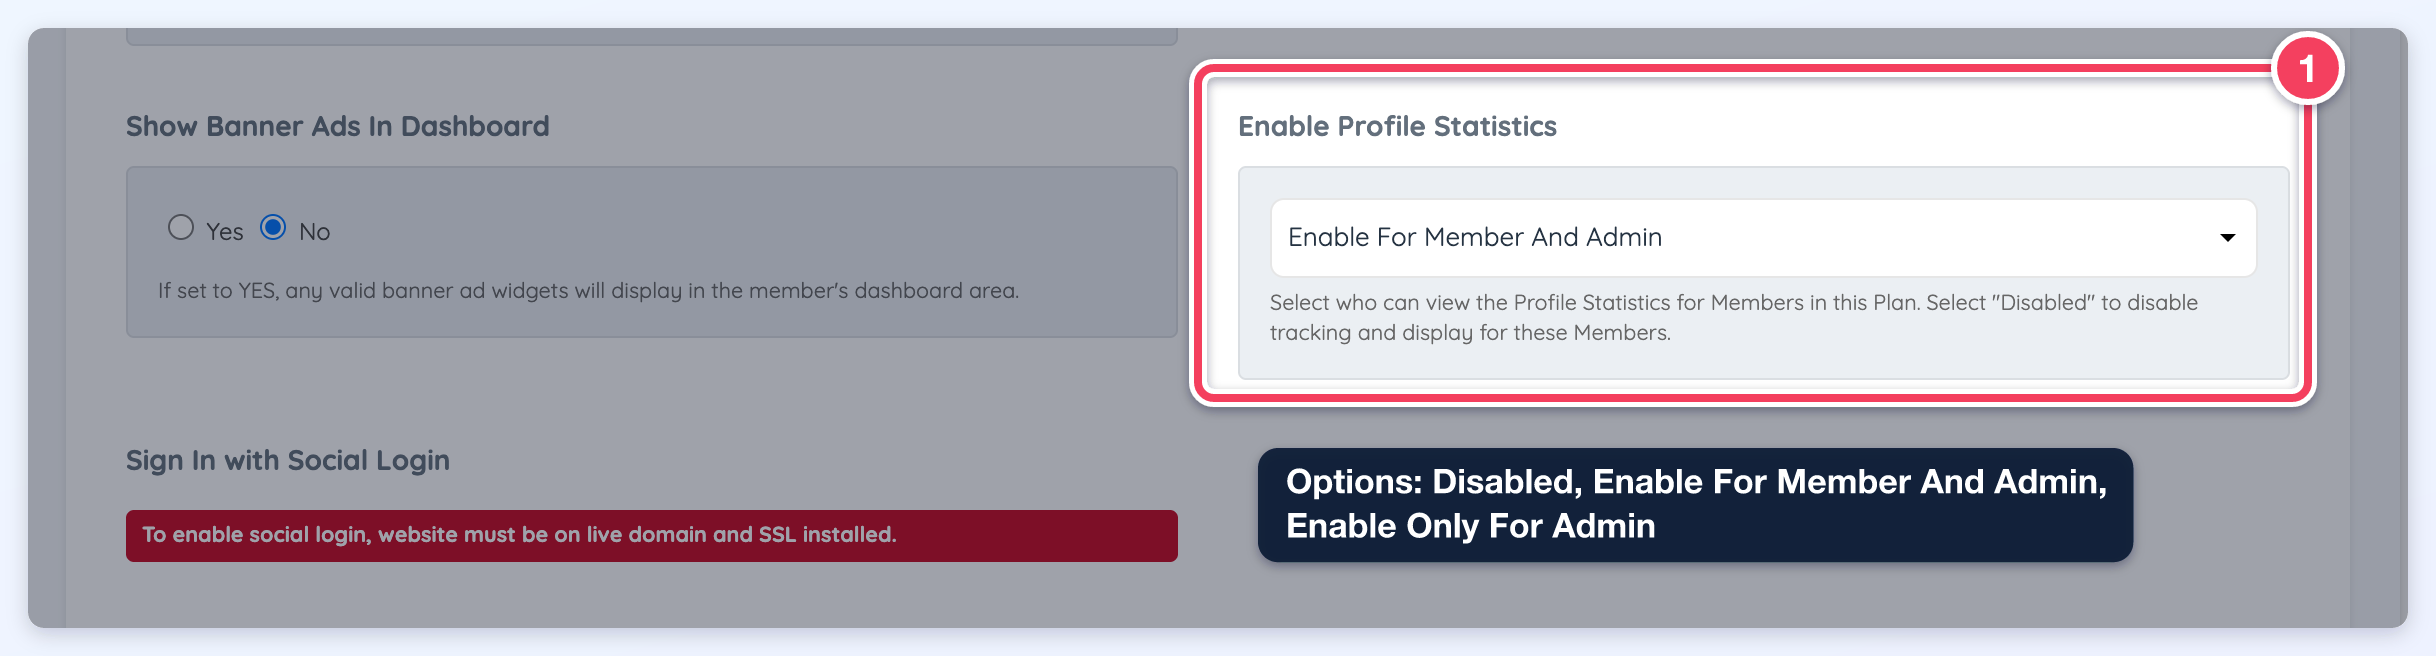
Scroll down to the option for "Enable Profile Statistics" and select the option that the admin wishes to have:
- Enable Only For Admin
- Enable For Member And Admin
- Disabled
Tracked Links
Here is a list of the links that the website tracks in the Profile Analytics for members.
Member Profile Clicks
- Profile Visit
- Phone Number
- Member Website URL
- Member Social Media Links
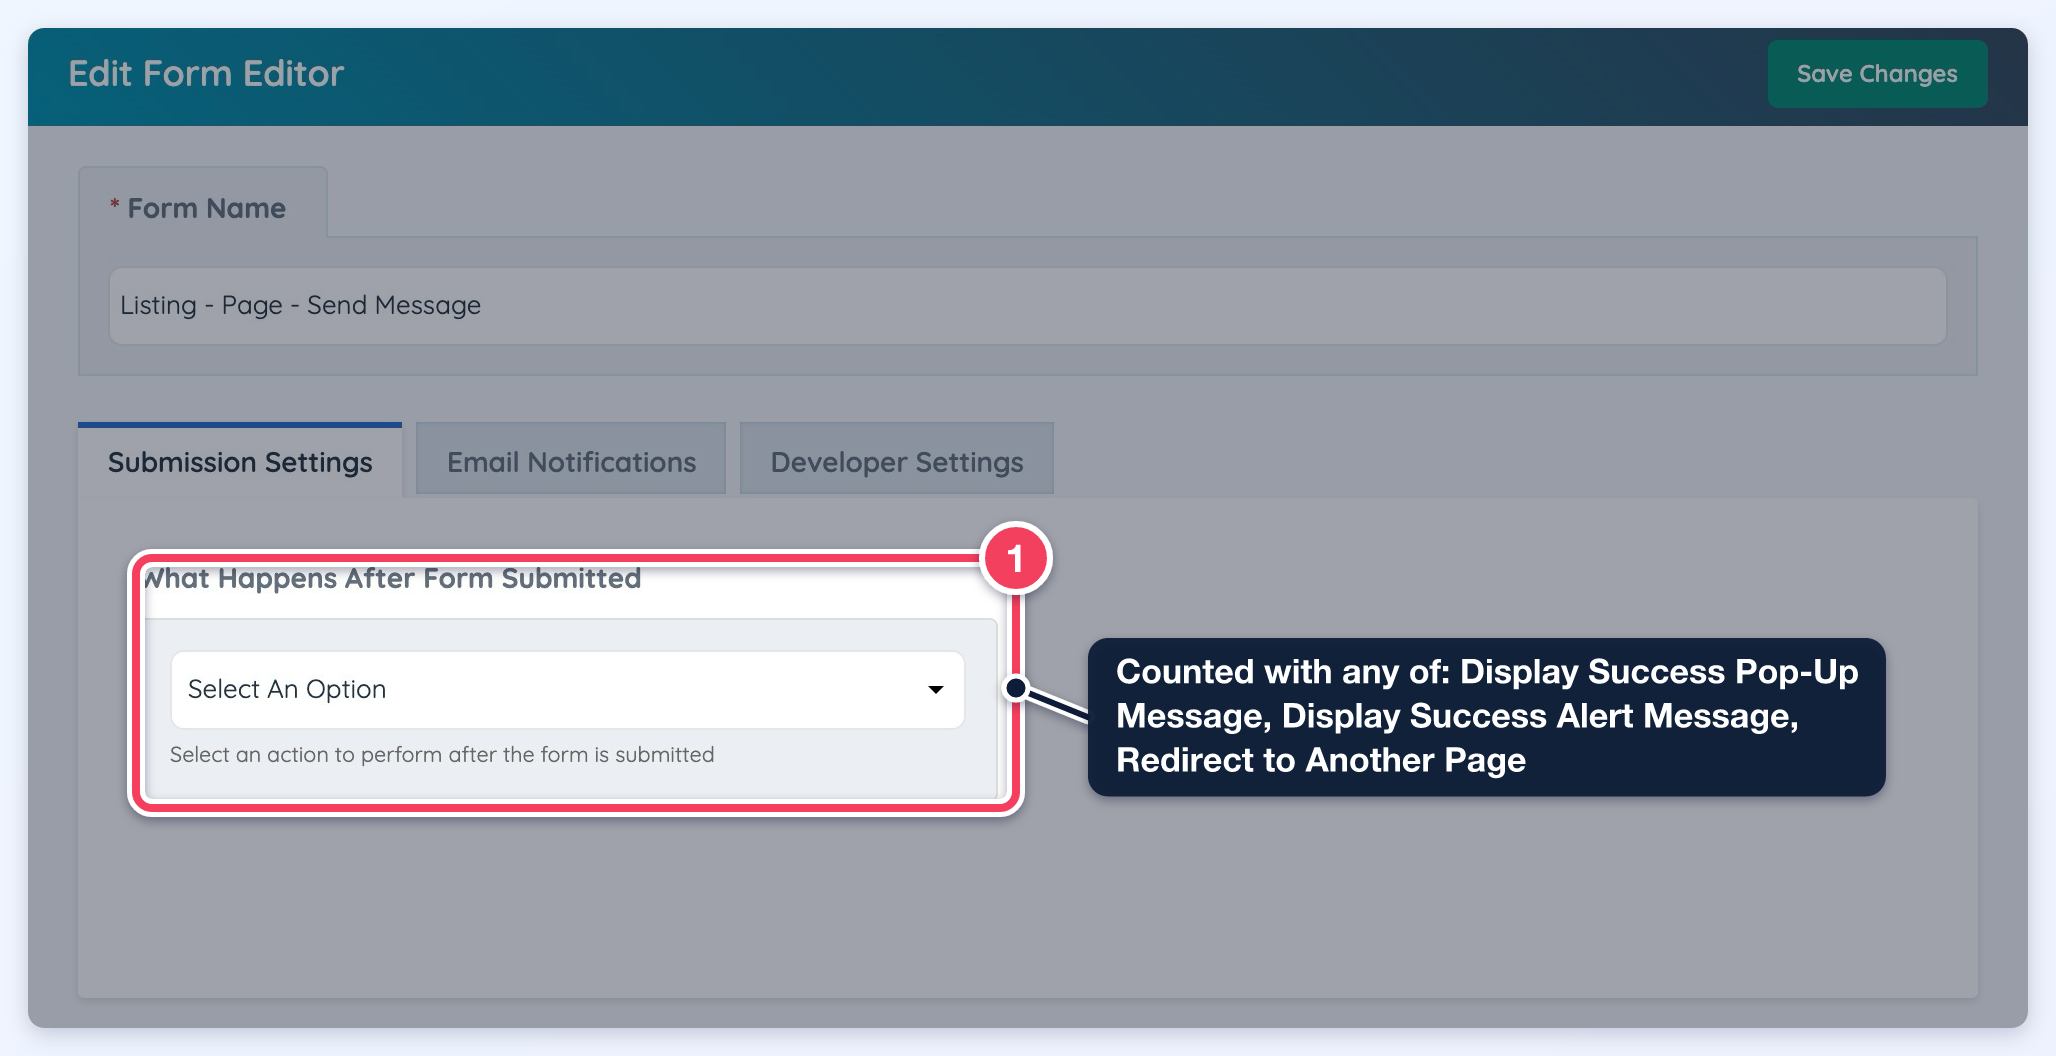
- Contact Form (Send Message): counted once per submission, whichever option the form uses under What Happens After Form Submitted (Display Success Pop-Up Message, Display Success Alert Message or Redirect to Another Page).
- Private Chat Messages (first interaction)
The option that decides what happens after a contact form is submitted is set per form in Toolbox > Form Manager, by clicking Edit Form Settings on the form. Contact Form submissions are counted with any of the three options in the What Happens After Form Submitted dropdown:
Multi-Image Post Clicks
- Photo Albums
- Products + External Link (Web URL that will link visitors to more details)
- Digital Products
- Properties + External Link (Web URL that will link visitors to more details)
- Classifieds + External Link (Web URL that will link visitors to more details)
Single Image Post Clicks
- Videos
- Articles
- Jobs + External Link (Web URL that will link visitors to more details)
- Events + External Link (Web URL that will link visitors to more details)
- Coupons + External Link (Web URL that will link visitors to more details)
- Audios
- Discussions
Tracking Custom Links
A custom link or button added to a member’s listing, such as a booking button that opens an outside booking service, can be tracked too. Its clicks are counted in Profile Analytics under a name chosen for the link.
A tracked custom link needs two things in its HTML: the weblink class and a data-click-type attribute holding the name that should appear in the statistics:
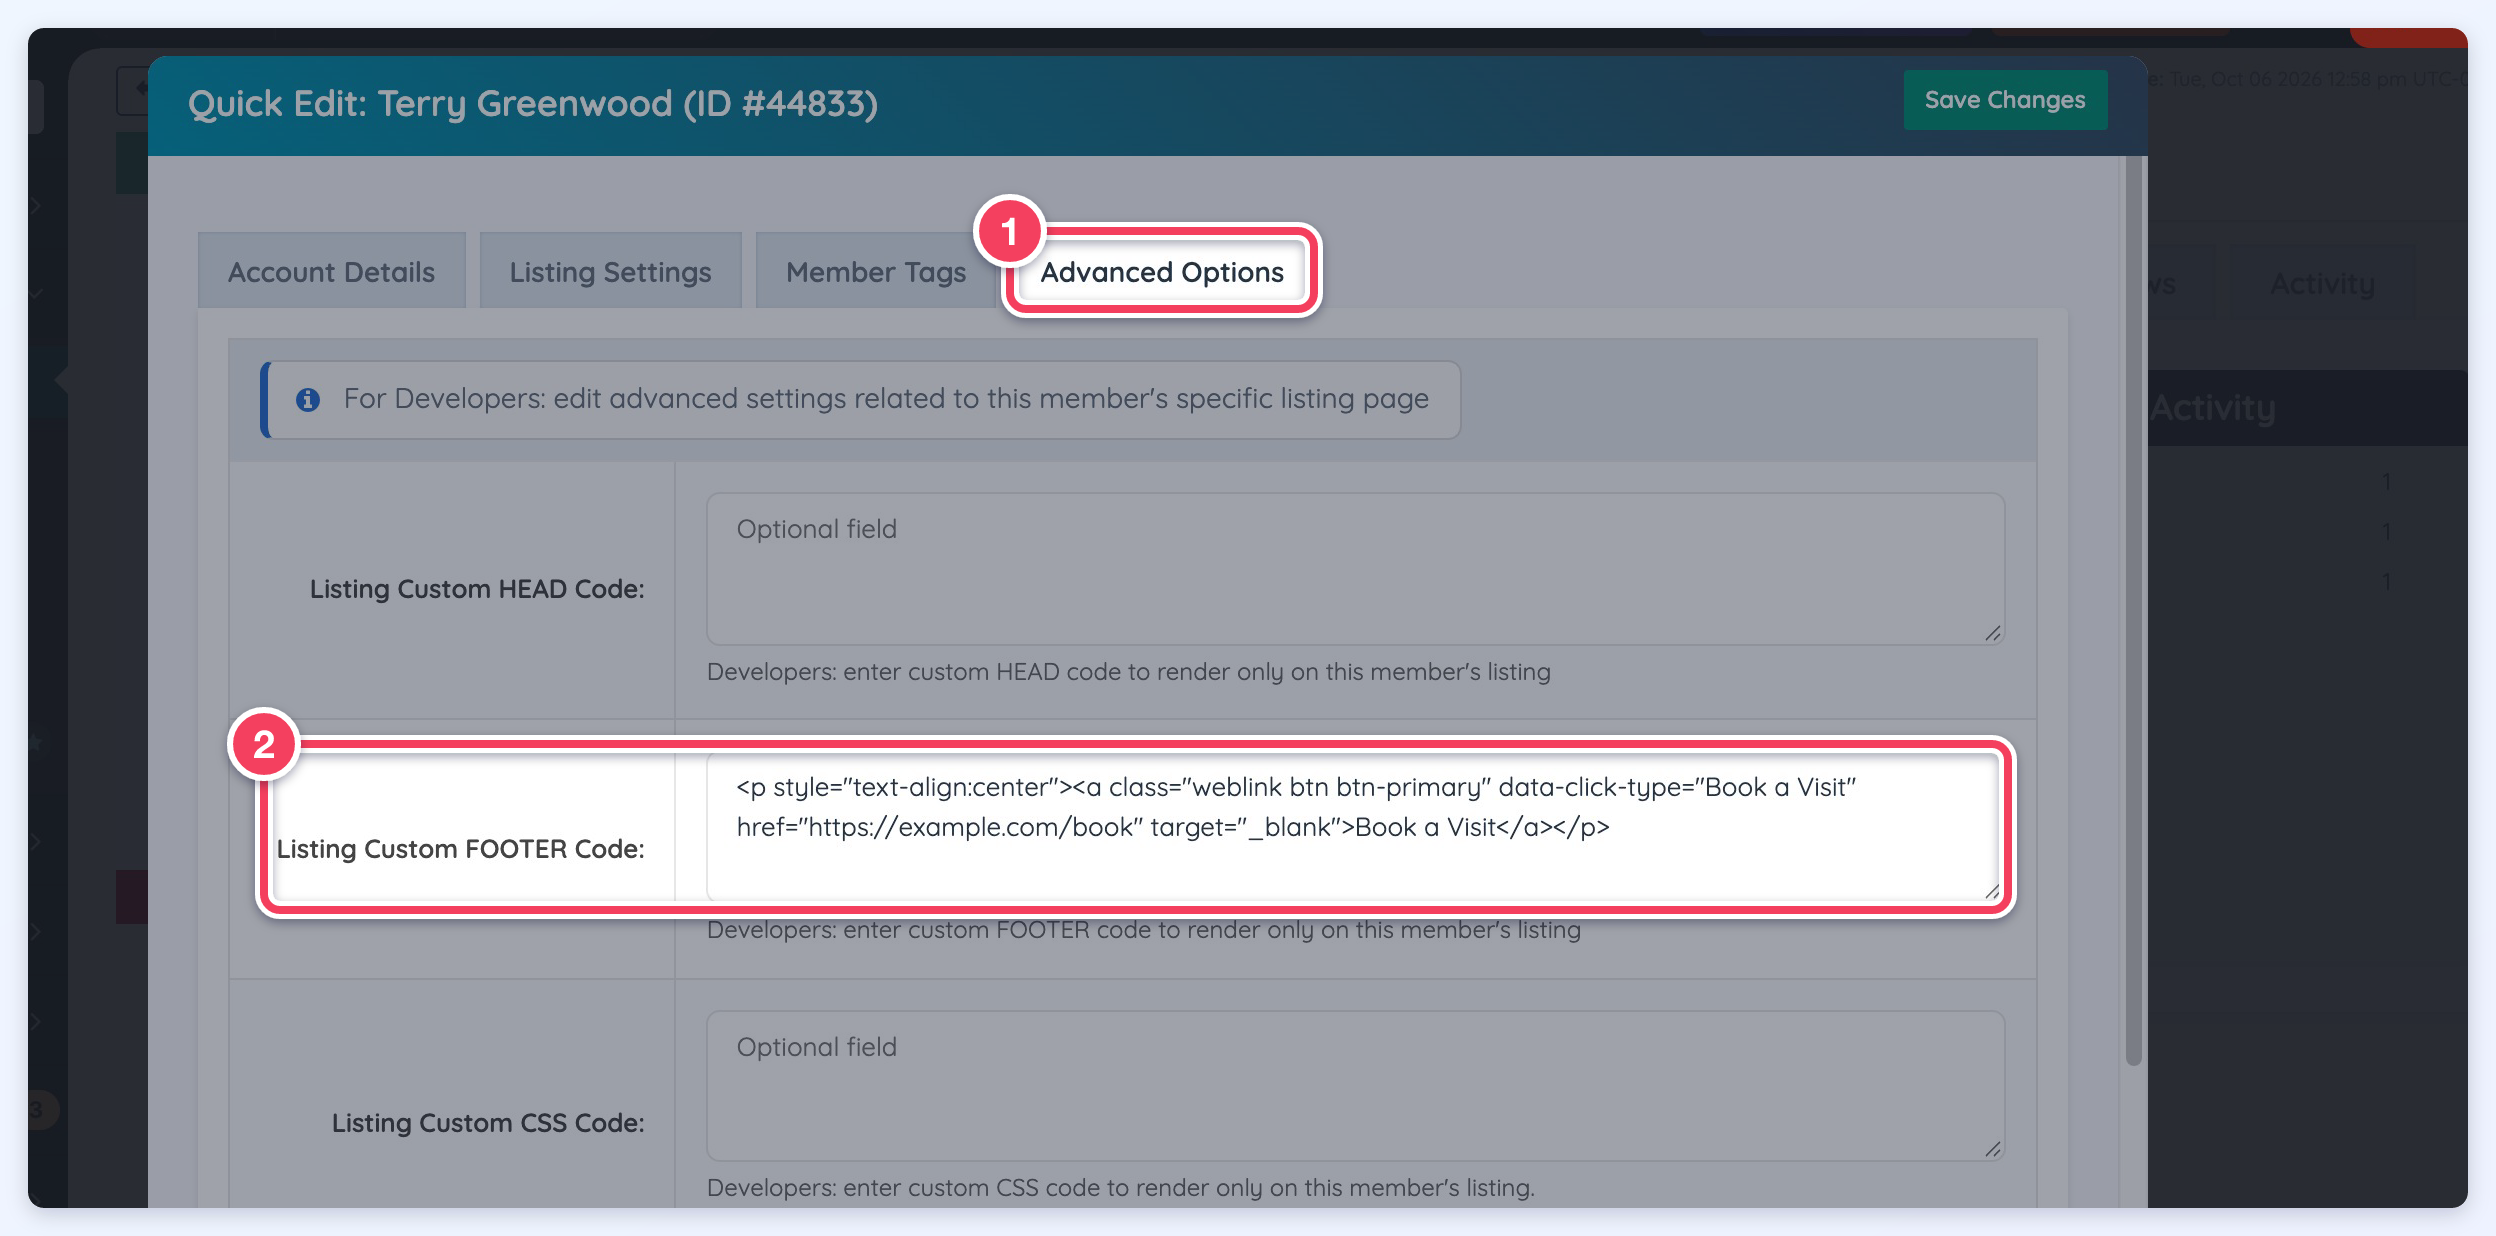
<a class="weblink" data-click-type="Book a Visit" href="https://example.com/book" target="_blank">Book a Visit</a>
To add a tracked link to a member’s listing:
- Go to My Members >> Search Members and open the member.
- Click Edit Status to open the Quick Edit window, then open the Advanced Options tab (1).
- Paste the link HTML into Listing Custom FOOTER Code (2), changing the name, address and button text as needed.
- Click Save Changes.
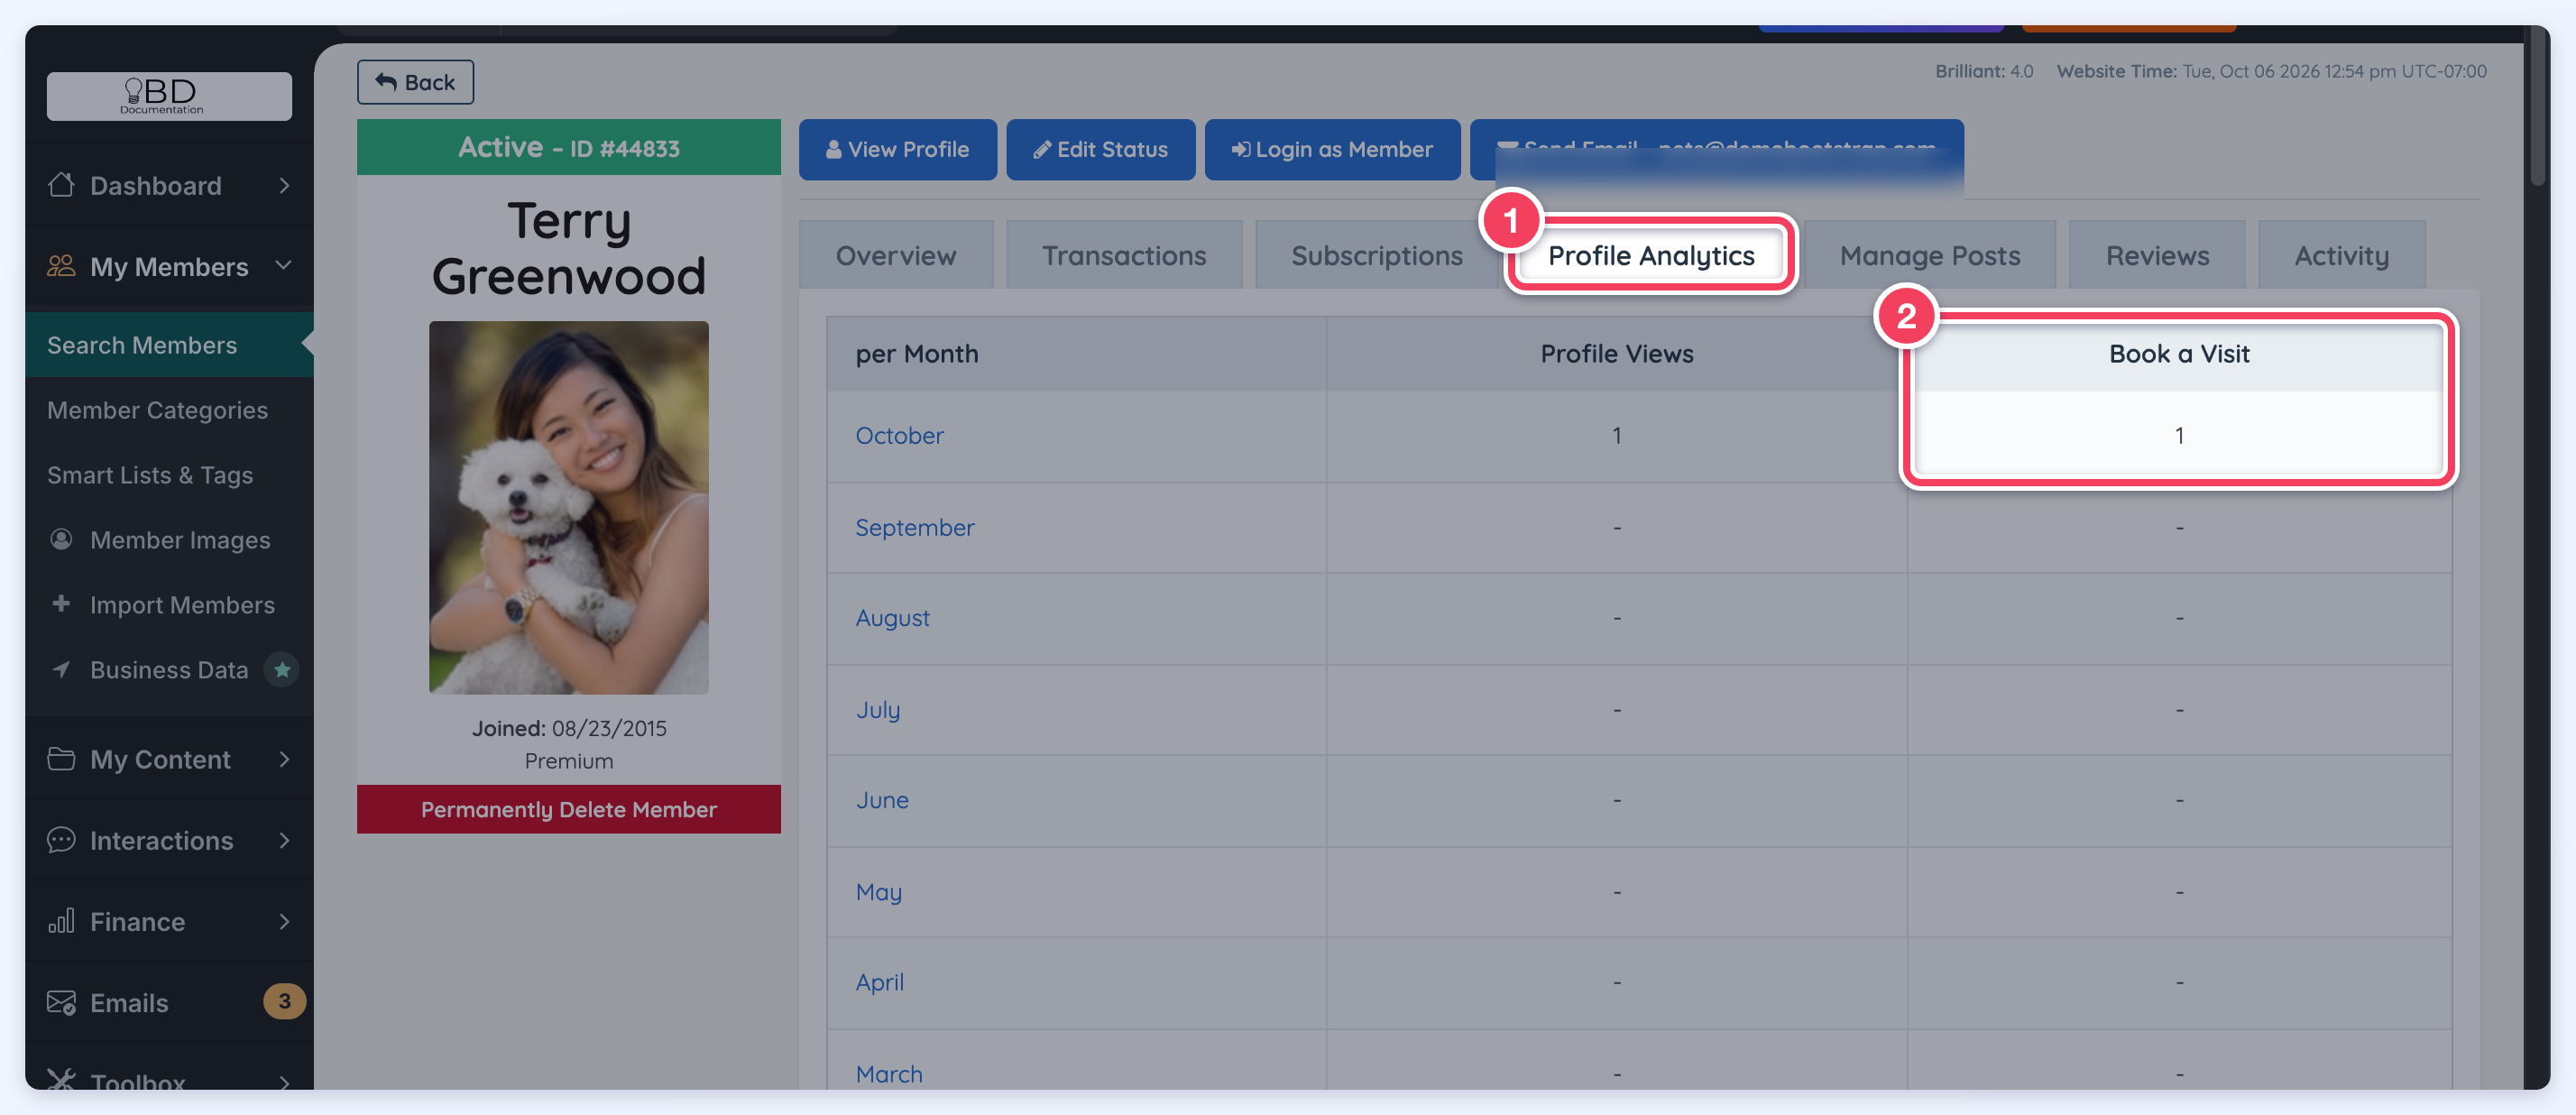
Once the link has been clicked at least once, its name appears as its own column on the member’s Profile Analytics tab (1, 2):
Rules for tracked custom links:
- The link must be saved on the member’s own record, for example in Listing Custom FOOTER Code. A click is only counted when a link with the same data-click-type name is stored on that member. Links added another way, such as through site-wide header or footer code or a widget, are not counted.
- Names can use letters in any language, numbers, spaces, hyphens and underscores, up to 64 characters. Upper and lower case are treated as the same name. Names containing combining marks (some vowel signs in scripts such as Hindi or Thai) are not accepted.
- Built-in statistic names cannot be used, such as Website, Phone, Profile Views, Contact Form, Facebook or Instagram, so a custom link never adds to a built-in count.
- The link address can be anything, including an outside website. A link that is not a full web address (such as
#bookor/contact-us) still counts; the click is stored with the address of the profile page it came from. - A link without data-click-type is not counted when it points somewhere other than the member’s own website or social media profile fields. Adding the weblink class alone is not enough.
- Test while logged out. As with profile views, clicks made by the website admin or by the member while logged in are not counted.
Notes
- All page loads are counted. However, views generated by the profile owner while logged in, as well as views by the website admin, are excluded.
- Clicks won't be tracked if the page content is set to Members-Only Content, or if the member is inactive.
Viewing Profile Analytics
Admins can monitor profile analytics from the Admin Dashboard and Member Dashboard, including search result views, daily and monthly profile visits, and recorded clicks on social media and website links.
Detailed insights are available when profile statistics are enabled for a membership plan.
Admin Dashboard
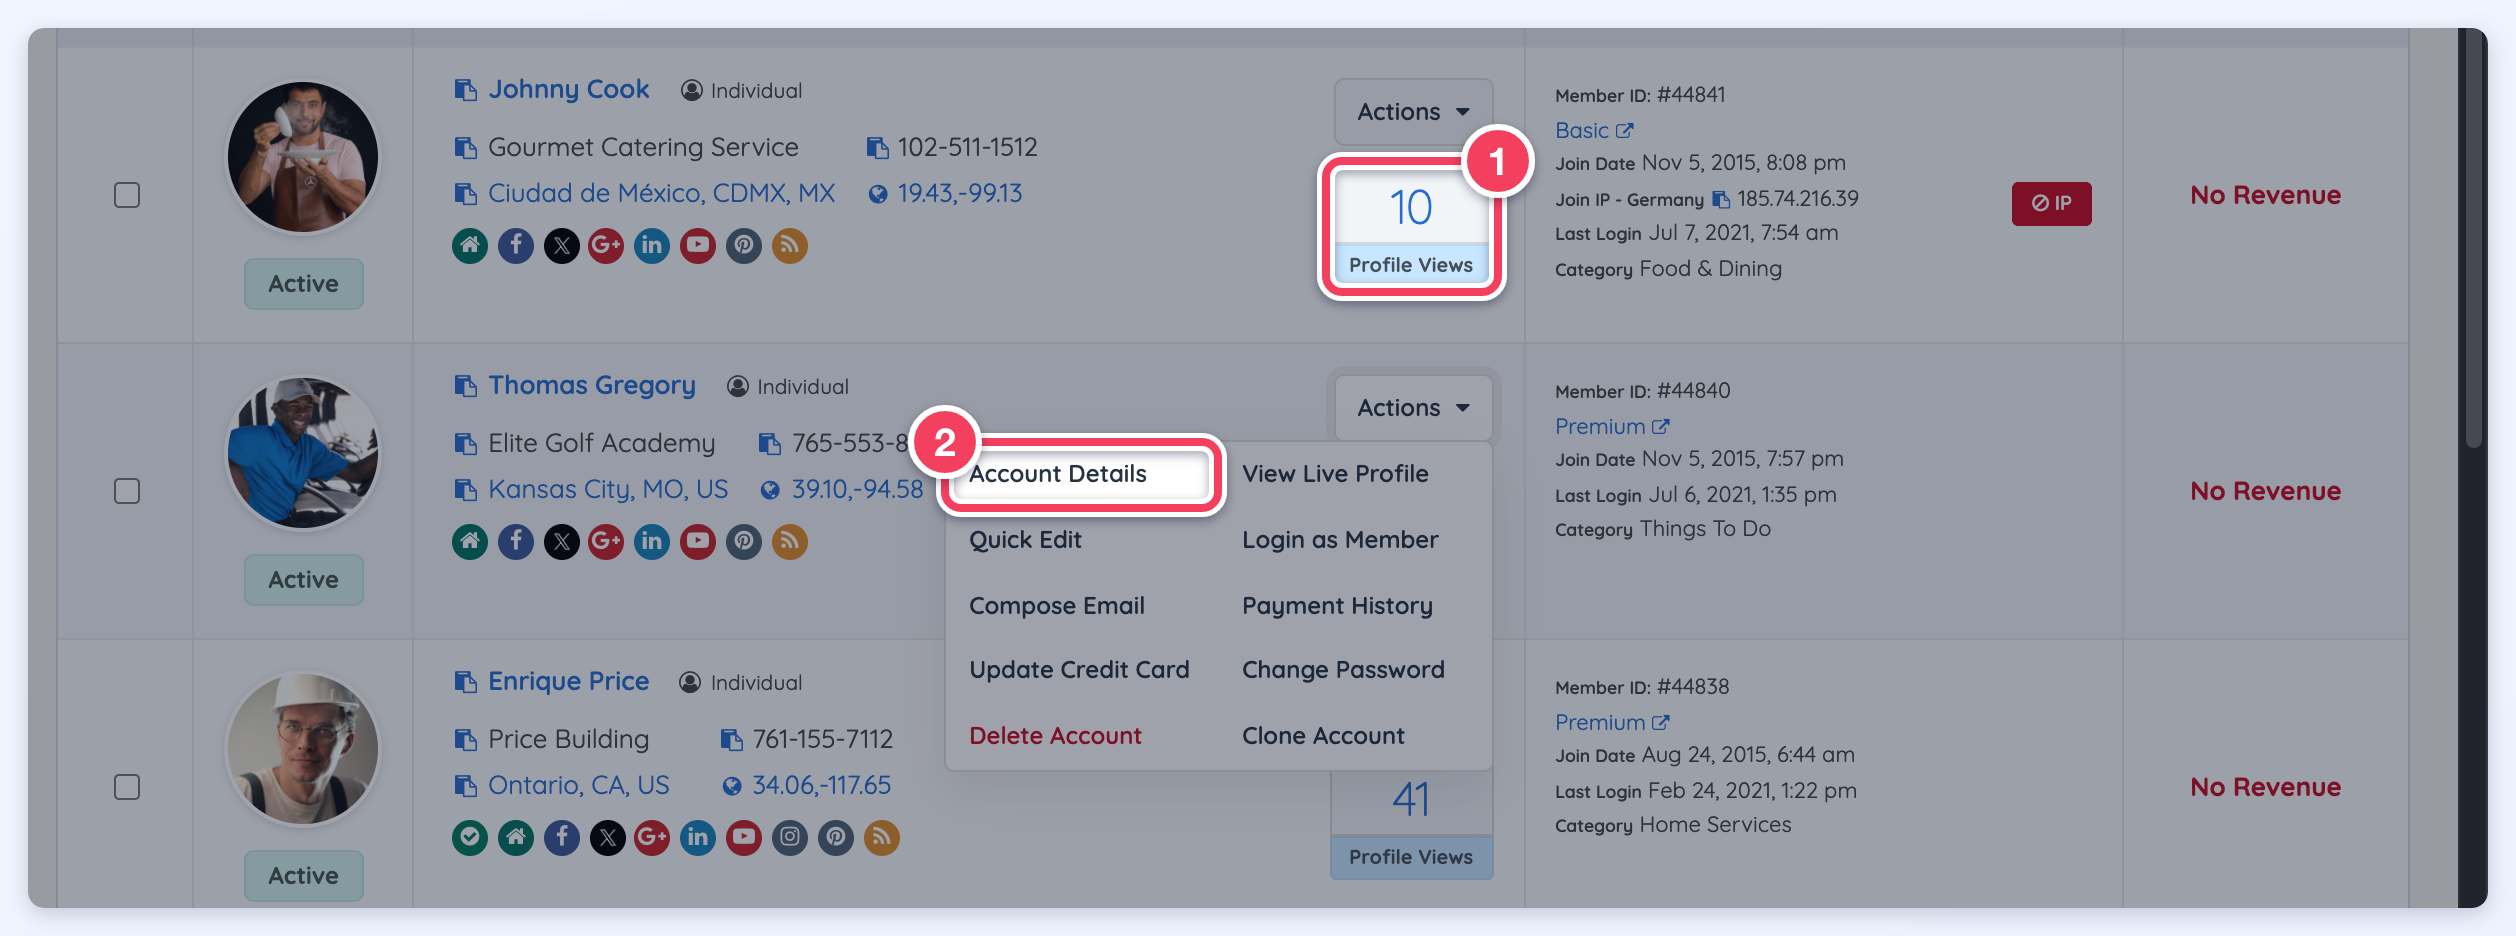
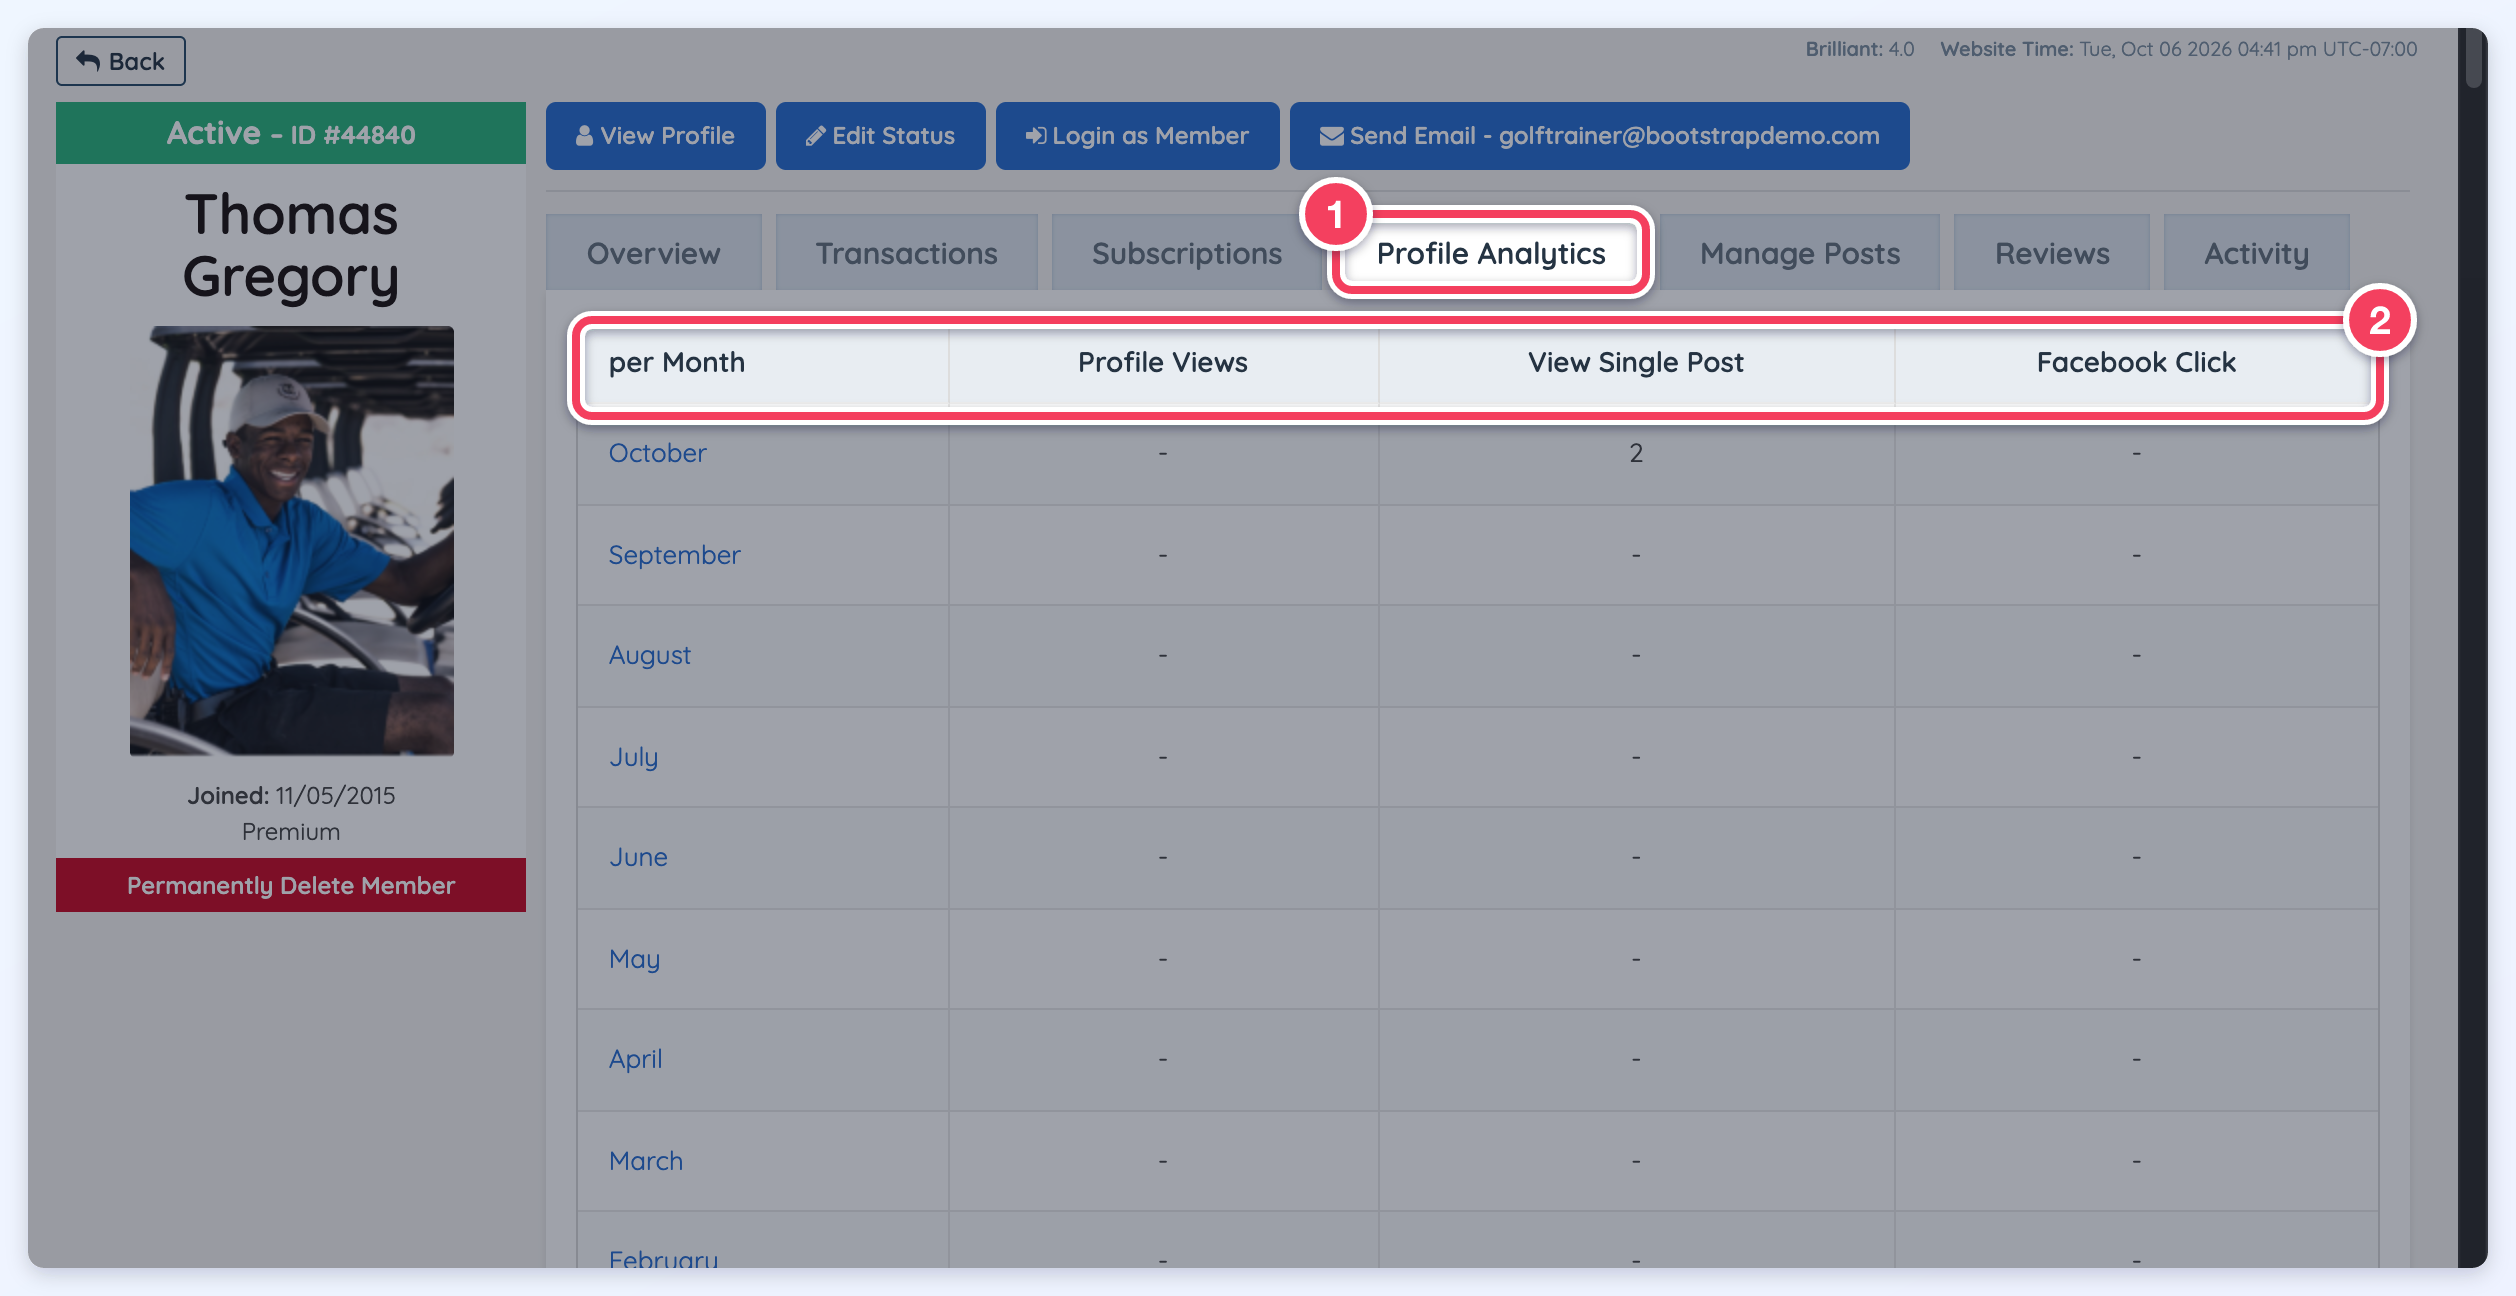
The admins will be able to see the amount of views in the member search results, as well as in the member's Profile Analytics tab (opened from Actions » Account Details) if the profile statistics are enabled for the membership plan:
Top Views Dashboard Modules
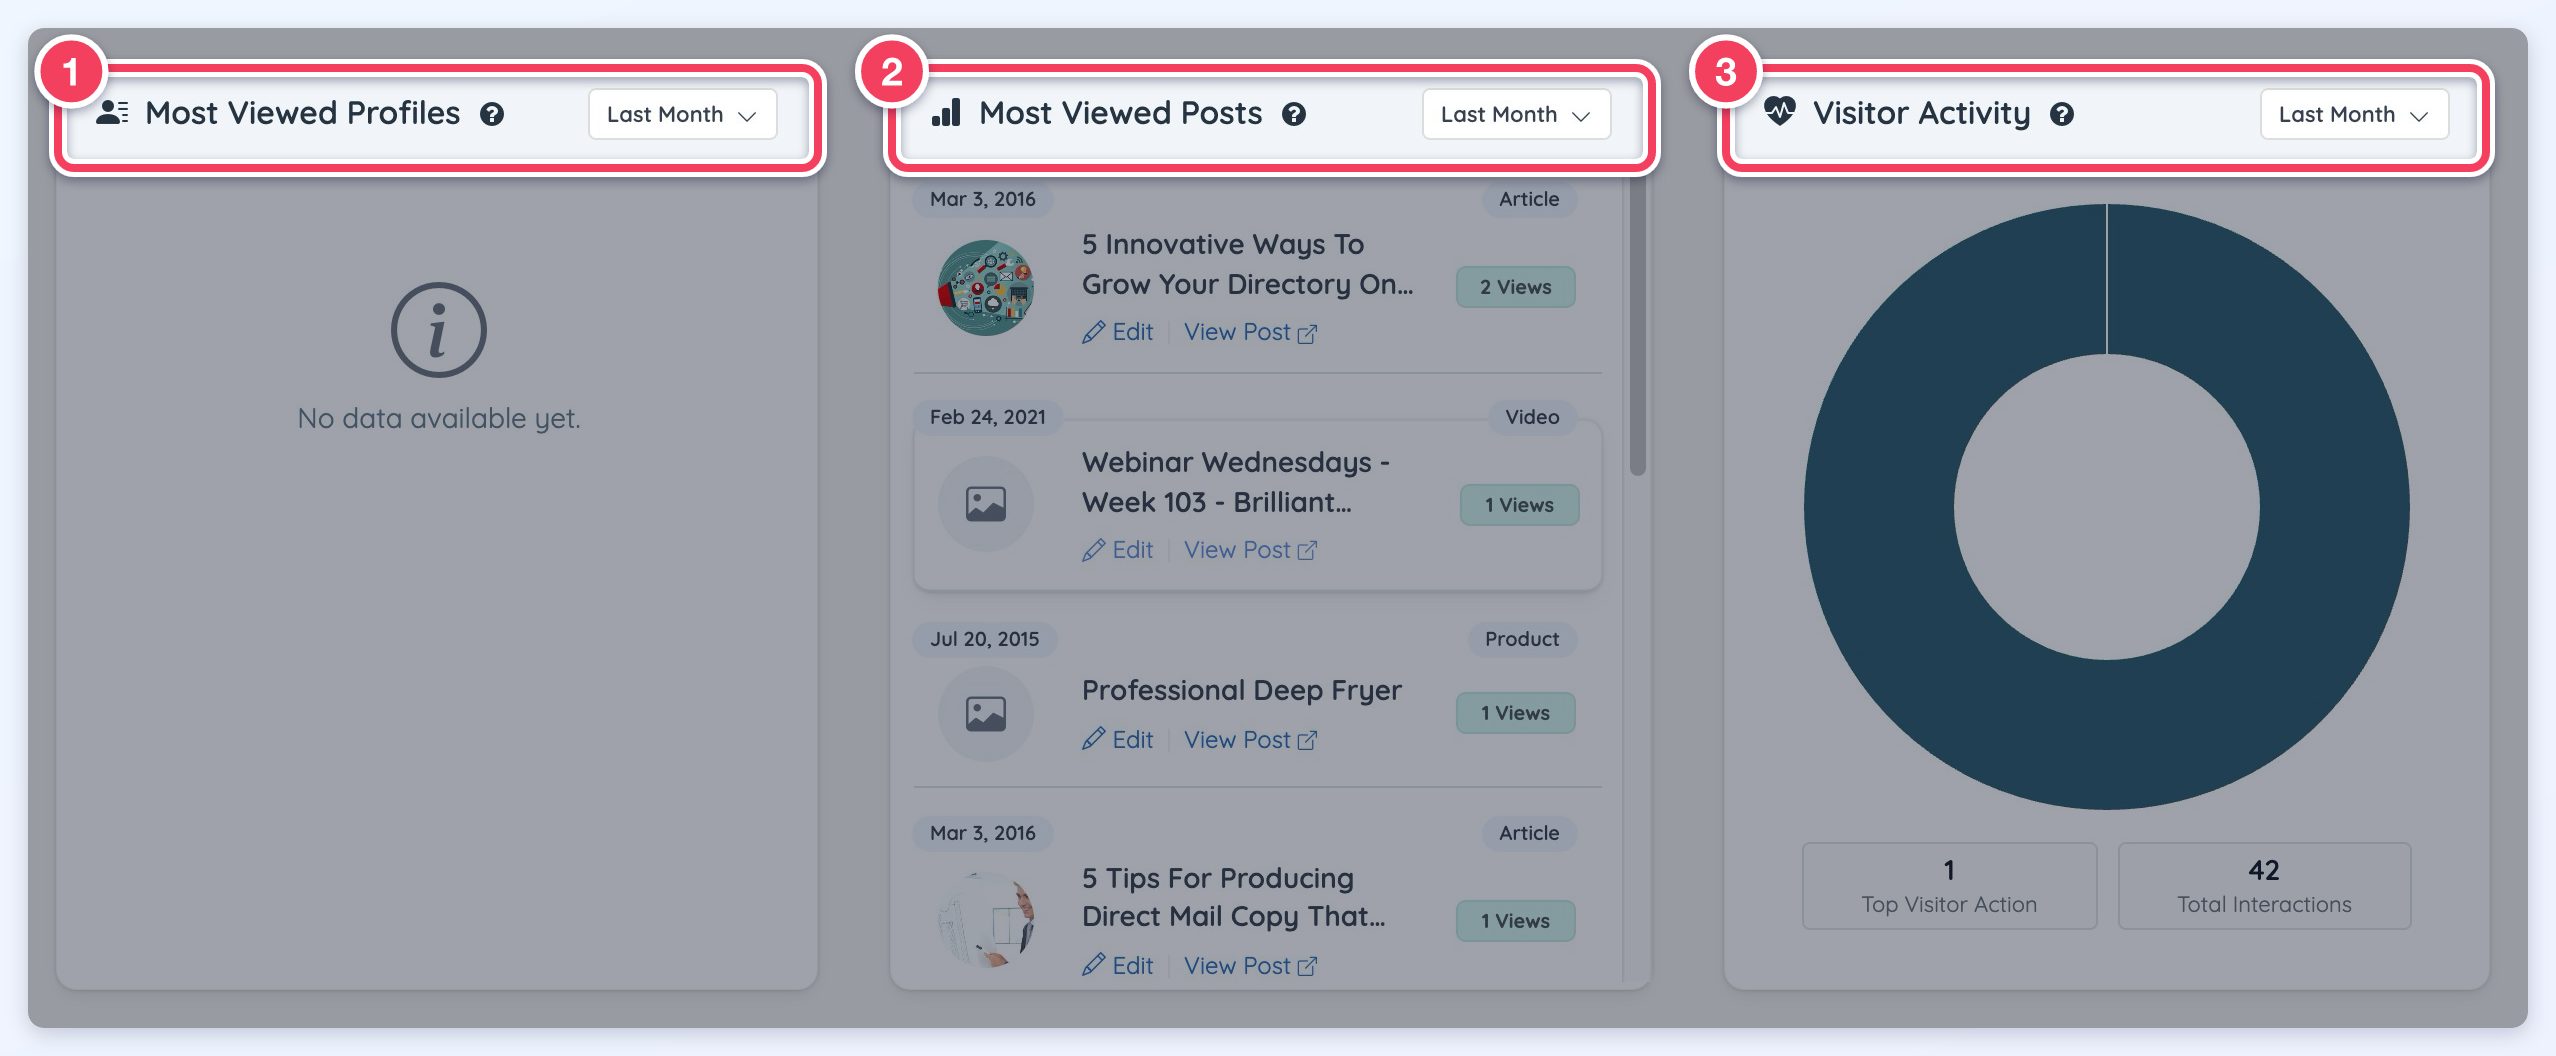
The admin dashboard shows three modules for this: Most Viewed Profiles (1), Most Viewed Posts (2) and Visitor Activity (3), each with its own date range.
Member Dashboard
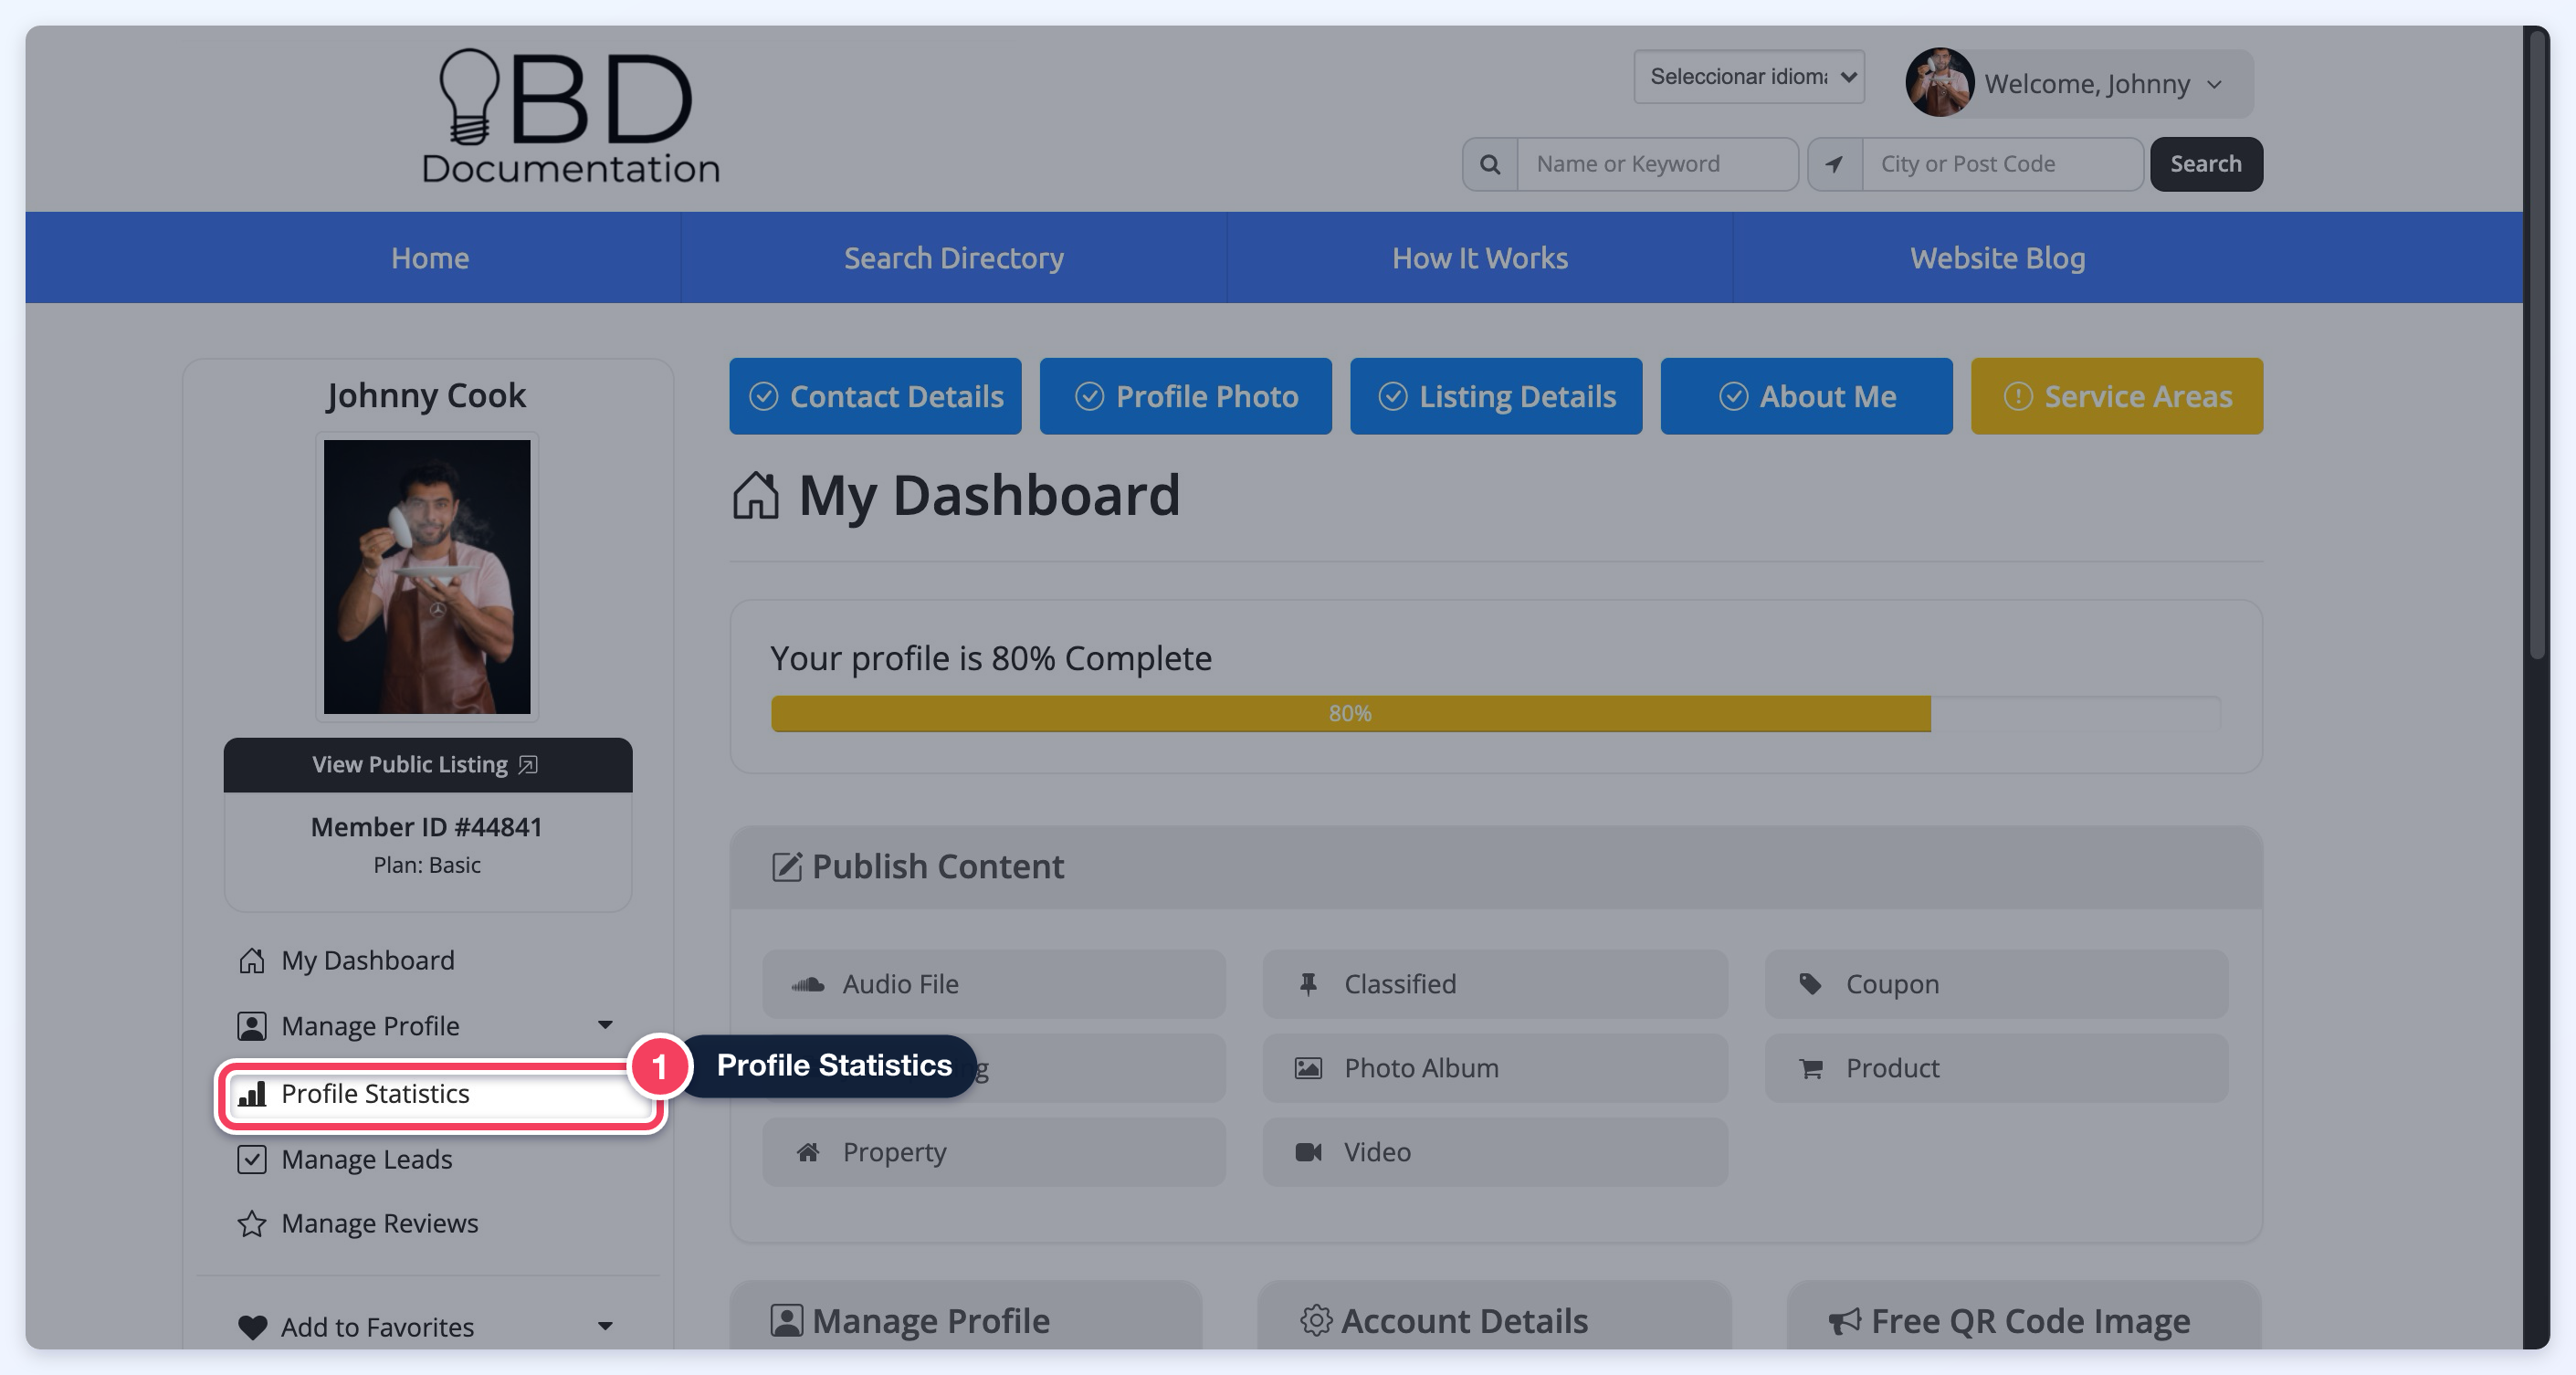
Also the admin can login as any member in that specific Membership Level, on the left sidebar look for Profile Statistics click on it and the profile views per month will be shown:
Click on the month to check more detailed stats, it will display the views per day:
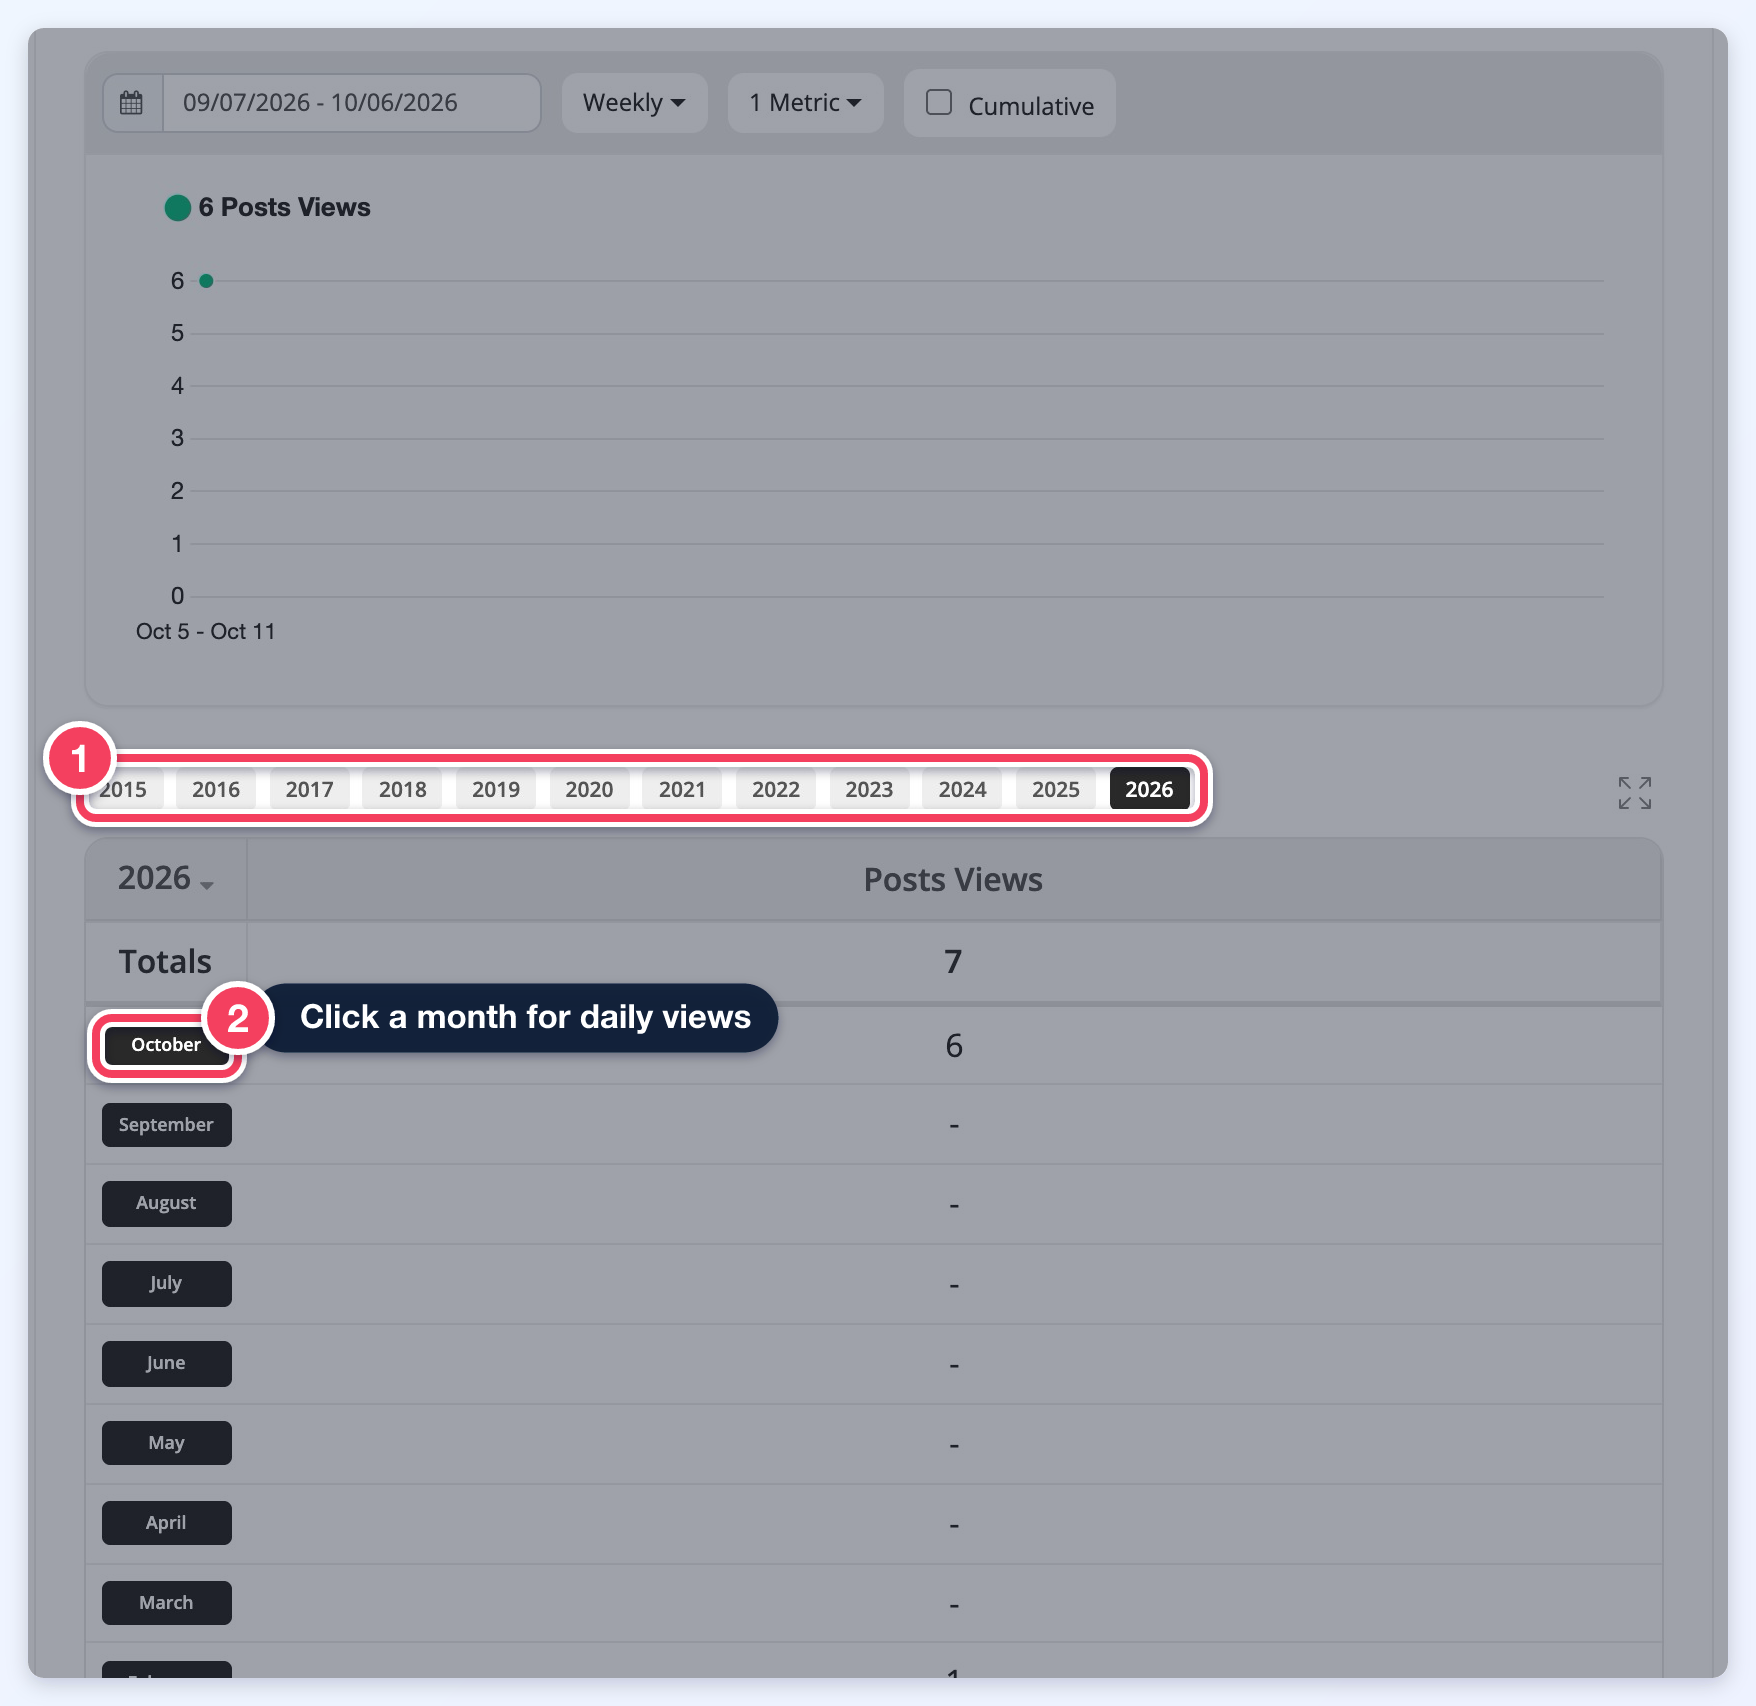
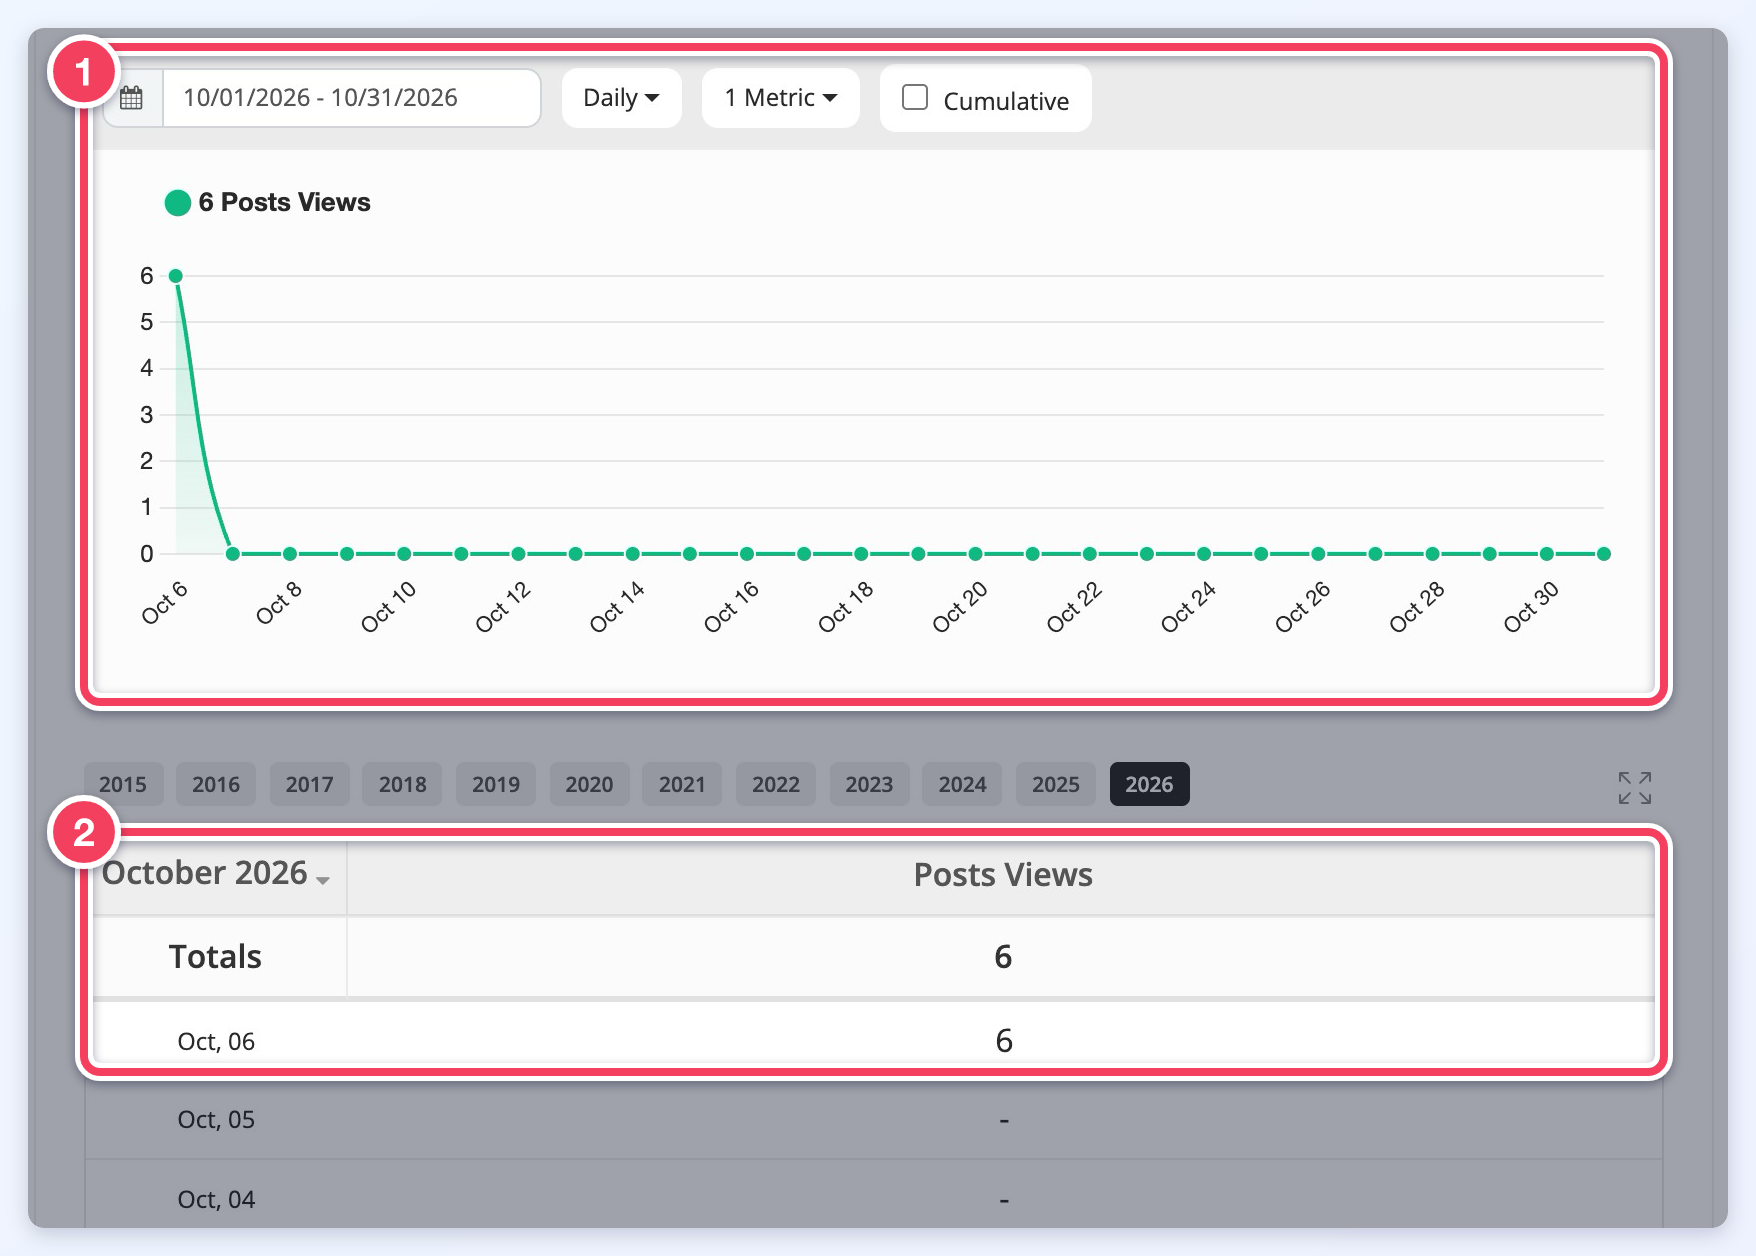
Social media clicks and website link clicks will also be recorded and added to the report. They will not show up if no clicks have been registered.
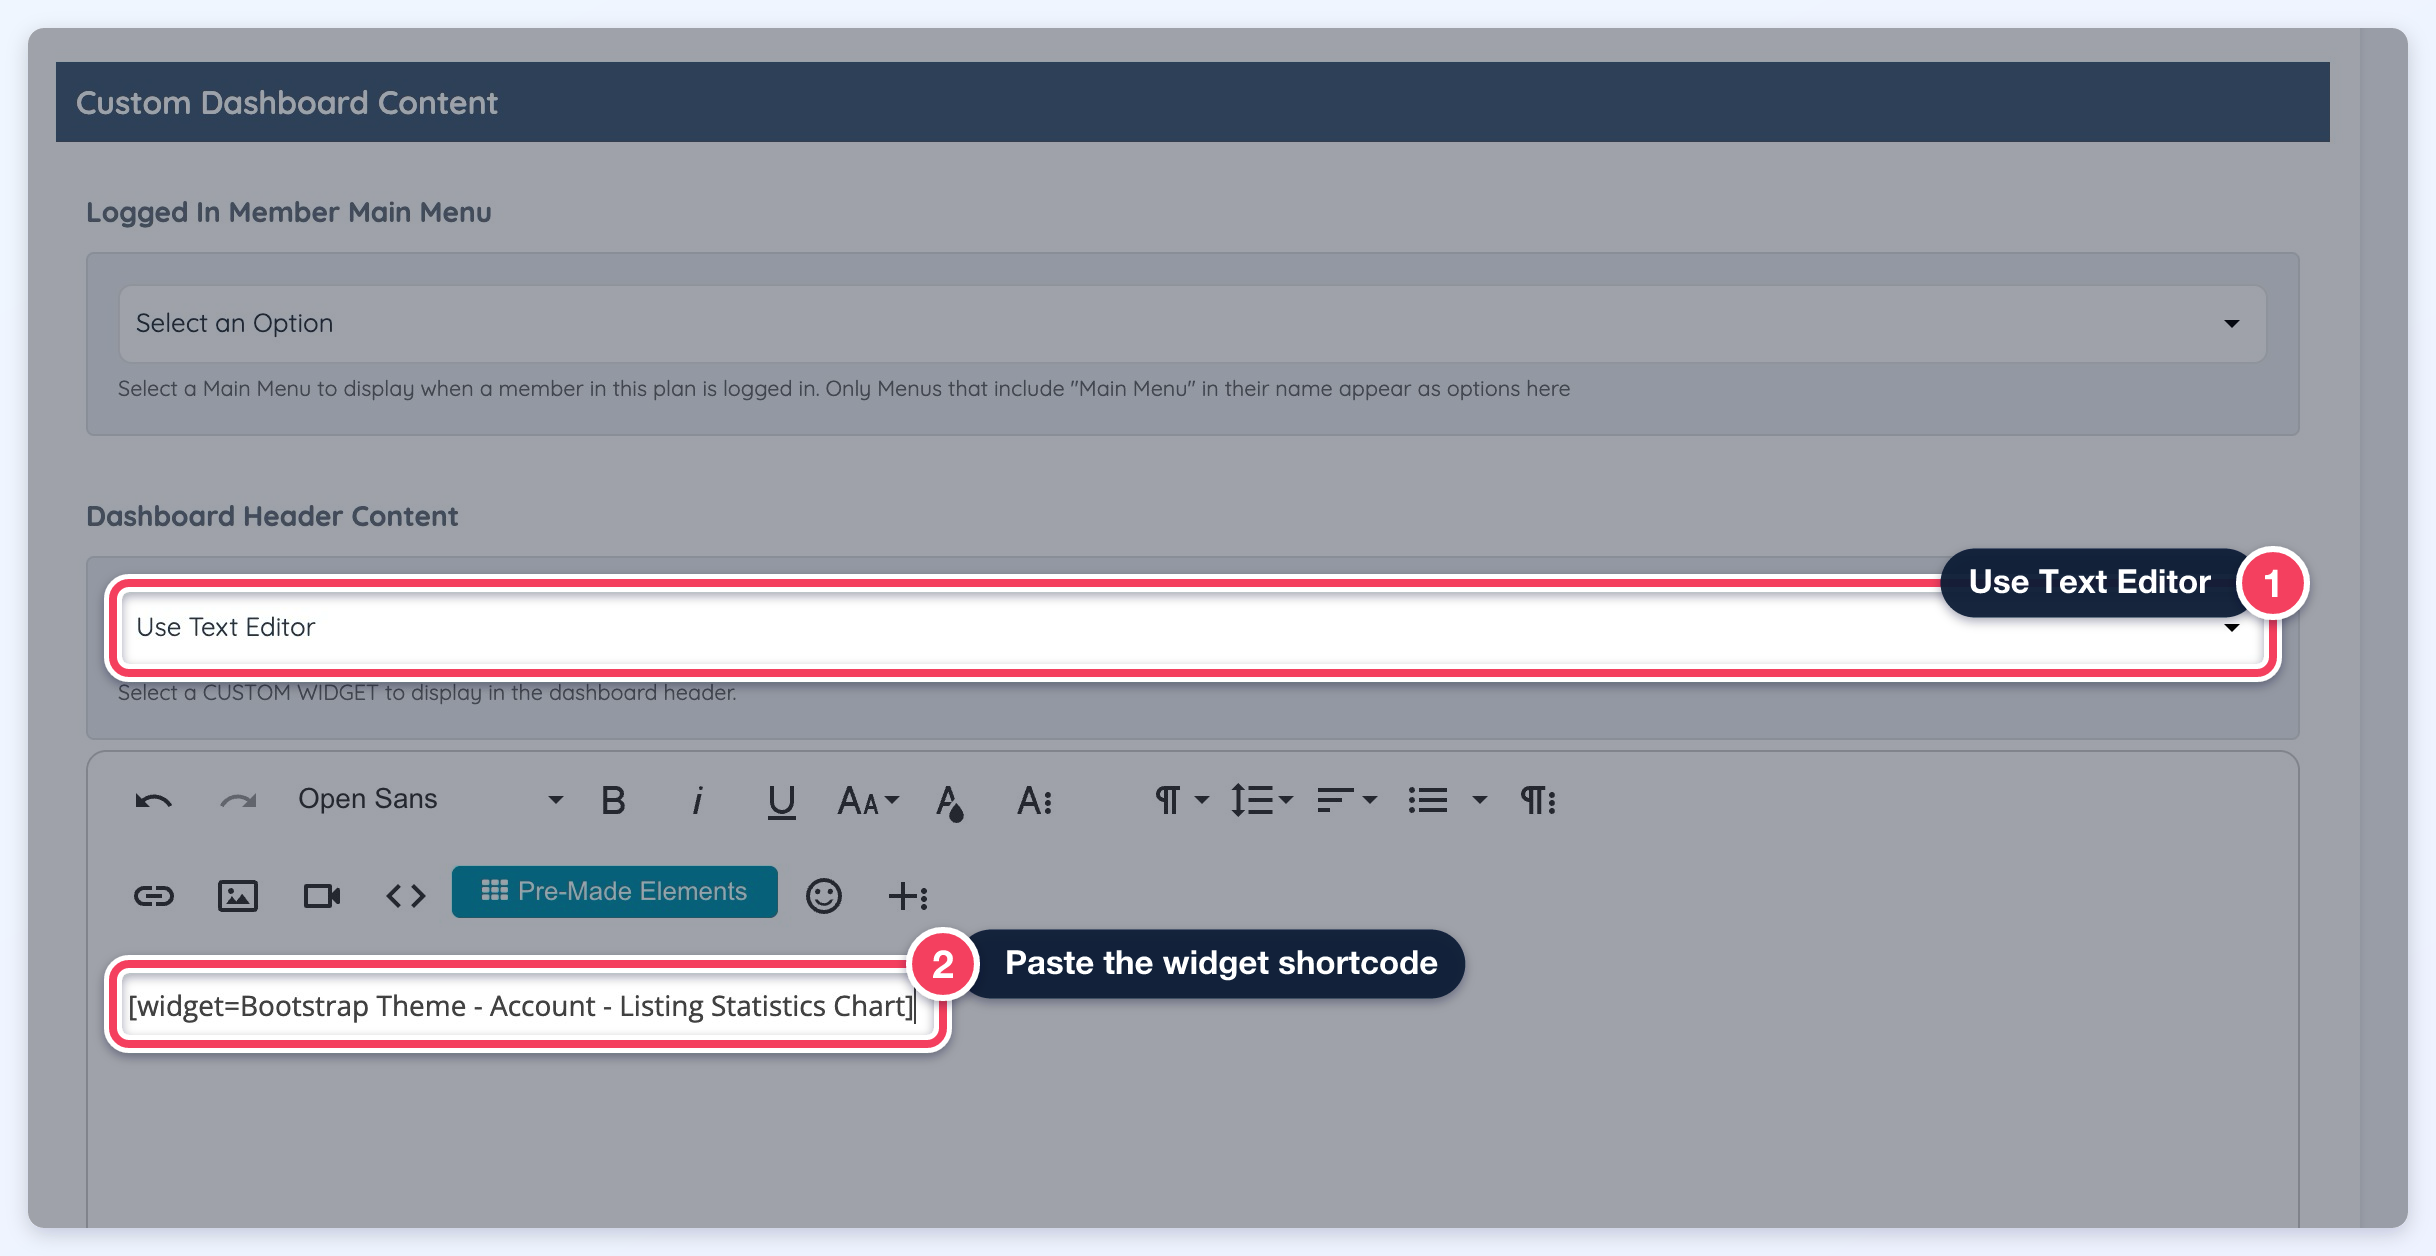
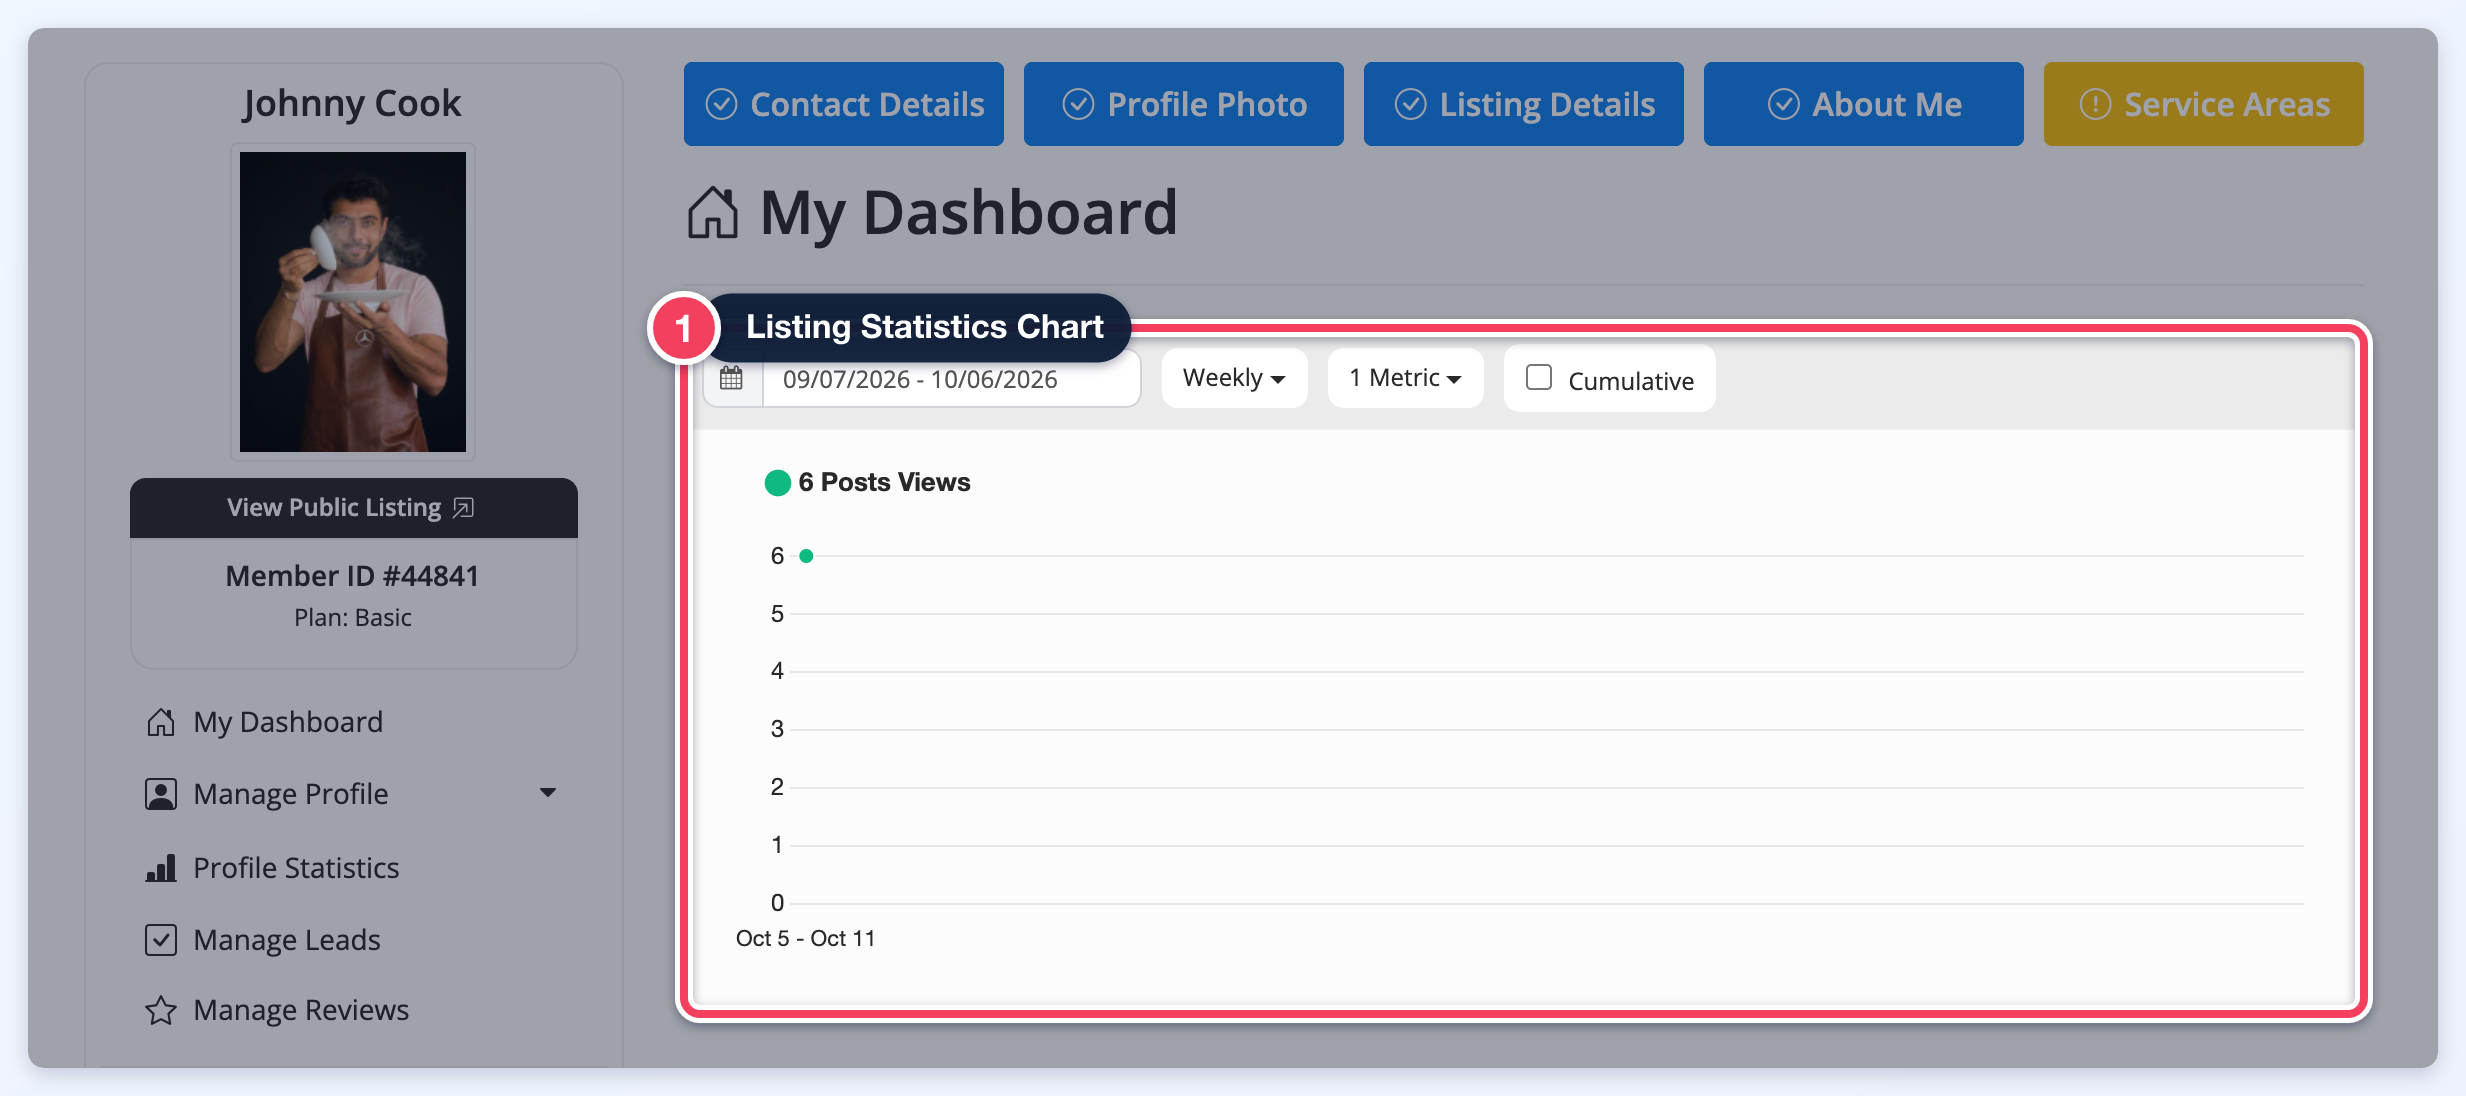
The Visual Chart can be placed anywhere in the Member Dashboard. For example, adding [widget=Bootstrap Theme - Account - Listing Statistics Chart] per Membership Plan under Member's Dashboard » Custom Dashboard Content » Dashboard Header Content: set the dropdown to Use Text Editor (1), paste the shortcode into the editor (2) and save the plan:
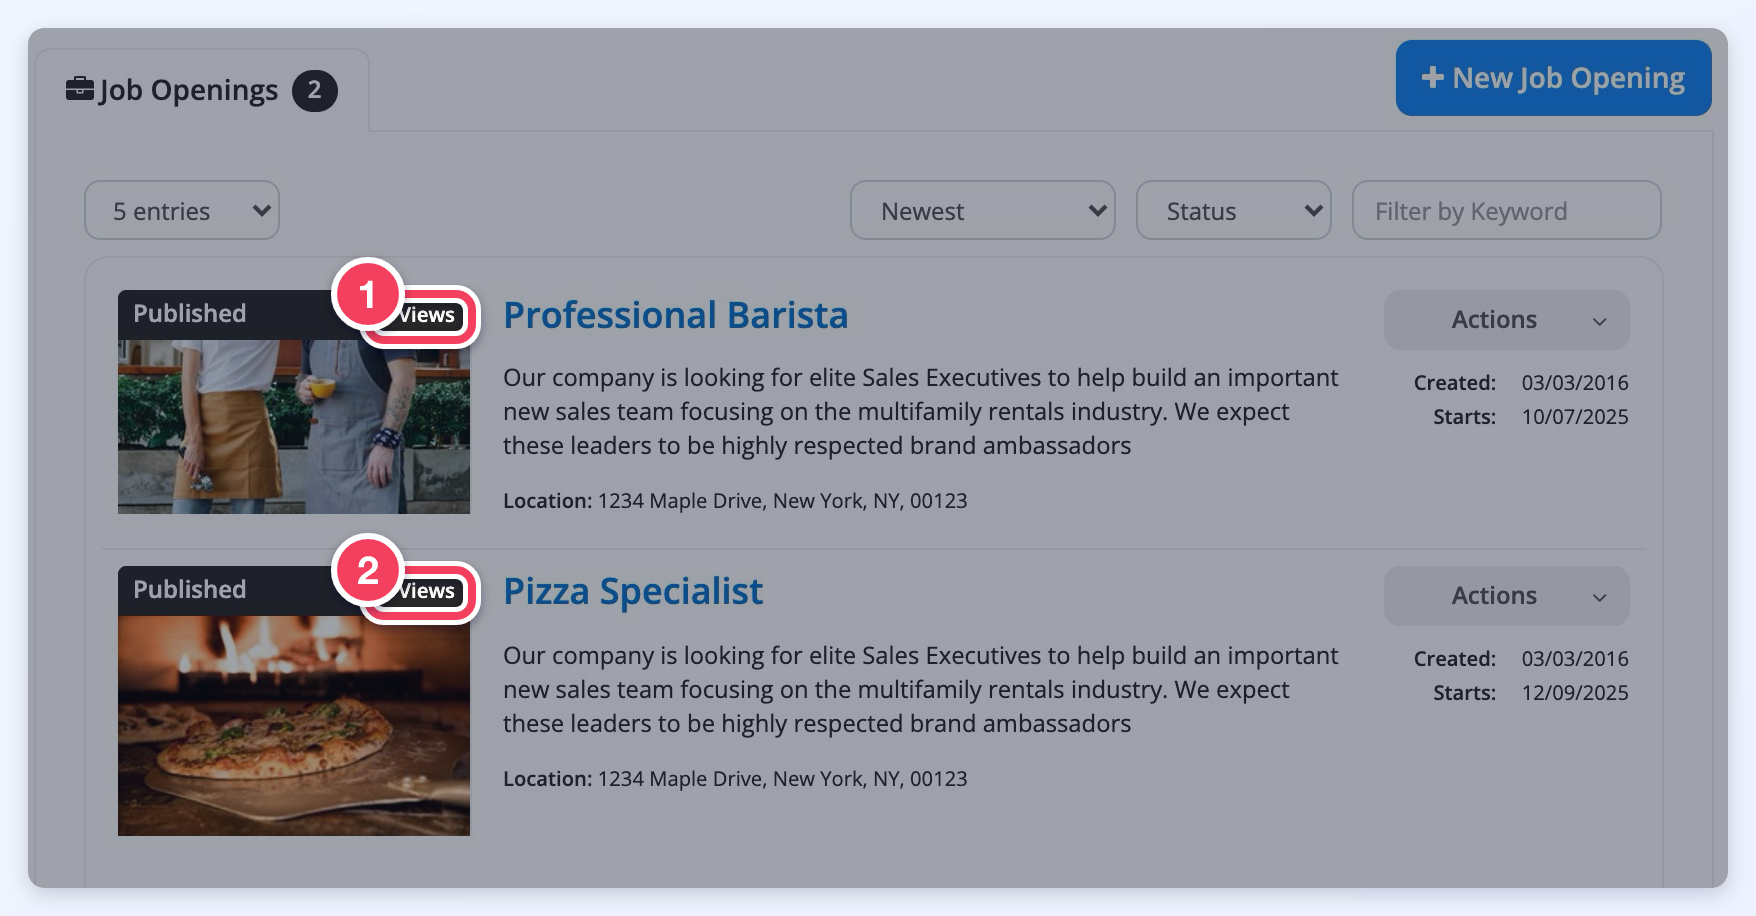
Post Views
Posts will display how many views they have received in total:
Notes
Currently, there is no Download Report functionality for this tool; the content is viewable only.
Adding Stats to Emails
Email variables make it possible to display the Stat numbers inside outgoing emails. This article outlines the format, shows the default variables available in the editor toolbar, lists all supported date options, and explains how to create custom variables.
User Stats: Displaying Profile Statistics in Emails Using Variables
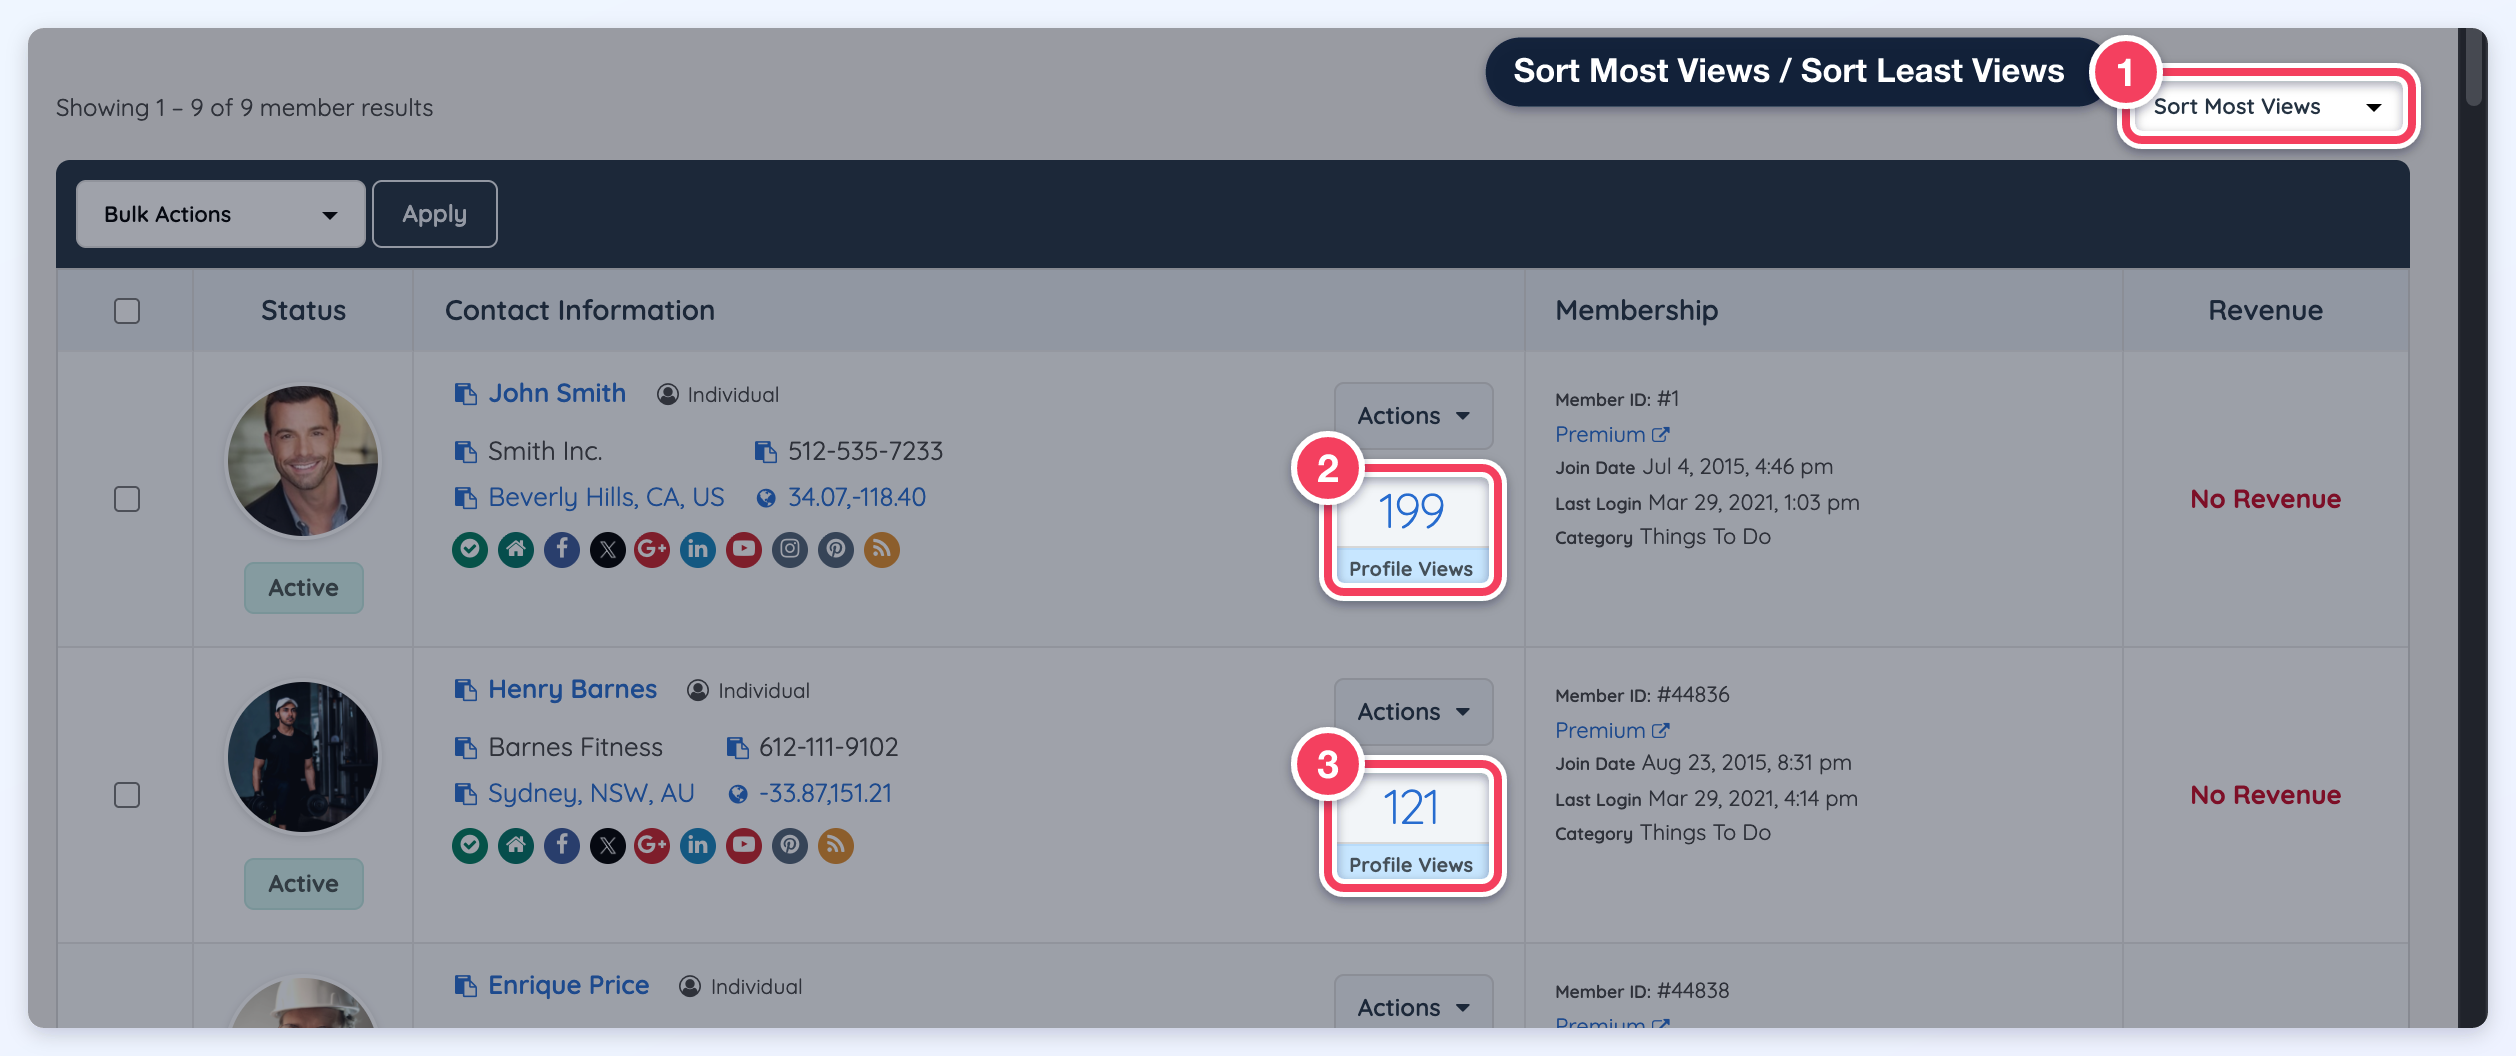
Search Members Sorting Options
Having this add-on active will show additional sorting options in the Search Members section in the admin dashboard.
Members can be sorted by Most and Least views: