Member Credits System
Link: https://support.brilliantdirectories.com/support/solutions/articles/12000086306
Incentivize members to take action by rewarding them with credits and preserve revenue by issuing credits instead of processing refunds.
Manually assign credits to member accounts or give credits to members automatically after signup or an upgrade. Credits take the form of the website’s primary currency and can be used as payment for future purchases on the site.
Easily add or deduct credits from specific members and quickly identify which member payments were made with credits – all from the website’s admin area.
How To Get This Add-On
- Websites with the VIP Add-Ons Club automatically have this add-on available: Join The VIP Add-Ons Club
- Purchase Individually: Member Credit System Add-On
How Credits work
- Available credits will automatically be used for the member’s next payment(s)
- Credits work for all purchases (renewals, upgrades, lead & post purchases, etc.)
Using the Add-on
With the Member Credits System add-on, admins can manually add or deduct credits from individual member accounts as needed.
Credits can also be automatically added to a member’s account after they sign up or upgrade to a new plan.
From the member’s perspective, credits can be used as a form of site currency to access features or make purchases, depending on how the system is set up.
Important
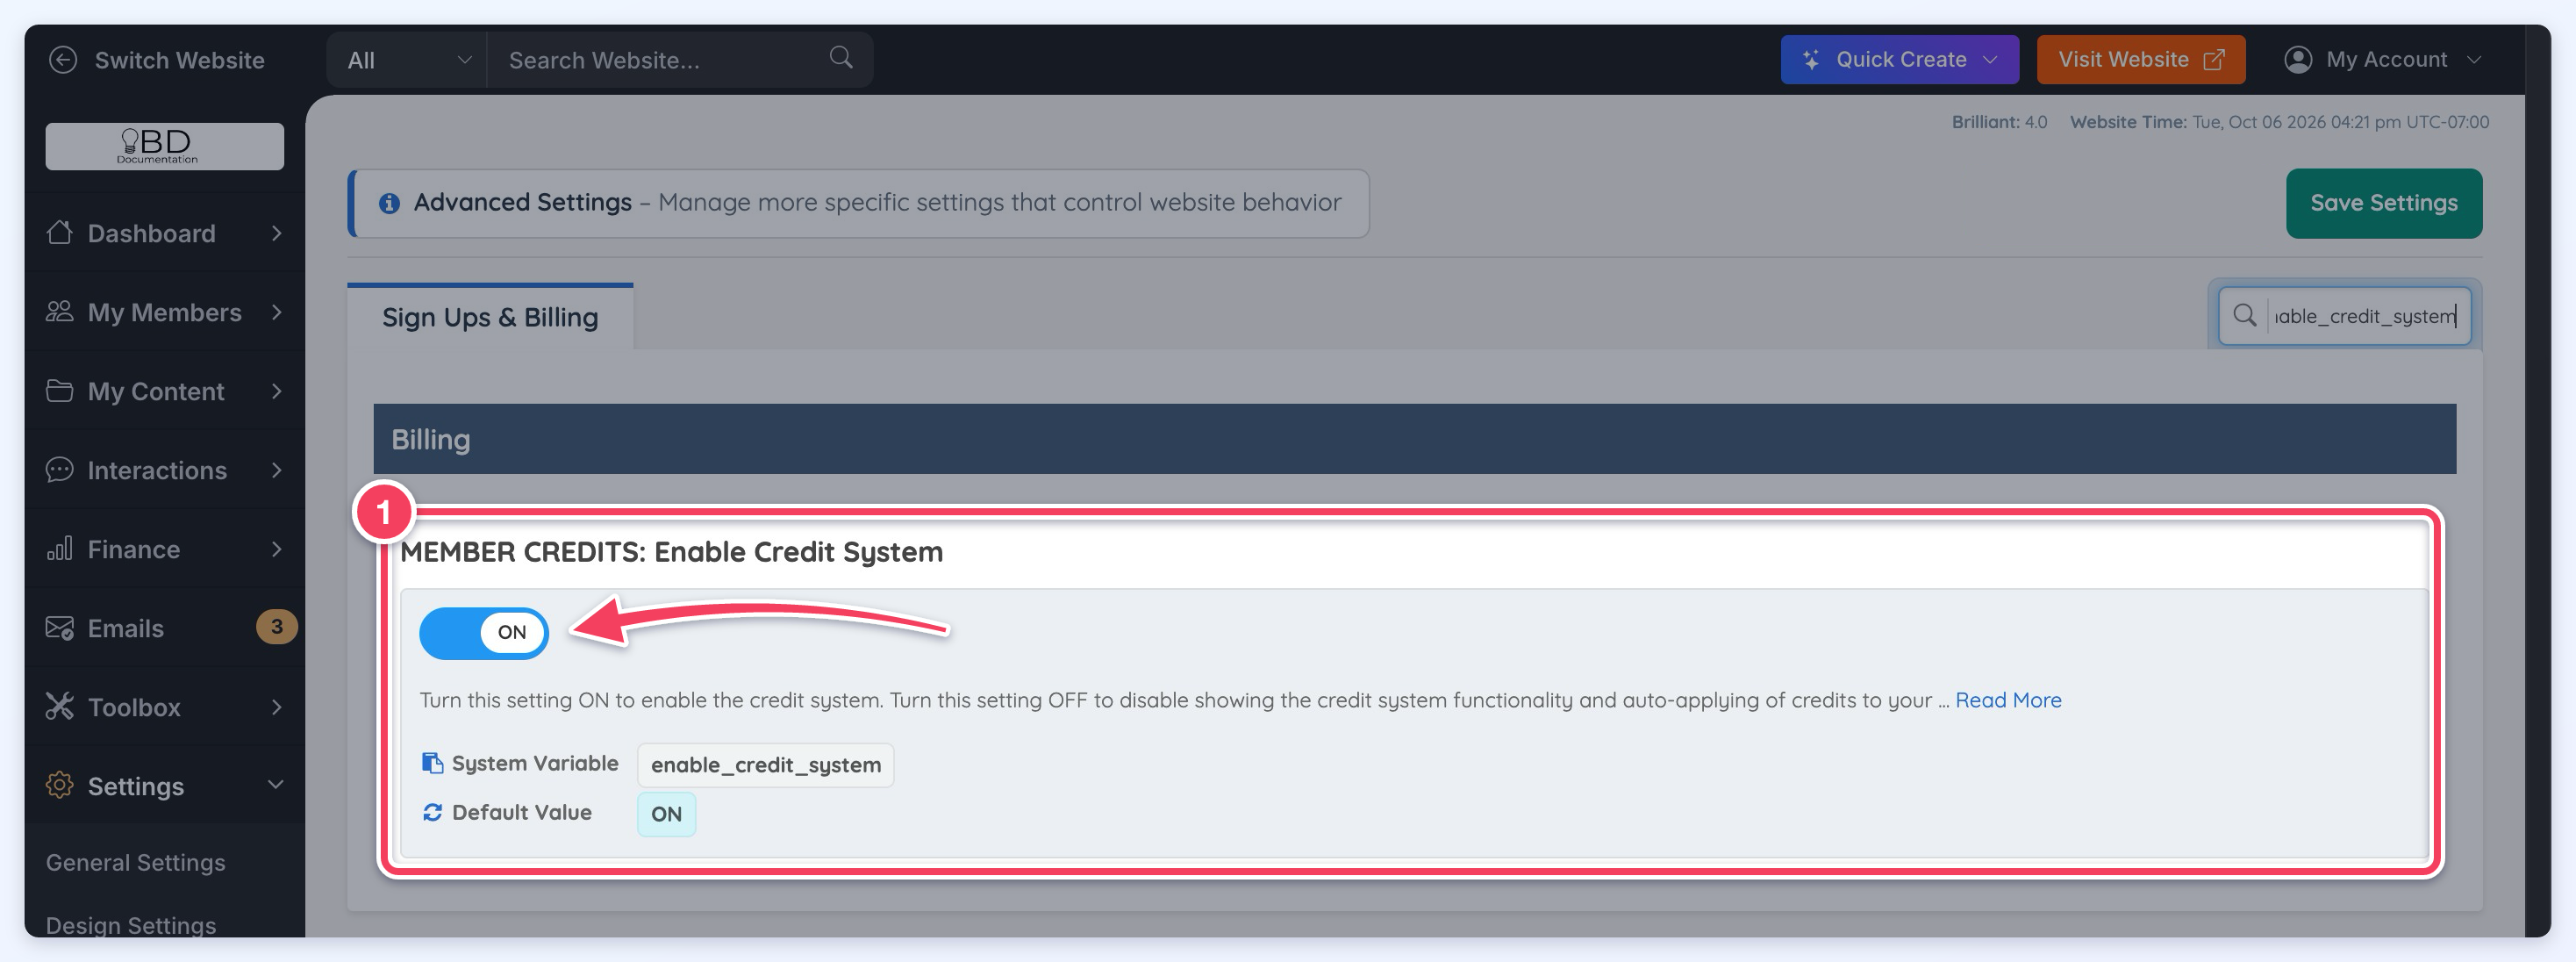
Locate the setting enable_credit_system and ensure that it is turned on:
Add & Deduct Credits
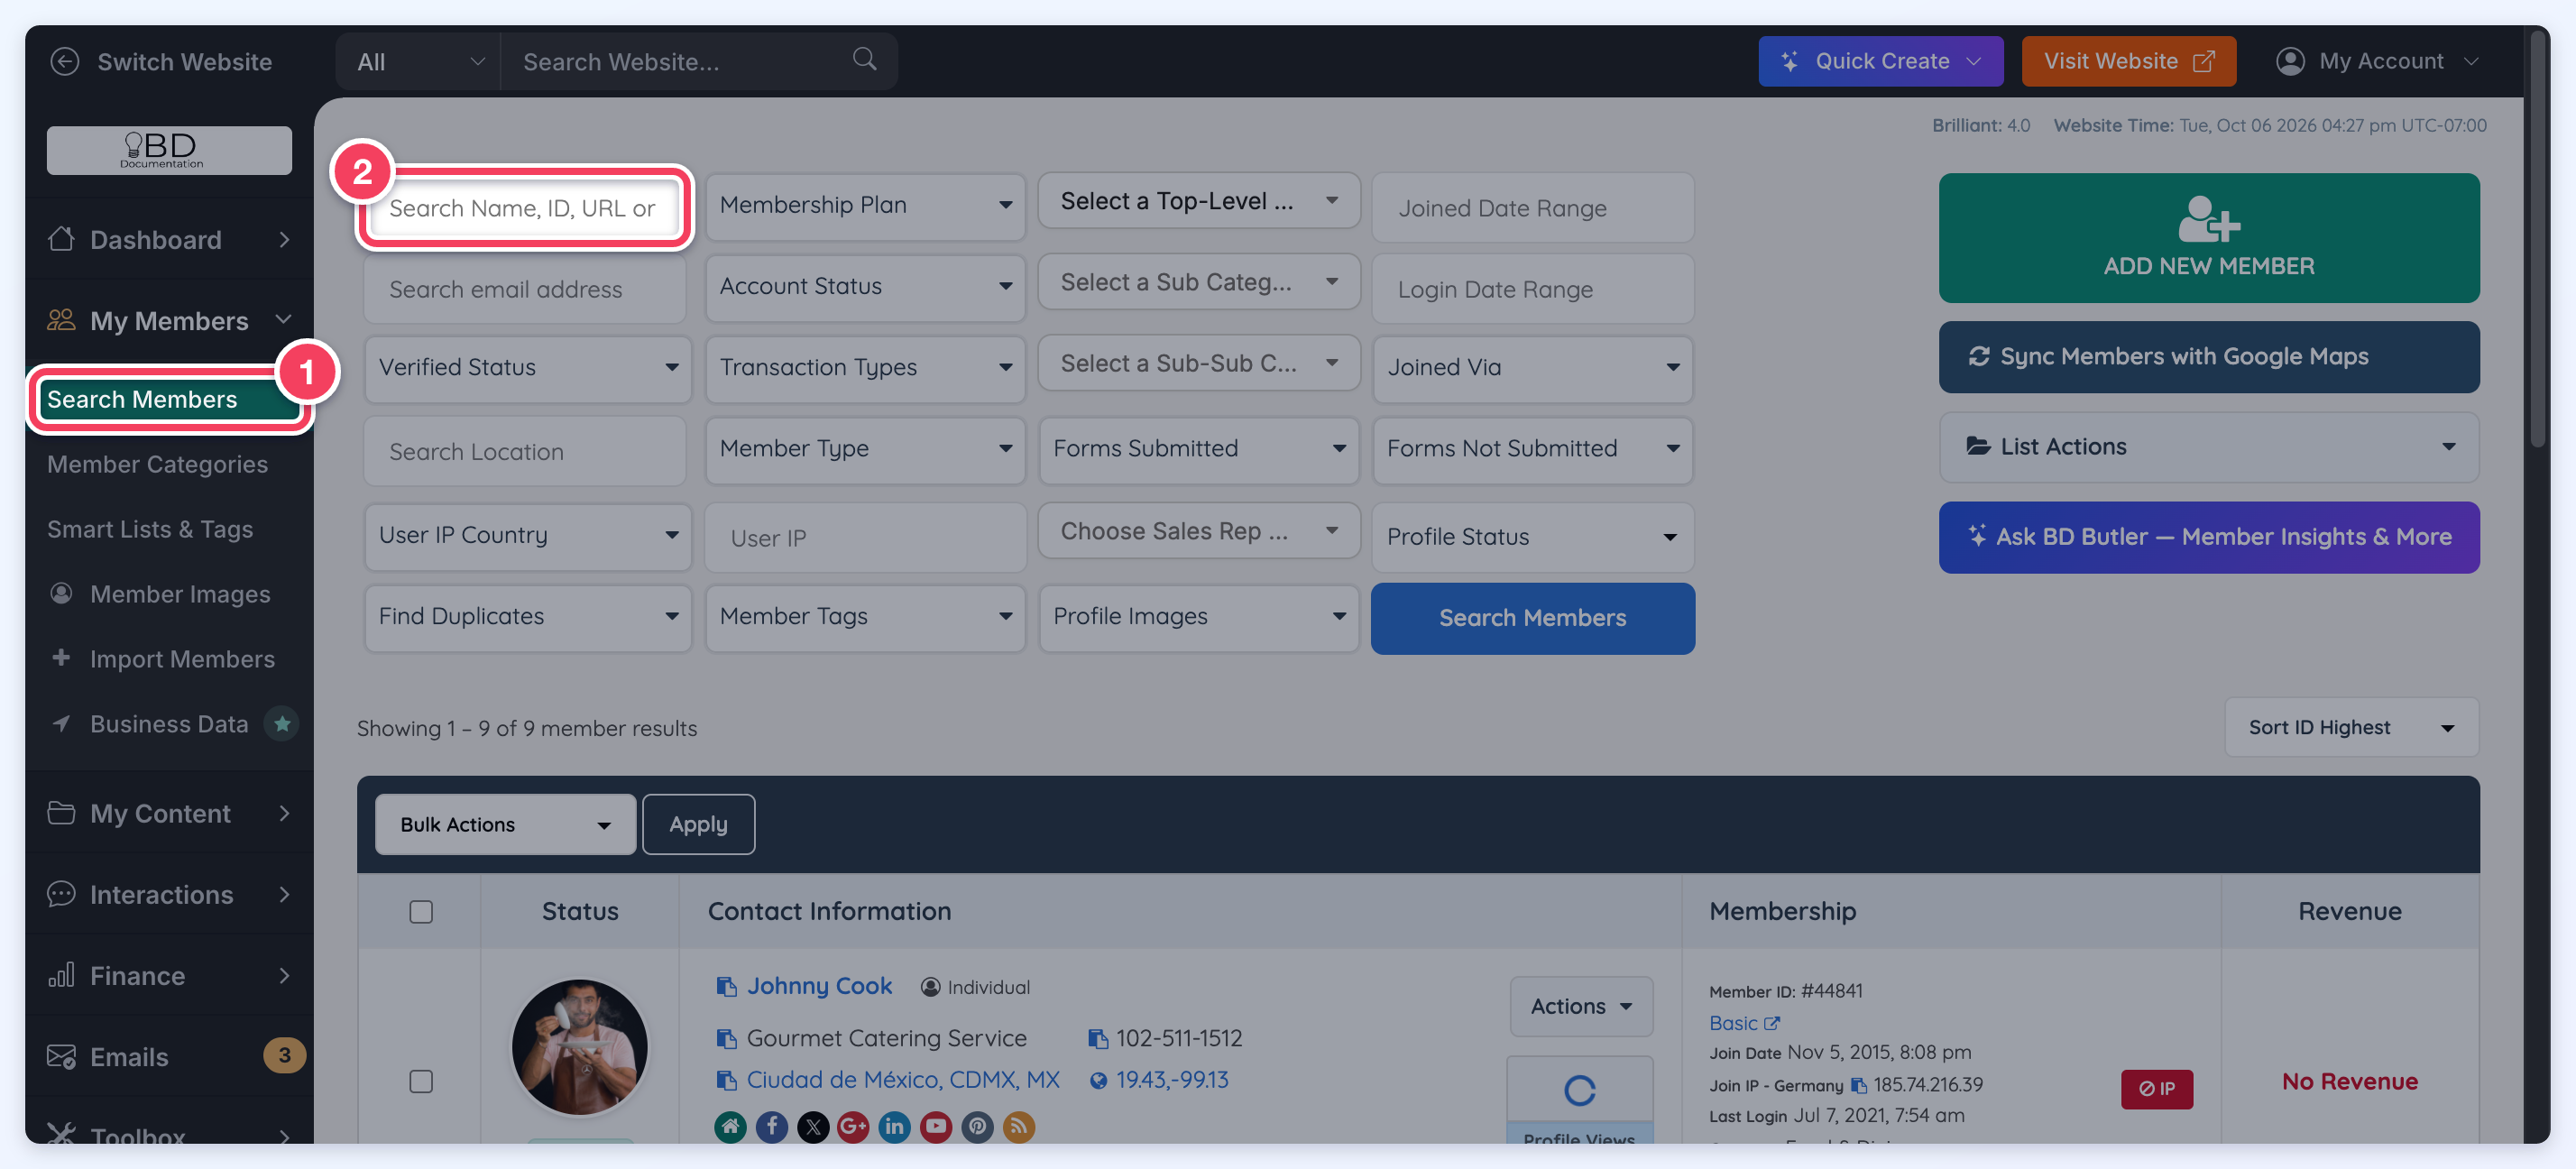
Go to My Members » Search Members (1) and search for the member (2):
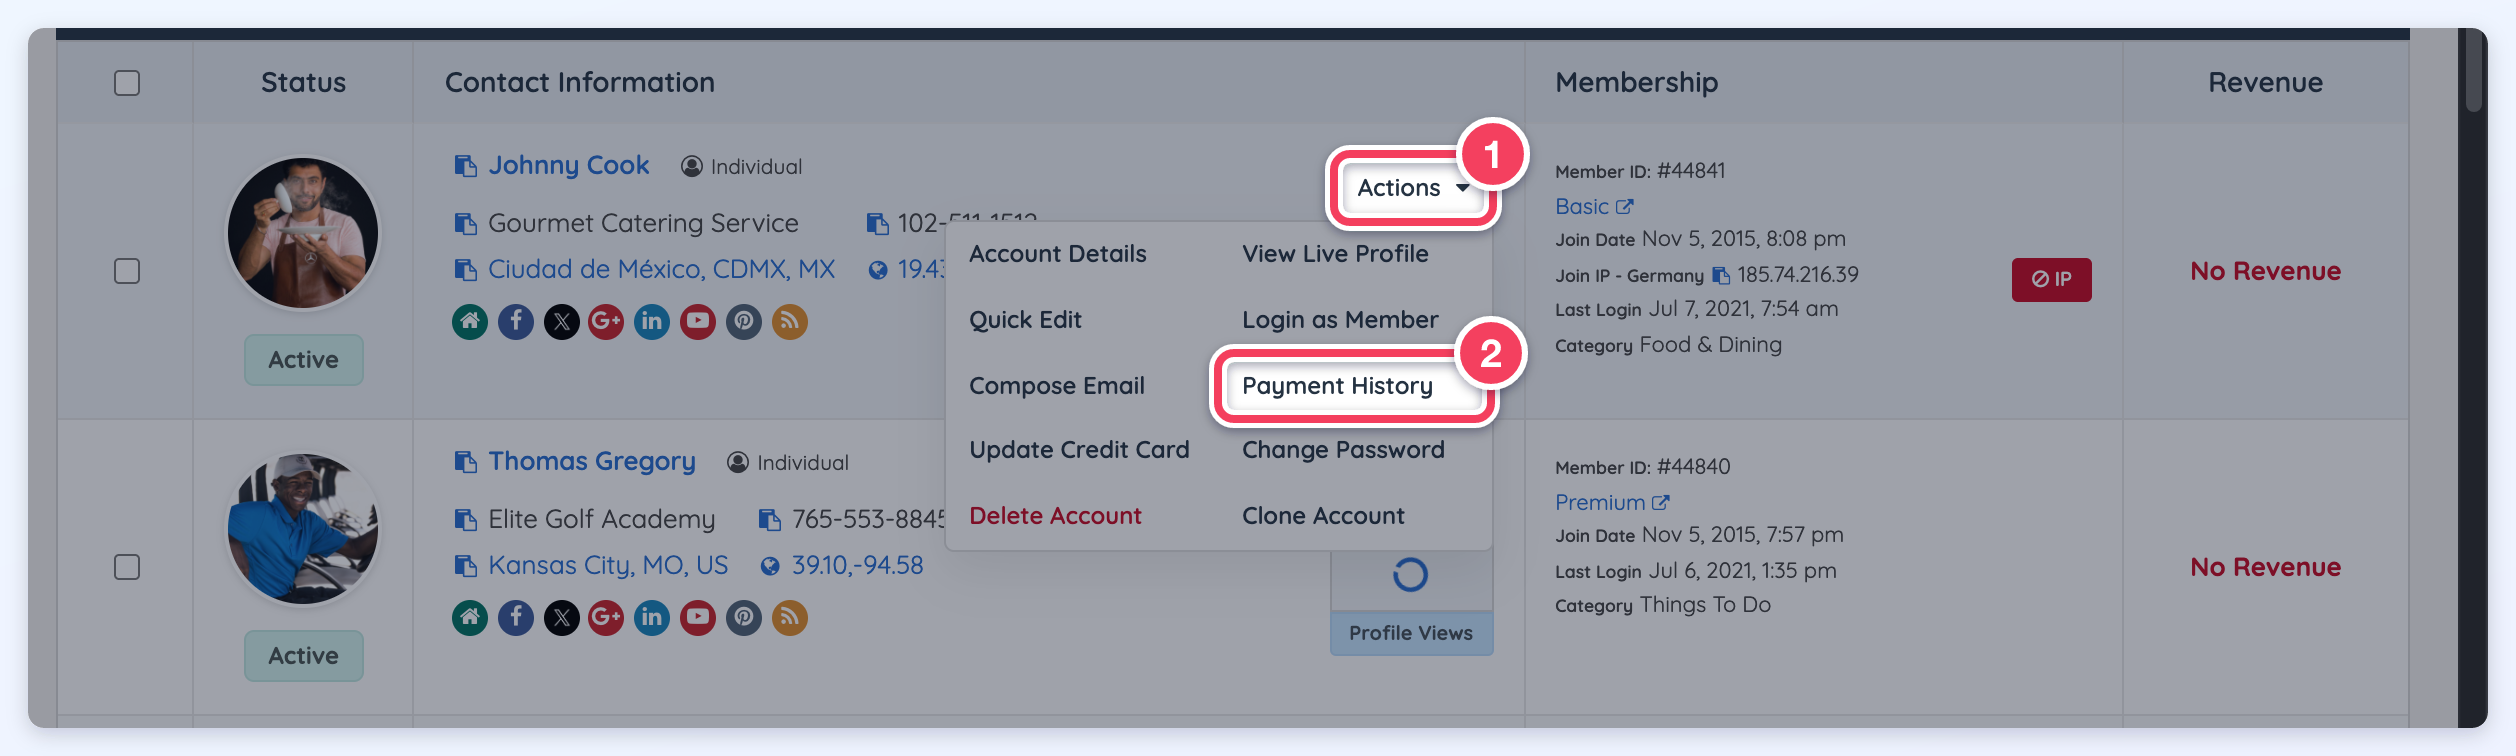
Search for the member that will receive or be deducted credits then click on Actions > Payment History:
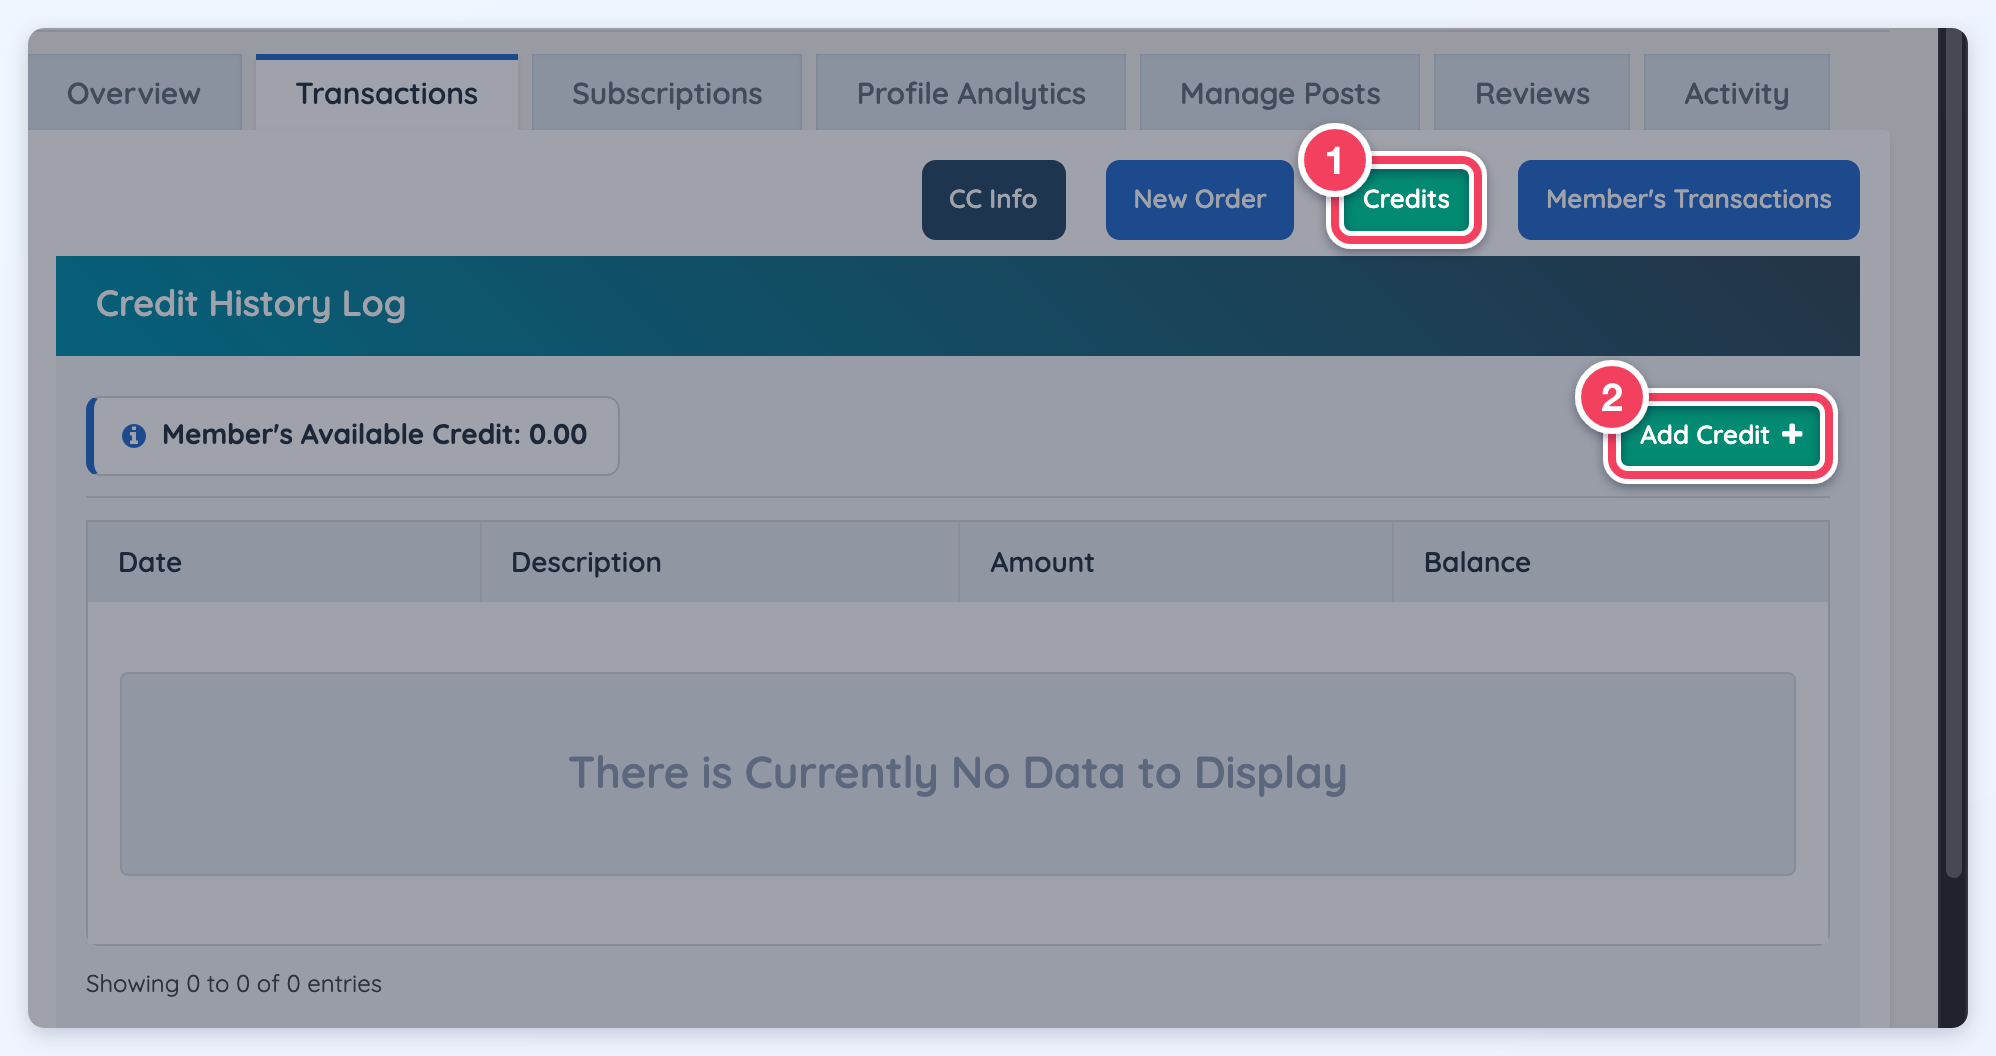
On the member’s Transactions tab, click Credits (1), then Add Credit (2). A Deduct Credit button also appears there when the member already has a credit balance:
A pop-up form will open with the following fields:
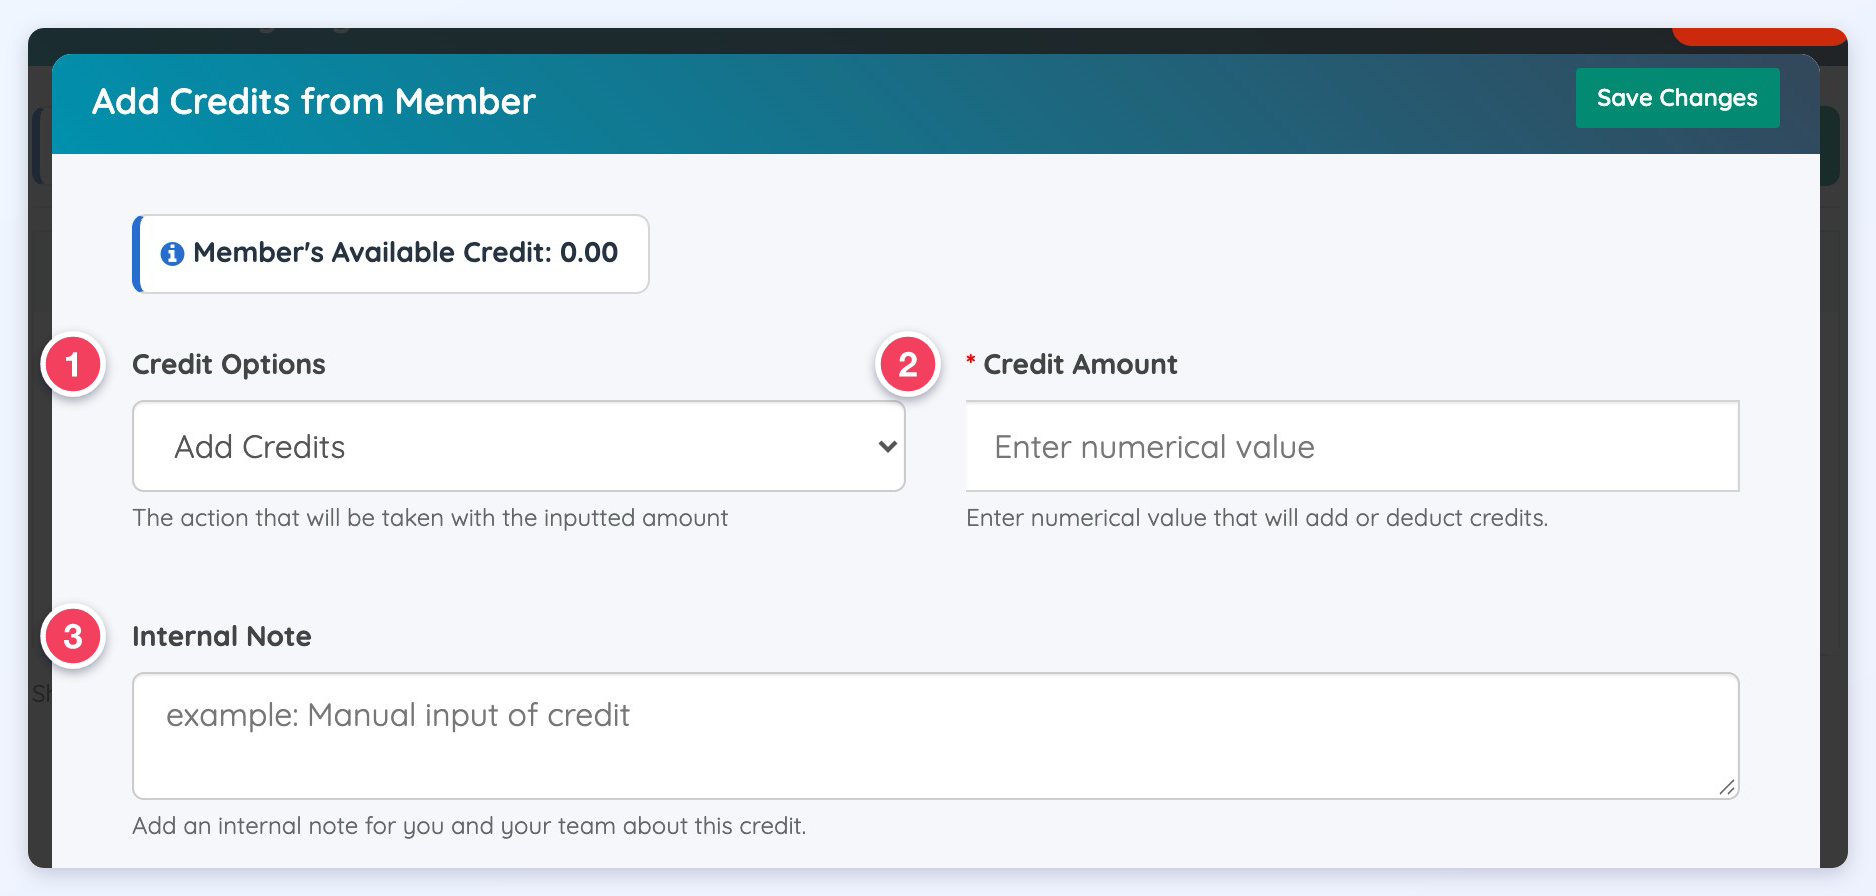
- Credit Options: Shows Add Credits or Deduct Credits, depending on which button was clicked.
- Credit Amount: Add the numerical value of the credits that will be applied or deducted using the website currency.
- Internal Note: Add a note for internal use, for future reference.
Automatically Add Credits After Signup Or Upgrade
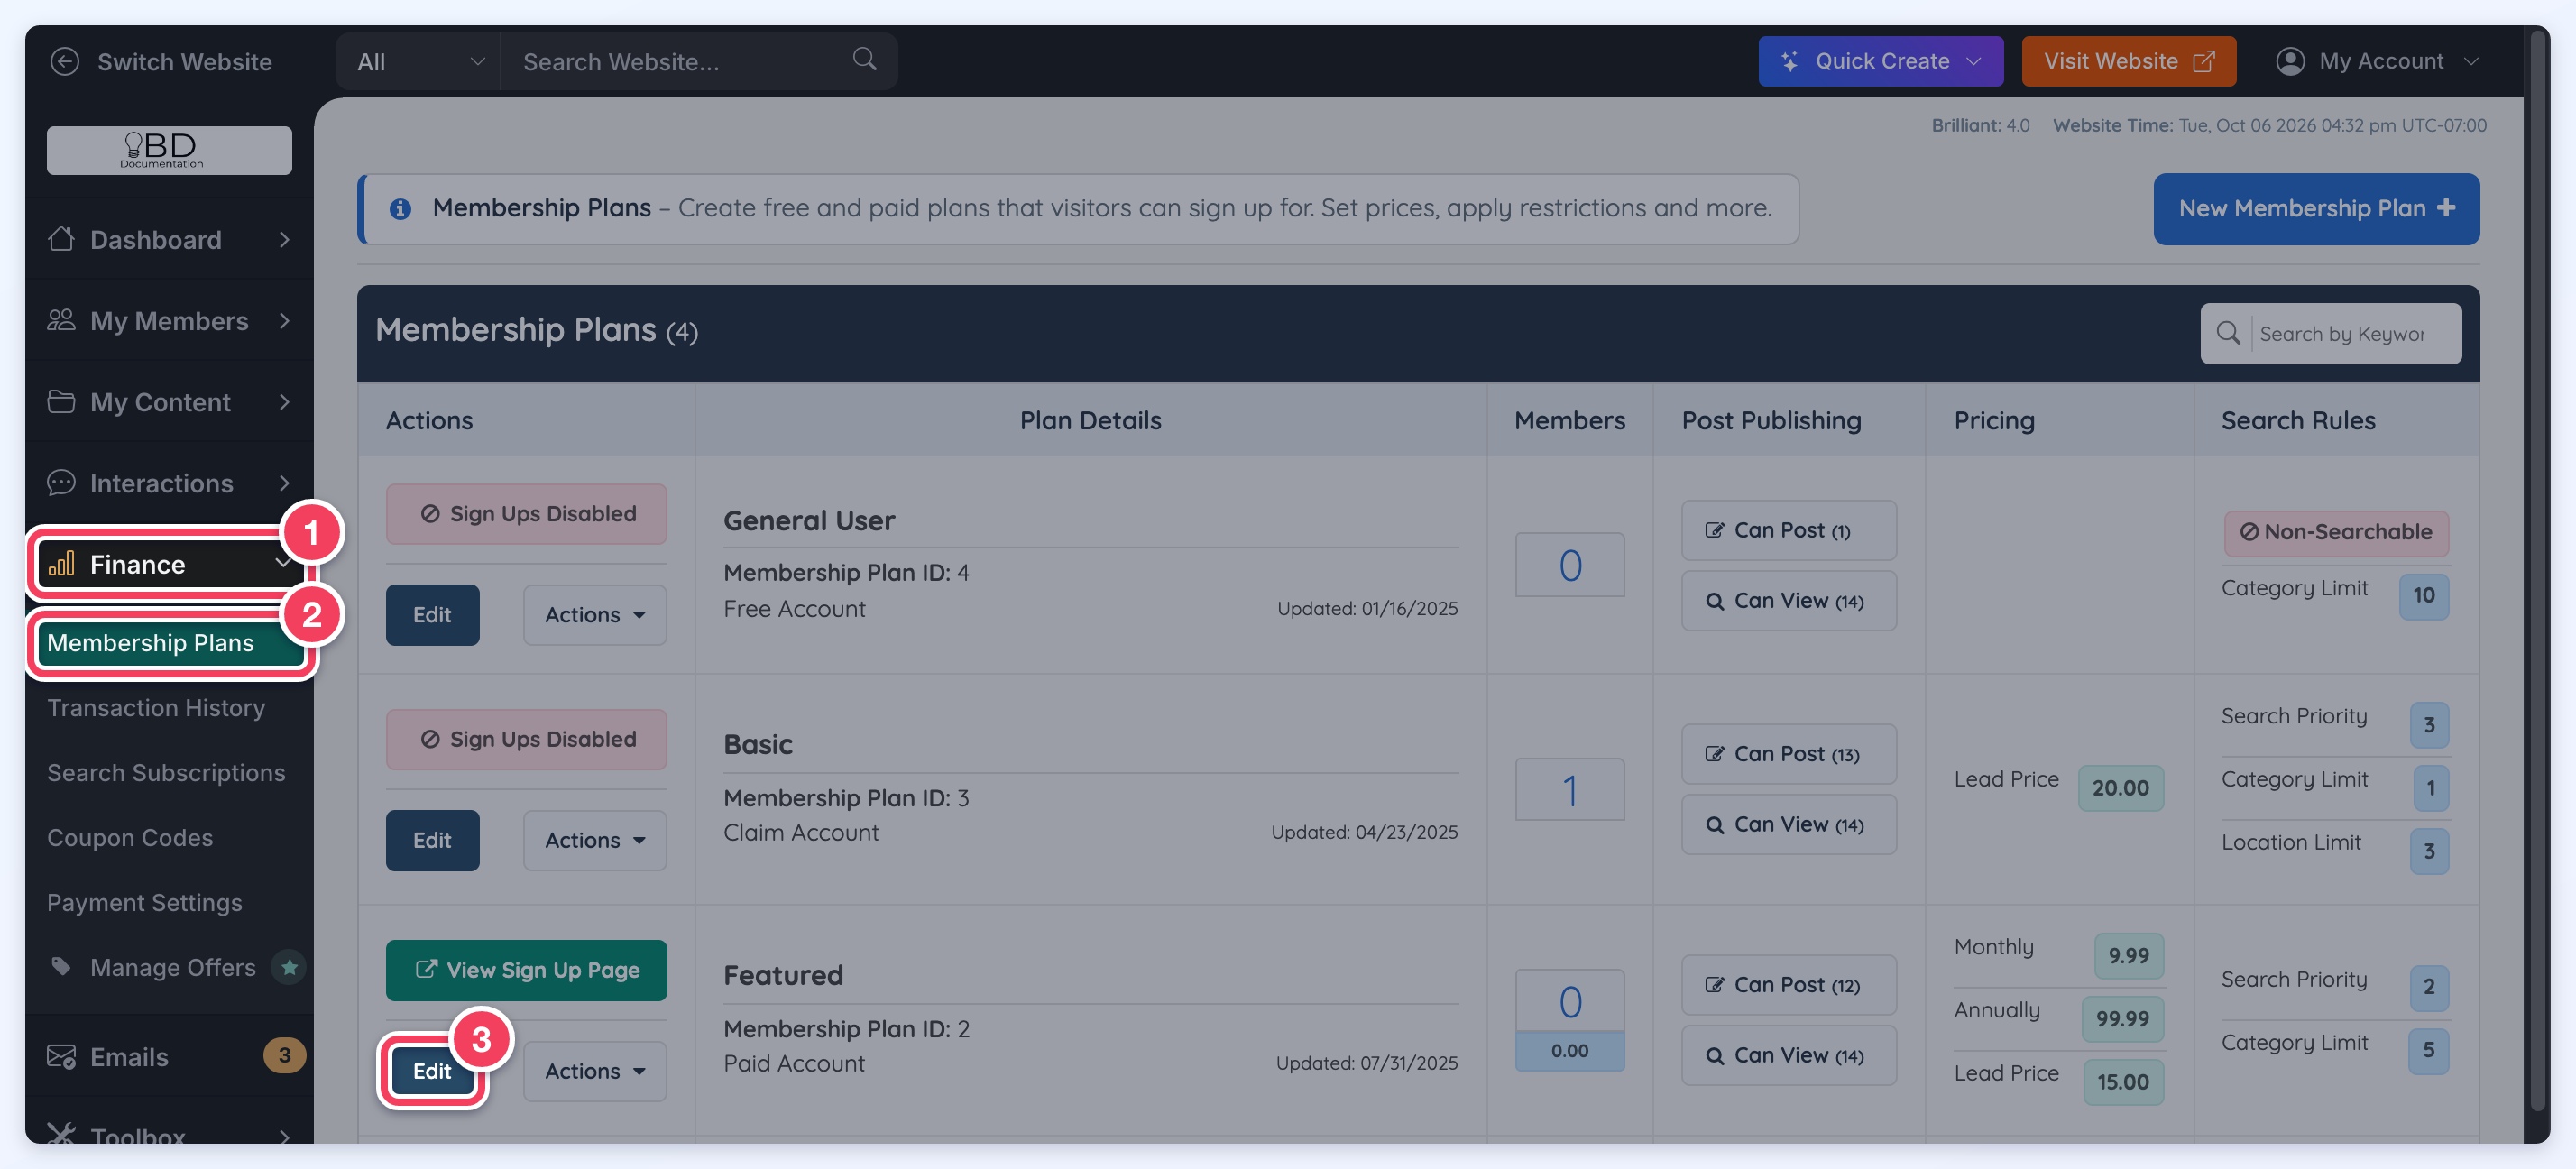
Go to Finance > Membership Plans > select the plan > Edit:
Under the Sign Ups & Upgrades tab, scroll down to the 5 credit options:
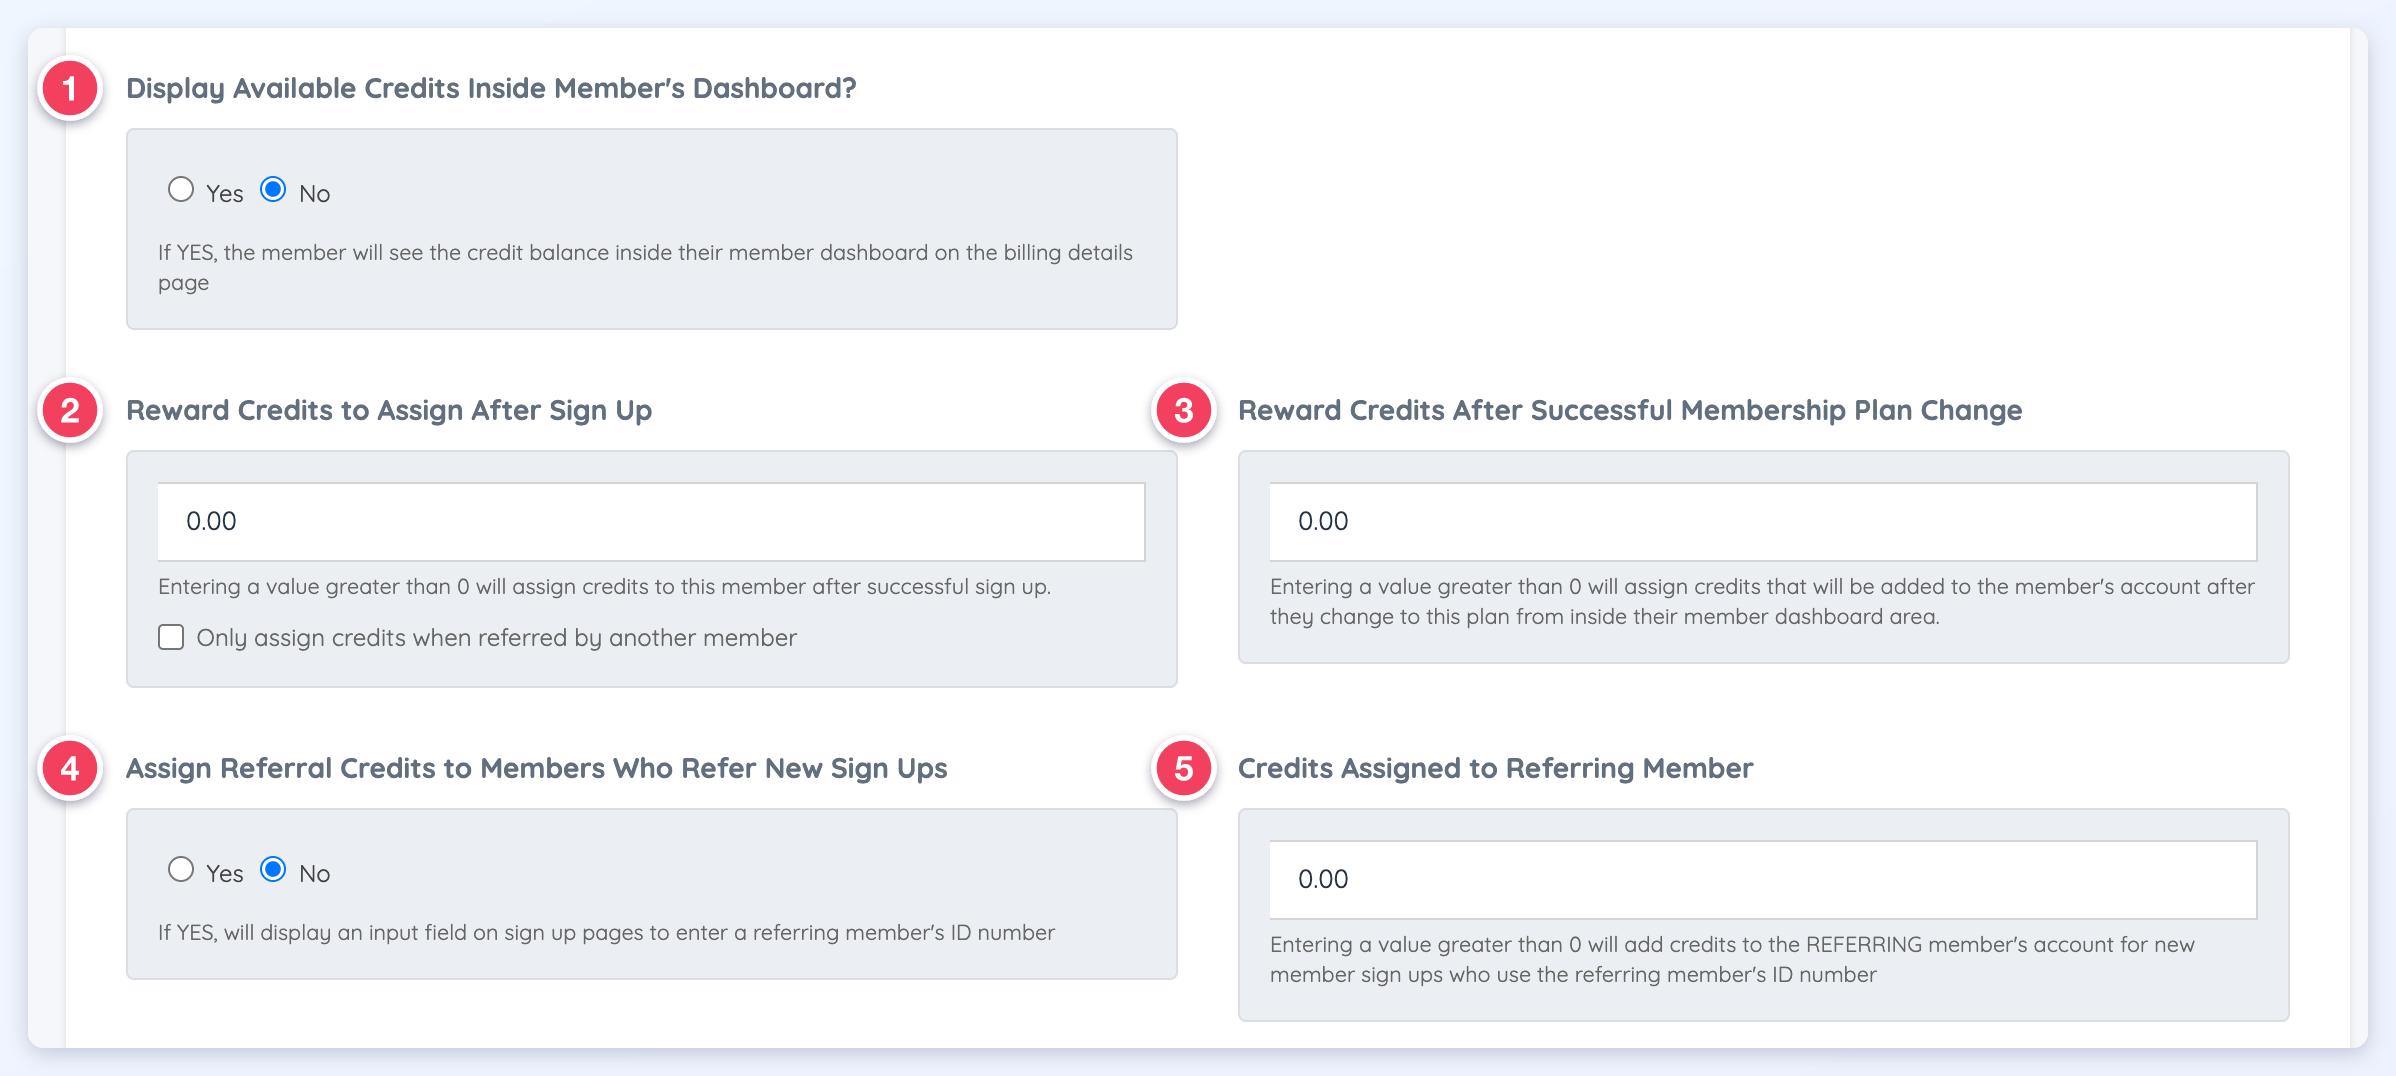
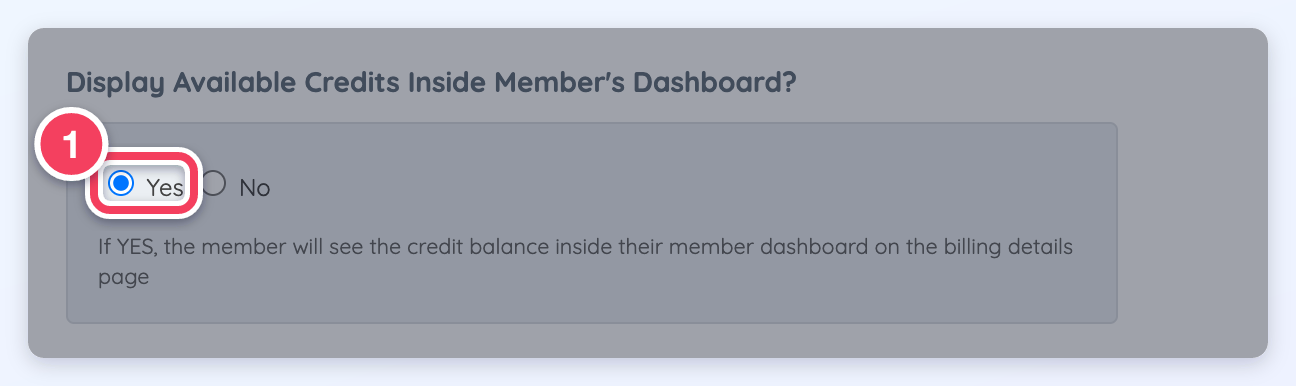
1. Display Available Credits Inside Member's Dashboard? : If YES, the member will see the credit balance inside their member dashboard on the billing details page.
2. Reward Credits to Assign After Sign Up: Entering a value greater than $0 will assign credits to this member after successful sign-up. There is a checkbox with the option to only assign credits when referred by another member.
3. Reward Credits After Successful Membership Plan Change: Entering a value greater than $0 will assign credits that will be added to the member’s account after they change to this plan from inside their member dashboard area.
4. Assign Referral Credits to Members Who Refer New Sign Ups: If enabled, an input field on sign-up pages to enter a referring member's ID number:
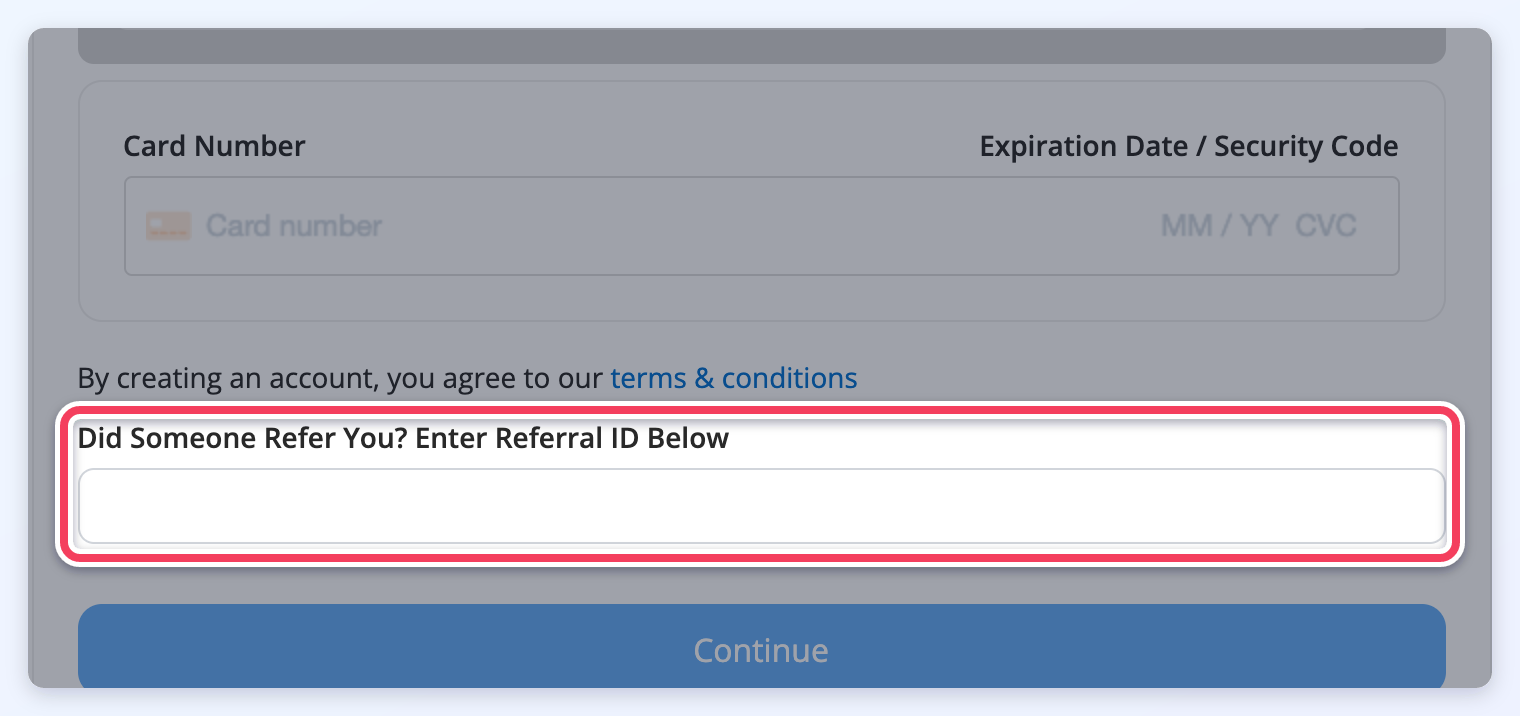
5. Credits Assigned to Referring Member: Entering a value greater than $0 will add credits to the referring member's account for new member sign-ups who use the referring member ID number.
Important Note: Credits can't be assigned or awarded for "completed tasks" like filling out forms, publishing posts or uploading documents, etc.
Credits for Digital Products
In combination with the Sell Digital Products & Services add-on, the admin will have two additional fields in the Digital Products form:
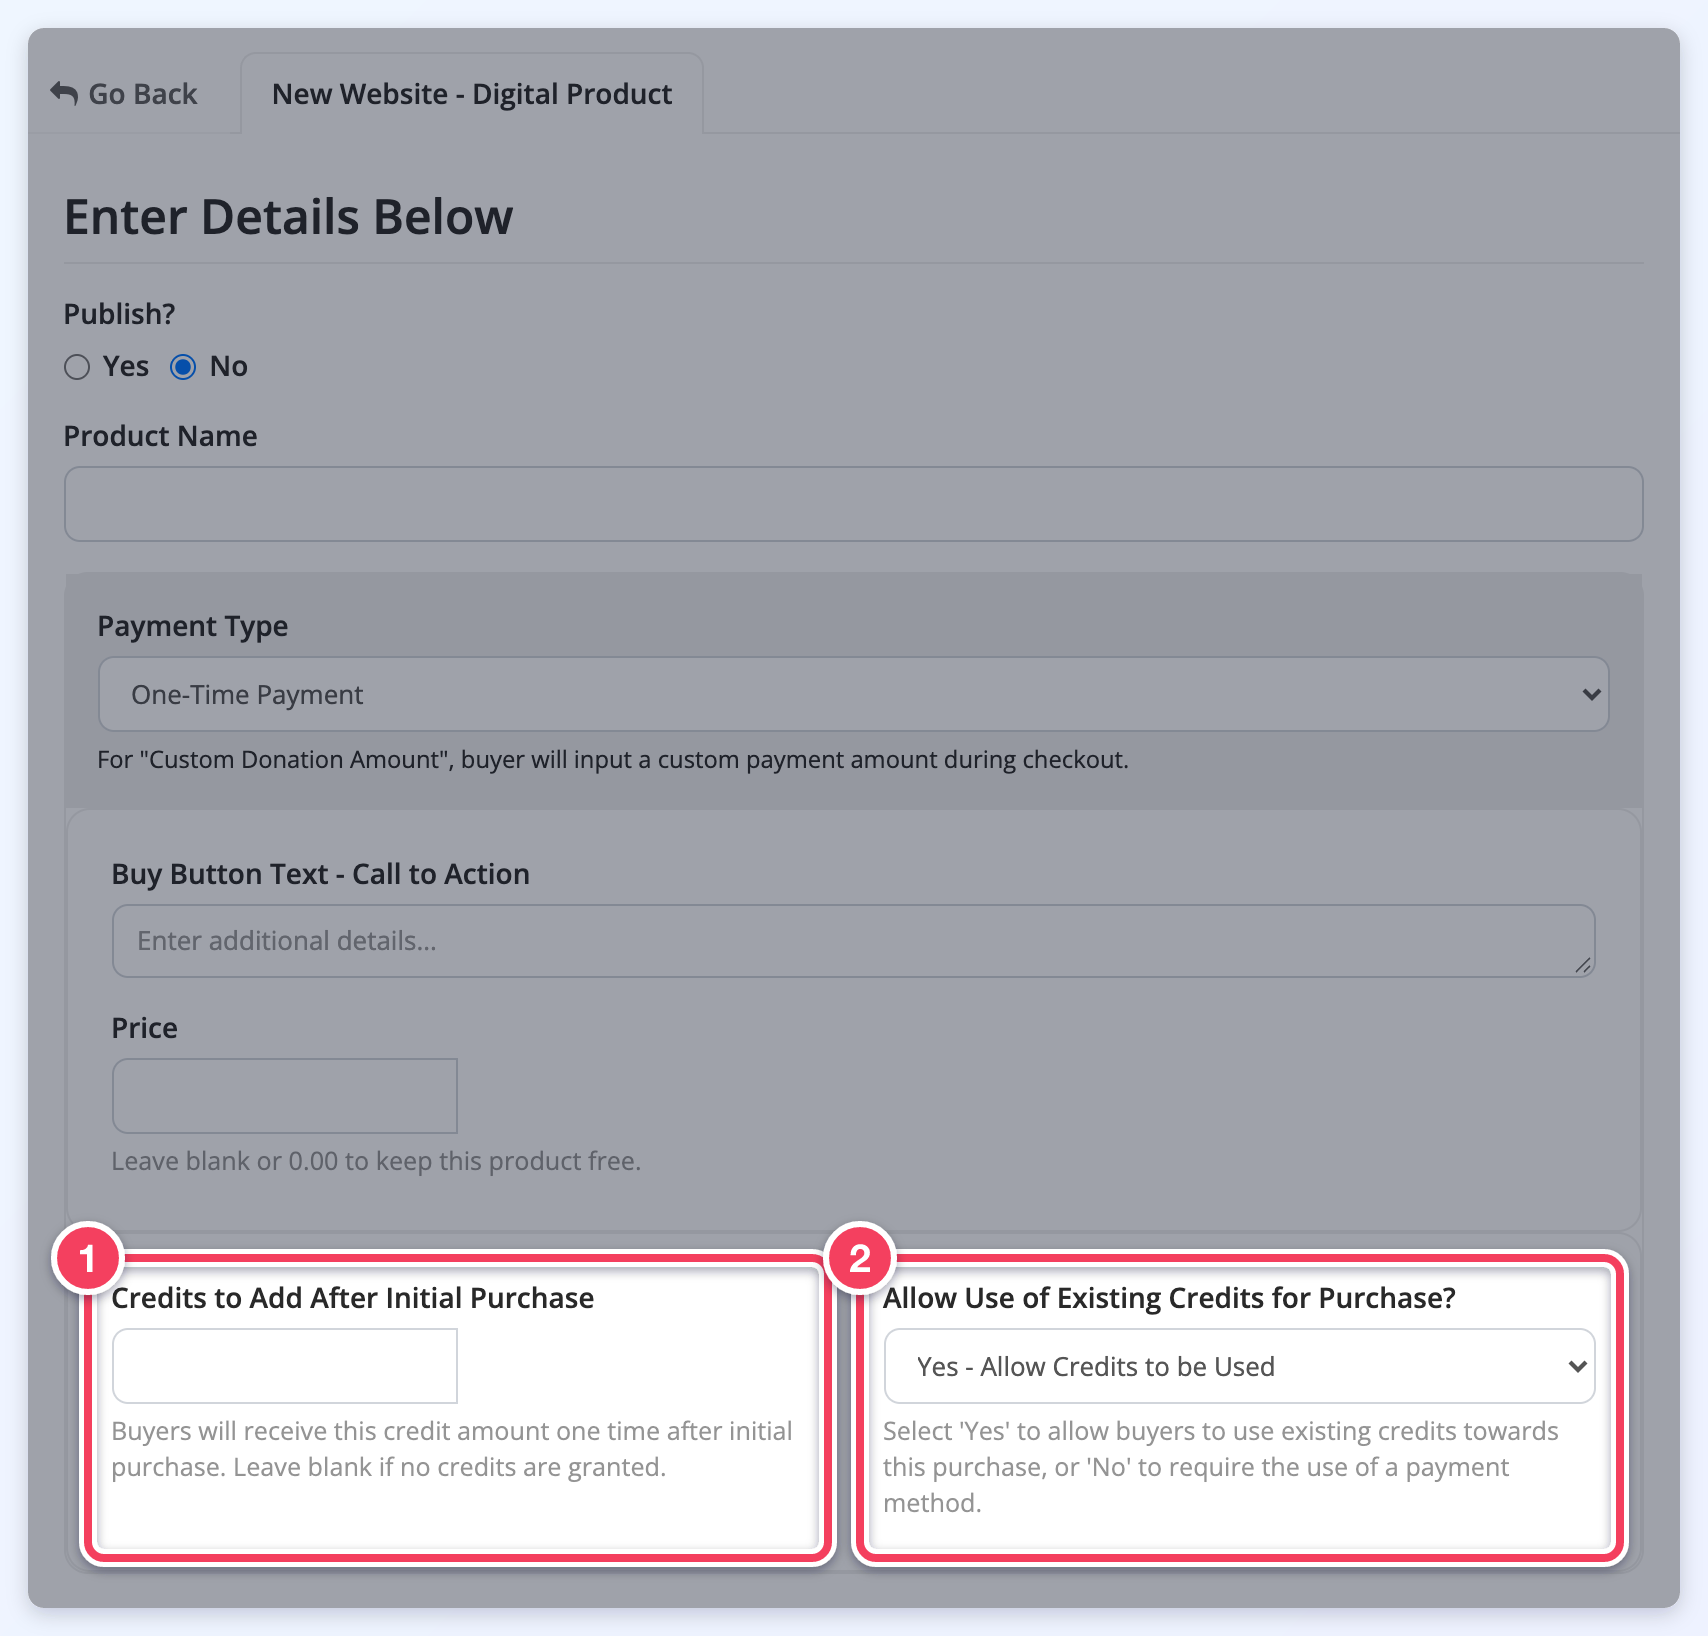
- Credits to Add After Initial Purchase (1): Buyers will receive this credit amount one time after initial purchase. Leave blank if no credits are granted.
- Allow Use of Existing Credits for Purchase? (2): Select 'Yes' to allow buyers to use existing credits towards this purchase, or 'No' to require the use of a payment method.
Search For Members with Credits
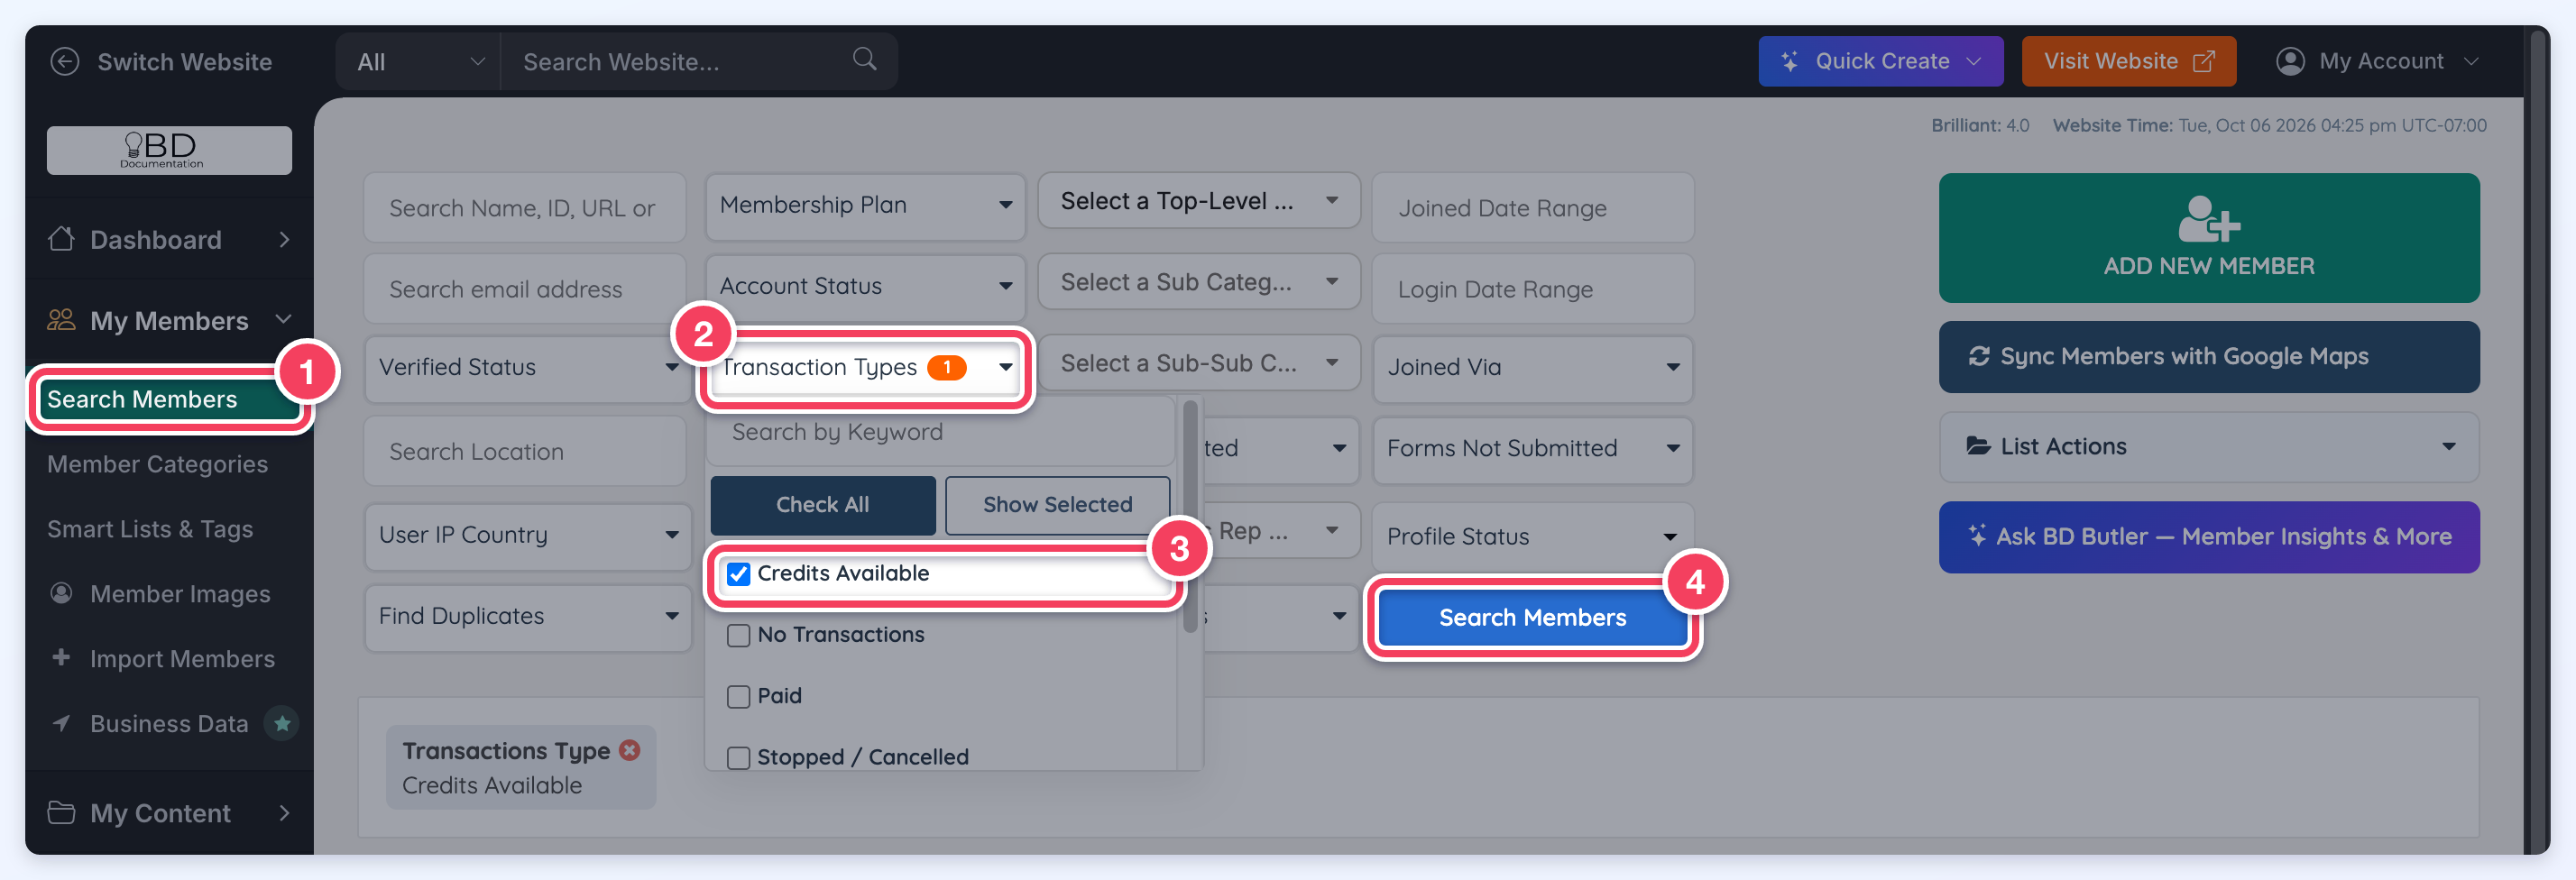
To look for members that have credits available in their profile go to My Members » Search Members (1), open Transaction Types (2), tick Credits Available (3) and click Search Members (4):
Member credit balances can also be included in a member export: select the member_credit_balance field when exporting from Search Members. See Export Member Data.
Credits History
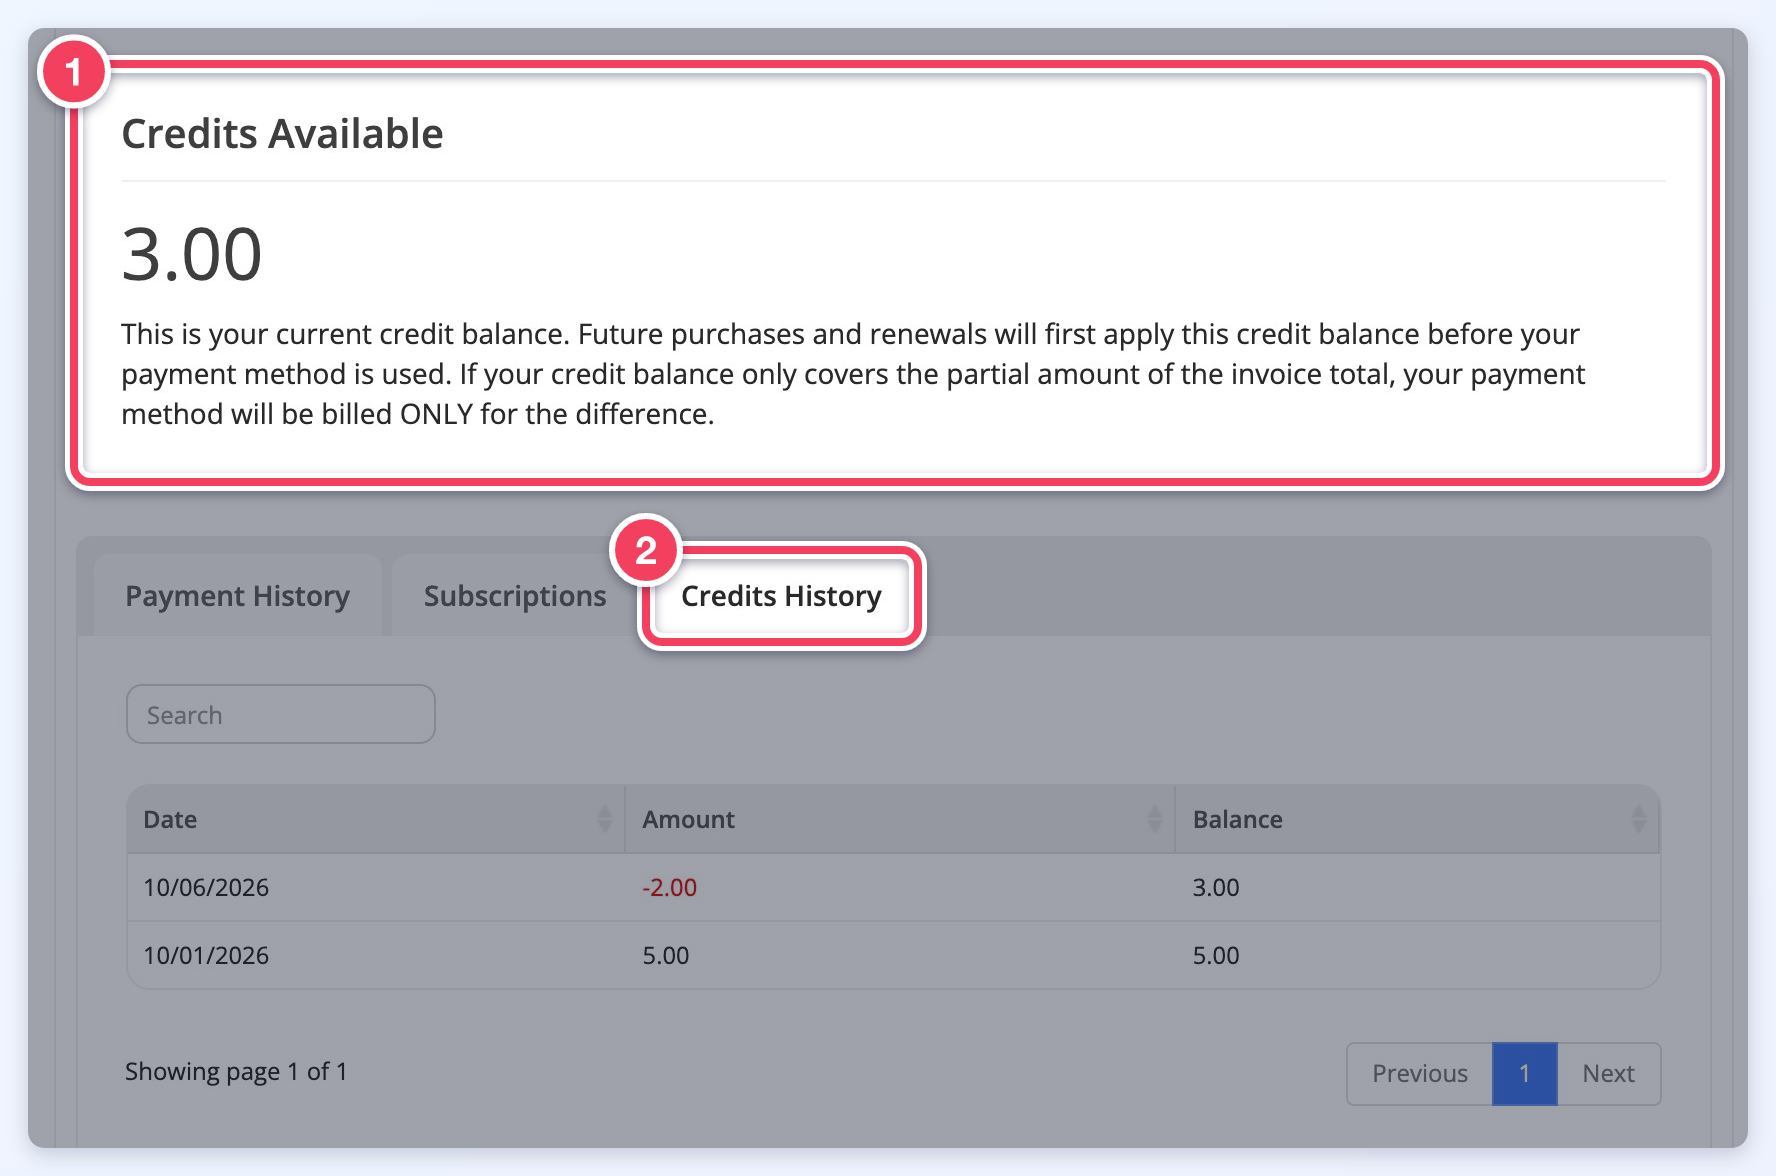
For the member to see the available credits, the option Display Available Credits Inside Member's Dashboard? needs to be set to YES (1) in their Membership Plan:
These members will be able to see the number of credits available in their Billing Information section (1) and see the historical usage of the credits in the Credits History tab (2).
The Payment History, Subscriptions and Credits History tabs only appear when the advanced setting Enable Member Account Billing History (enable_member_billing_history) is turned on.
Log in as a member >Account > Billing Information
Credits Usage
- Available credits will automatically be used for the member’s next payment(s)
- Credits work for all purchases (renewals, upgrades, leads, digital products, post purchases, etc.)
This means that the next purchase that this member tries to process will automatically use the credits available.
If the amount of credits cover the full amount of the renewal, upgrade, post or lead purchase it will automatically be deducted.
Example #1
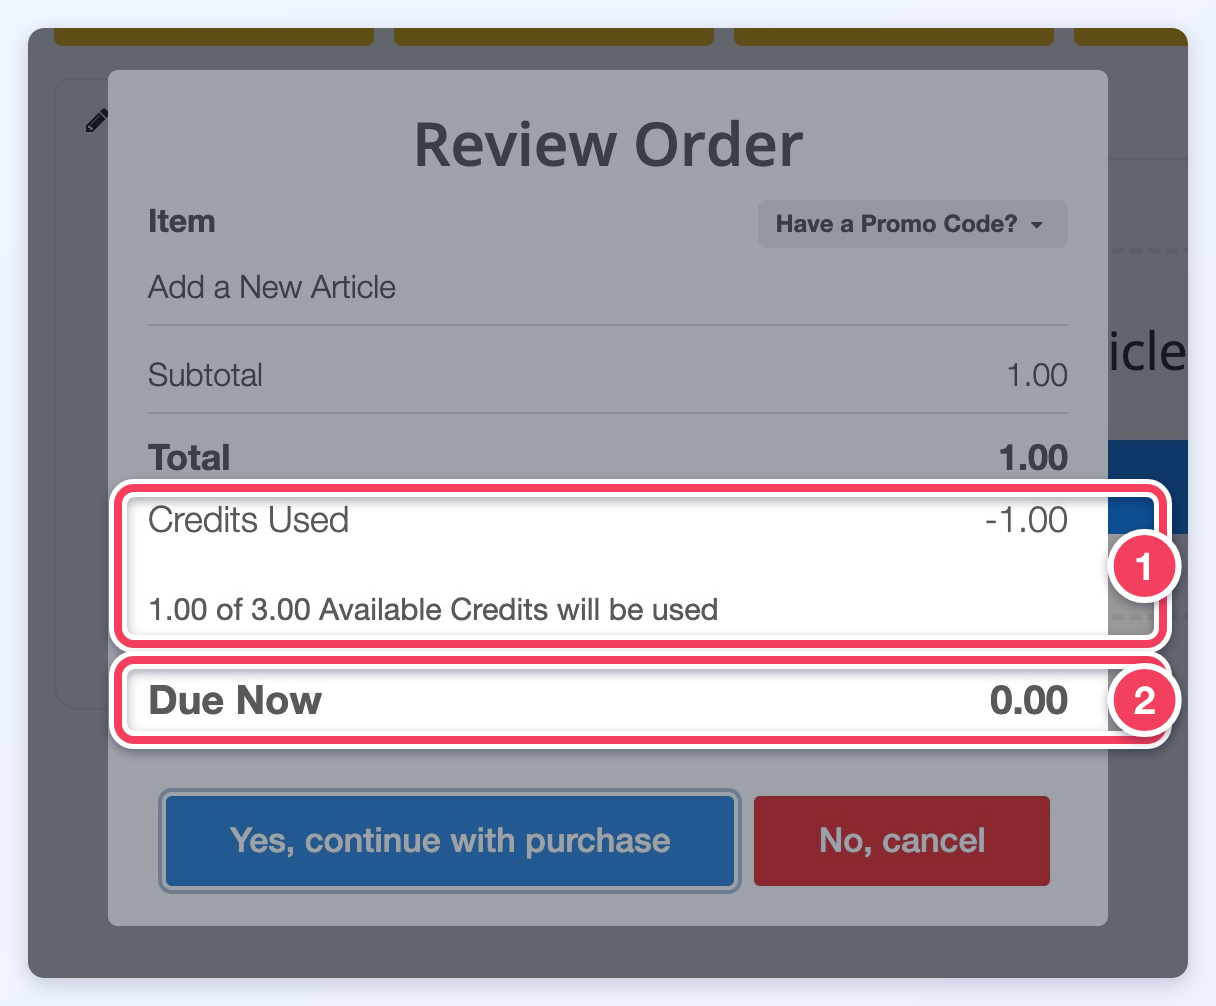
A member has 3.00 in credits and wants to publish an article that costs 1.00. The Review Order window shows that 1.00 of the 3.00 available credits will be used (1), so nothing is due (2). The remaining 2.00 in credits stays in the member's account:
If on the contrary, the amount is not enough to cover the full amount of the purchase, the system will use the available credits to cover a part of the total cost and the remaining amount will be charged to the credit card on file.
Example #2
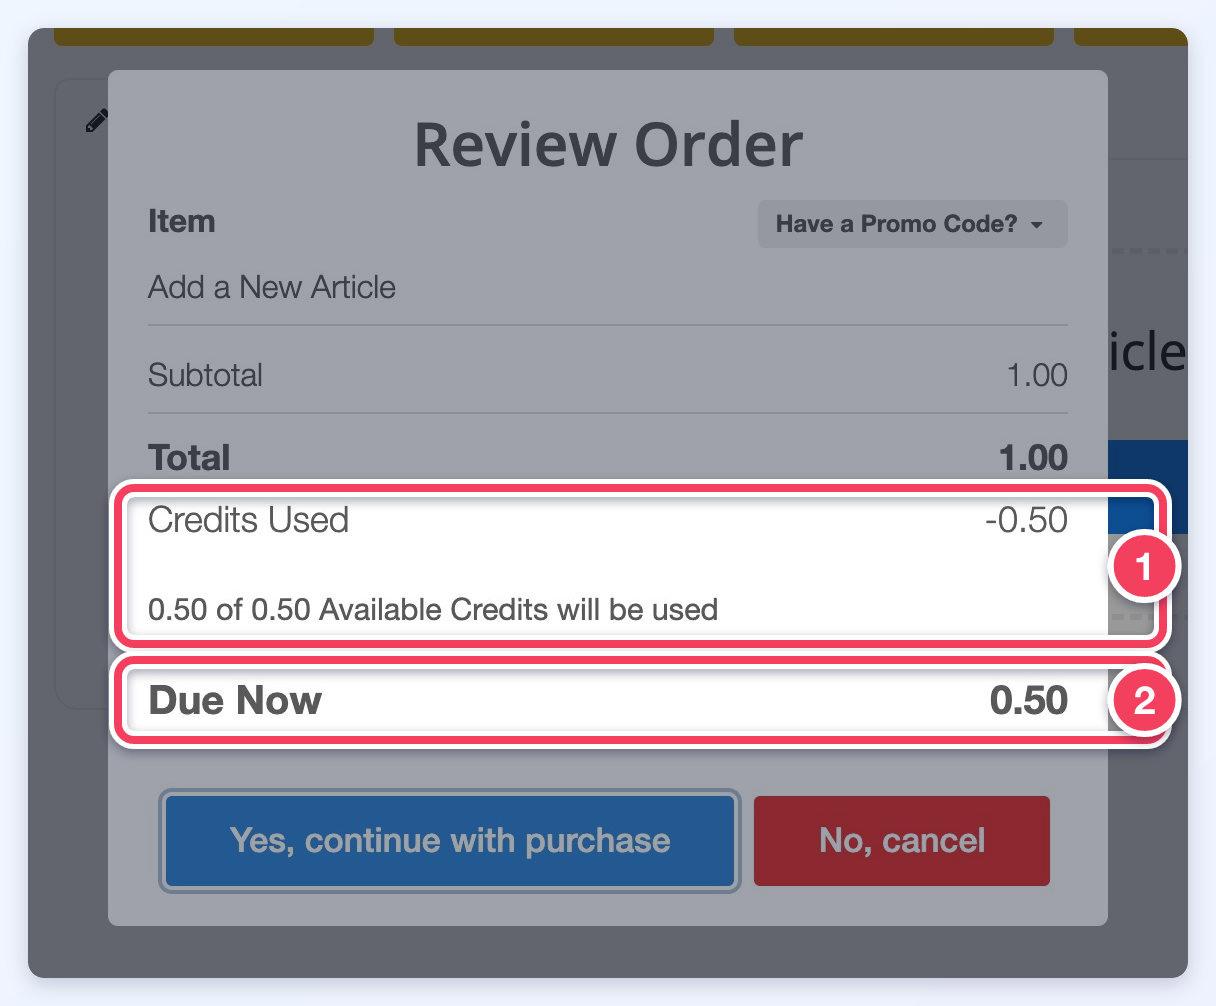
A member has 0.50 in credits and wants to publish the same 1.00 article. All 0.50 of the available credits will be used (1), and the remaining 0.50 is due now (2) and charged to the credit card on file:
Credit Transaction Types
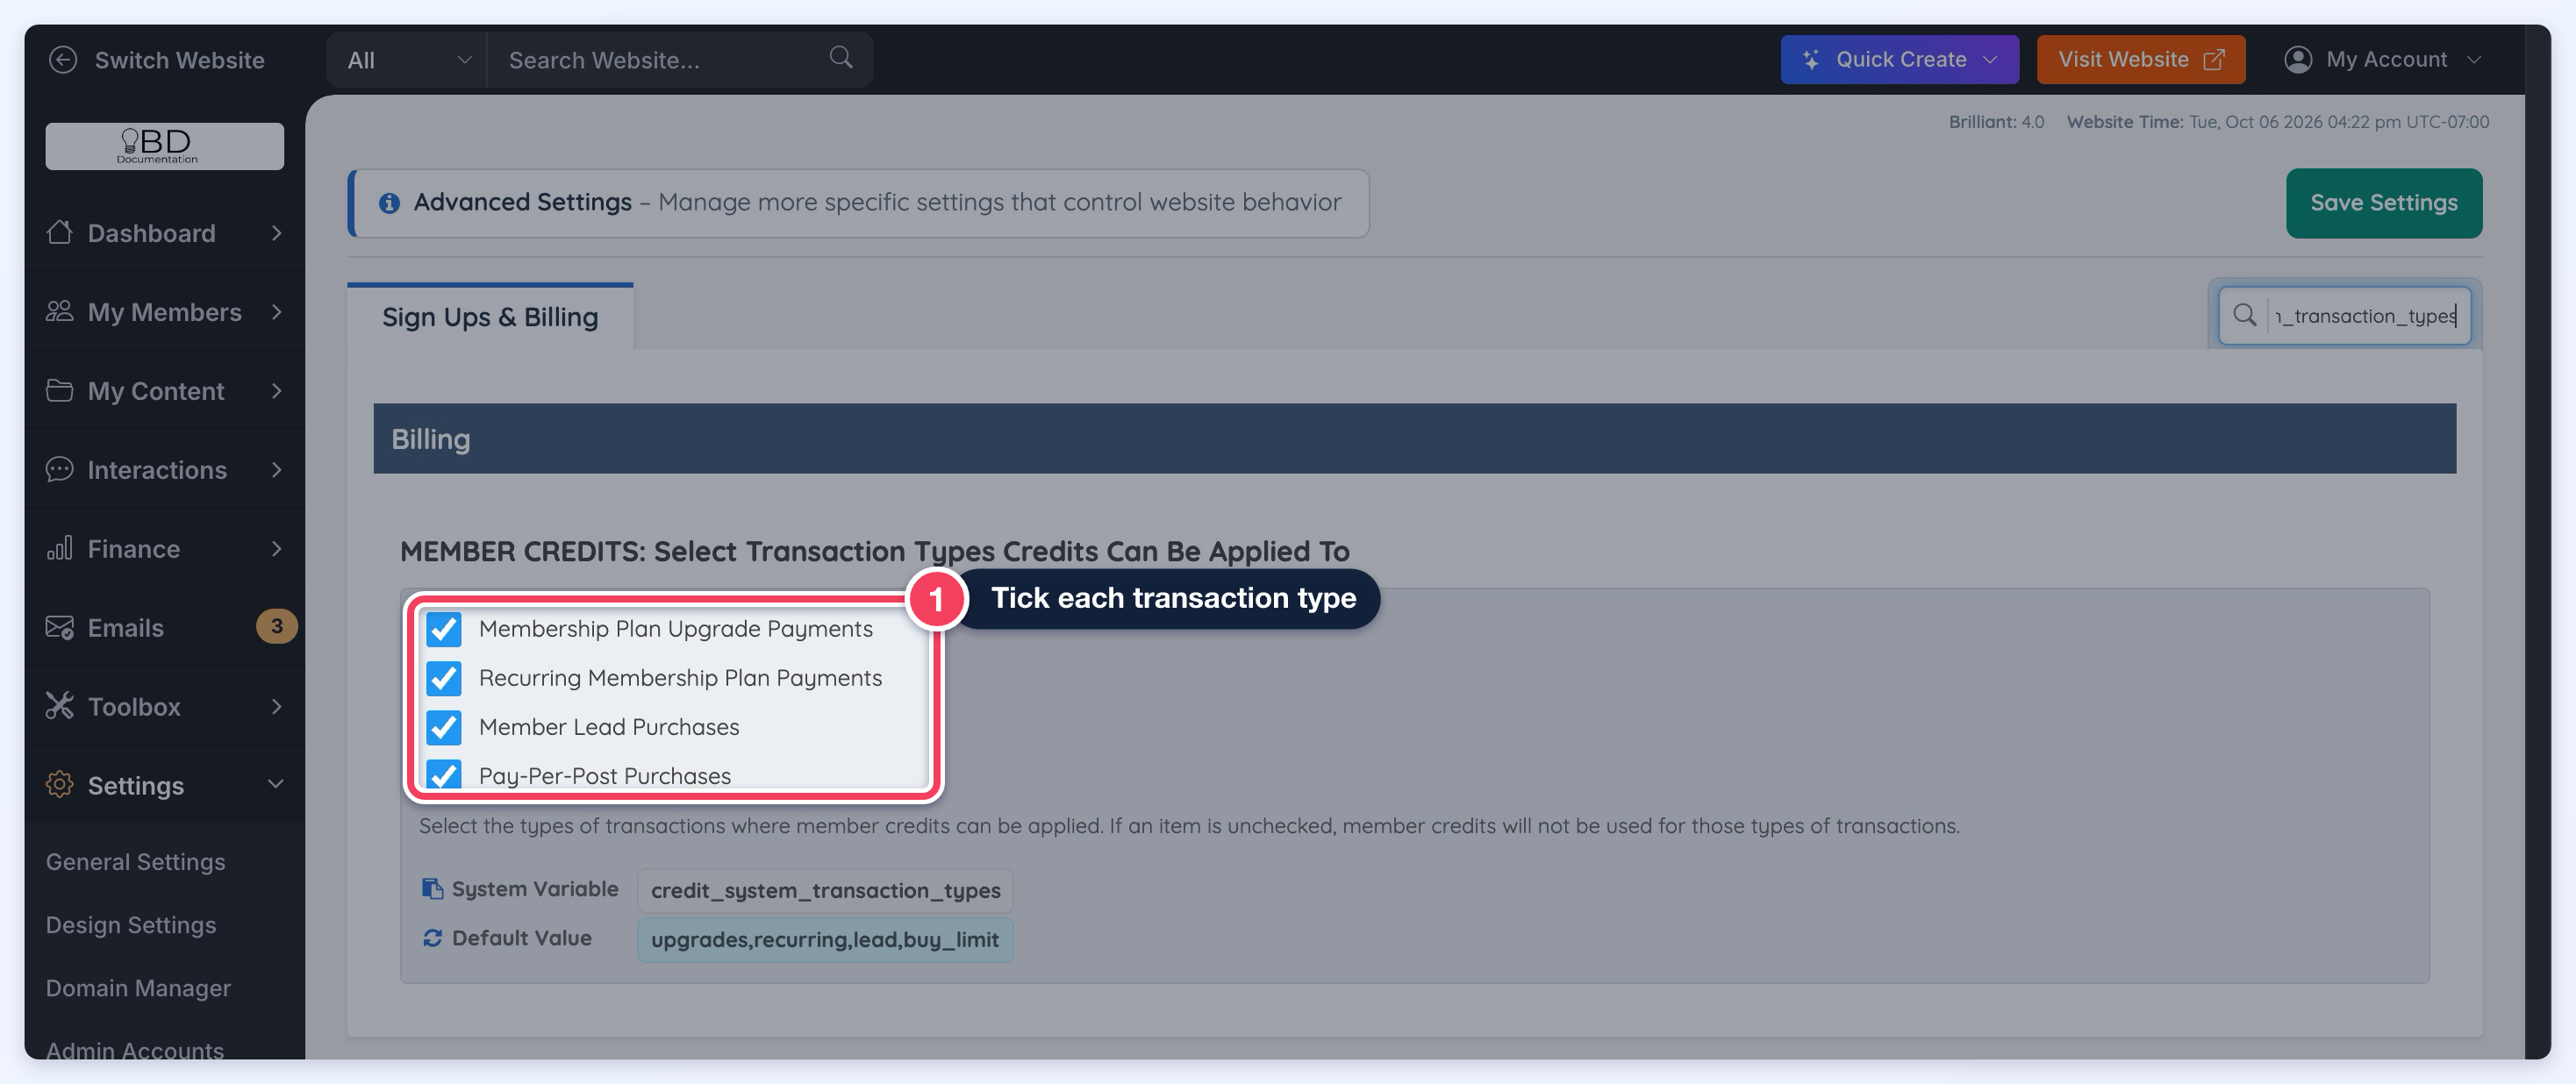
Select the types of transactions where member credits can be applied. If an item is unchecked, member credits will not be used for those types of transactions.
MEMBER CREDITS: Select Transaction Types Credits Can Be Applied To