
Guide 9. How to Enable Maps with Google Maps API
Link: https://support.brilliantdirectories.com/support/solutions/articles/12000019818
In order to use location search and Google Maps features on a Brilliant Directories website, a Google Maps API key must be created in Google Cloud and added to the site admin.
>> Google Maps API: Features, Functions, and Key Considerations
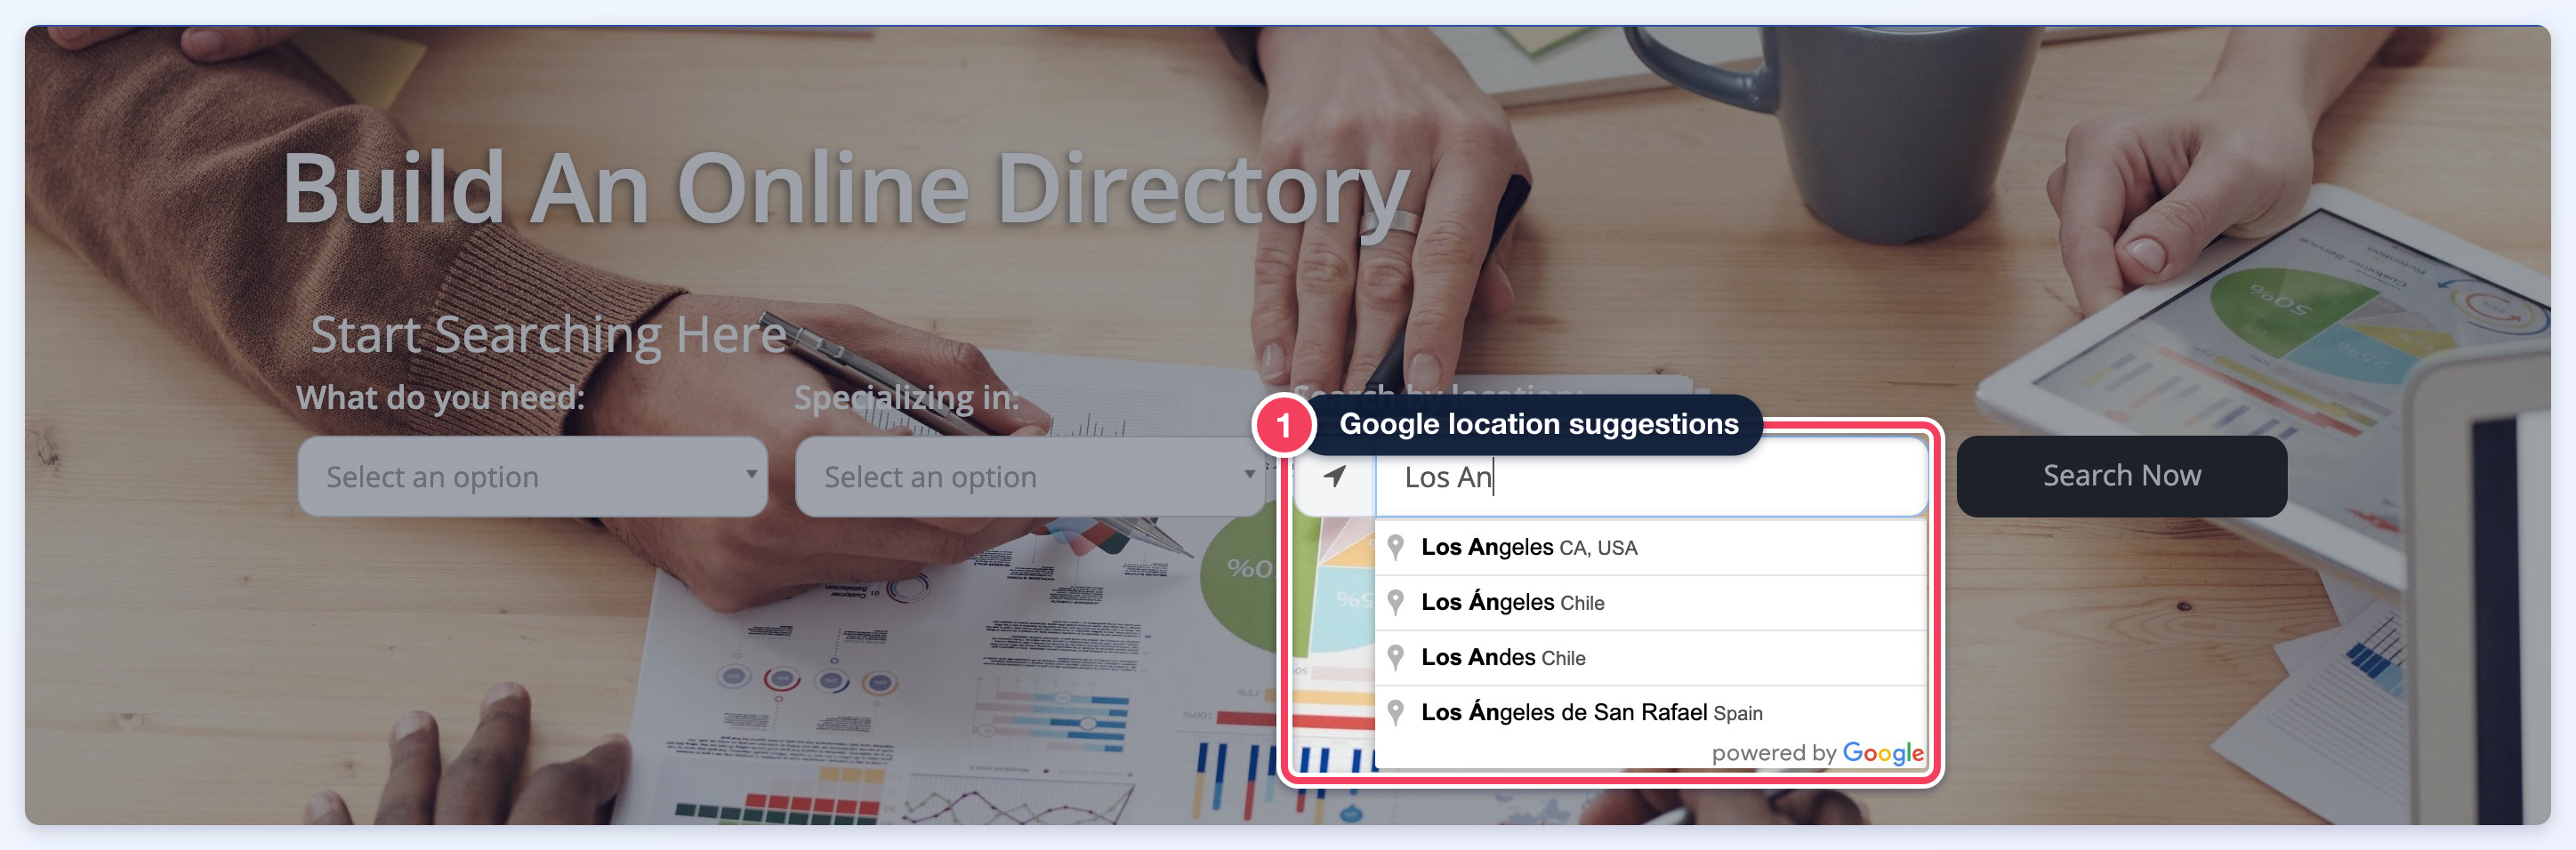
The Google Maps API key is what lets Google Maps work on the website. The key is created in Google Cloud, which is managed by Google, not Brilliant Directories. Because of this, the setup screens may look a little different for each person depending on their Google account, location, billing setup, or whether they have used Google Cloud before.
Important Notes
- The live domain should be connected before completing the Google Maps API setup.
For help connecting a live domain, see: How To Move A Site To A Live Domain - Google requires billing to be enabled for Google Maps Platform projects. Google controls billing requirements, credits, limits, and account settings.
- If Google Cloud Console opens a blank screen, redirects unexpectedly, or loses the setup session, return to the Google Maps Platform page and select Get Started again.
Most of this setup happens inside Google Cloud. The final step happens inside the Brilliant Directories admin.
Step 1 - Create Account
Start by opening Google Maps Platform:
Click Create an account to get started, or open the Google Cloud Console. Google may ask for account setup, billing information, or project details before continuing.
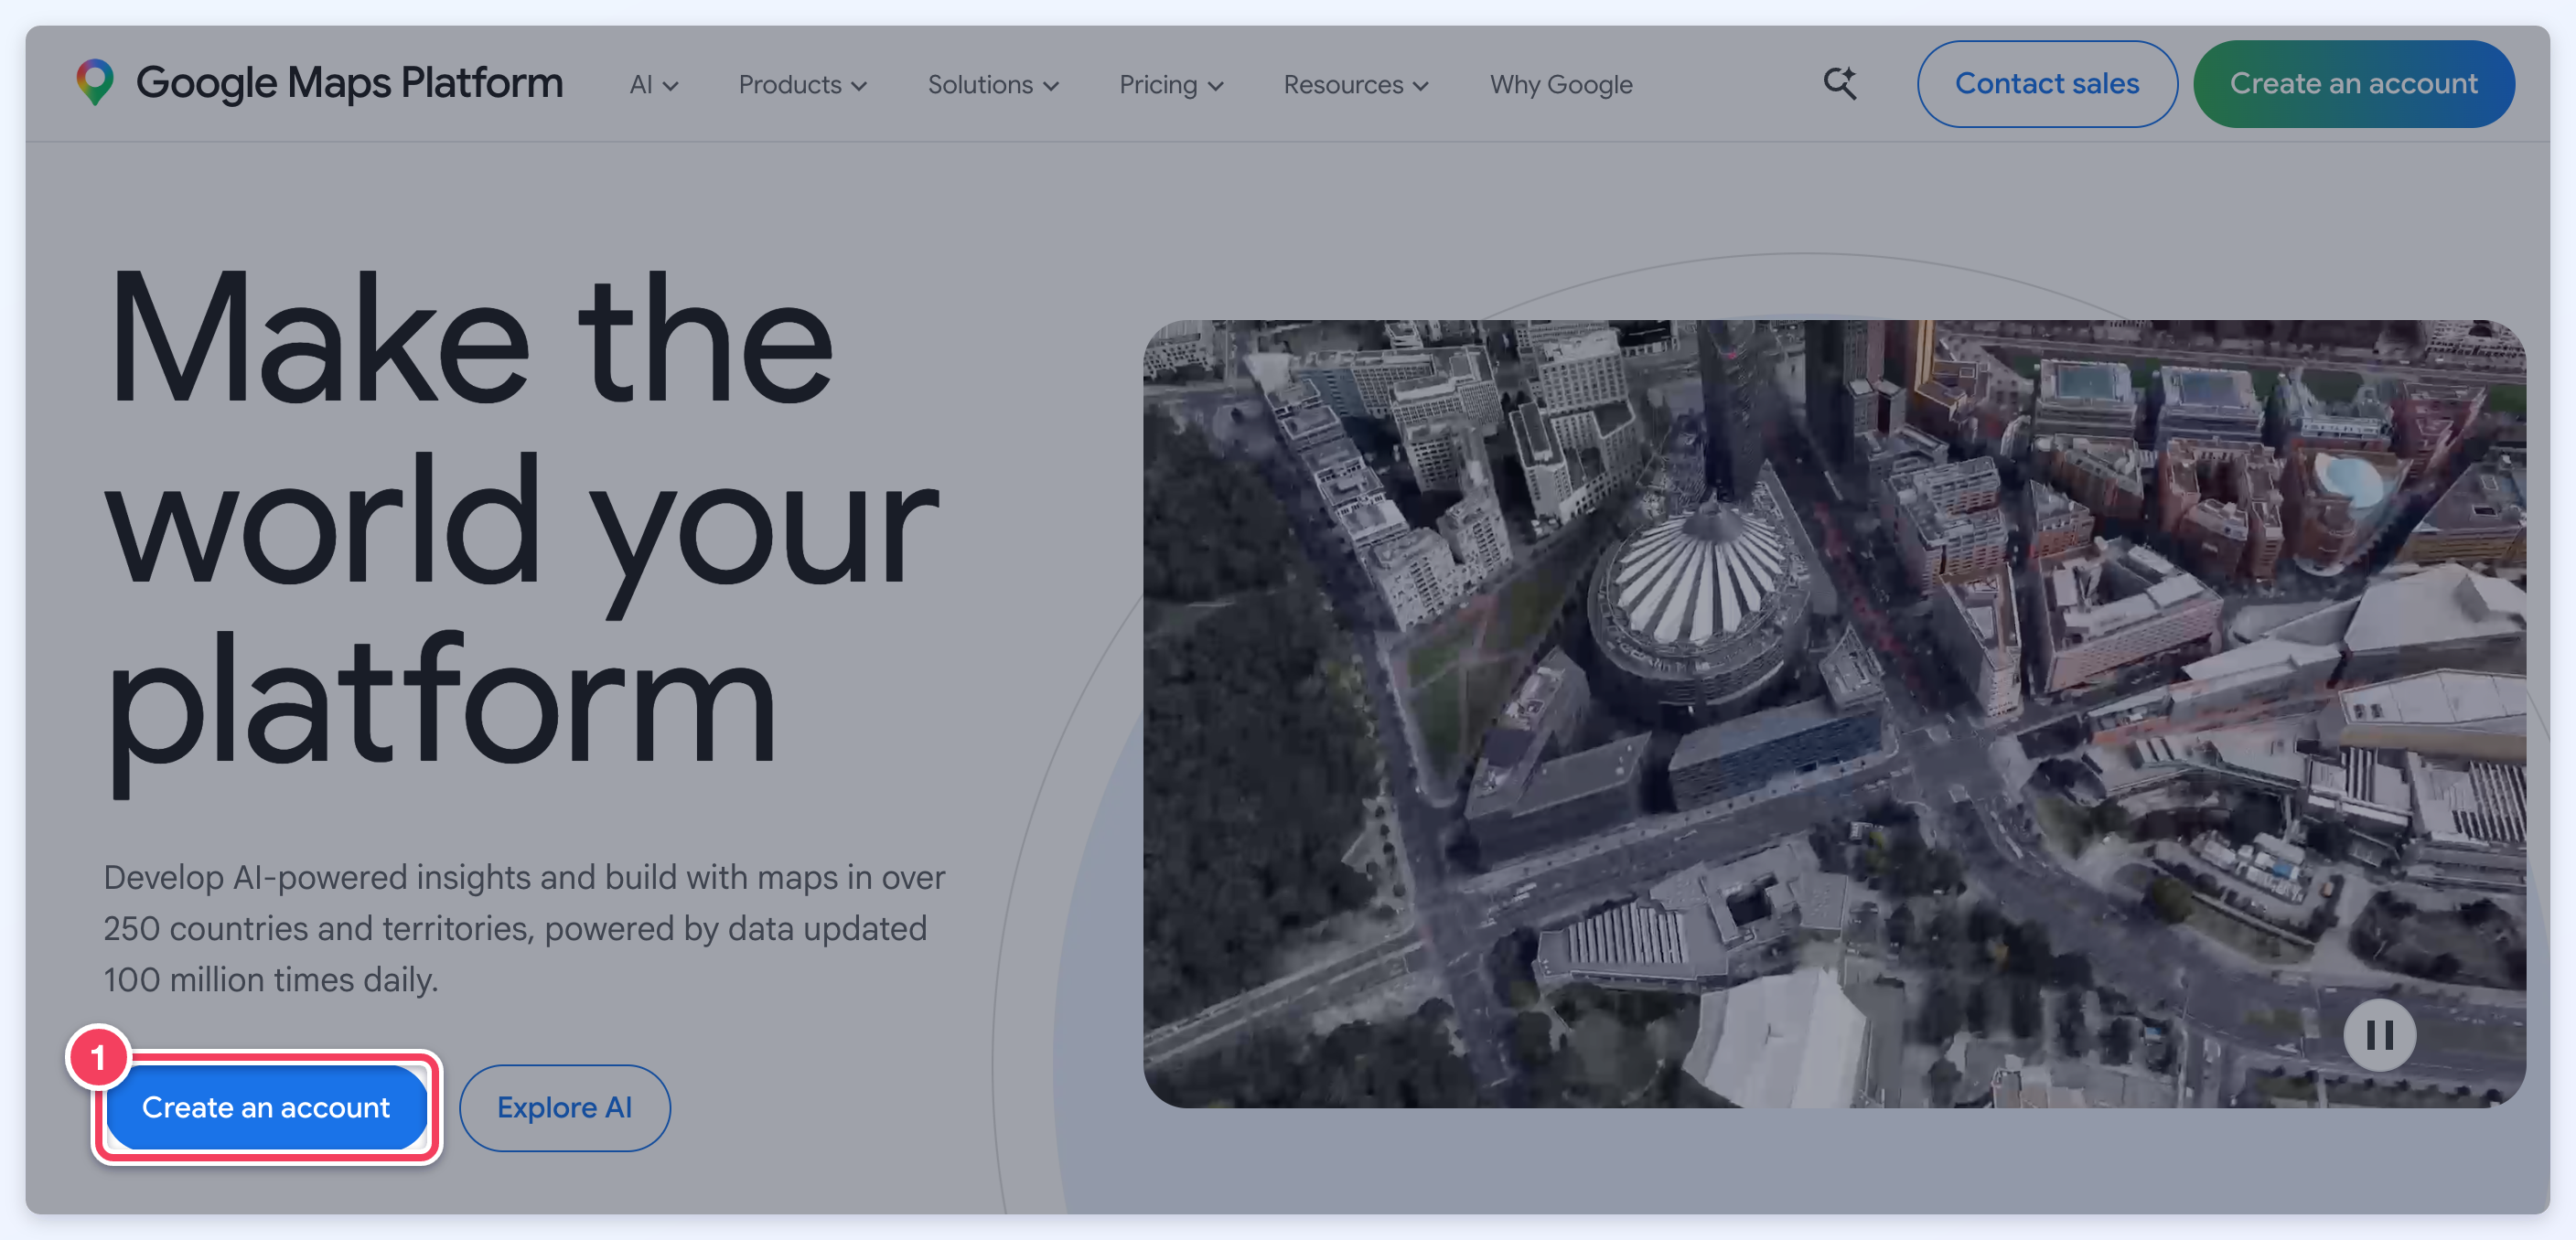
If Google asks setup questions, answer them based on the website or project being connected. These questions are managed by Google and may vary by account.
Step 2 - Enable Billing
Goal: The Google Cloud project must have billing enabled before Google Maps can work properly on the website.
Open the Google Cloud Billing page:
Select the same Google Cloud project being used for the website and confirm that billing is active.
If billing is not active, follow Google’s prompts to add or connect a billing account.
If Google rejects the payment method, requires identity verification, or shows a billing account error, that issue must be resolved directly inside Google Cloud.
Step 3 - Enable the APIs
Goal: Enable the required Google Maps APIs for the same Google Cloud project.
Open each API link below and enable it for the Google Cloud project being used for the website.
[WATCH] How to enable Google Maps Platform APIs
Make sure the correct Google Cloud project is selected at the top of the Google Cloud Console before enabling each API.
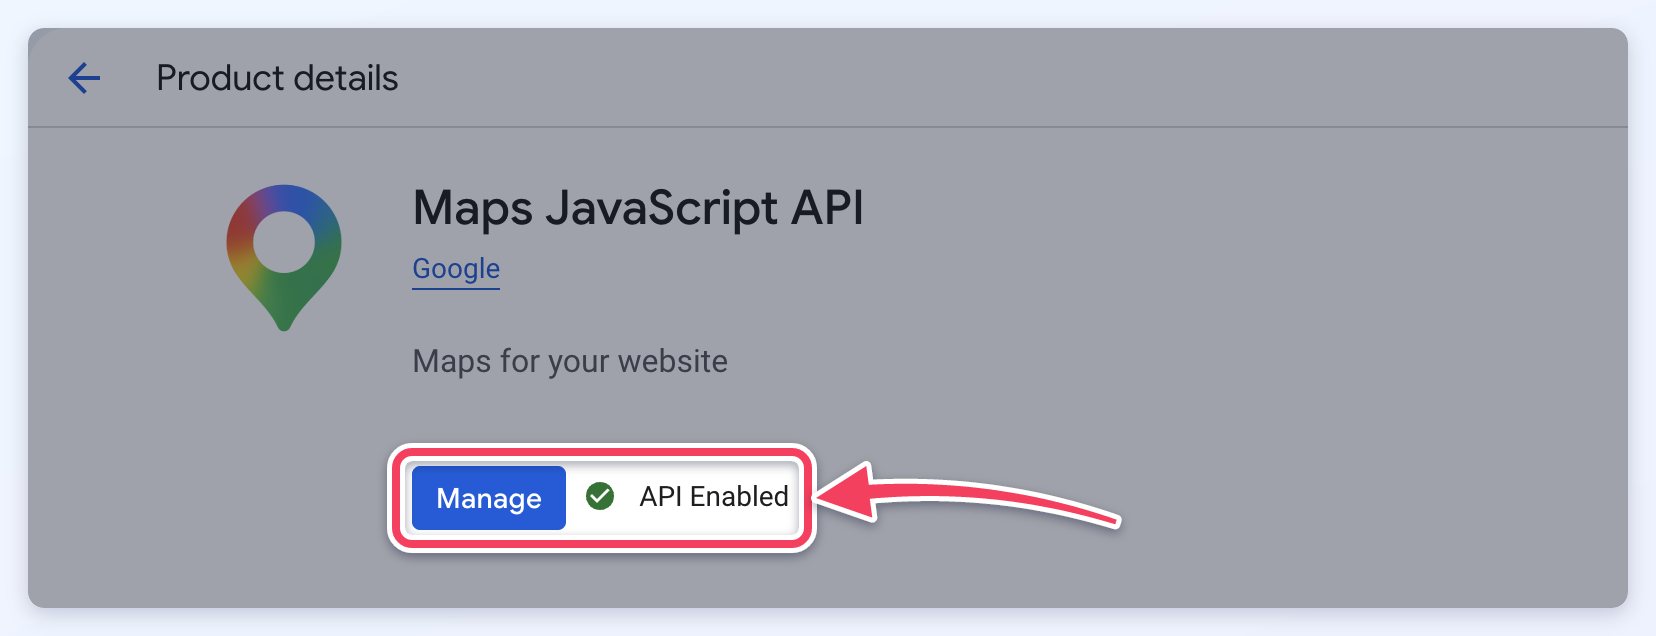
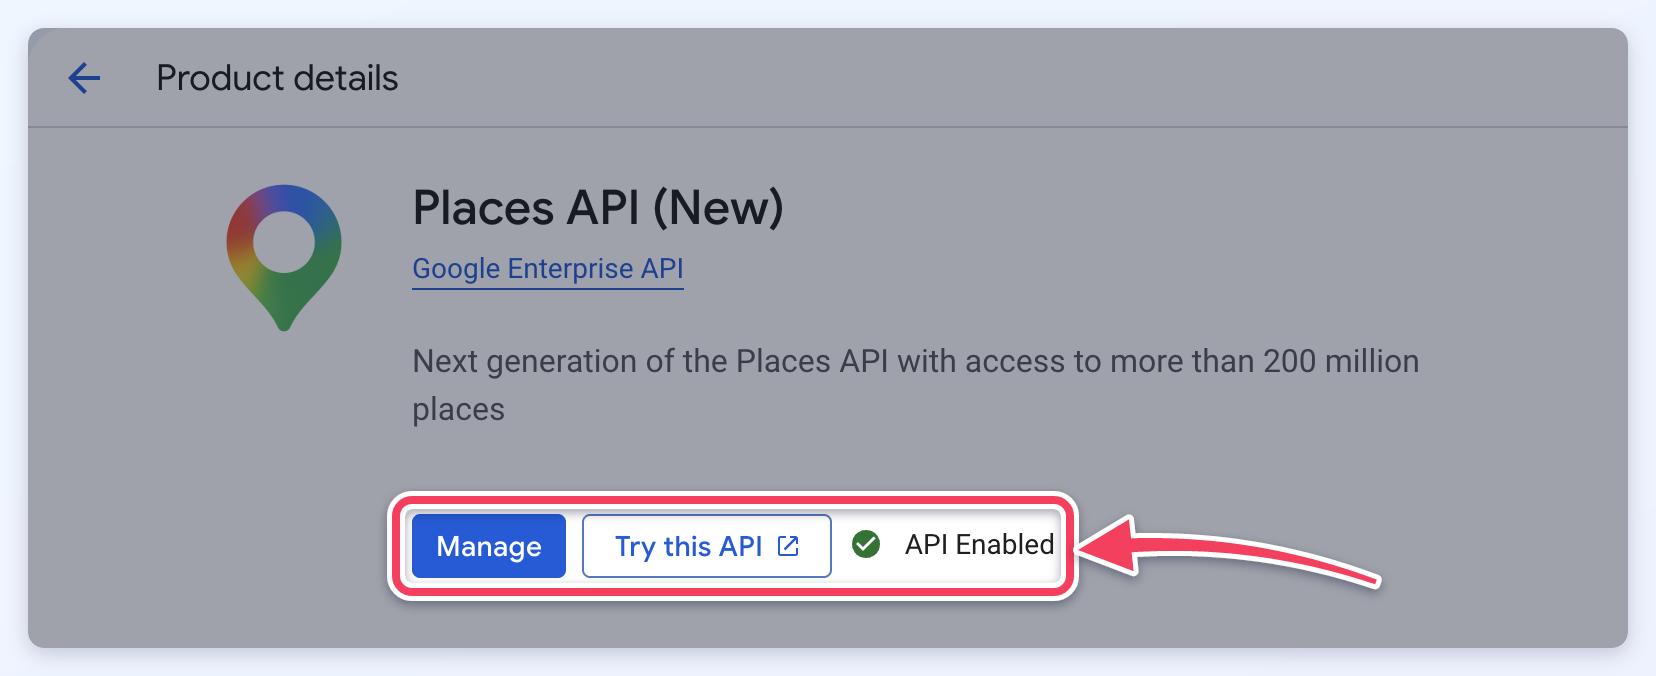
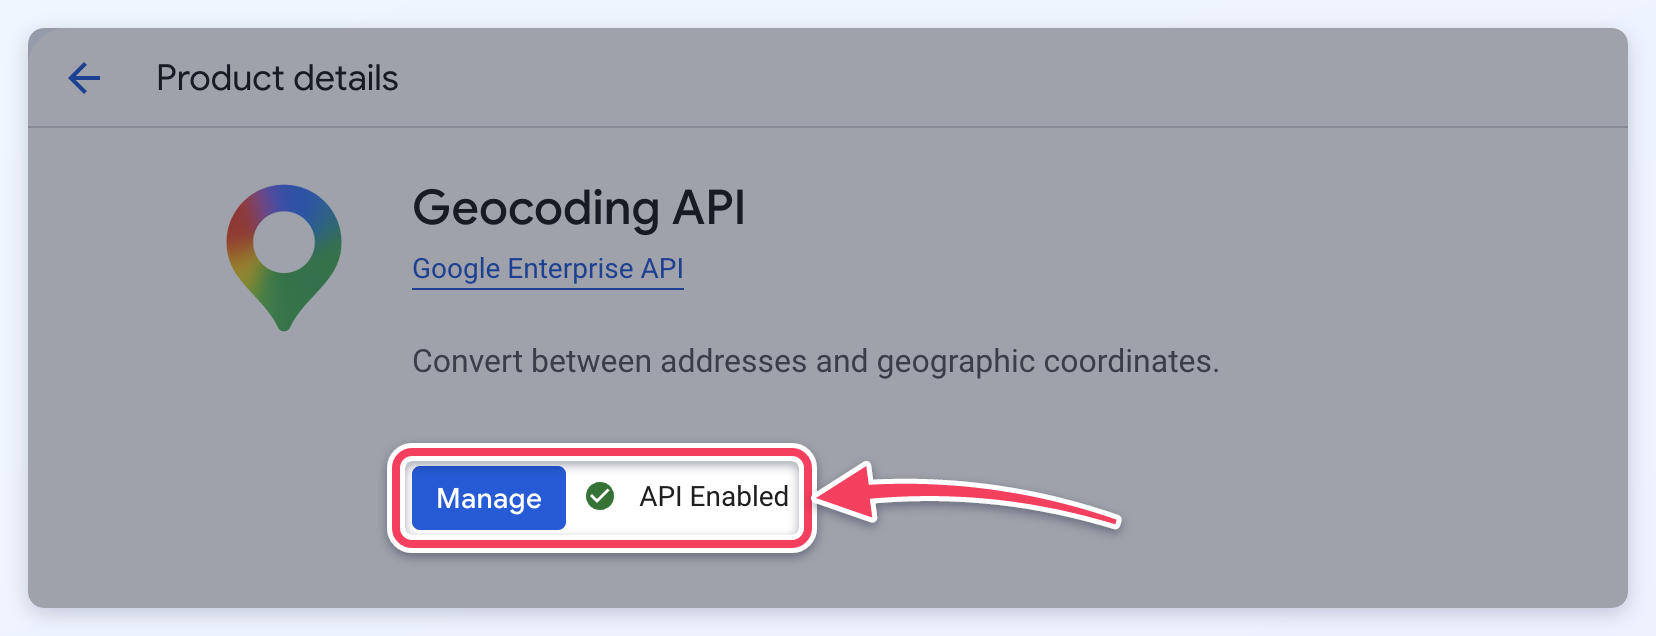
If Google shows a different screen than expected, focus on the outcome of this step: each of the required APIs should be enabled for the same project.
Step 4 - Create the API Key
Goal: Create one Google Maps API key that will be added to the Brilliant Directories admin.
Open the Google Cloud Credentials page:
- Click Create credentials.
- Select API key.
- The Create API key panel opens. The API restrictions (Step 5) and website restrictions (Step 6) can be set here before clicking Create, or added later by editing the key.
- Copy the new API key.
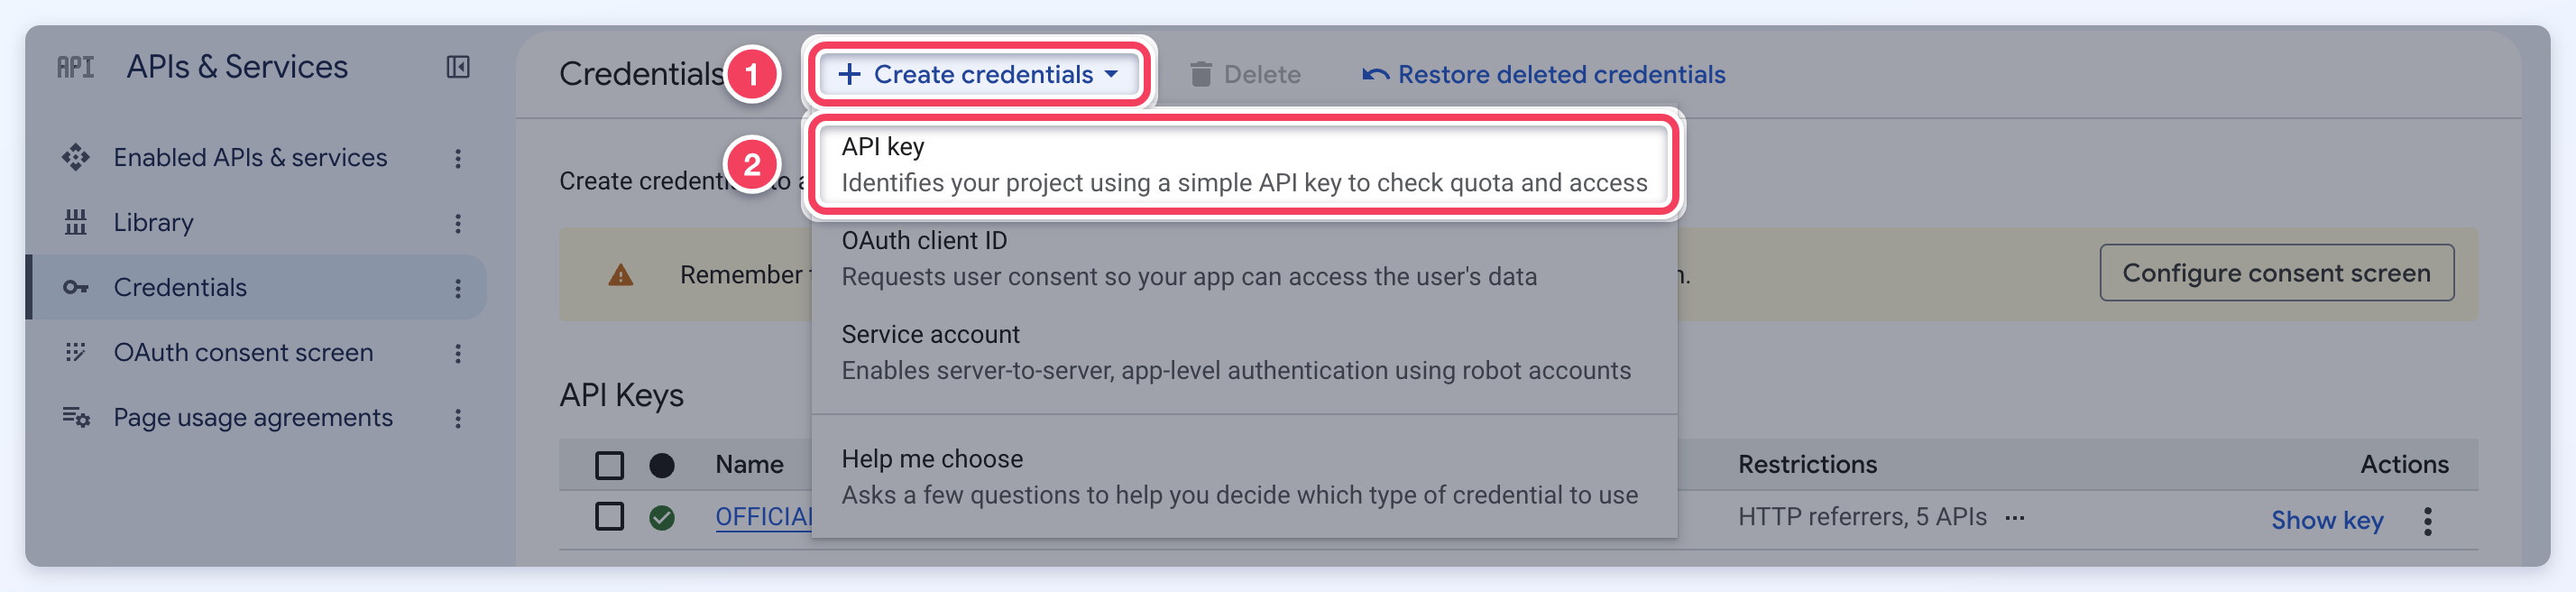
Google may show slightly different labels depending on the account. The main goal is to create an API key inside the same project where the required APIs were enabled.
Step 5 - Restrict API Access
Goal: Limit the API key so it can only access the Google Maps APIs needed for the website.
Open the API key from the Google Cloud Credentials page:
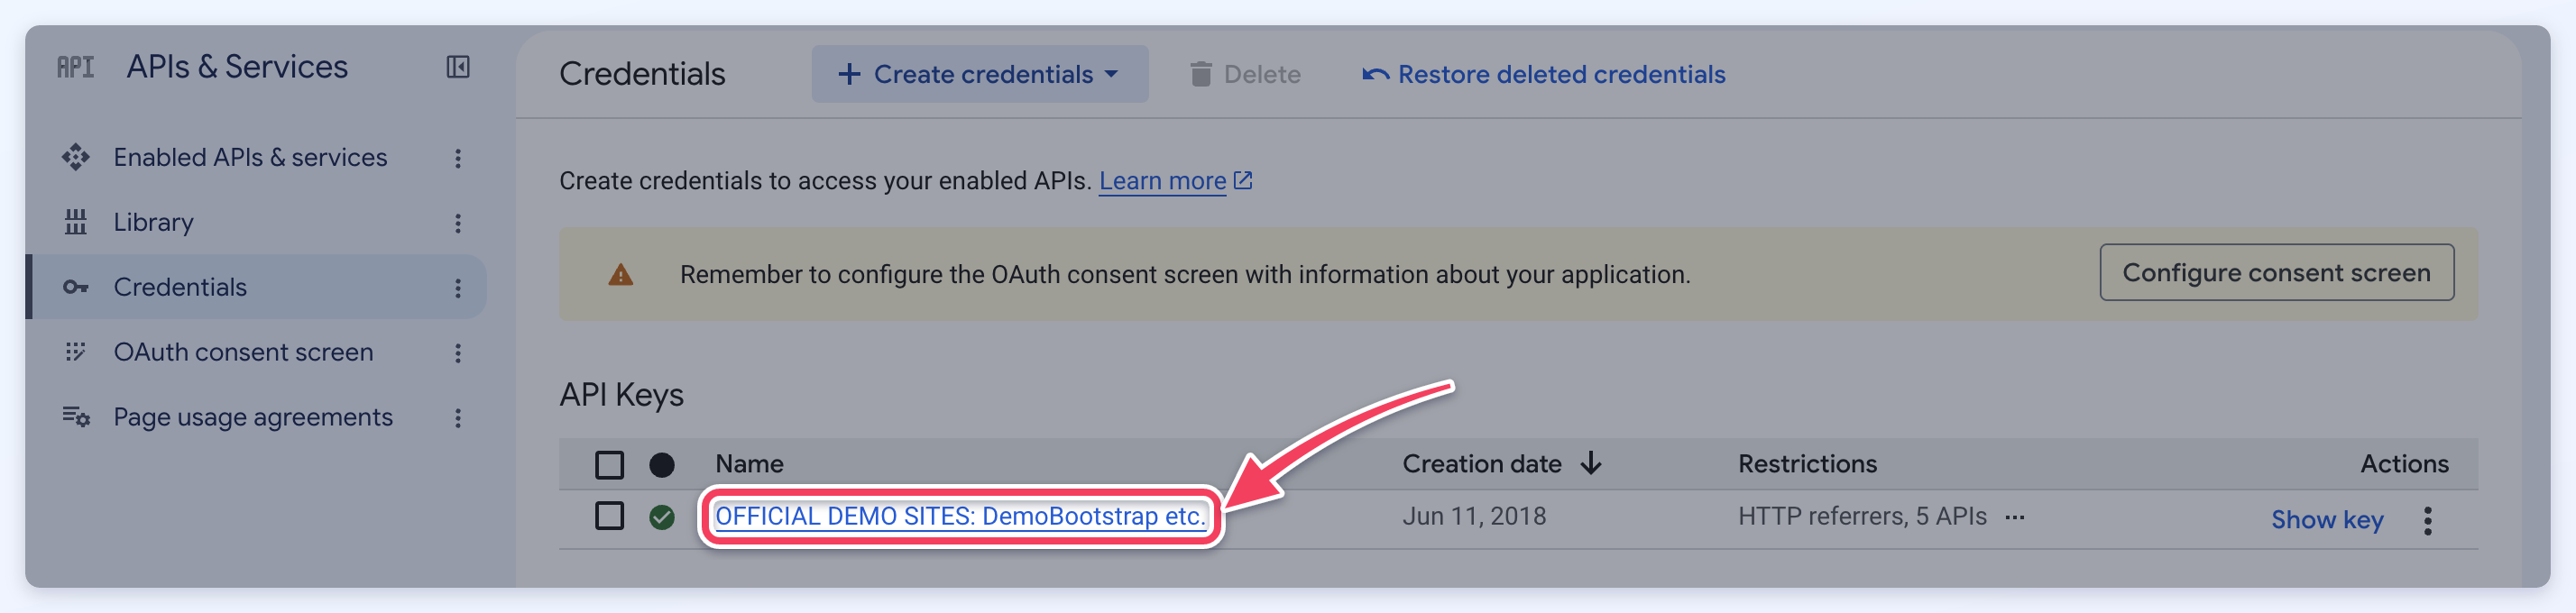
In the Create API key panel, or on the Edit API key page of an existing key, find the Select API restrictions list.
Open the list, select the APIs used by the website, and click OK:
- Maps JavaScript API
- Places API (New)
- Geocoding API
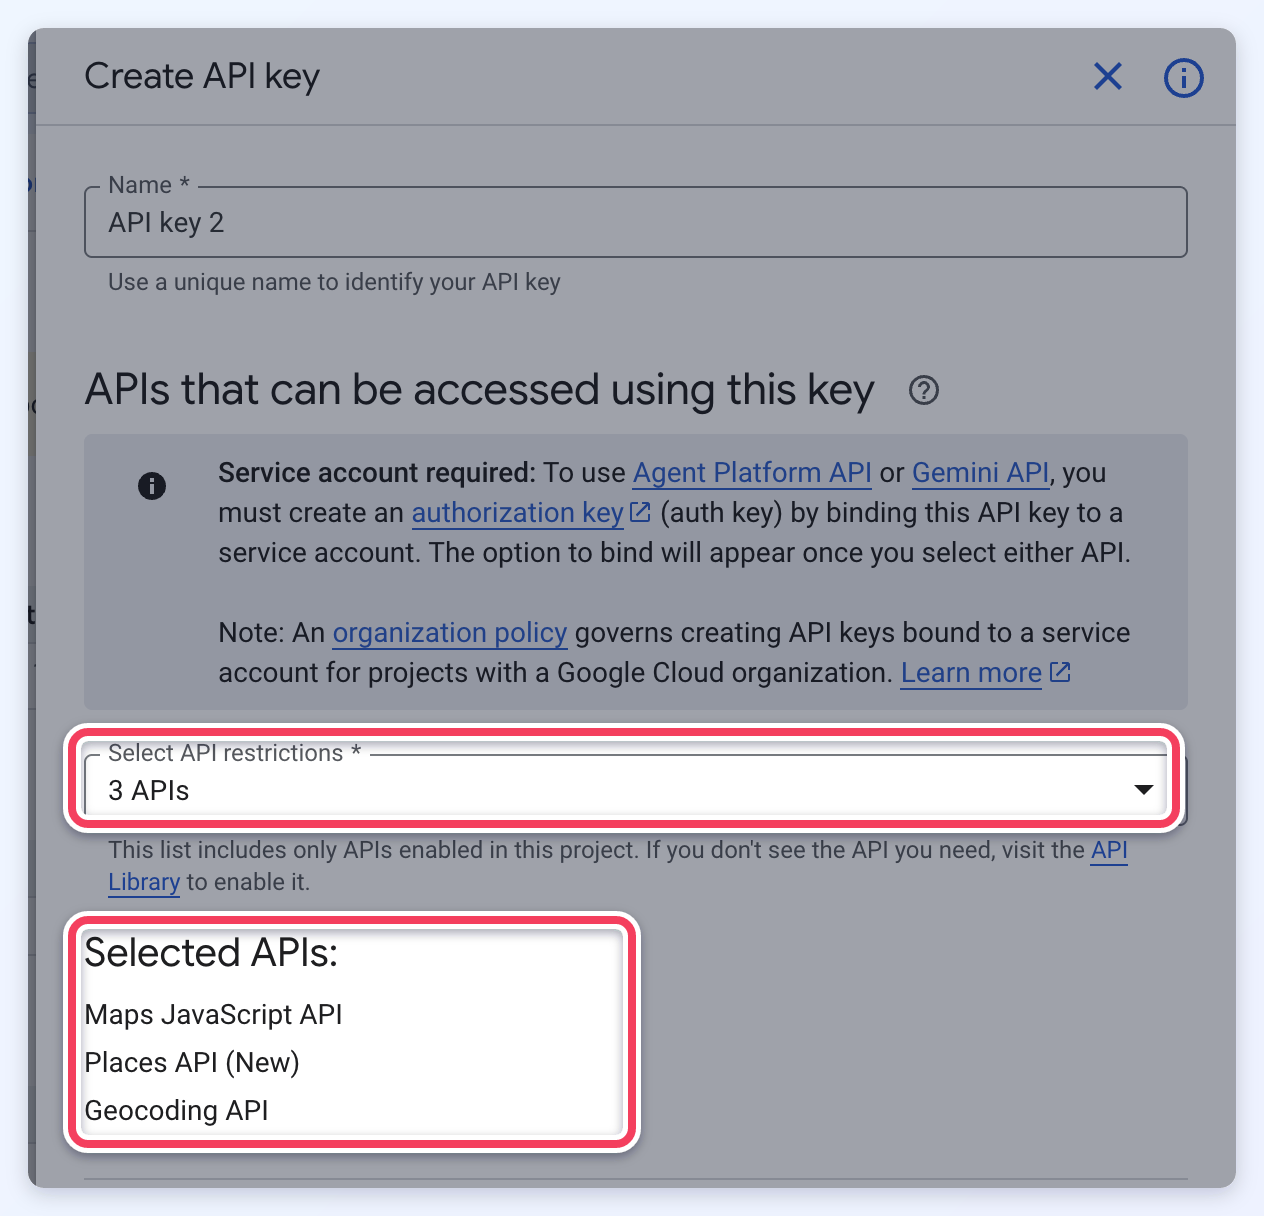
If one of these APIs does not appear in the list, return to Step 3 and confirm that the API was enabled for the same Google Cloud project.
When editing an existing key, click Save after selecting the APIs. In the Create API key panel, finish Step 6 first, then click Create.
Step 6 - Restrict the API Key
Goal: Restrict the API key so it can only be used by the approved website domains.
This step is important because it tells Google which websites are allowed to use the API key.
Under application restrictions, select:
- Websites
Then click Add under Website restrictions and add the allowed website referrers one at a time.
Required Referrers
Use the examples below as a guide. Replace example.com with the final domain of the website.
- *.directoryup.com/*
- *.managemydirectory.com/*
- managemydirectory.com
- *.example.com/*
- example.com
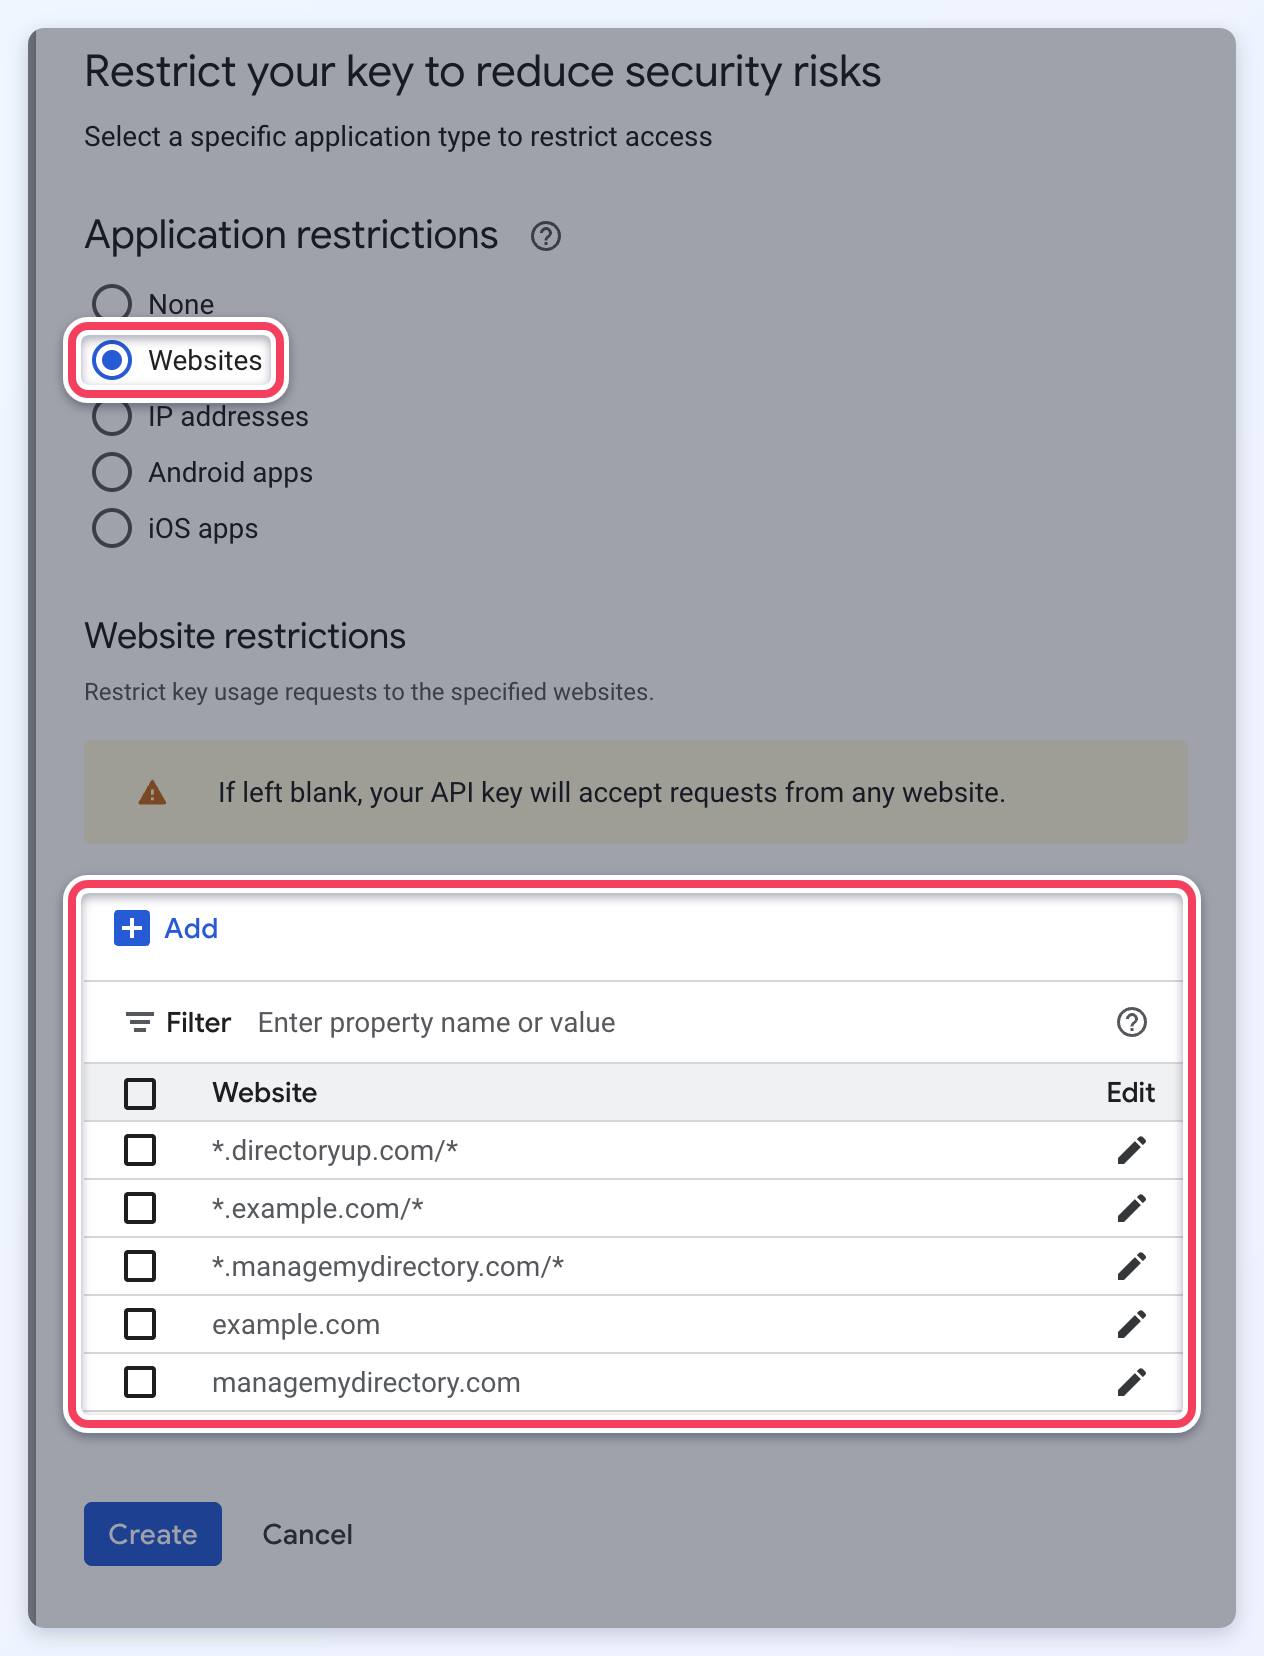
The directoryup.com referrer is useful if the site is not live yet.
The managemydirectory.com referrers are needed so map-related features can work properly inside the Brilliant Directories admin area.
The custom domain referrers allow the API key to work on the live website domain.
After adding the referrers, click Create in the Create API key panel, or Save when editing an existing key.
Step 7 - Add the API Key
Goal: Add the finished Google Maps API key to the Brilliant Directories admin.
- Go to Settings.
- Click General Settings.
- Click the Integrations tab.
- Paste the Google Maps API key into the Google Maps Javascript API Key field.
- Click Save Changes.
Optional shortcut: type Google Maps in the Search by Keyword box at the top right of General Settings to show only the matching fields.
After saving, the Google Maps API key is connected to the website.
Step 8 - Check the Result
Goal: Confirm that Google accepts the key.
Right after Save Changes, the Integrations tab tests the key with Google and shows the result below the key field:
- Website key: green (Google Maps key is working or Maps work on your website) means Google accepts the key. A key restricted to the website's domain is tested on the live domain, the way visitors use it.
- Server key: the optional server key, used to geocode members during imports. No server key saved in grey is fine for most sites.
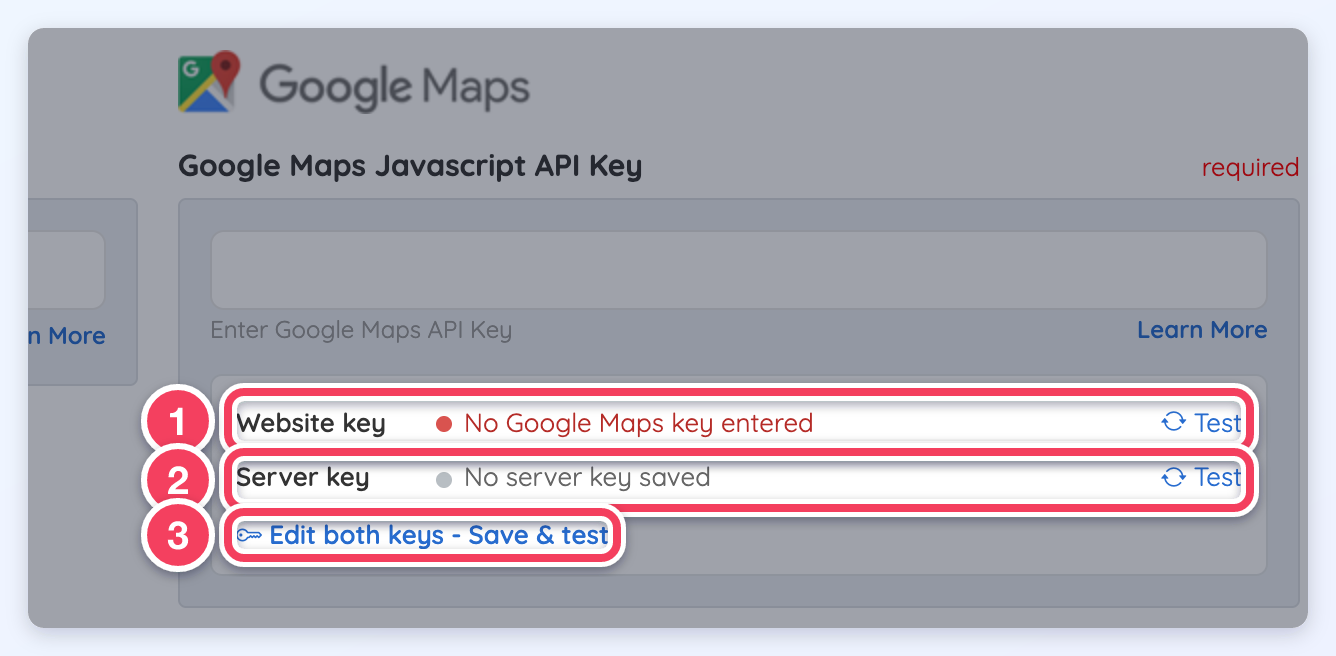
A red result names the problem. Click it to see the fix steps and edit the key; a key Google refuses there is not saved. For each possible result, see Google Maps Issues: Index.
Google API Usage
Different Brilliant Directories features may use different Google Maps services.
Front-End Website Features
- Member profile maps: Maps JavaScript API
- Location searches: Places API (New) and Geocoding API
- Detect Visitor Location Add-On: Geocoding API
Member Dashboard Features
- Contact details forms: Maps JavaScript API, Places API (New), and Geocoding API
- Post forms with location fields: Maps JavaScript API, Places API (New), and Geocoding API
- Multi-Location Add-On: Maps JavaScript API, Places API (New), and Geocoding API
Admin Dashboard Features
- Geocode Members tool: Geocoding API
- Location searches in admin tools: Places API (New) and Geocoding API
- Enable All Location Features For Pretty URL Search Results Pages advanced setting: Geocoding API
FAQ
| Google Cloud Screen Does Not Match This Article -- Google may update labels, layouts, and setup screens at any time. If the screen looks different, focus on the goal listed in each step. The main requirements are still the same: billing must be active, the required APIs must be enabled, the API key must be created, and the key must be restricted to the correct website domains. | Google Shows a Questionnaire -- The questionnaire is part of Google’s setup process. Answer the questions based on the website or project being connected. Brilliant Directories does not require one specific answer pattern for the Google questionnaire. |
| SDK Options Appear in Google -- For a standard Brilliant Directories website setup, SDK options are not needed. Ignore iOS SDK, Android SDK, Navigation SDK, Fleet Engine, and mobile app setup options unless a separate custom mobile app project specifically requires them. | The API Does Not Appear When Restricting the Key -- If Maps JavaScript API, Places API (New), or Geocoding API does not appear in the API restrictions list, the API may not be enabled for the selected Google Cloud project. Return to Step 3, confirm the correct project is selected, and enable the missing API. |
When to Contact Brilliant Directories Support
Contact Brilliant Directories Support if:
- The API key has been added to the Brilliant Directories admin, but maps are still not loading
- The correct APIs appear to be enabled, but the website still shows a map error
- There is uncertainty about where to add the API key inside the Brilliant Directories admin
- Location features are not working after the Google setup has been completed
When to Contact Google Support
Some issues must be handled directly inside Google Cloud because Google controls the account, billing, verification, project, and API key system.
Contact Google Support or review Google Cloud Help if:
- Billing cannot be activated
- Google rejects the payment method
- The Google Cloud account is locked, suspended, or restricted
- Google requires identity verification
- The Google Cloud project cannot be accessed
- Google shows billing, permissions, or account-level errors
