Tax and VAT Manager
Link: https://support.brilliantdirectories.com/support/solutions/articles/12000076725

Overview
Configure unlimited tax & value-added tax (VAT) rules to be applied on the website’s checkout pages with the Tax and VAT Manager Add-on. Tax rules can be applied universally to all members/customers or location-specific tax rules can be created.
The tax rules will be applied to all payments processed by the website including one-time and recurring payments.
How To Get This Add-On
- Websites with the VIP Add-Ons Club automatically have this add-on available:
Join The VIP Add-Ons Club- Purchase Individually: Tax & VAT Manager Add-On
Enabling the Add-On
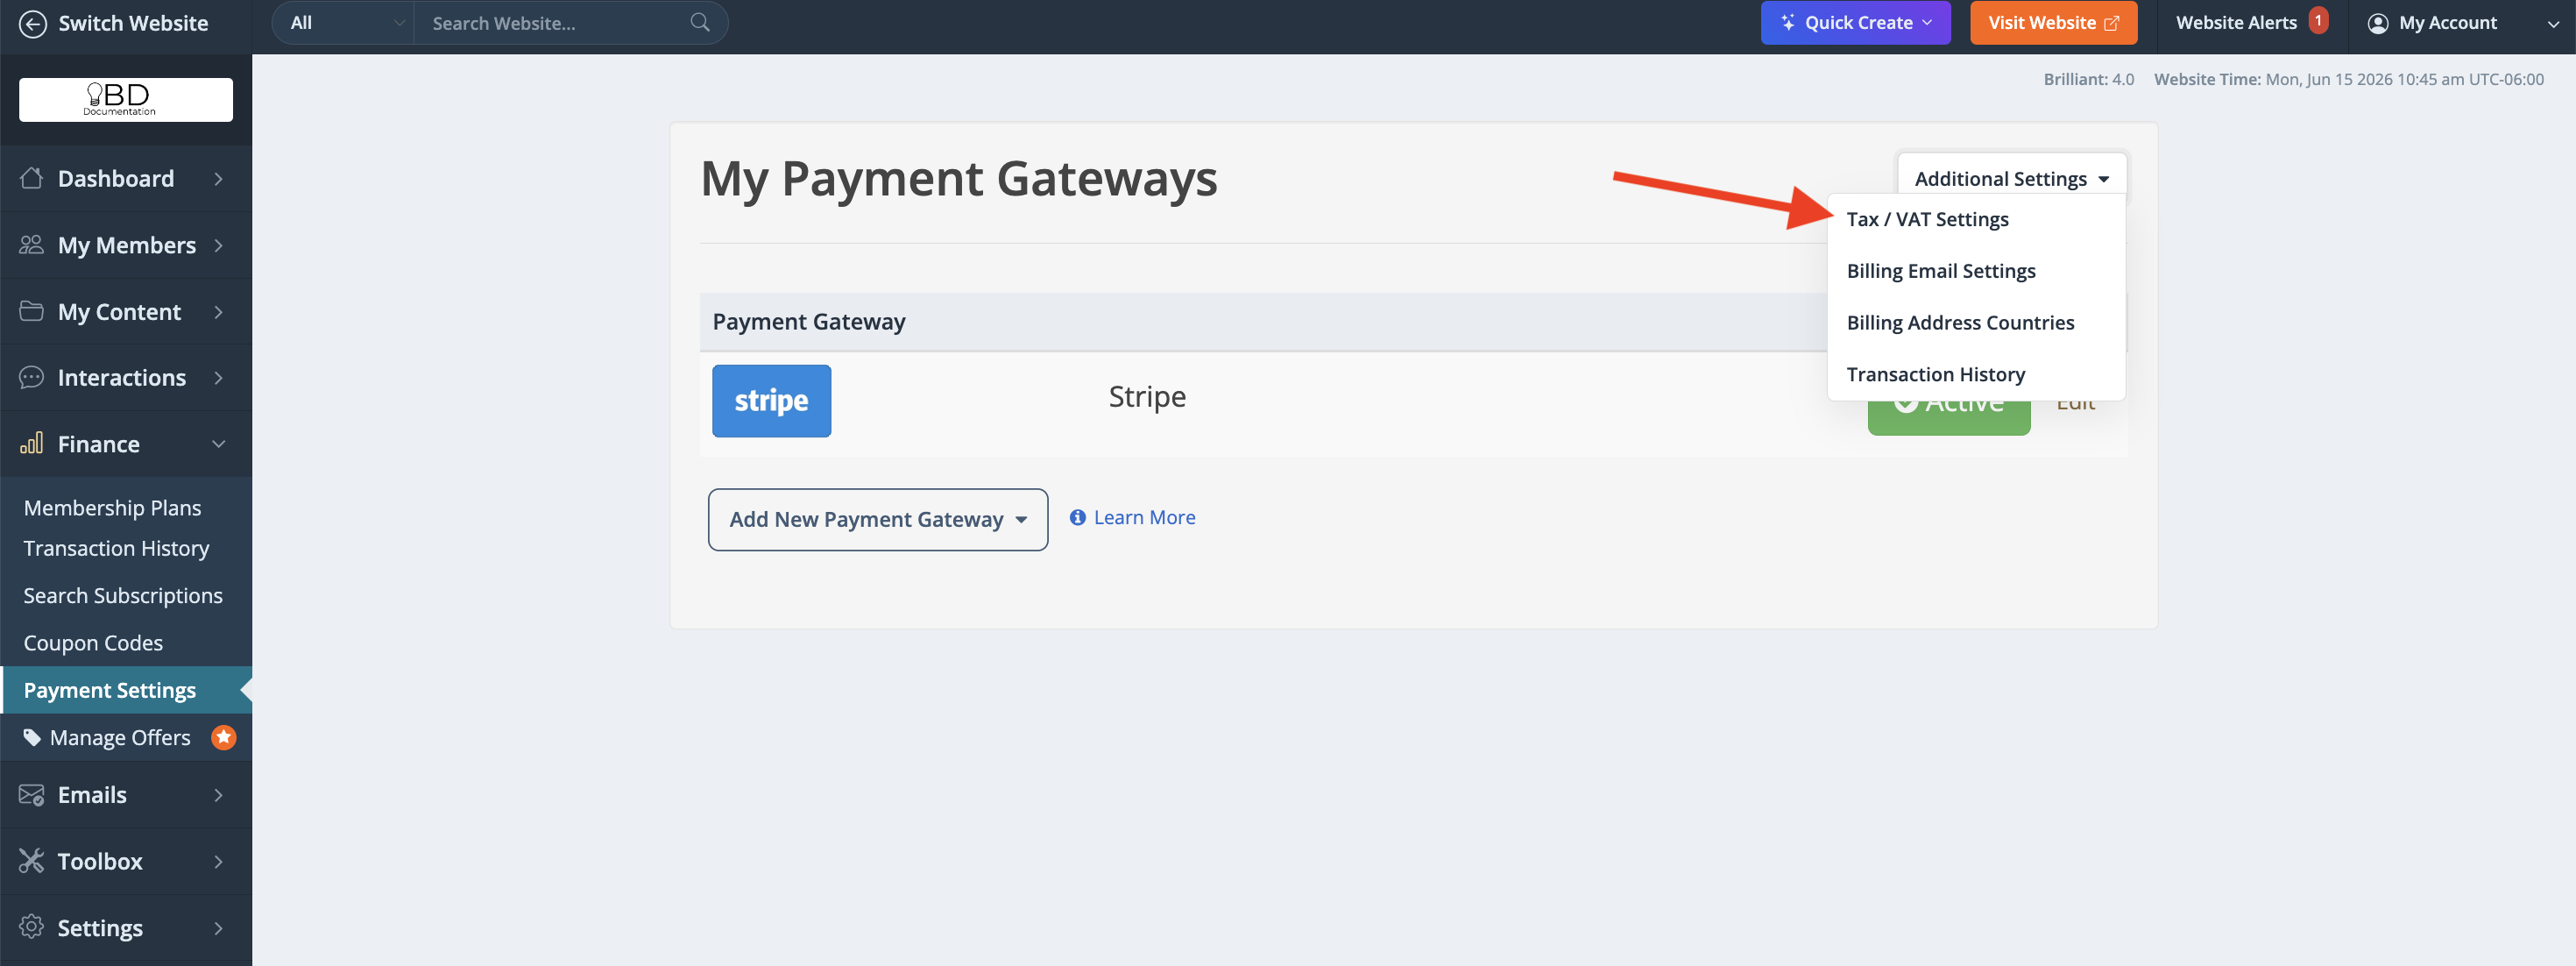
1. Go to Finance - Payment Settings:
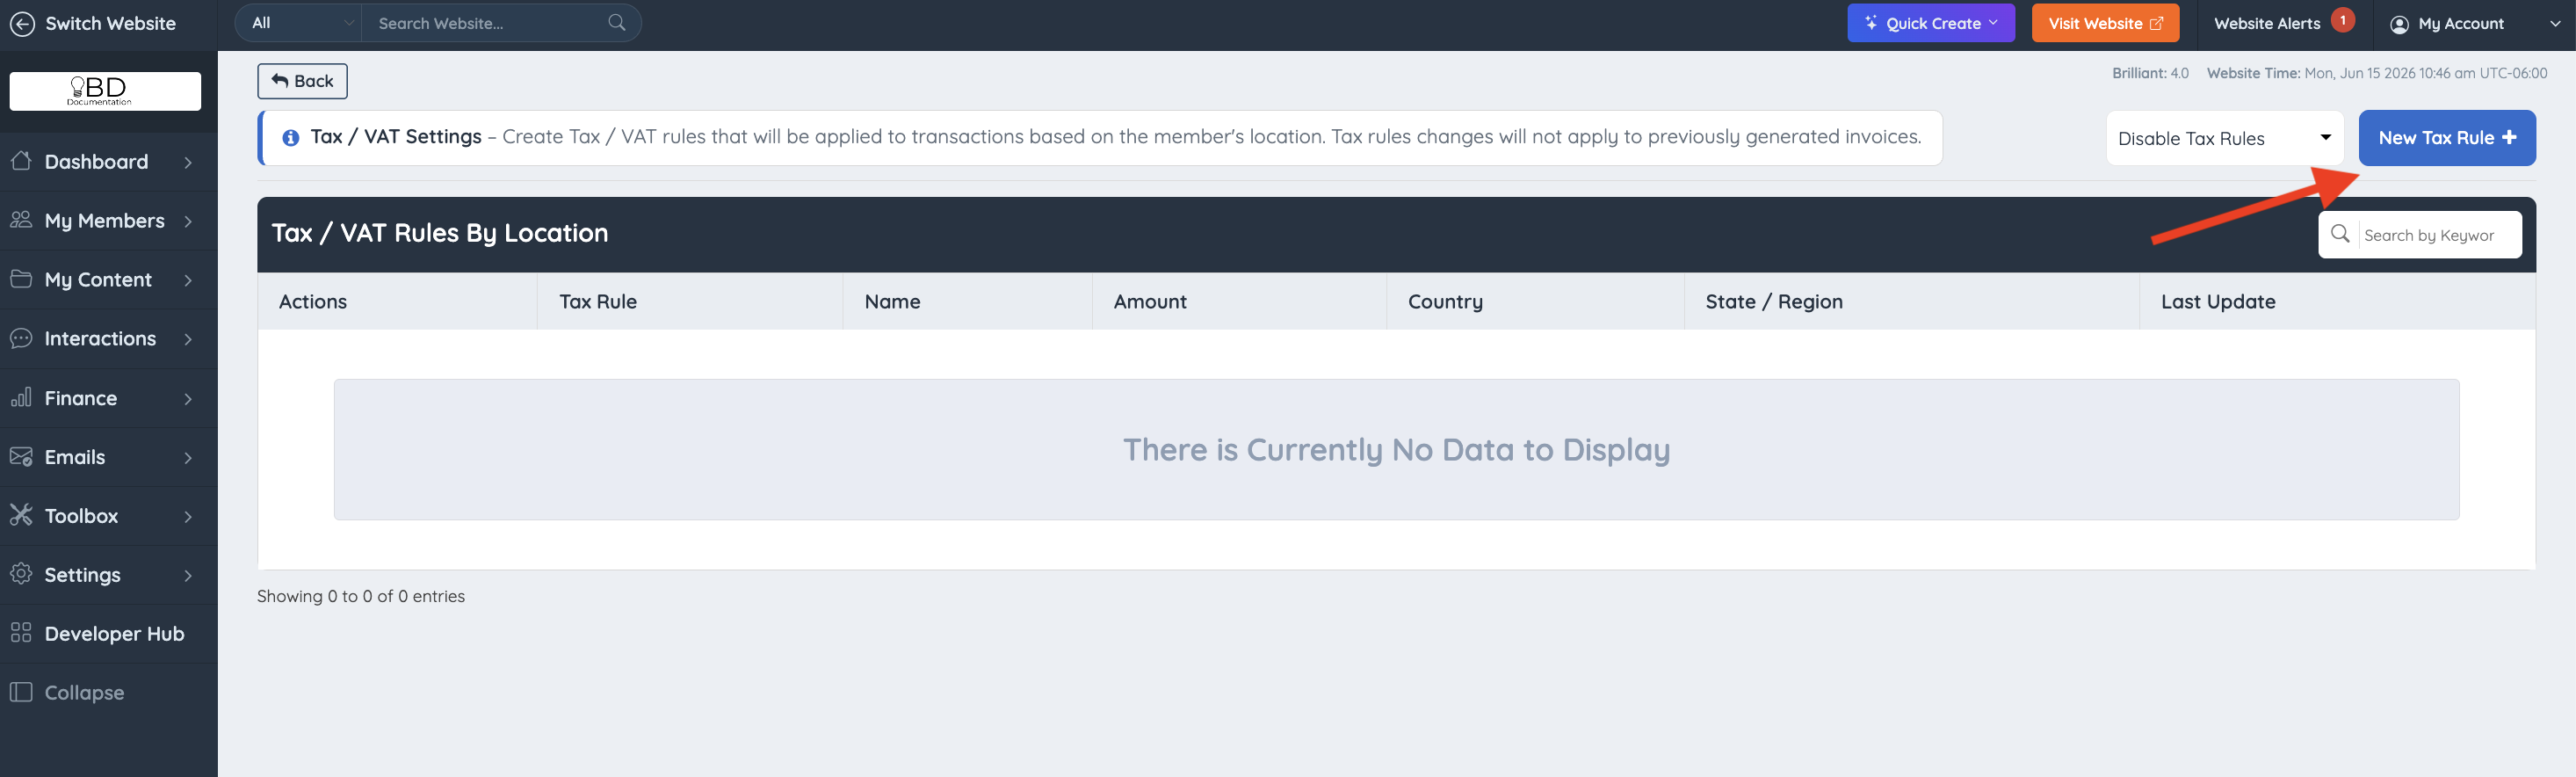
2. Click on Tax/VAT Settings (This will only display if the payment gateway and the add-on active):
3. To create a new tax rule click on the blue button on the right side:
4. Fill out the pop-up form to complete the new tax rule:

1. Enter Tax Name - This will appear on the invoice as the name of the tax.
2. Select Country - This will allow the admin to select the country that the tax will apply.
3. Select State - This will allow the admin to select the state/province that the tax will apply.
4. Tax Rate - This will be the tax percent-based tax rates, enter value between -100 and 100.
5. Tax Rule Order - If this is the first tax, select primary. If this is a second-level tax rule, select secondary.
5. Click Save Tax Rule when everything is set up to the admin's liking.
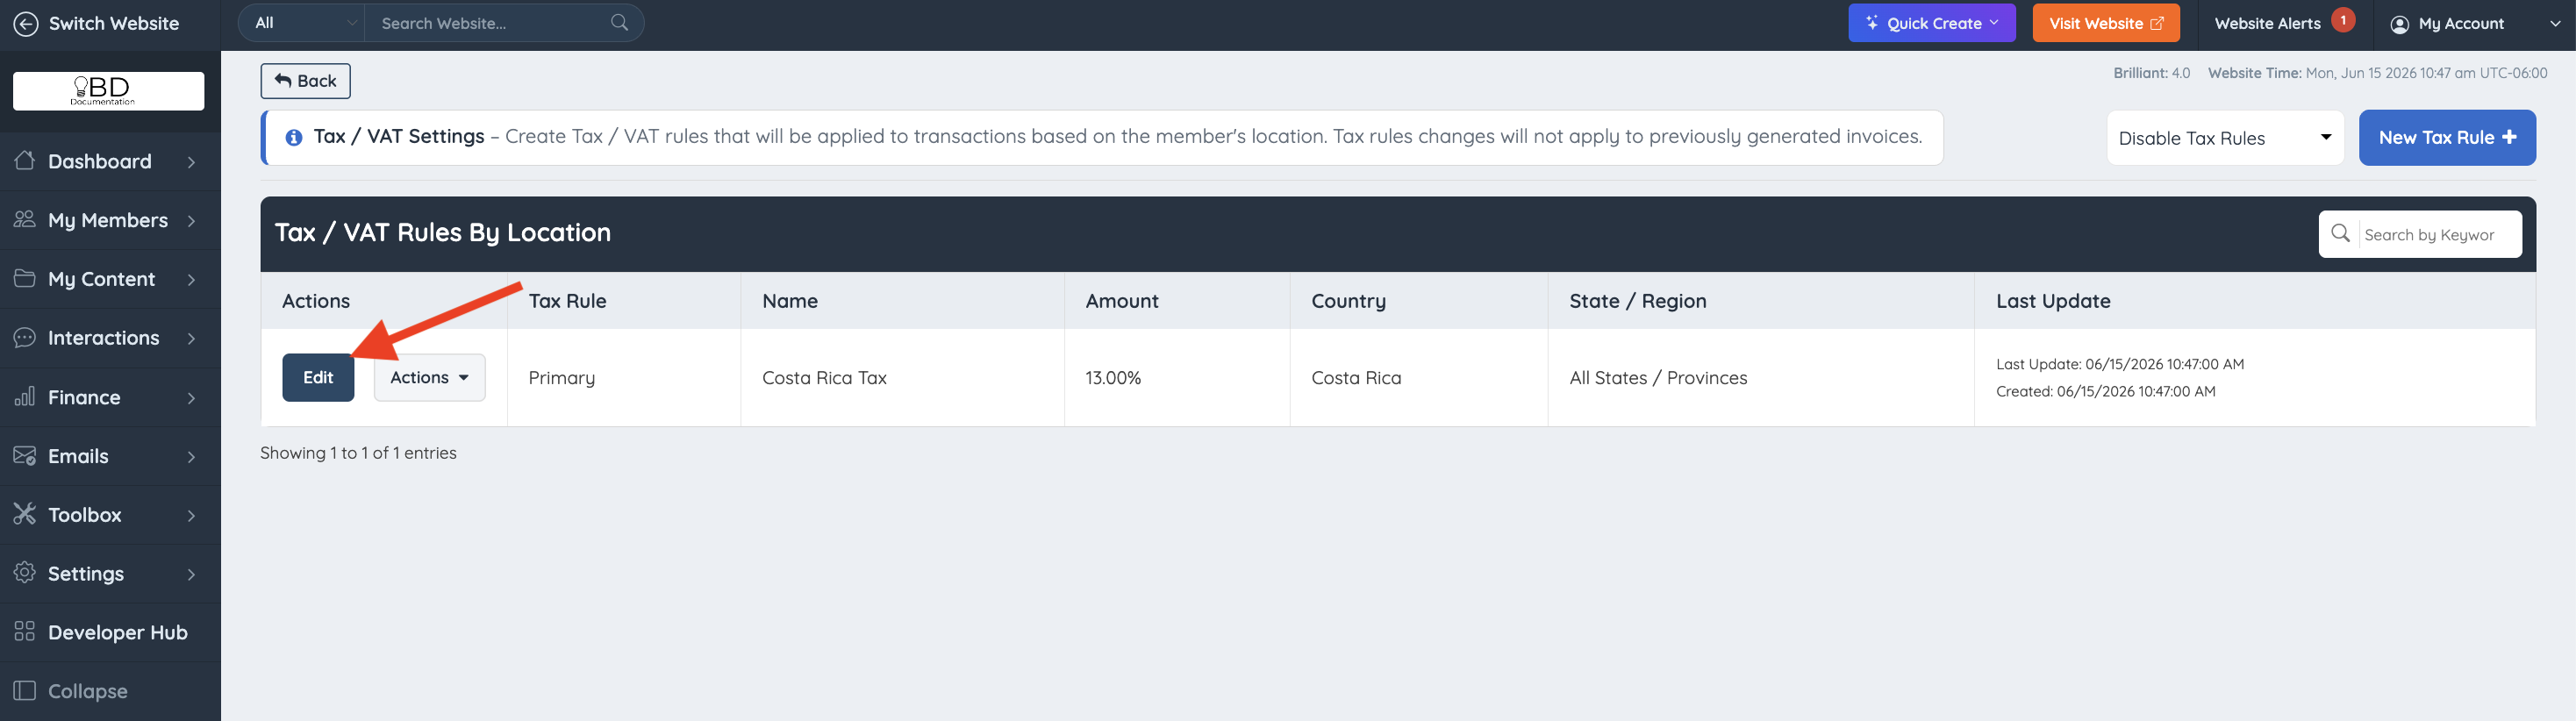
6. The admin will be able to edit an existing tax rule here as well create a brand new tax rule:
The admin also has the option to select how the tax will display for the members in the front end:
Important: One must be selected in order to show in the front-end.
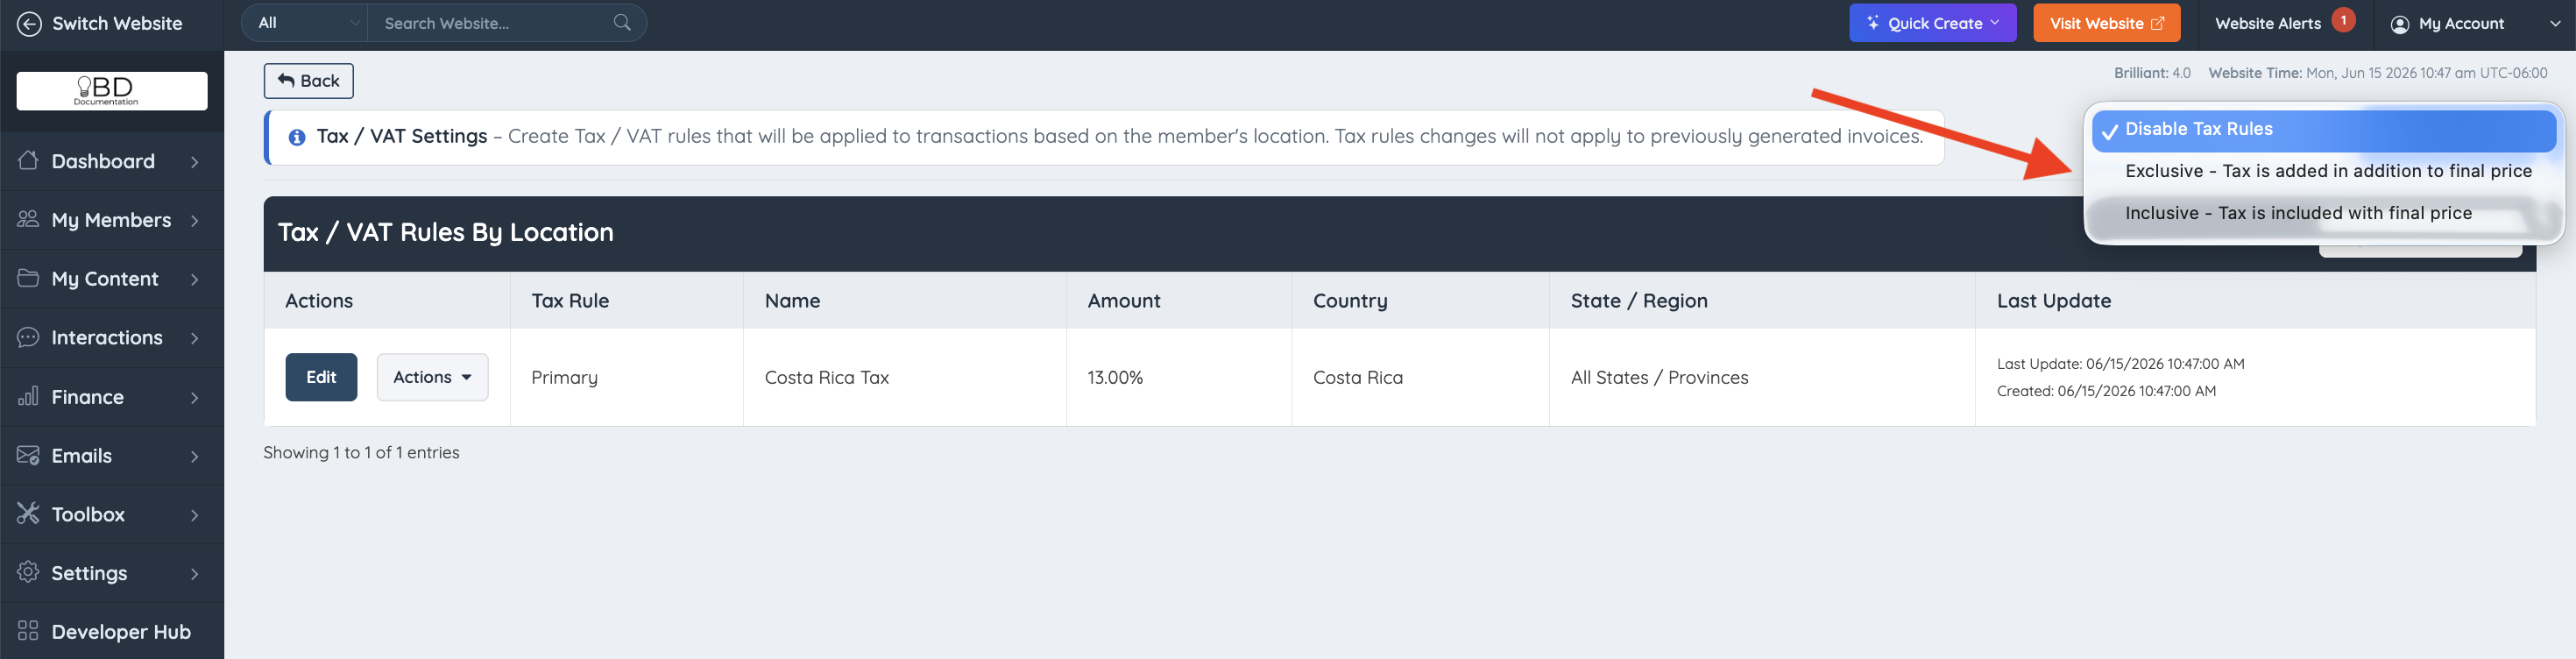
Exclusive - Tax price will be charged in addition to the prices the admin sets:

Inclusive - Tax price will be included in the price the admin sets:

Now there is also a Membership Plan setting to select if this order summary displays or not and the position of the promo code input.
Choose the position in which the promo code input will display. There are 3 options:
- Left
- Right
- Do Not Display

This is how the promo code applied to the price will display on the left side, the tax is applied to the discounted price:

If the promo code is set to display on the right:

Keep in mind that if Do Not Display is selected, the order summary won't display and this includes the tax information. Also, users won't have the option to enter a promo code.
