
How To Create A Custom Webhook
Link: https://support.brilliantdirectories.com/support/solutions/articles/12000105678
A custom webhook sends the data of one specific form, or one specific Smart List, to its own Webhook Link. Use one for a custom form, a customized copy of a default form, a post type form, or a single Smart List.
Creating a Custom Webhook
- Go to Developer Hub and click Manage Webhooks.
- Click New Webhook. The New Webhook drawer opens.
- Under Connect to, choose Form or Smart List.
- Open the Form (or Smart List) list and pick the one that should send its data. Type in the Filter box at the top of the list to narrow it down.
- Check the Webhook nickname. It fills in with the form or Smart List name and can be changed.
- Optionally, add an Internal description as a reminder of what the webhook is for.
- Click Save. The page reloads and the new webhook is listed under Custom Webhooks.
- Switch the new webhook on, paste the endpoint address into its Webhook Link, and click Save in the Unsaved changes bar at the top of the page.
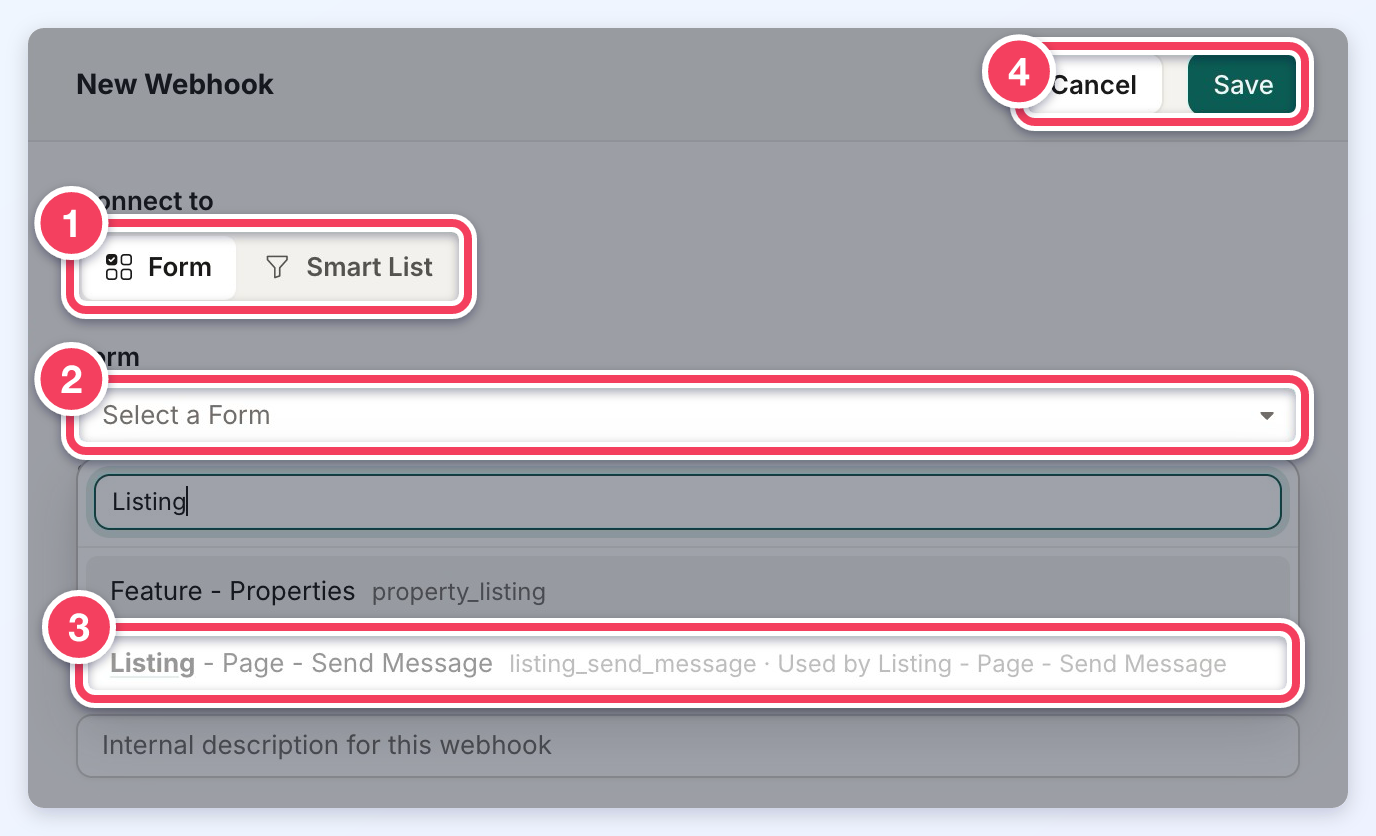
- Connect to: Form or Smart List.
- The list of forms (or Smart Lists), in A-Z order, with the form's internal name beside each title. Each form appears once; when the website has its own customized copy of a form, that copy is the one listed.
- A form already connected to a custom webhook is greyed out and marked Used by with that webhook's nickname. Each form or Smart List can have one custom webhook.
- Cancel and Save. If anything was changed, Cancel asks before discarding it.
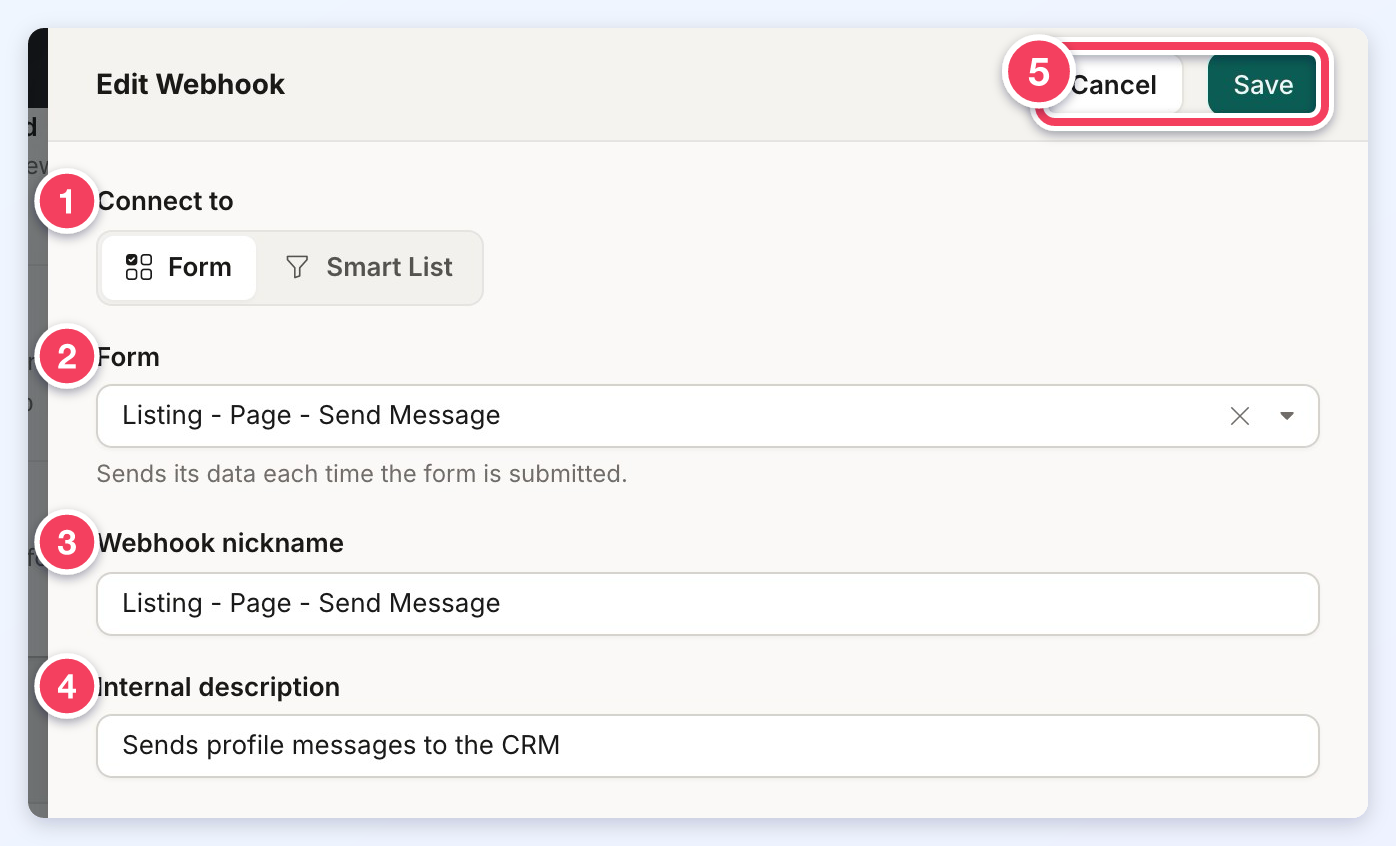
- Connect to: Form or Smart List.
- Form: the form whose submissions are sent. A form sends its data each time it is submitted; a Smart List sends its records when Sync Webhook Now is clicked or its schedule runs.
- Webhook nickname: the name shown on the Webhooks page. It is required.
- Internal description: an optional note, shown under the nickname on the Webhooks page.
- Save adds the webhook (or saves the changes when editing).
If no form or Smart List is chosen, or the nickname is empty, the drawer shows the problem under the field and does not save.
To test the webhook, enter a Webhook Link and submit the form, if a form was selected, or sync the Smart List, if a Smart List was selected. For Smart List webhooks and how to connect them see: How To Create Smart List Webhooks
Editing or Deleting a Custom Webhook
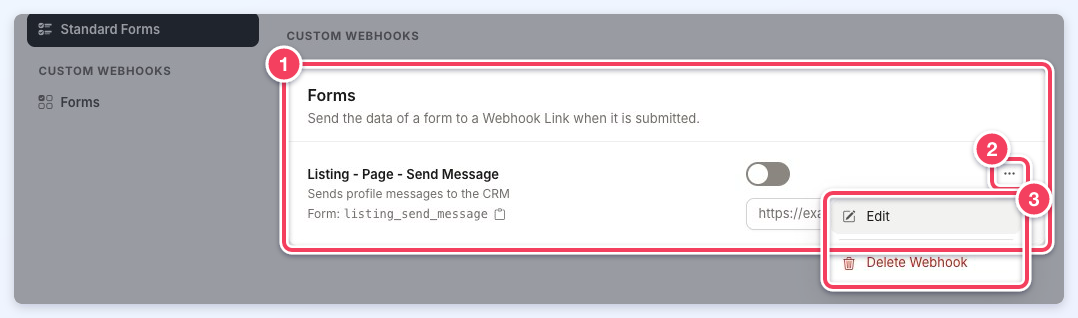
- Custom webhooks are listed under Custom Webhooks, in a Forms or a Smart Lists section. Each row has the same switch, Webhook Link and copy button as the default webhooks.
- The menu button (three dots) beside the switch.
- Edit opens the drawer to change the form, nickname or description. Delete Webhook removes the webhook.
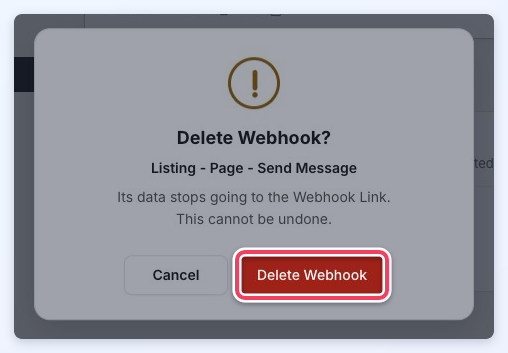
Deleting asks for confirmation. Once deleted, the form's data stops going to the Webhook Link, and this cannot be undone.
Save or discard any unsaved changes to Webhook Links before adding, editing or deleting a custom webhook: these actions reload the page, so the page asks for the changes to be saved first.
If the form or Smart List a custom webhook was connected to no longer exists, the row is marked Form Not Available or Smart List Not Available.
Custom Webhooks for Post Types
The default webhooks Standard Post Saved and Photo Album Post Saved send the data of every Single Image and Multi-Image post type. To send one post type to a different link, create a custom webhook for that post type's form (EG Feature - Blog Articles). That post type then uses the custom webhook, and the other post types keep using the default webhook for their type.
Activity Tracker:
Logs of the Webhook actions and the information sent can be seen in the Activity Tracker (Dashboard » Activity Tracker), where each one is listed with the Type Webhook.
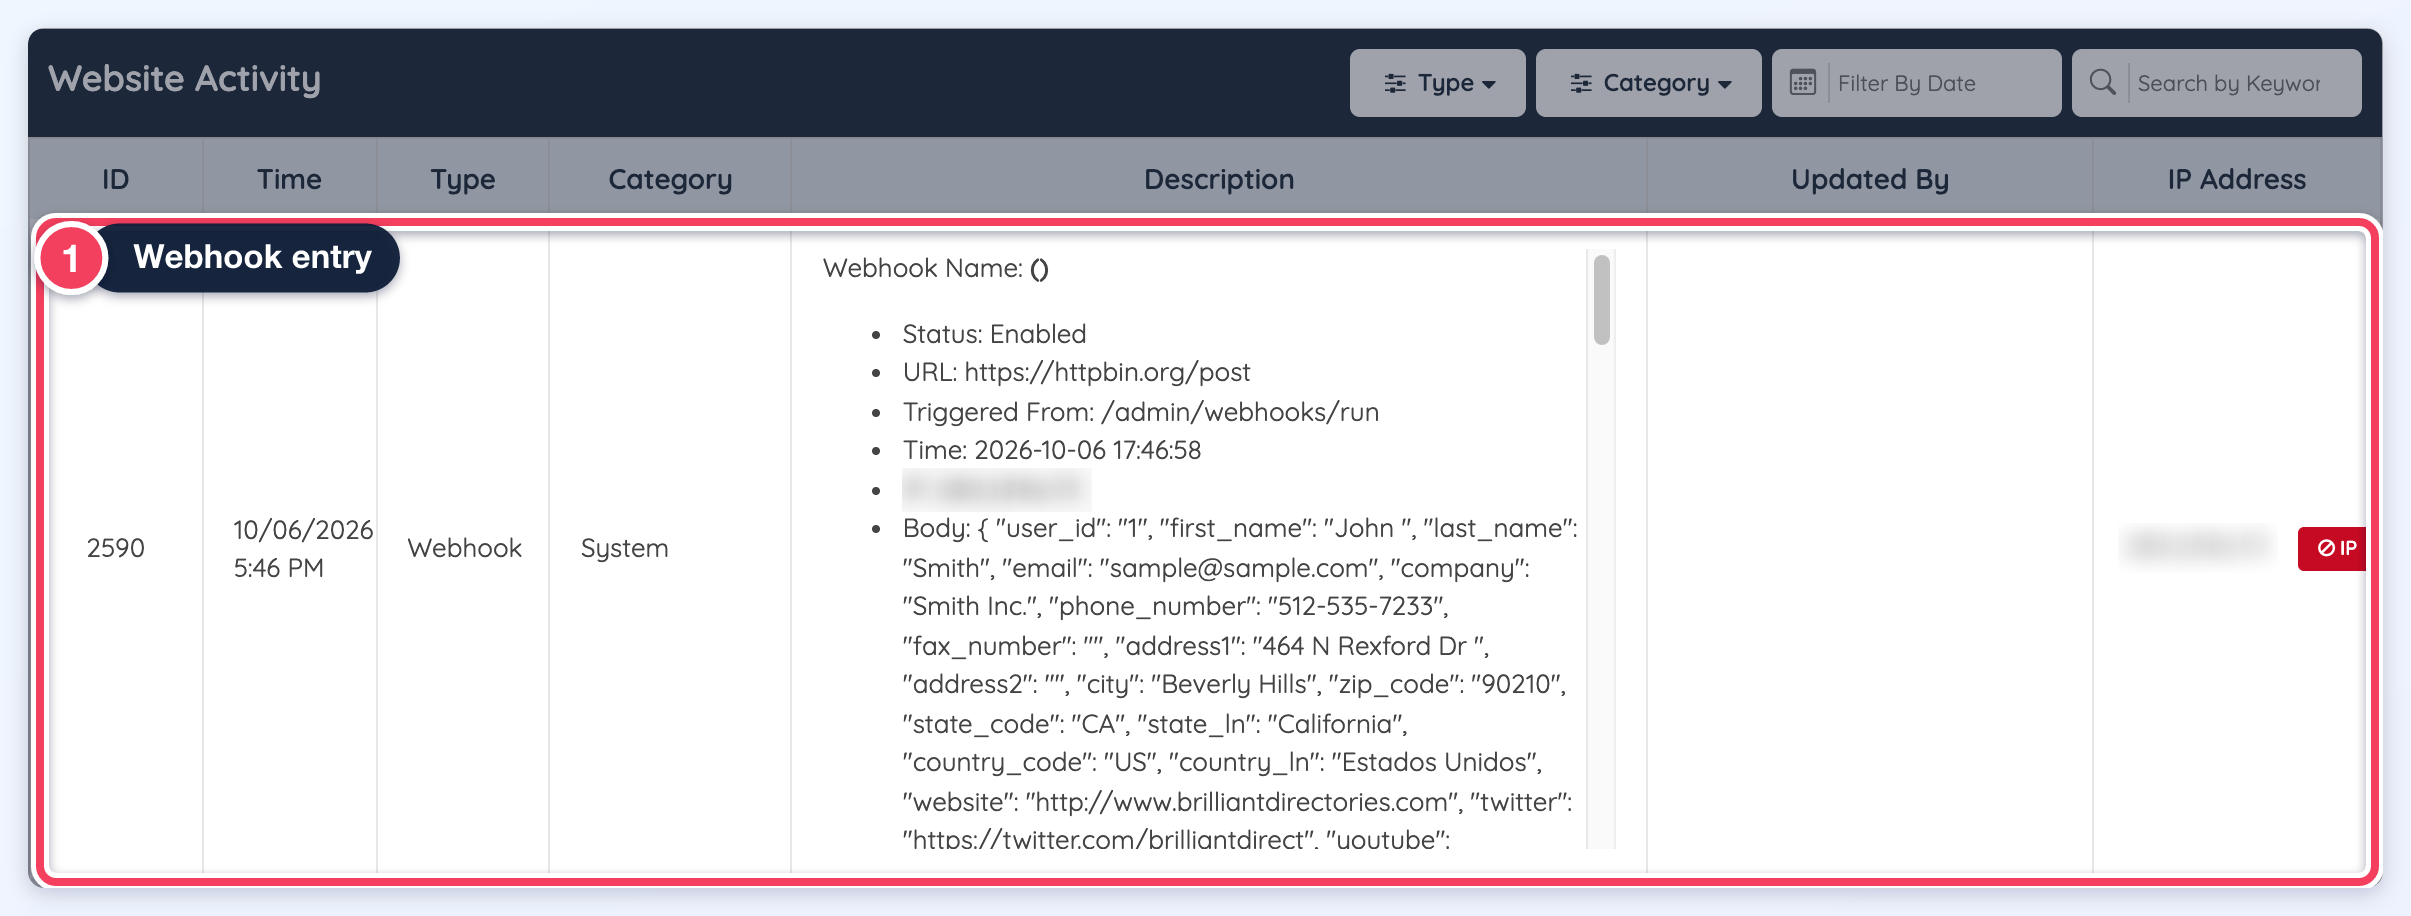
When a webhook is triggered, this is the information logged in the Activity Tracker: its status, Webhook Link, where it was triggered from and the time (1), and the data sent in the Body (2). This example is a custom Smart List webhook run with Sync Webhook Now:
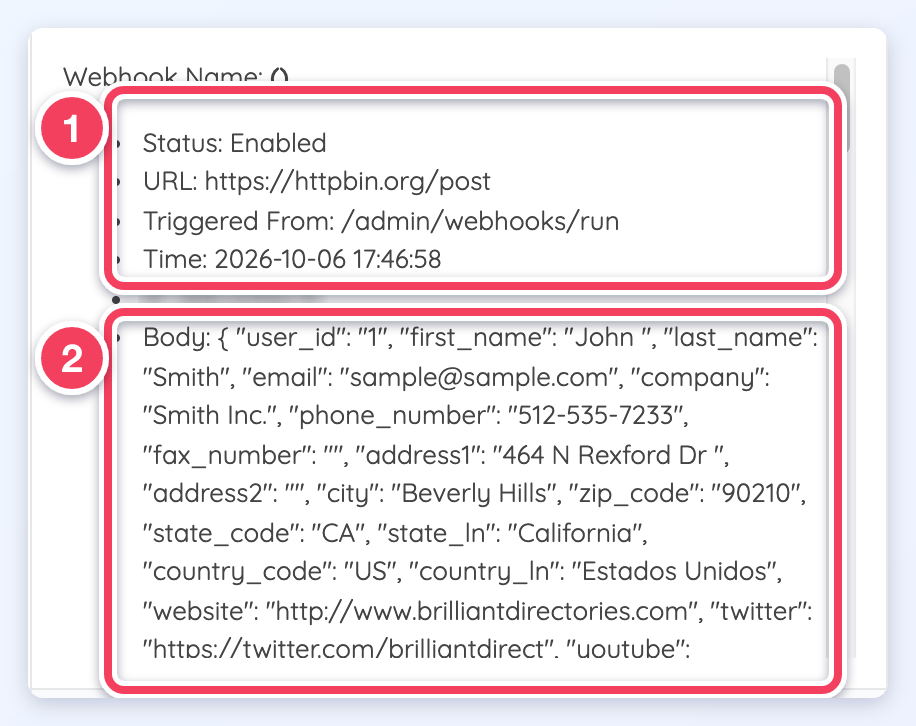
When a Smart List webhook is triggered, only the first record sent to the webhook endpoint with a confirmation message that the webhook data was correctly sent is logged.
Multi-Value Fields(Checkboxes, Dropdowns, Radial Buttons)
All Multi-value fields types like Checkboxes, Dropdowns and Radial buttons will send the normal information and additionally, it will send information about the field Option labels from the front end and database variables. These can be identified with labels that have "_stringify" on the webhooks
For example a checkbox field:
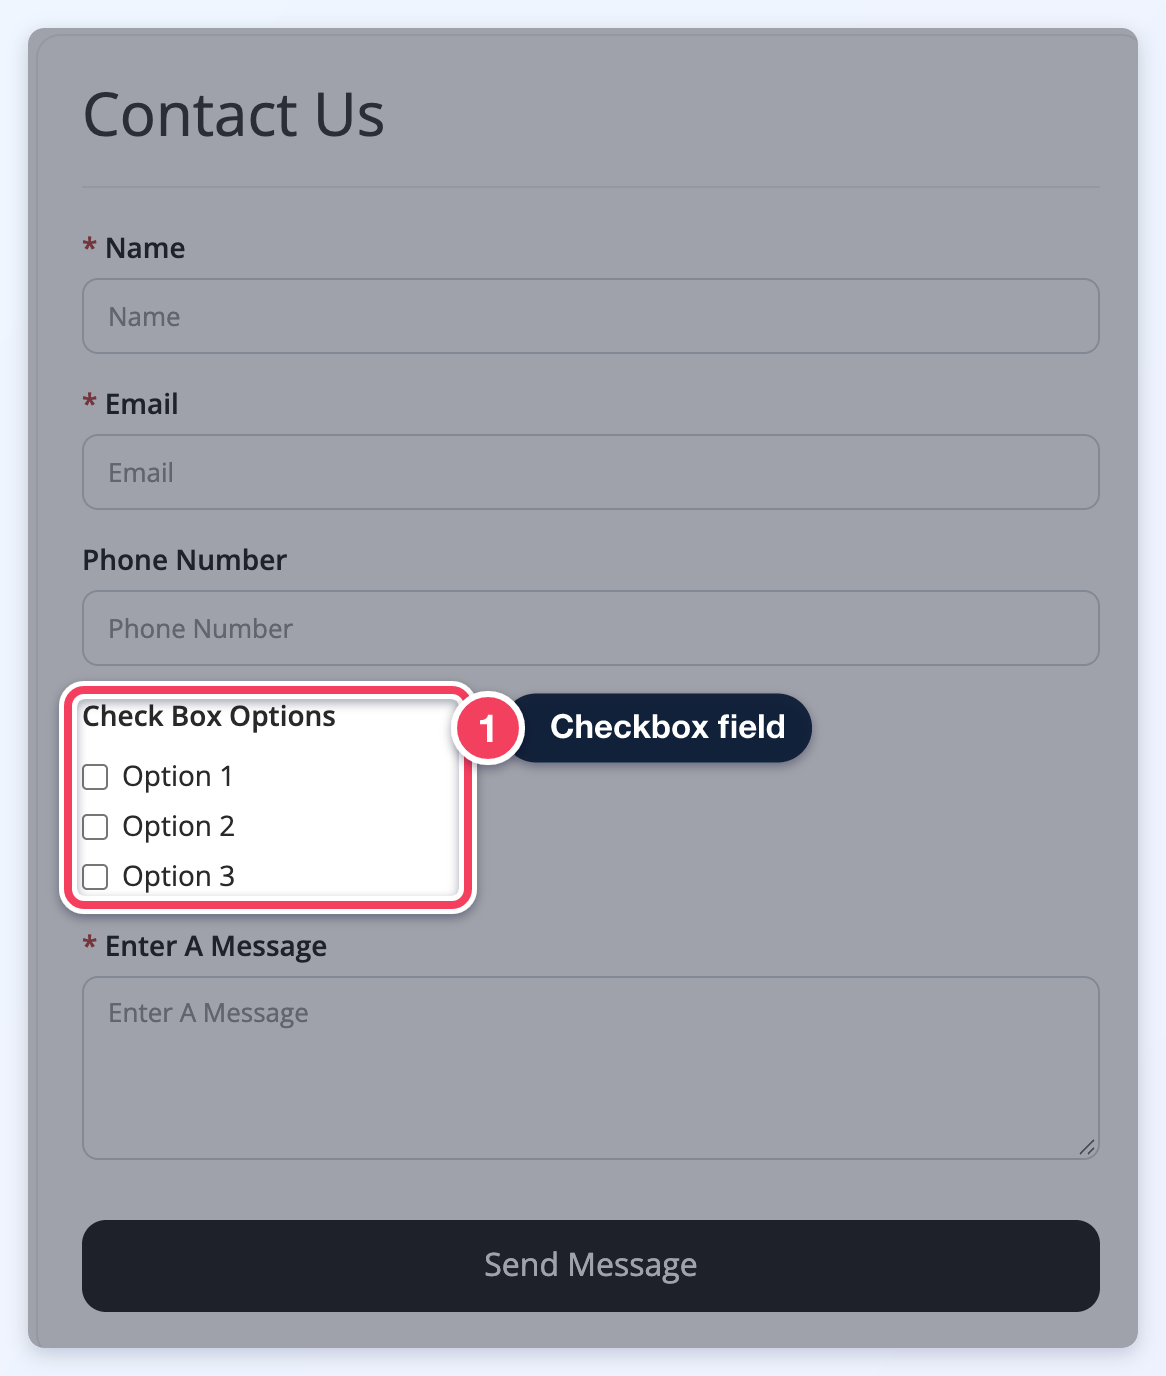
When the options are selected:
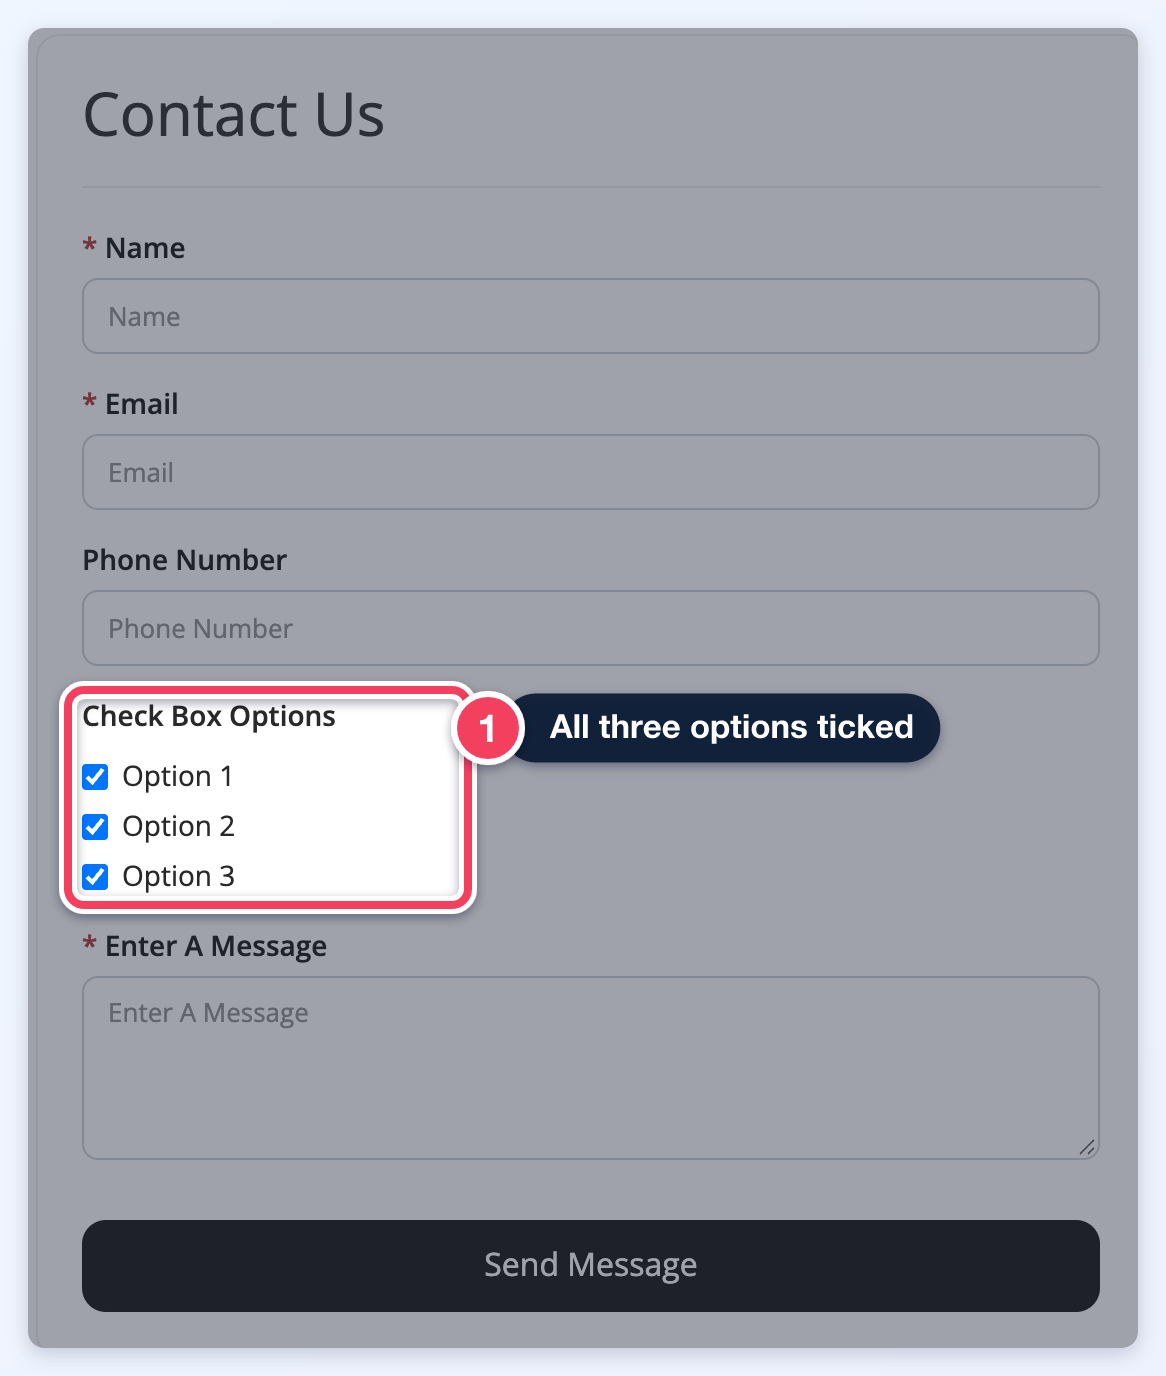
The information sent to the webbooks:
Array of the different options selected : "checkbox_label": ["option_1","option_2","option_3"]
Database Values: "checkbox_label_stringify": "option_1,option_2,option_3"
Values of Labels in the front end "checkbox_label_values_stringify": "Option 1,Option 2,Option 3"
Important: This information can also be viewed in the Activity Tracker:
What happens when a Form Submission Webhook Event is triggered?
When a user submits one of the forms a Webhook is configured for, the data submitted in the form is sent to the Webhook URL via CURL (https://www.php.net/manual/es/book.curl.php) as a POST array.
For example, the default Contact Us form has the following fields:
Name [yourname]
Email [inquiry_email]
Phone Number [phone]
Message [comments]
A user submits the following information to these fields:
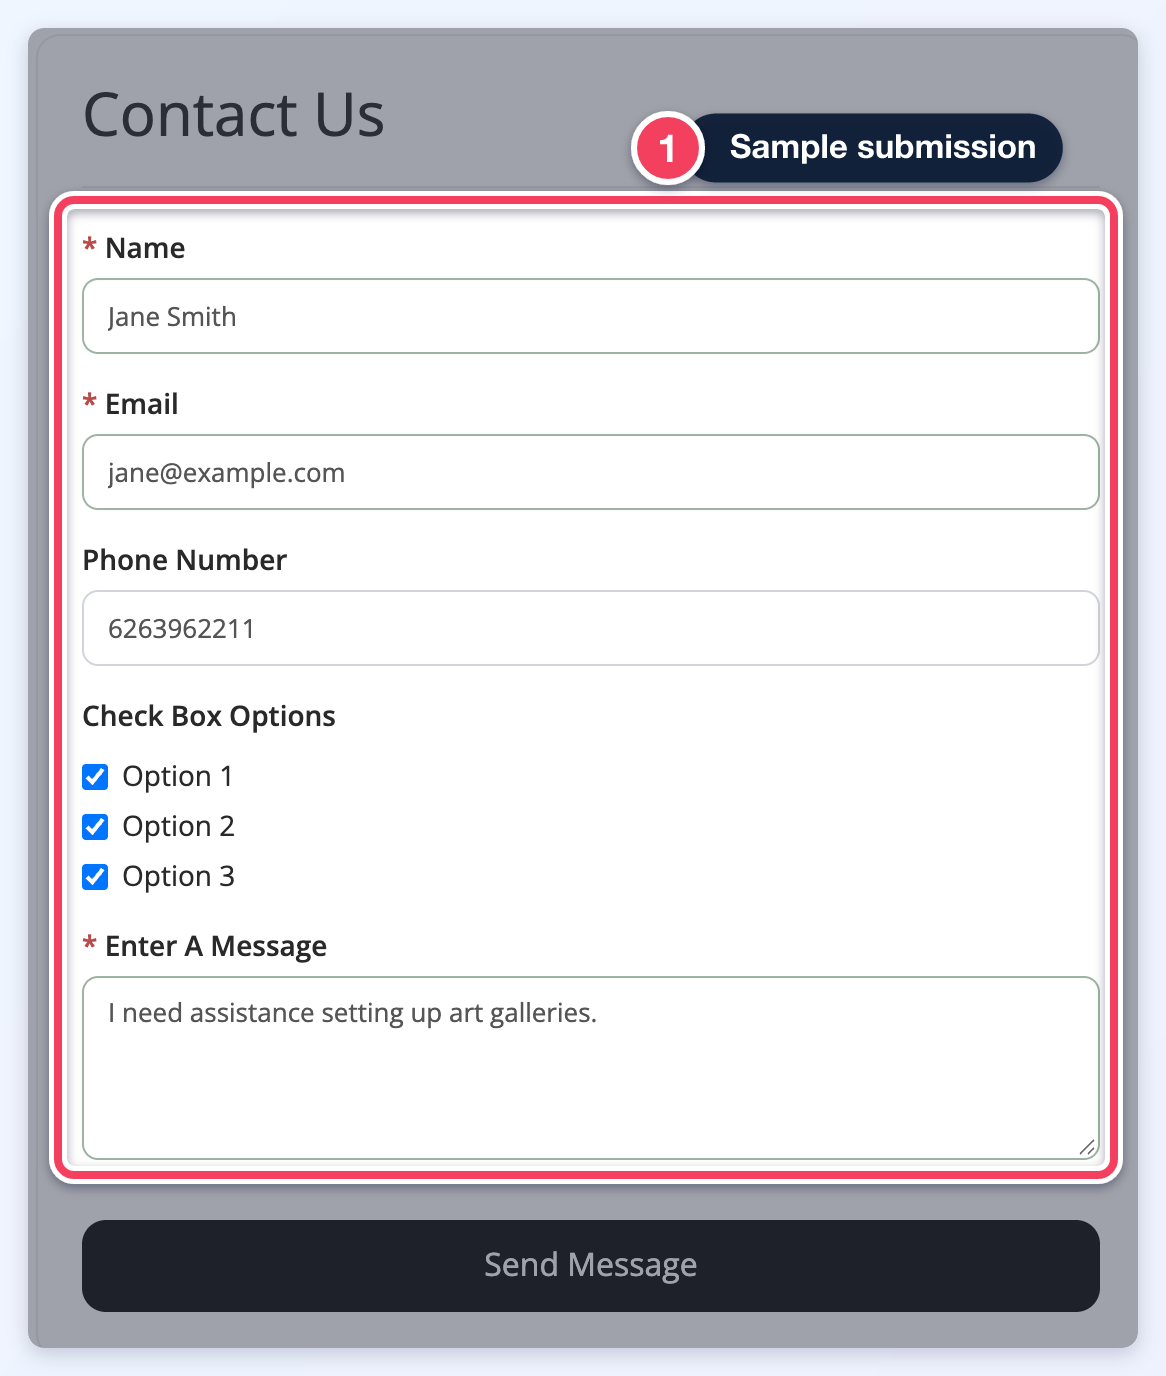
The following $POST array would be sent to the Webhook URL setup for this form.
formname: contact_form
yourname: Jane Smith
inquiry_email: jane@example.com
phone: 6263962211
comments: I need assistance setting up art galleries.
g-recaptcha-response: 03AGdBq25plMxoJT4Y634dC_nAu_zDQYhtep04LByAG5AFQ2k4_Y0BvhNle9GrSh7UX0snQYQ4VwaQPaT1iHv4Q2qySvUY9w3VRWH7p4sT4DI6dbjndt28b3KpaUYdc3nO5loeBSwf1G5lk0KE90whyRj7_8CwSs1Foif18Ai2MkCYFo6JU_fk6REx9Z_3Tpk2ZTiciYoy_5oyPirmWXaUKYF5NLEcGvFRA_CusrVlFTpuyTnWfiNYnsqoZQb3TQsds5f-p1LgsmTSMDWZCQfnUt2ZEA45uZtz0m5fmC_9RybfIdySPNX2guugQVN27nWu2H9P2hY7ChCAmKM0BSbP8P83n_o4_yb4gRynhQCwFlVzfUiaiLK6fA1jWrfHQkX5NAKmwhVvEfgKwGPgk1yJ2cmULdkcjEQFTuvBOHfxTaJq0dbav4x07vuKmldcp92PLZyQj0Ogl16tr9_XJqqjJ_U7BTyJq6-WyA
HTTPR: https://www.demobootstrap.com/about/contact
DATE: 20211015110636
IP: 201.191.195.131
CONTACT_TYPE: contact_form
Important Note: Click here to access the Full List of Variables Per Webhook.
