
Emails » Send Newsletter » New Email Newsletter
Link: https://support.brilliantdirectories.com/support/solutions/articles/12000004622
Smart ListsEmails >> Newsletter OverviewThis article explains how to create, edit, preview, schedule, and send a new email newsletter campaign from the admin area.
Email newsletters can be created from the Emails >> Send Newsletter section of the admin.
Where to Create a New Newsletter Campaign
- Go to Emails >> Send Newsletter.
- Click the New Email Newsletter button.
A popup will open where the newsletter campaign can be named and a starting option can be selected.
For more information about these options, please see the following article:
Edit the Newsletter Draft
After the newsletter is named and the starting option is selected, the newsletter will open in draft mode.
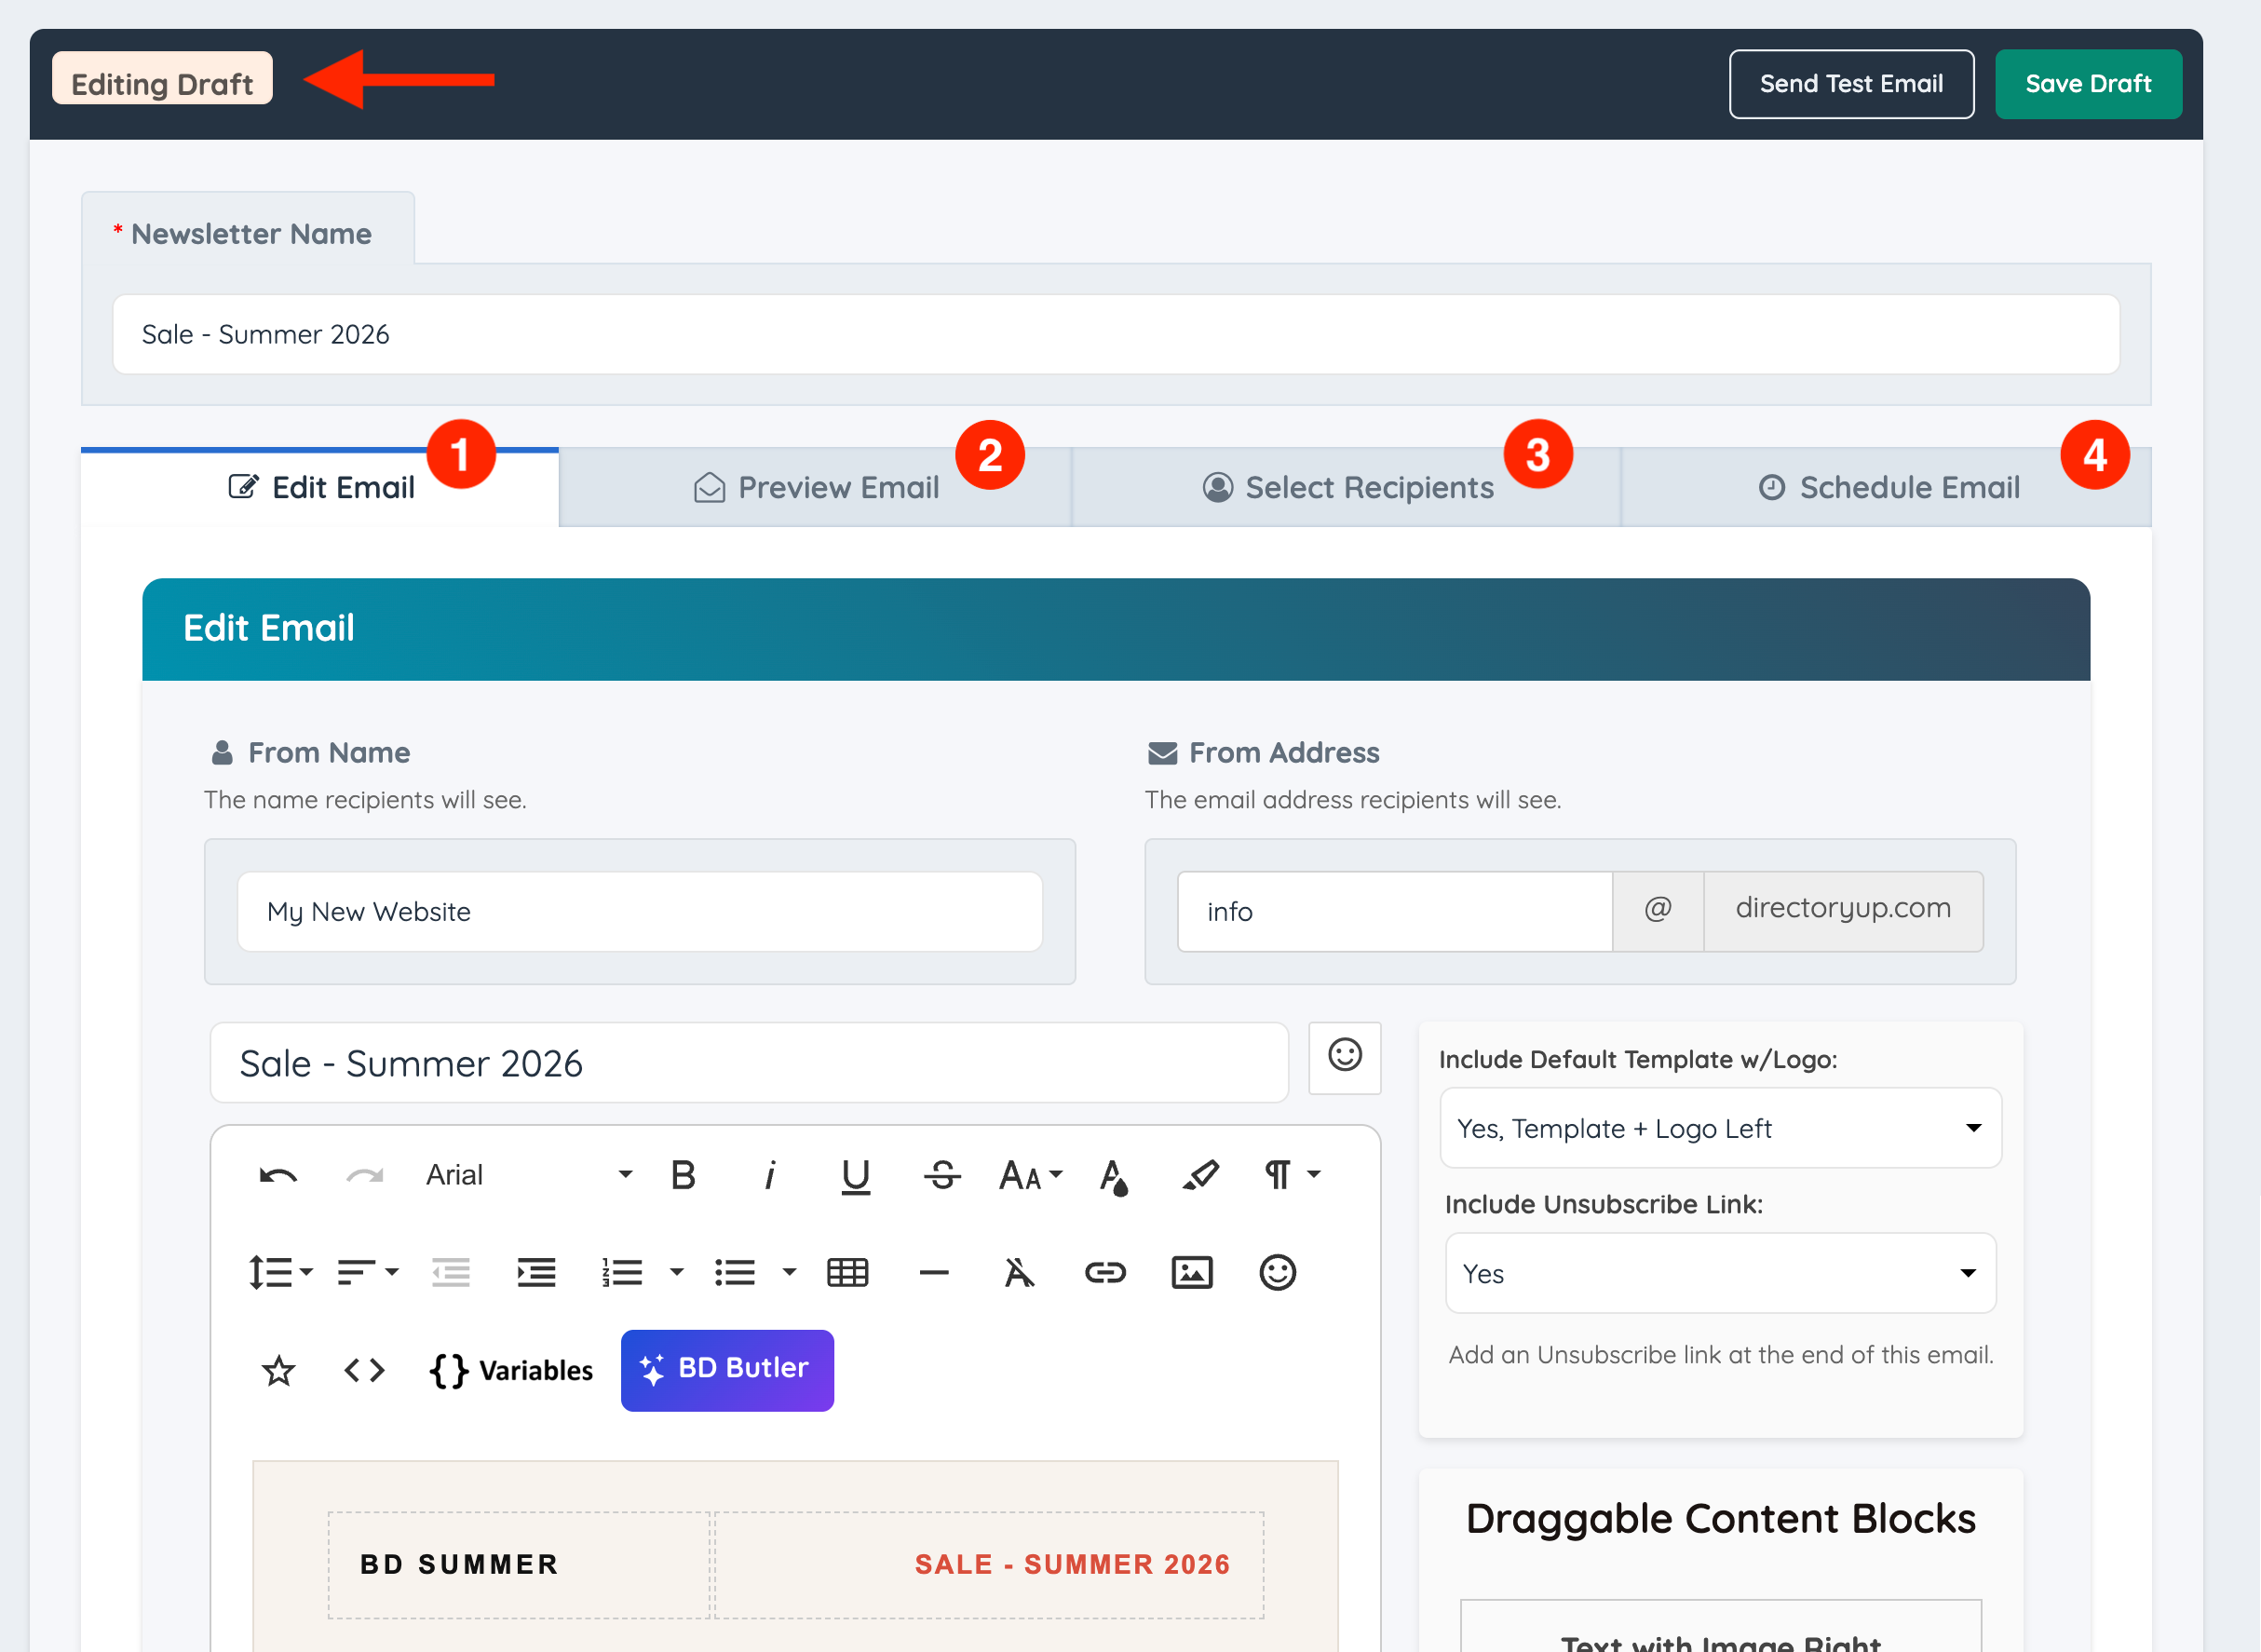
The newsletter editor includes four main sections:
- Edit Email
- Preview Email
- Select Recipients
- Schedule Email
Edit Email
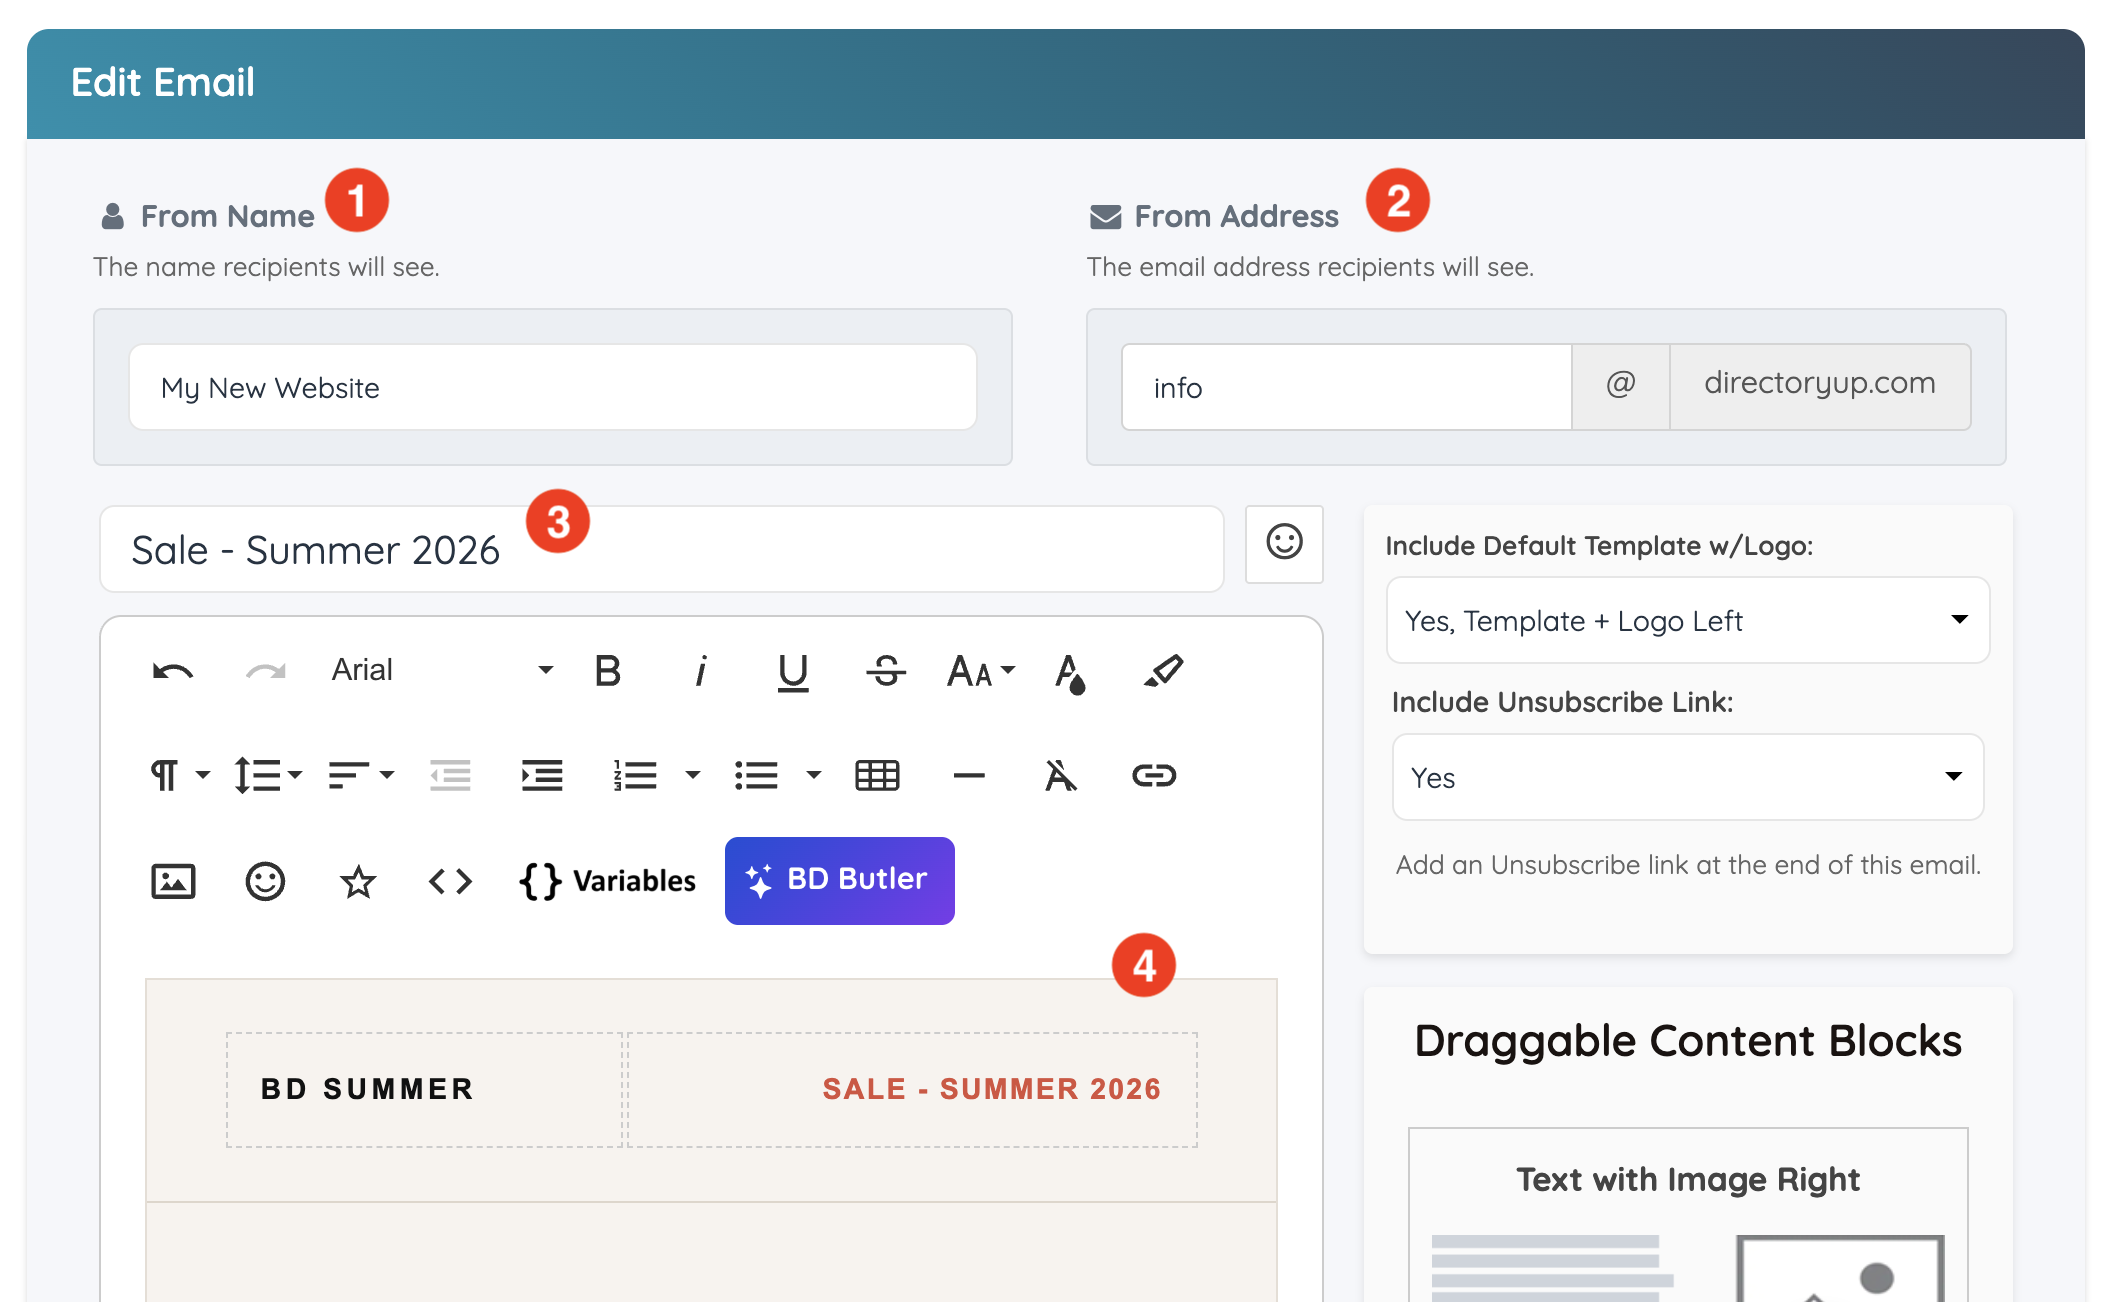
The Edit Email section is where the main newsletter details and content are managed.
The following fields can be edited:
- From Name: The name recipients will see when the email arrives.
- From Address: The email address recipients will see when the email arrives.
- Template Subject Line: The subject line of the newsletter.
- Template Content: The main body content of the newsletter.
Sidebar Settings
The sidebar includes additional newsletter settings and content tools.
- Include Default Template w/Logo: Controls whether the email template logo from Brand Images is included in the newsletter.
- Include Unsubscribe Link: Controls whether an unsubscribe link is included in the newsletter.
- Premium Content Blocks: Allows content blocks to be dragged and dropped into the newsletter content.
- Email Variables: Displays available variables that can be used to personalize the newsletter with member details, website information, URLs, company names, and other dynamic values.
Preview Email
The Preview Email section allows the newsletter to be reviewed before it is sent. If the newsletter includes member-related variables, such as a member’s first name, an existing member ID can be entered to preview how the dynamic information will display for that member.
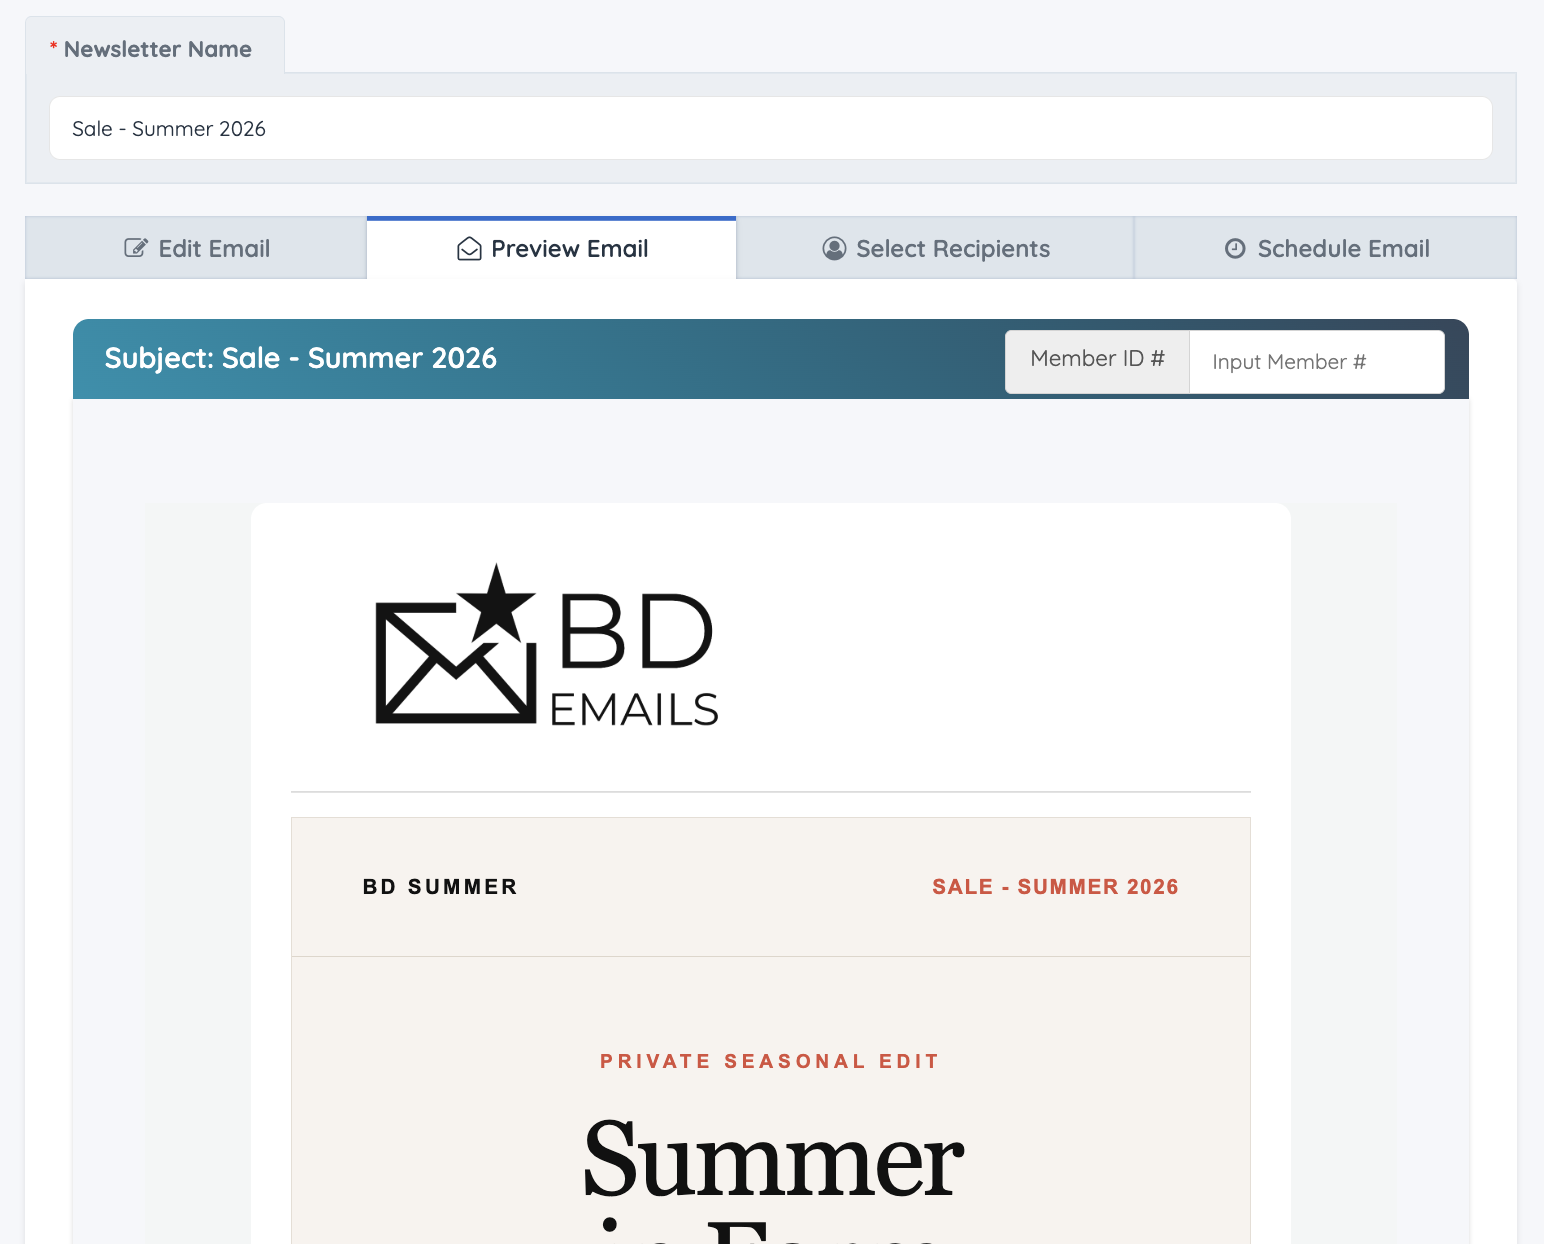
The member ID can also be adjusted using the up and down arrows in the preview area.
Select Recipients
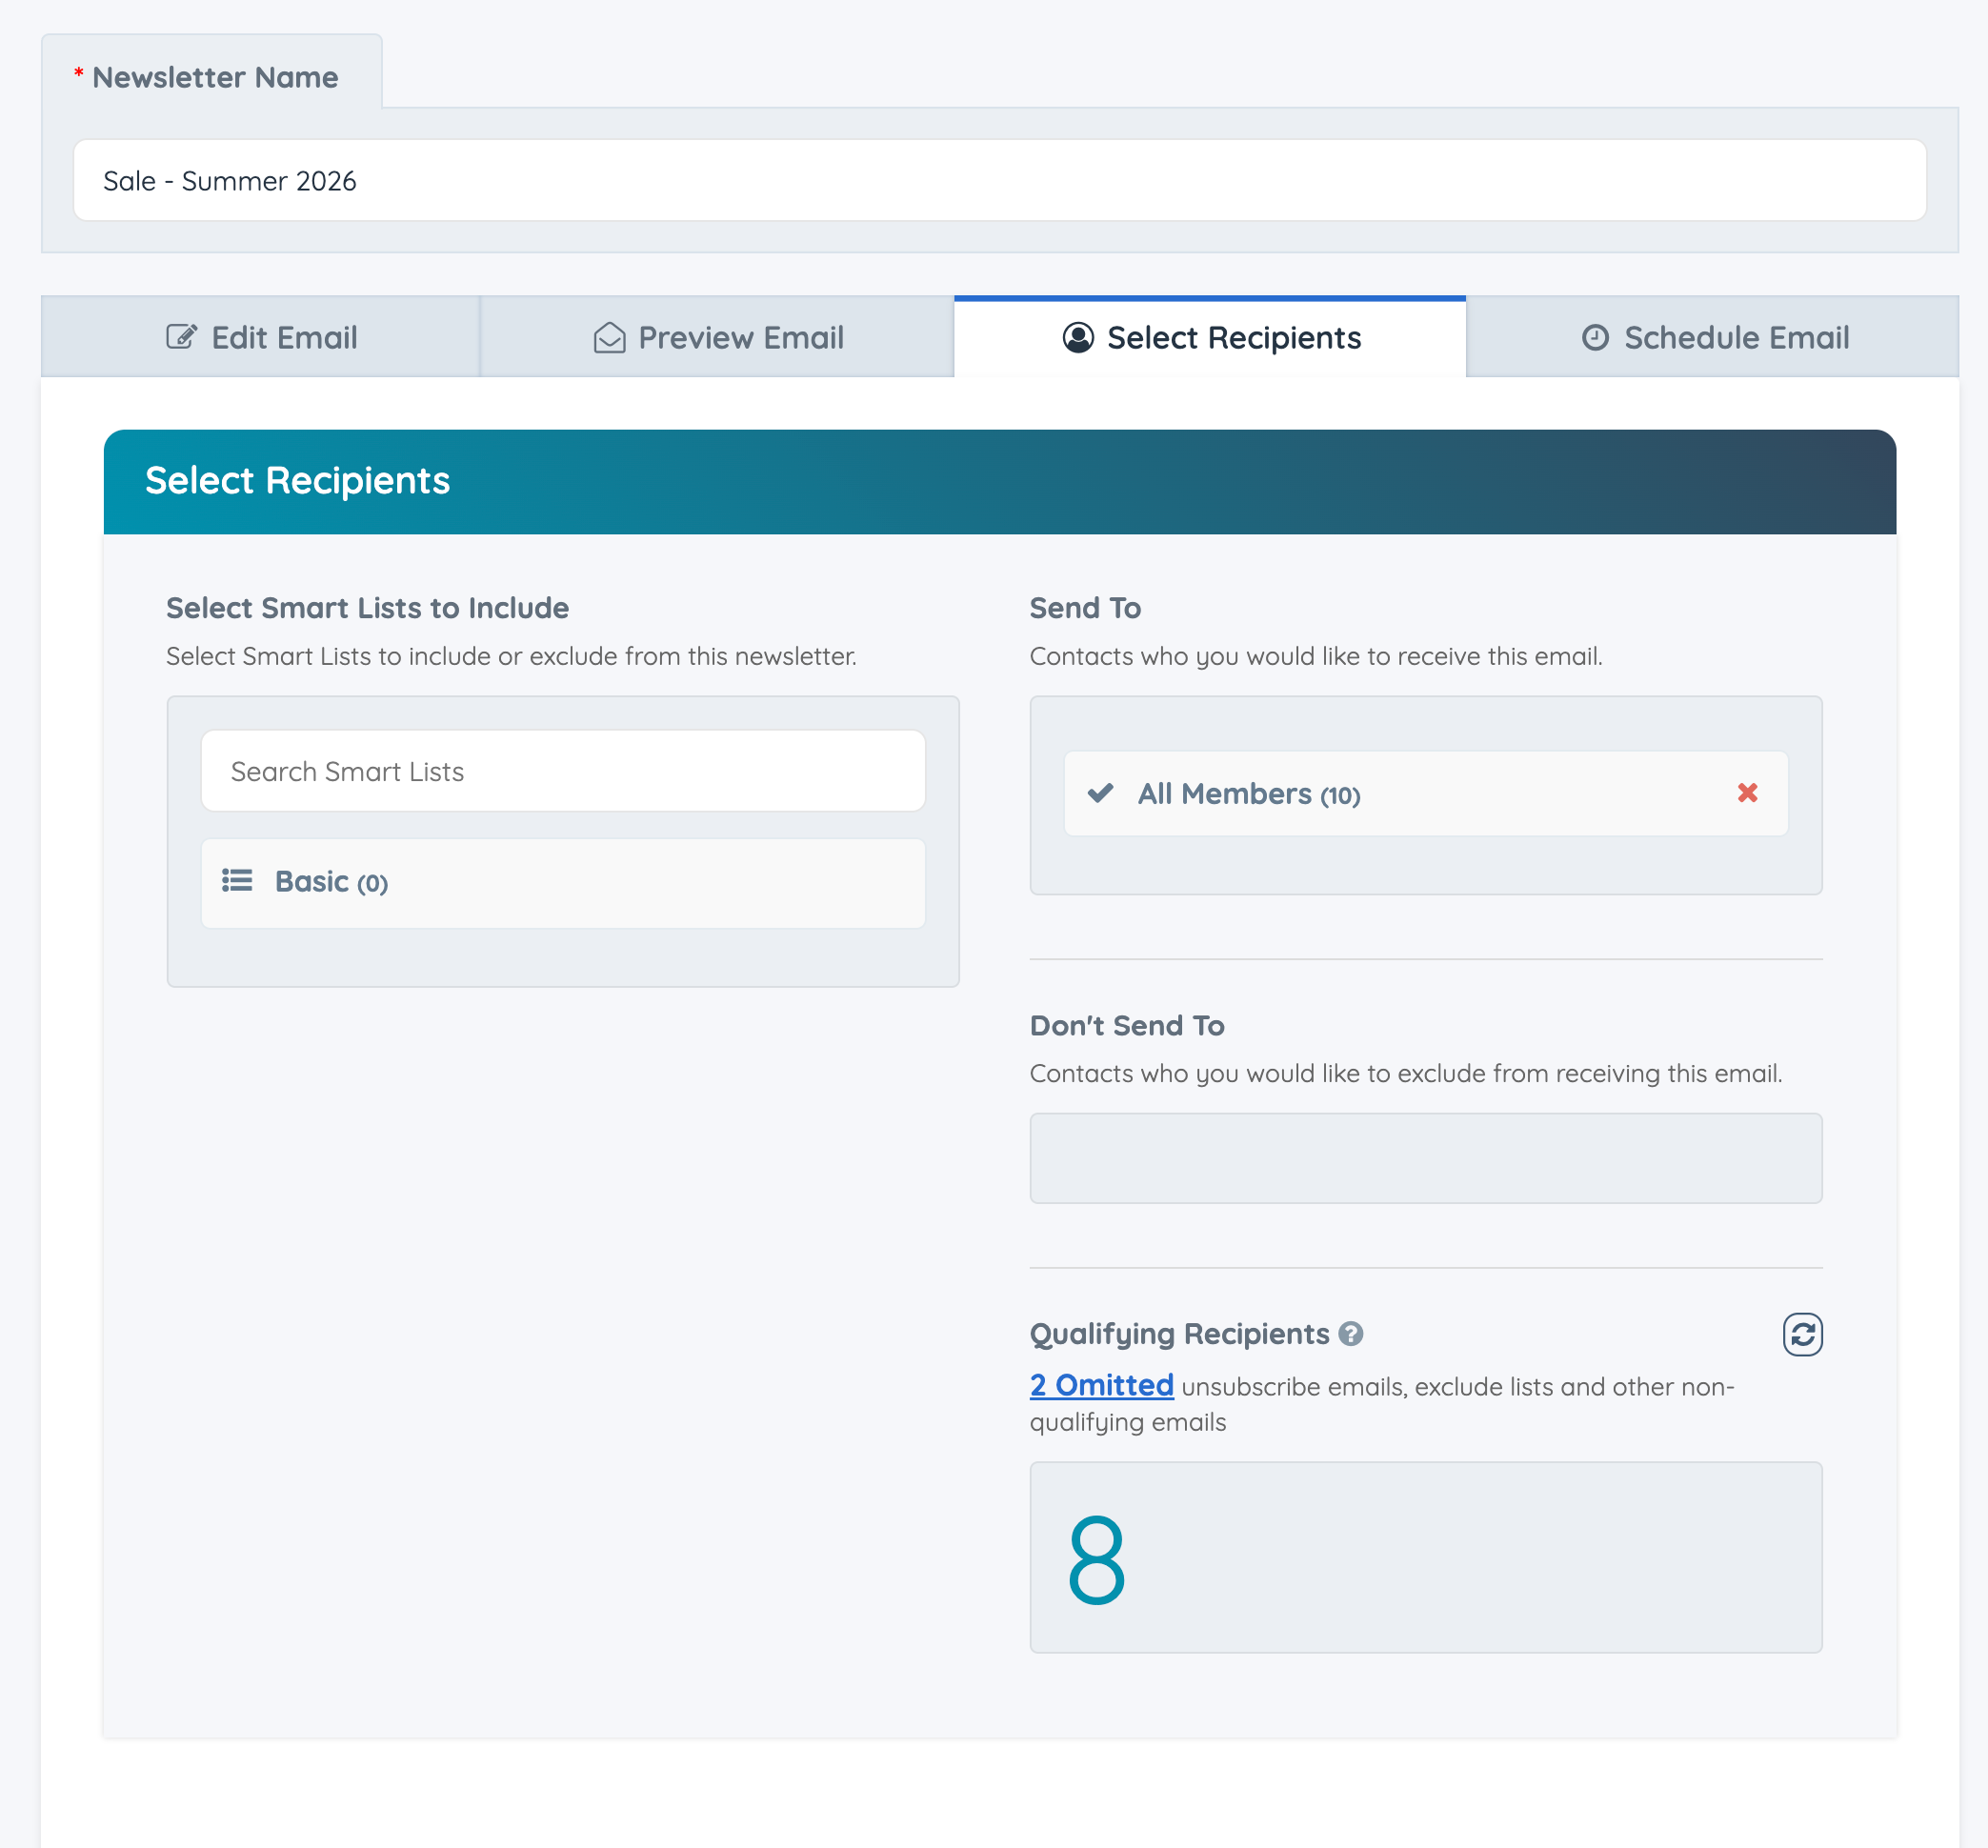
The Select Recipients section controls which members will receive the newsletter.
Smart Lists can be included or excluded to build the final recipient list. The total number of selected recipients will display in this section.
Include and Exclude Smart Lists
For example, if the newsletter should be sent to all members except members located in the United States and members on membership plan ID #3, Smart Lists can be used to create this recipient group.
For more information about Smart Lists, please see the following article:
Note: Same-domain emails are included in newsletters. If certain same-domain emails should be excluded, create a Smart List for those members and add it as an excluded Smart List.
Schedule Email
The Schedule Email section controls when the newsletter campaign will be sent. This section also displays the current monthly email limit for the website.
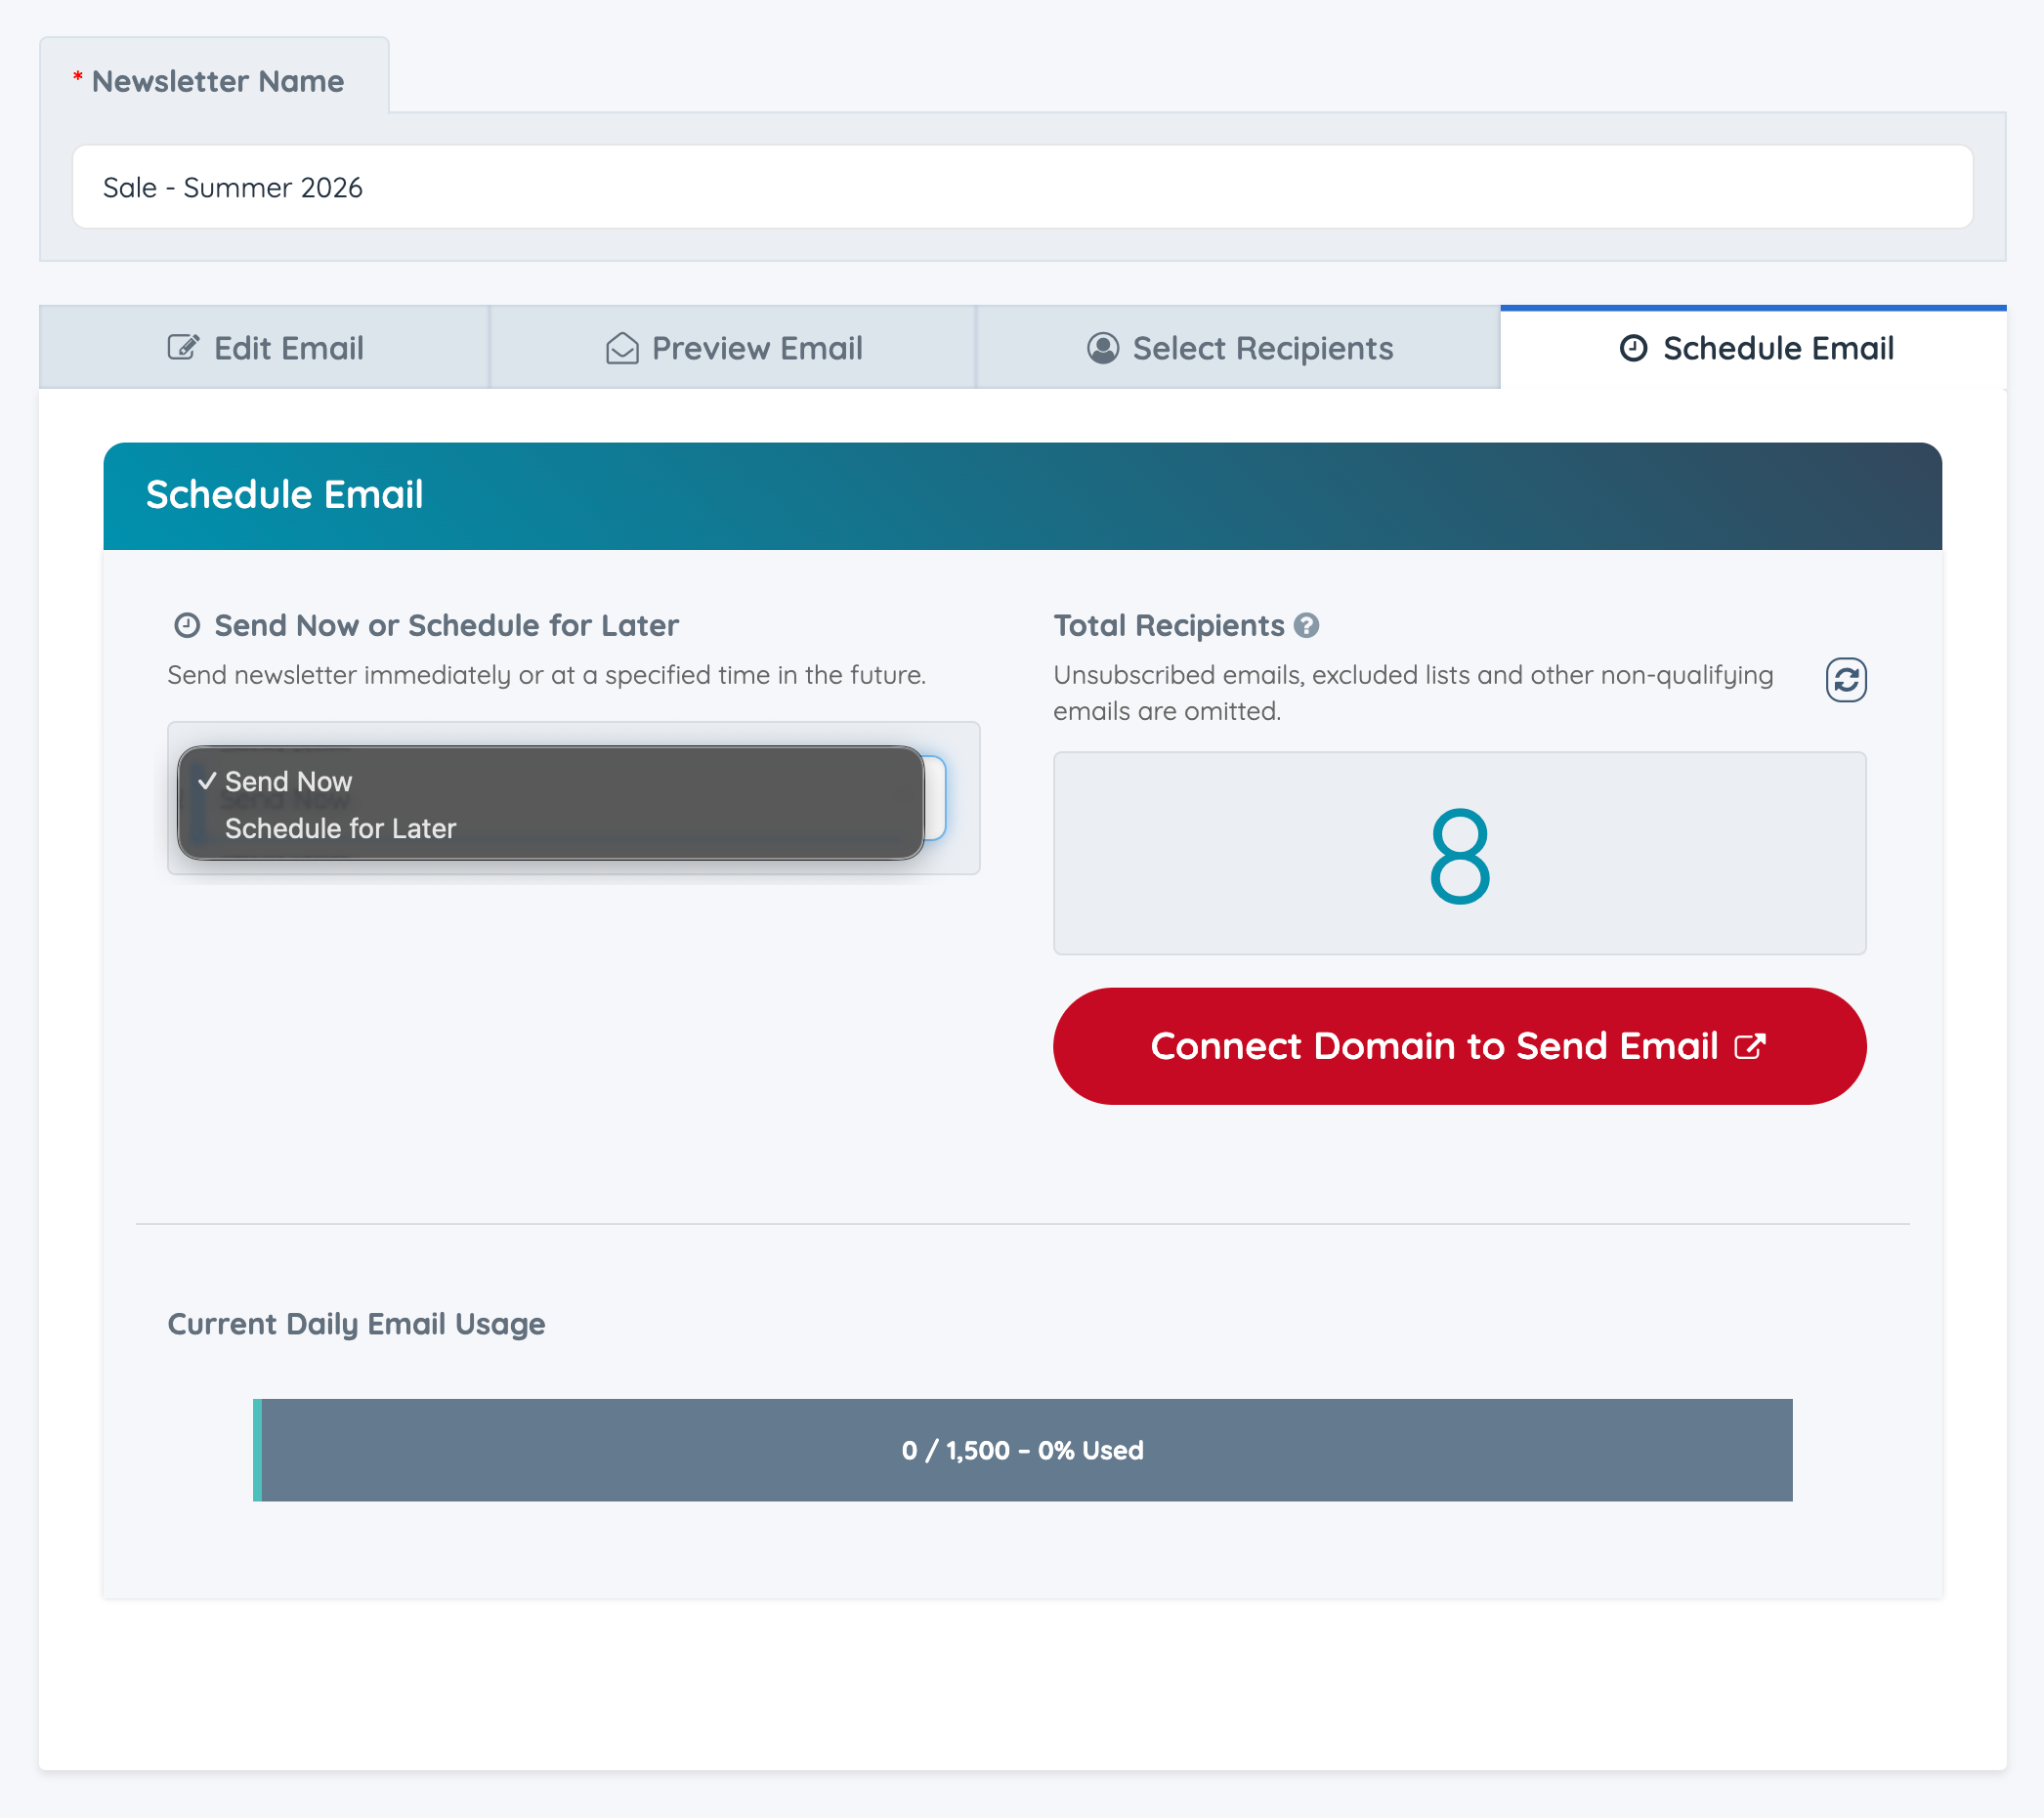
Send the Newsletter Immediately
- Go to the Schedule Email section.
- Select Send Now.
- Click Click to Send Email Now.
- Confirm the send action when prompted.
After confirming, the system will begin sending the newsletter campaign within approximately 2 minutes. Campaign statistics will begin to display once the sending process starts.
Schedule the Newsletter for Later
- Go to the Schedule Email section.
- Select Schedule for Later.
- Choose the date and time the newsletter should be sent.
- Click Click to Schedule Email.
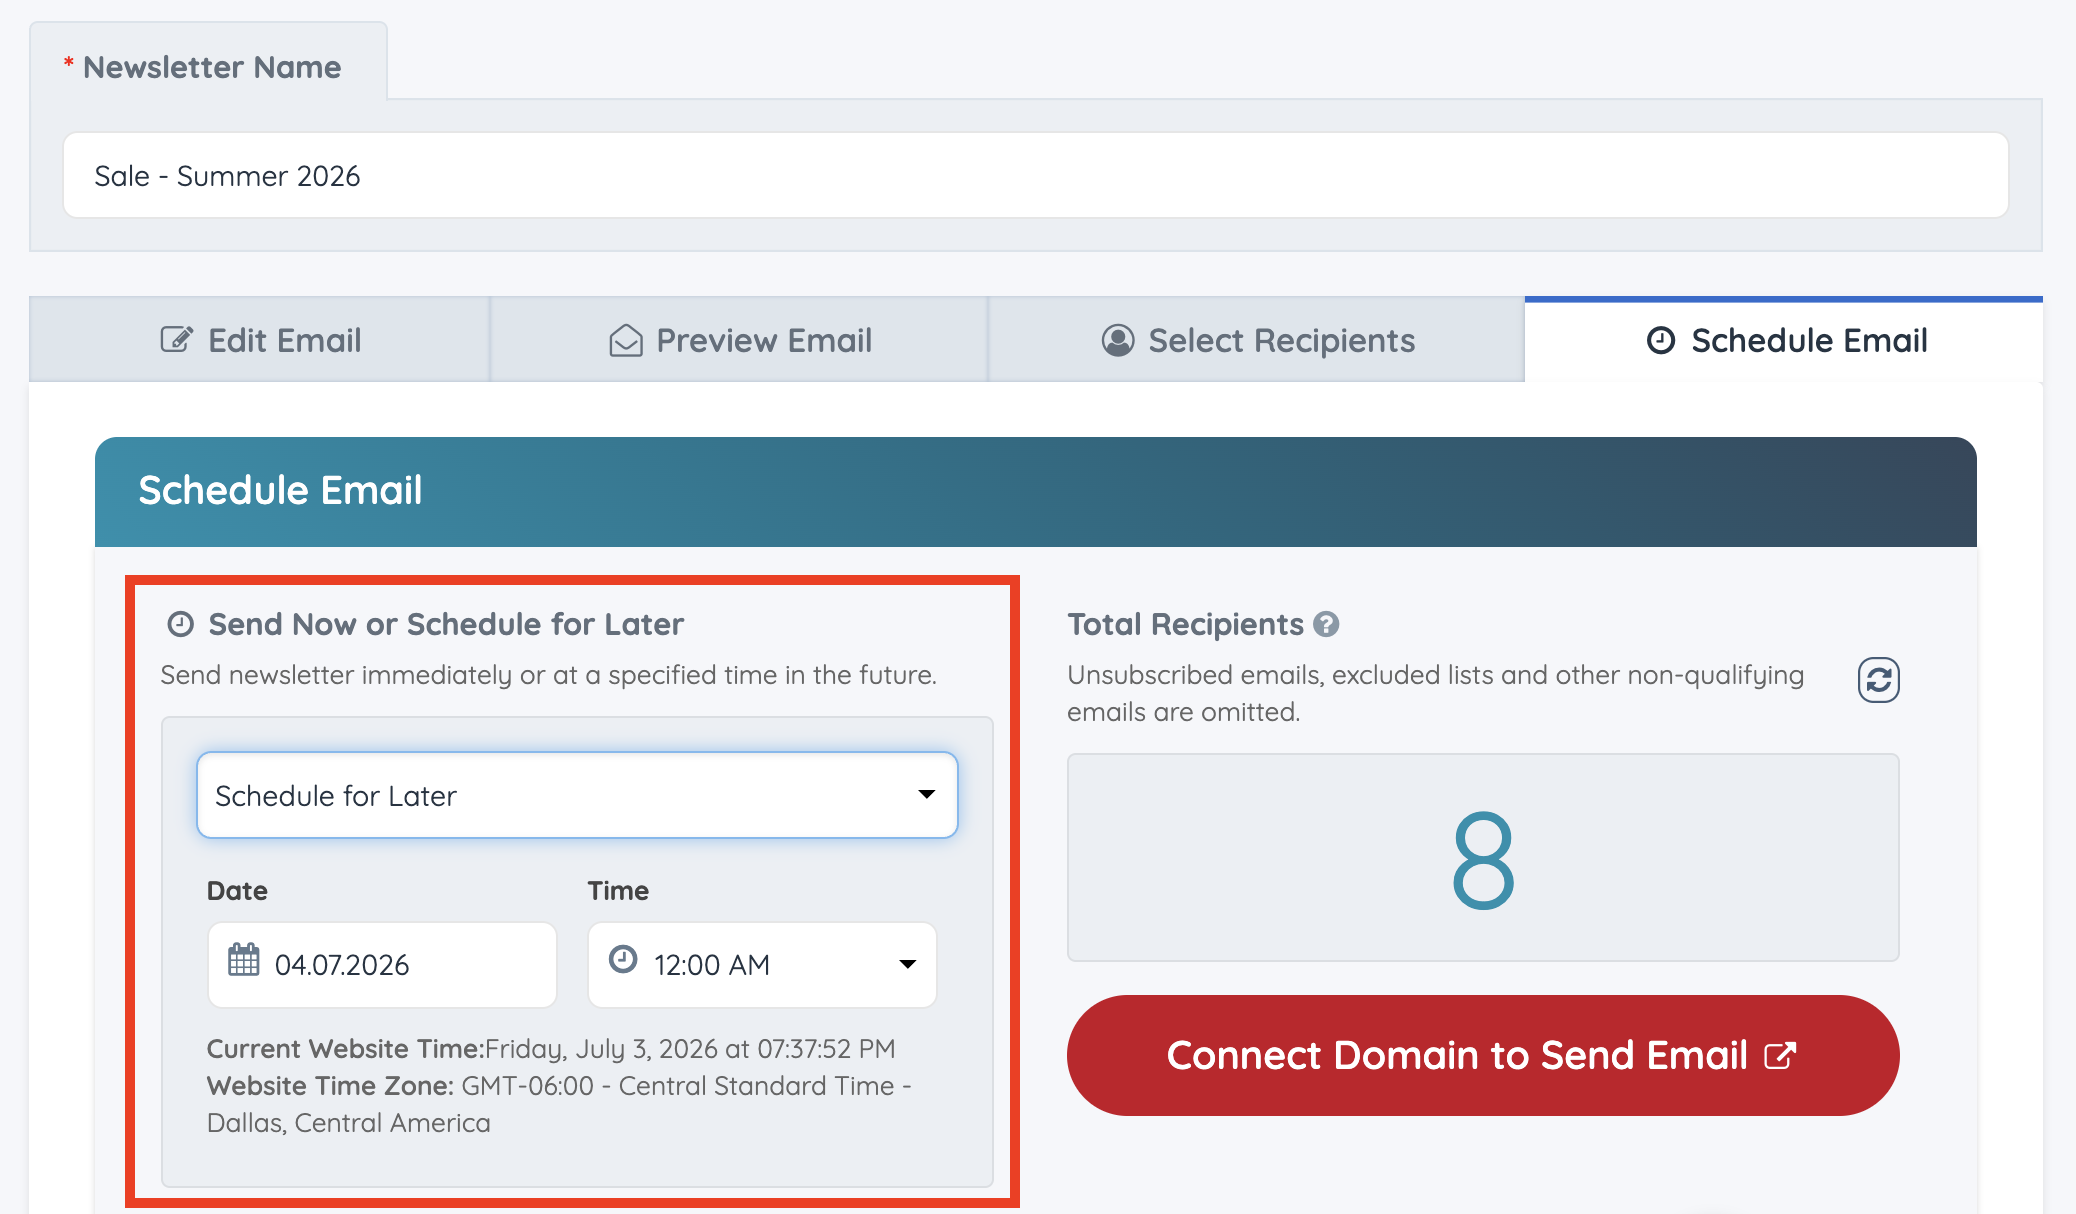
Once scheduled, the newsletter campaign will appear under Emails >> Send Newsletter with a Draft status until it is sent.
For more information about newsletter statuses and campaign statistics, please see the following article:
Important Notes
- If the daily email sending limit has already been reached, the system will not schedule a new newsletter for a future day because the current day’s sending limit is still being applied.
- If the monthly email sending limit has been reached, the limit can be increased by clicking the Increase Limit Now link in the newsletter scheduling area.
- It is recommended to preview the newsletter and confirm the recipient list before sending or scheduling the campaign.
