
Emails » Compose Emails
Link: https://support.brilliantdirectories.com/support/solutions/articles/12000076567
The Compose Email page writes and sends a one-off email from the admin area to any email address. It is found under Emails » Compose Email:
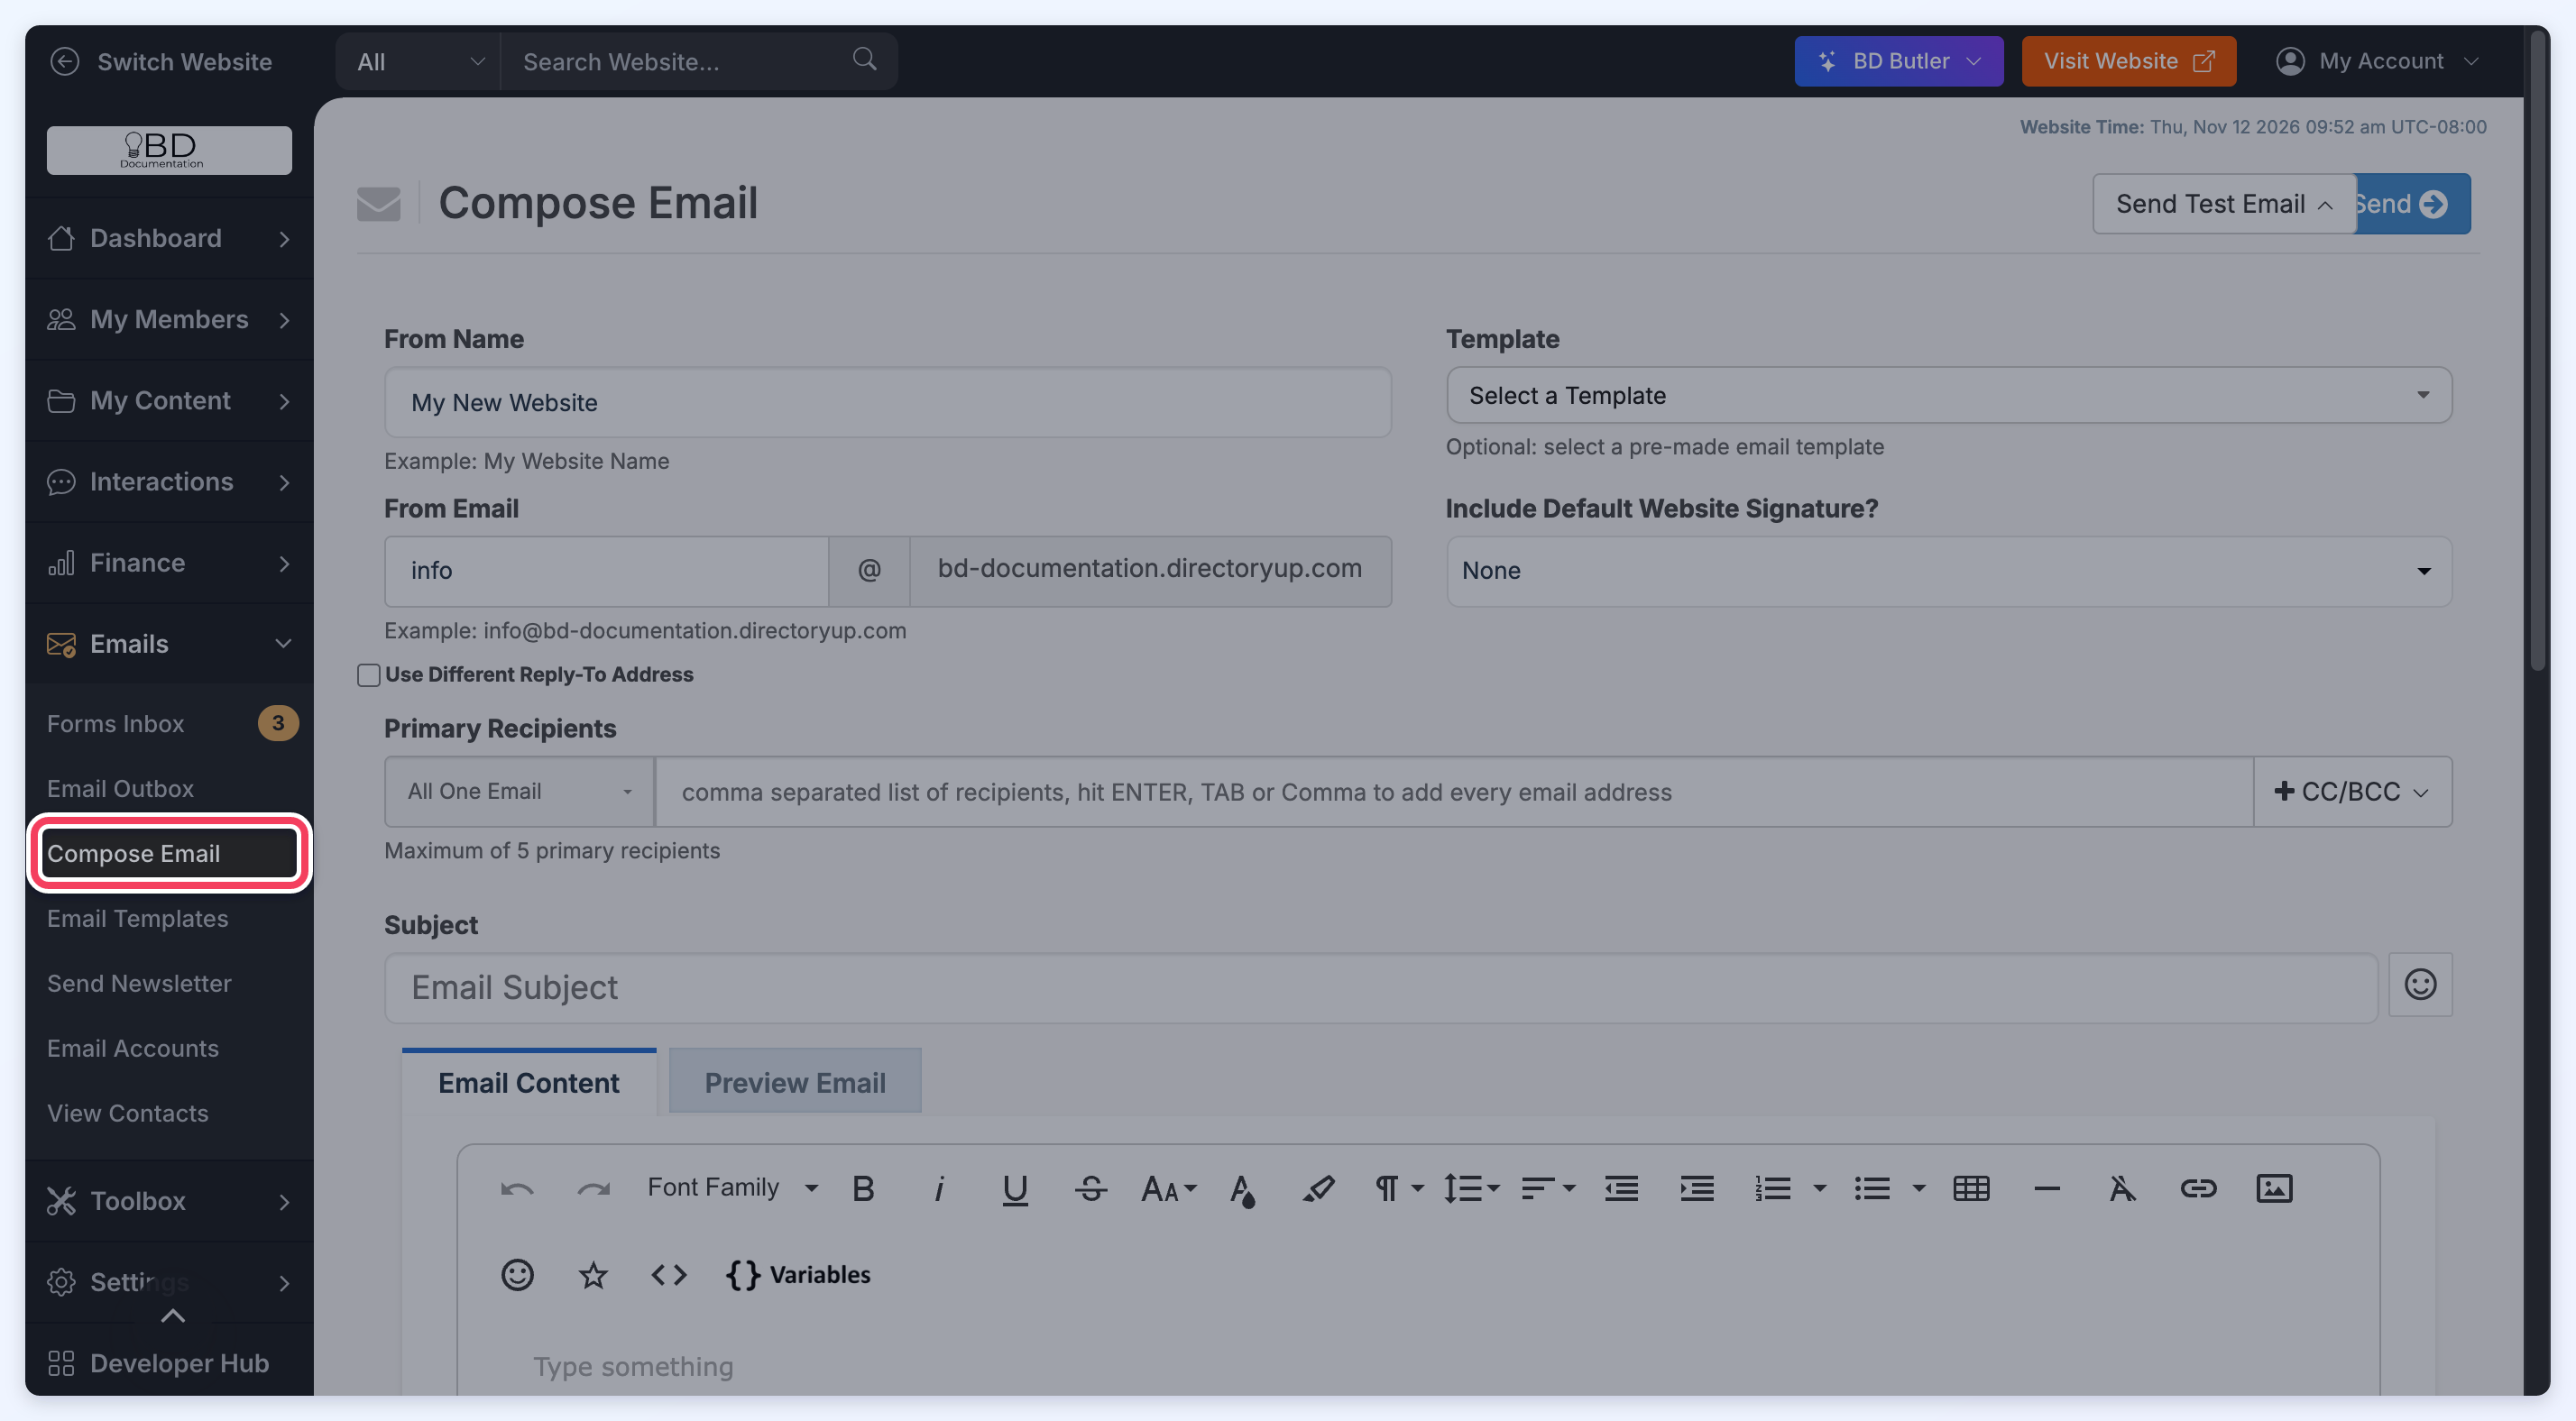
Overview of the Fields
The page shows the fields and options for writing and sending a manual email through the system. The numbers in the screenshots match the sections below.
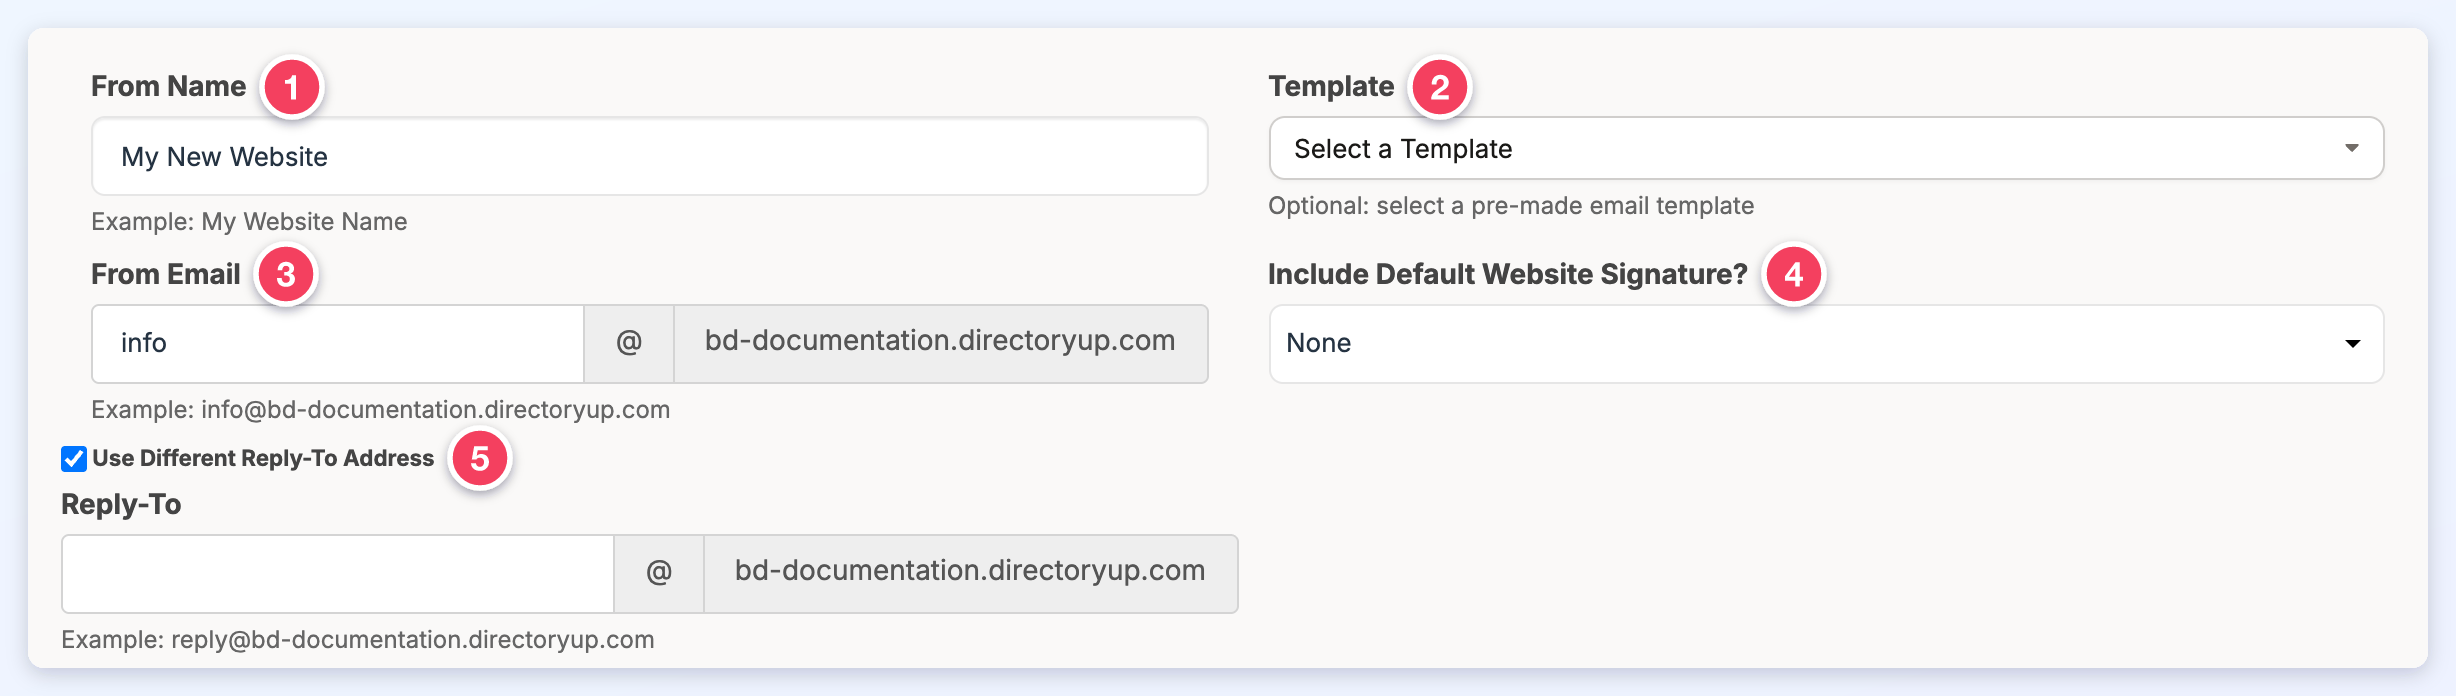
1. From Name
The website name is filled in by default. It can be edited.
2. Template
This optional dropdown lists the custom and default email templates. Selecting a template fills in the subject and email content.
3. From Email
The website's email address is filled in by default. The part before the @ can be edited; the domain is the website's domain.
4. Include Default Website Signature?
This dropdown adds a signature to the end of the email: None, Website Signature (the default Website Signature) or My Admin Signature (the signature of the admin sending the email).
5. Use Different Reply-To Address
Tick this box to send replies to a different address than the From Email. A Reply-To field appears for the address.
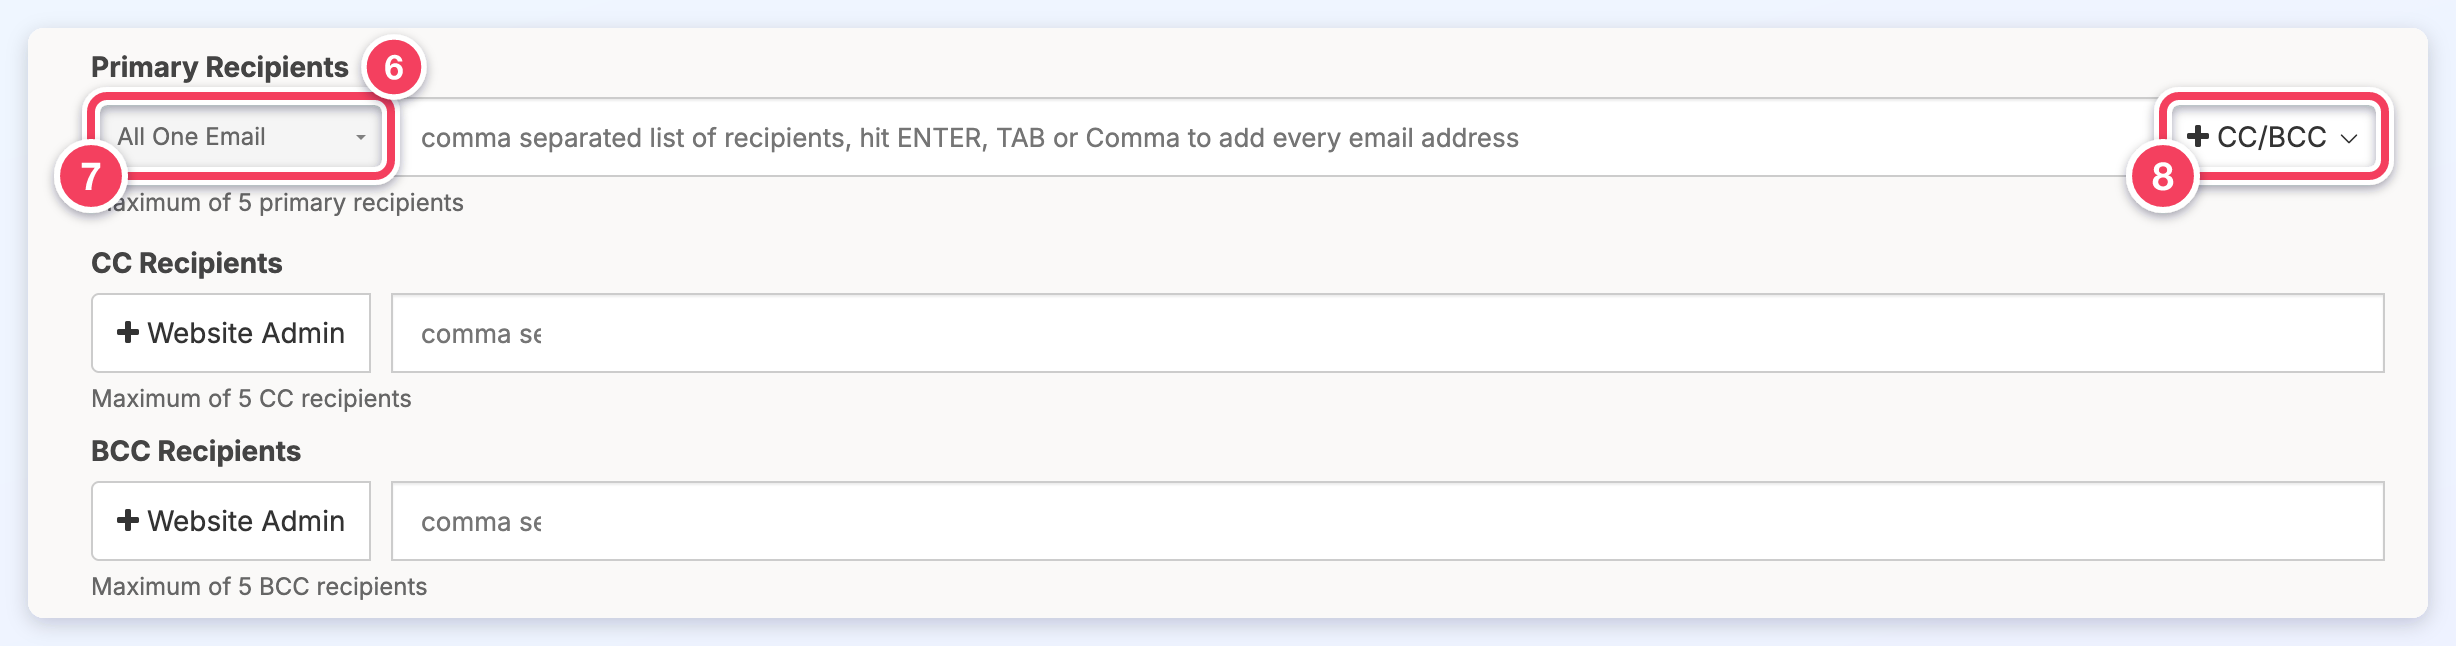
6. Primary Recipients
Type the email address of each recipient, then press ENTER, TAB or a comma to add it to the field. Up to 5 primary recipients can be added.
7. All One Email or One Per Recipient
This dropdown sets how the email goes to the primary recipients:
- All One Email: One email is sent with all of the addresses listed as recipients, so each recipient can see the others.
- One Per Recipient: A separate email is sent to each address, with only that address as the recipient.
8. CC/BCC
Click CC/BCC and choose CC or BCC to add the CC Recipients and BCC Recipients fields. Up to 5 addresses can be added to each. The Website Admin button next to each field adds the From Email address to that field, so the website gets a copy.

9. Subject
The subject line of the email.
10. Email Content and Preview Email
Write the body of the email on the Email Content tab. Click the Preview Email tab to see how the email will look before sending it.

11. Send Test Email
Click Send Test Email and choose an admin of the site from the list to send the email to that admin as a test.
12. Send
Click Send to send the email to every recipient. The same Send button, with a Cancel button, is also at the bottom of the page. Each email sent is listed in the Email Outbox with the Admin Sent label.
When the Email Sending Limit Is Reached
Every website has an email sending limit, for example 1,500 emails a day. When Send is clicked, the site's remaining allowance is checked first. If the limit has been used up, or fewer emails are left than the number of To, CC and BCC addresses on the email, the email is not sent to anyone. A red Email Not Sent: Sending Limit Reached message appears at the top of the form instead, and the recipients, subject and content stay in place.
The message gives the limit and what happened, for example:
- "This site has used its daily email sending limit of 1,500 emails, so this email was not sent to anyone."
- "This email goes to 3 addresses, but only 2 of this site's daily email sending limit of 1,500 are left, so it was not sent to anyone."
Both end with "Increase the email limit or wait for it to reset, then send again." To send the email:
- Increase the limit with an Email Limit Boost, which applies immediately, then click Send again.
- Or wait for the limit to reset, then click Send again.
- When only a few emails are left, removing addresses so the email goes to fewer recipients also lets it send.
This check applies to websites that send through the platform's email service. A website that sends through its own SendGrid account is not checked here.
