
How To Import Members Via CSV File
Link: https://support.brilliantdirectories.com/support/solutions/articles/5000558475
Overview
Importing members can be a bit of a tricky process due to the fact that all of the data entered must be simple, clean text (no formatting, line breaks, or other things that can break a CSV file), and the data must all be in the proper columns in order to import properly.
To start, here are some files that will help with understanding how the import process works:
- Import template with ALL fields and explanations of each field
- Import template with only the simple / basic required fields
- Example of a completed import file with ALL fields
- Example of a completed simple / basic import file
The template and example files that have "ALL fields" included show all of the different fields that can be filled out for a member during import.
However, not all imports will need to make use of all of these fields, so we also included a simple / basic version of each that has the most commonly used fields. Importing custom variables is also possible.
Downloading the File
- Download one of the CSV import templates shown above.
In row 1 of this file, one will see all of the headers required to import the data. Make sure not to edit the spelling of any of these headers, as doing so will cause the import to fail. In rows 2 to 4 of this file, one will see an explanation of what kind of text should be added into each column (in the listing_type column, rows 2 and 3 show its only two values, Company and Individual).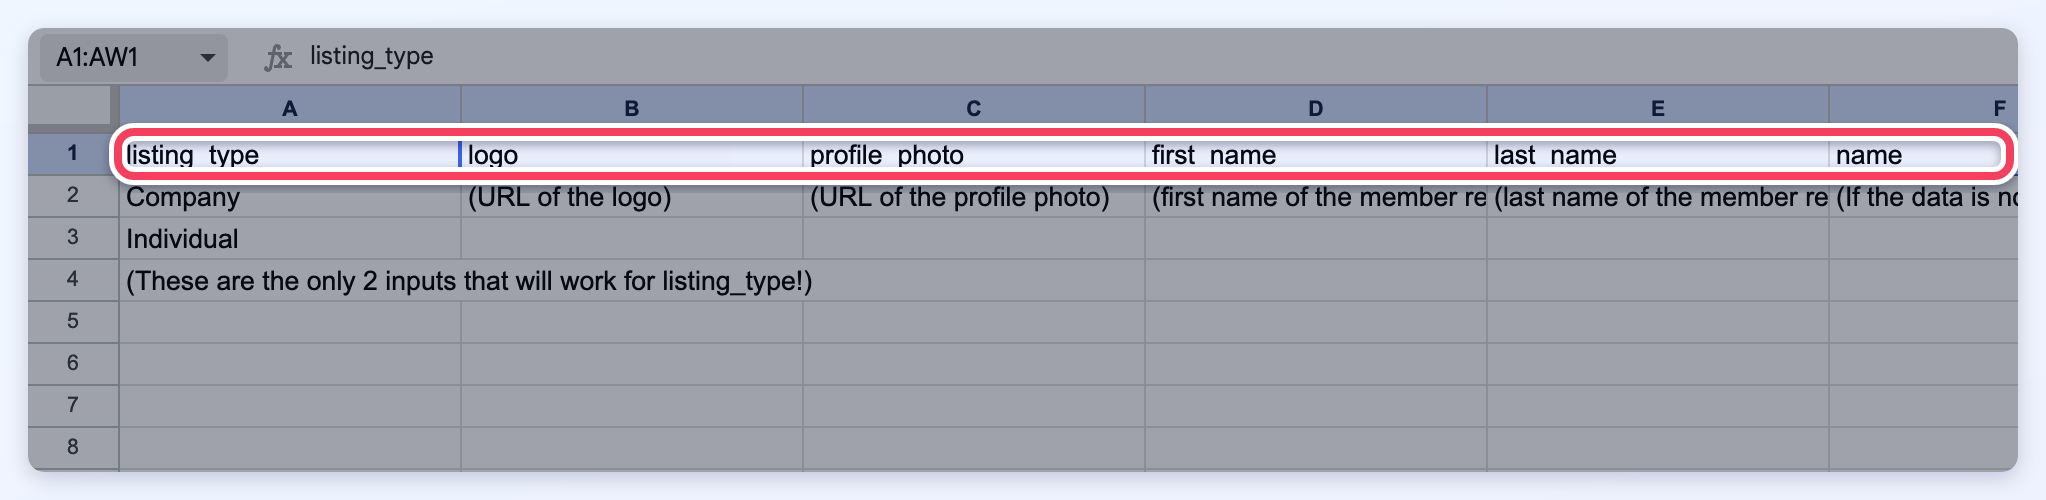
- Once the required content for each column is understood, delete rows 2 to 4 from the spreadsheet (if they are not removed, the explanations will be imported as members of the site!)
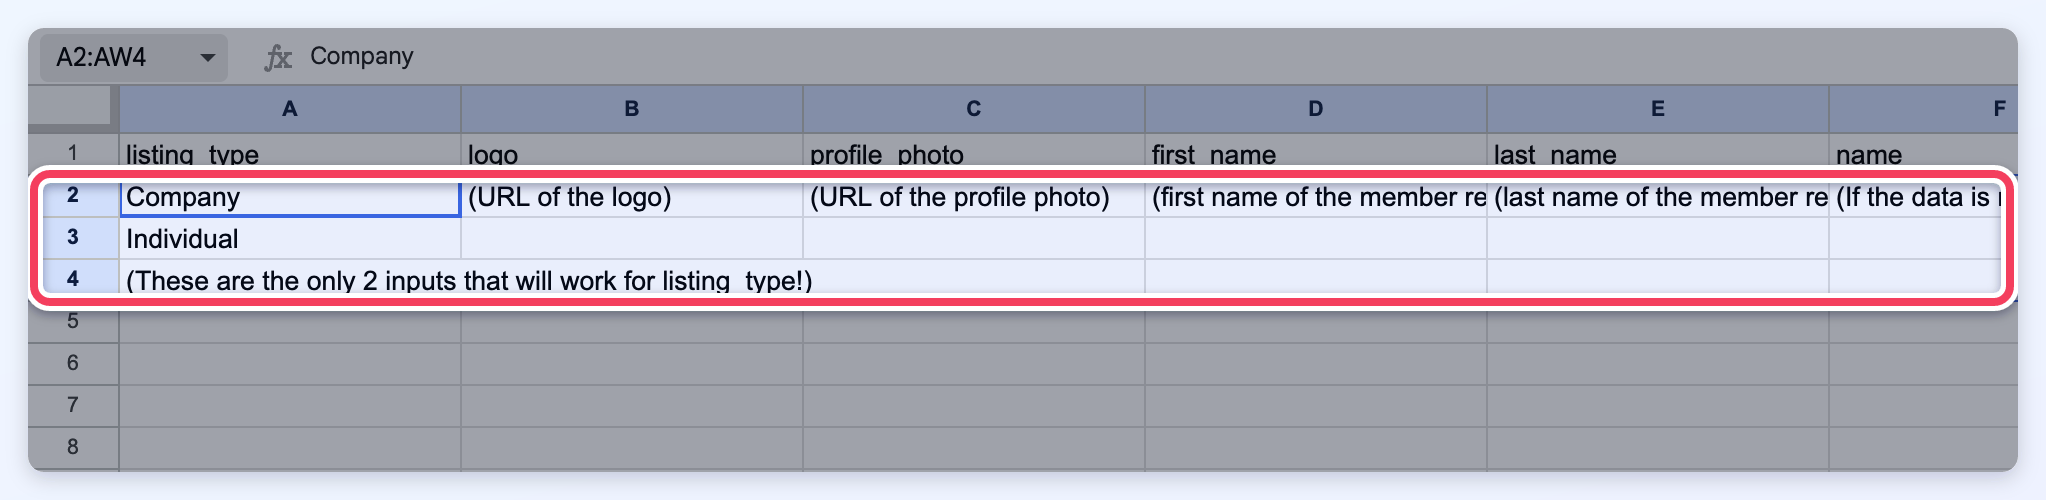
- Enter all of the member data into the correct columns
- Delete any empty columns from the spreadsheet - for example, if no data is entered in the Twitter column, that column can be deleted from the spreadsheet completely. This will reduce the size of the import file and speed up the import process.
Add Categories to a CSV Import Spreadsheet
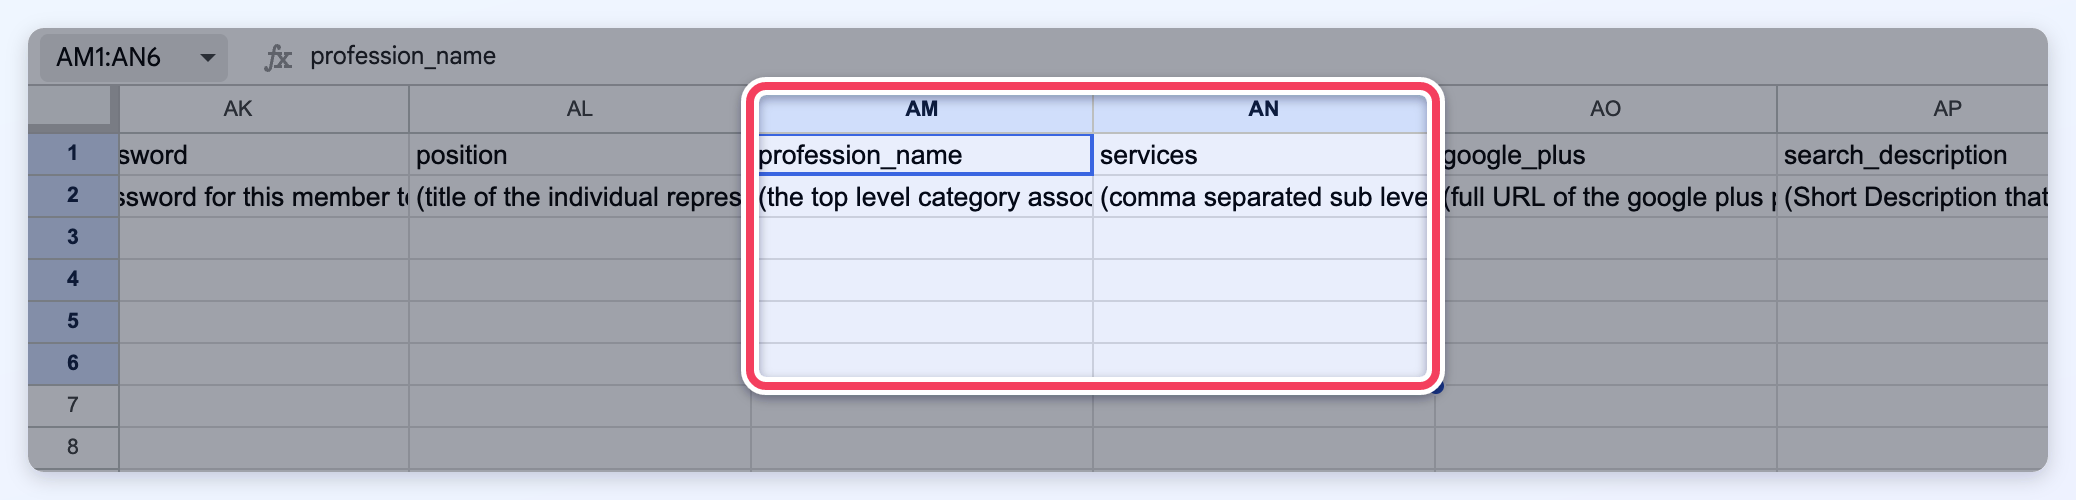
Categories go in 2 columns near the right side of the spreadsheet (columns AM and AN in the template with ALL fields) - "profession_name" and "services":
Top Categories
Under "profession_name" put the Top Level Category for the listing to be imported into. For example, if we were doing this for the Local Dessert Shops Directory then I could add “Ice Cream Shop” in this column.
The Membership Plan Settings also allow to pre-assign the Top level category to all profiles in that membership plan. For more information on how to do this, refer to step 2 in the following article.
Sub Categories + Sub-Sub Categories
In the "services" column, add a comma-separated list of Sub Level Categories and Sub-Sub Level Categories one would like the listing added into.
For example, for the listing added into the Top Level Category “Ice Cream Shop”, one could add the Sub Level Categories "Ice Cream,Ice Cream Cake,Ice Cream Cupcake" (since these are all Sub Level Categories of “Ice Cream Shop” that apply to this listing). If one would like a listing imported into ALL Sub Level Categories under the Top Level Category it is being imported into (as designated in the profession_name column), then one could simply put "all" under the services column.
If there are several sub or sub-sub-categories with the same name, it is possible to select which specific sub-category to assign the member to.
1) Specify the sub-category first followed by this sign: =>
2) Specify the sub-sub category, following this example:
sub level=>sub-sub level (Ice Cream Cake=>Vanilla Cake)
Helpful Tips
Automatically generated member URLs use the current name-formatting rules. Straight or curly apostrophes are removed, most other punctuation and spaces become hyphens, and underscores are preserved. For example, a member name of Ruby’s Clay Studio produces rubys-clay-studio in the name portion of the URL. These rules format the generated URL; the CSV file must still meet the import requirements in this article. See How To Customize The Member Profile URL Structure for the complete URL structure.
- If any columns are blank in the import file, it is always best to delete the entire column. This is also mentioned above, but is a very common issue that people run into! For example, if none of the members which are going to import have any data for the "fees" column, it is best to delete this column entirely before import.
- Some US zip codes begin with a zero or multiple zeros, which Excel and other spreadsheet programs sometimes remove automatically. Make sure all of the zip_codes are formatted as text and have all of the required 0’s at the beginning of the zipcode
- If one is entering data for the logo, profile_photo, website, twitter, facebook, linkedin, or google_plus fields, be sure to use full URLs including the http:// (EG: http://www.google.com/image.jpg)
- Make sure all listings have something entered into either the company or name field (or first_name and last_name fields) to insure that there will be a title for each listing.
- Make sure to enter either Company or Individual into the listing_type field for each listing (Entering "Company" will make the company name more prominent in the listing; entering "Individual" will make the name of the person more prominent in the listing) *Our variables are case sensitive so make sure to capitalize the first letter for these.
- Add the Top Level category for each listing into the profession_name column. Note that this must be spelled exactly the same as the category is spelled in the directory, or they will not import correctly. (See the section of this article above titled "How to Add Categories to a CSV Import Spreadsheet" for more tips)
- (OPTIONAL) Add a comma-separated list of Sub Level Categories in each listing imported into in the services column (See the section of this article above titled "How to Add Categories to a CSV Import Spreadsheet" for more tips).
- For best results, it is recommended to first create the Category Structure in your site before importing your members into these categories. For more information on how to create categories for members.
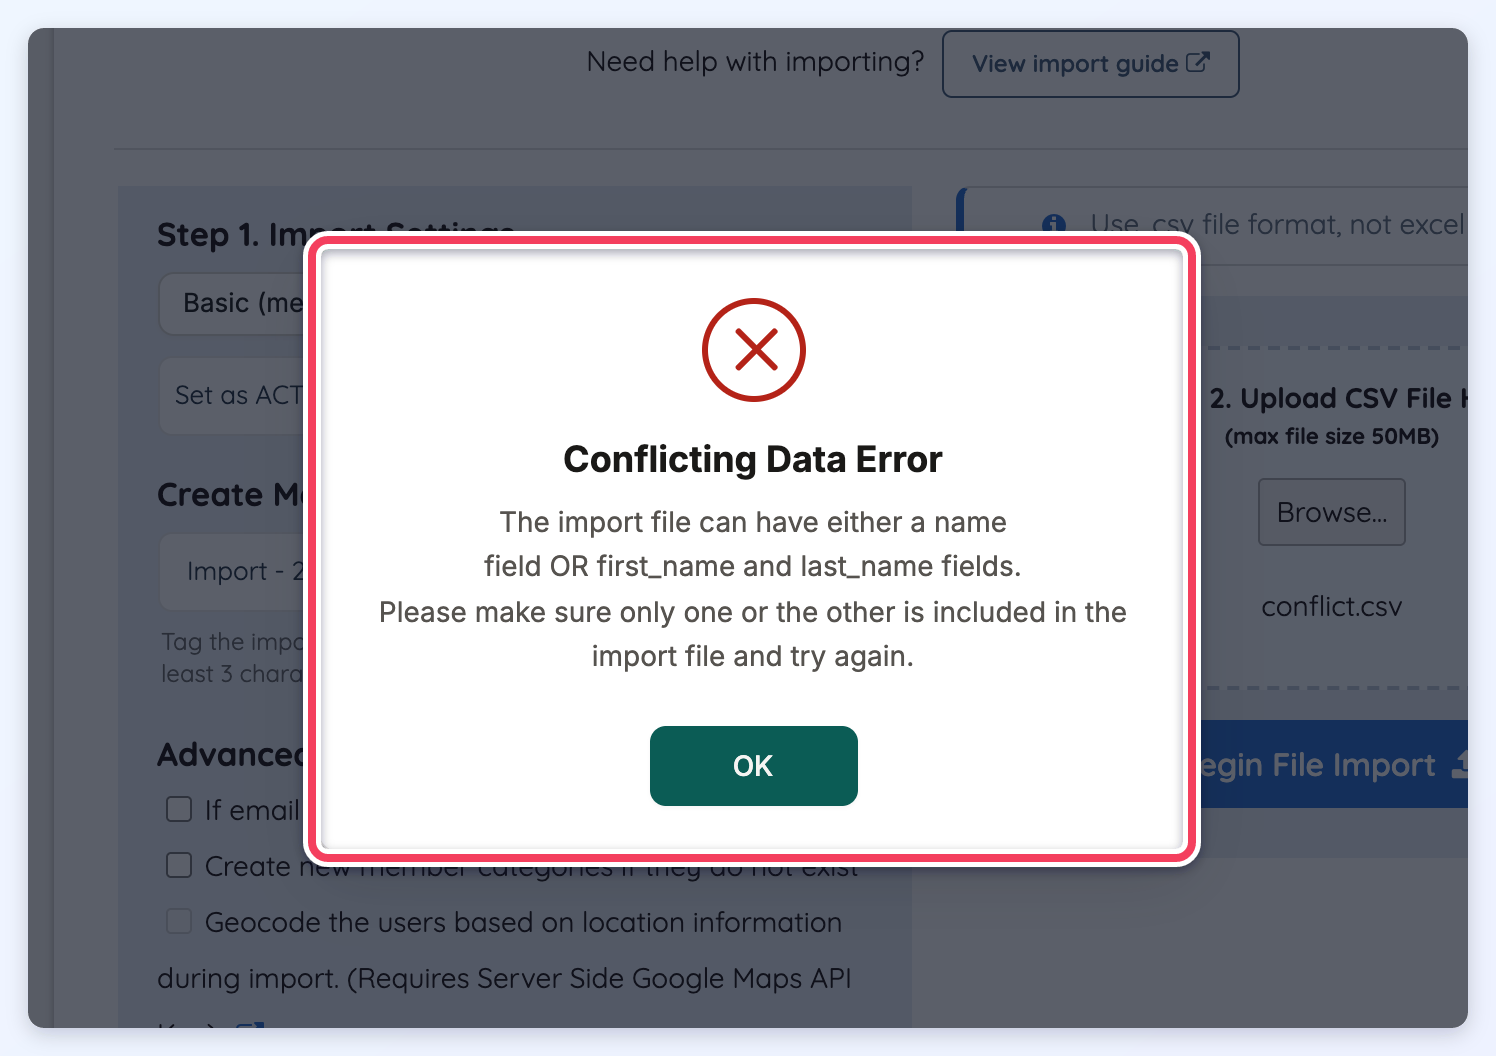
Simply make sure that only "name" or "first_name + last_name" are populated. Either one will import the name of the listing successfully.
Import Existing Subscription & Billing Information
When importing members whose subscriptions are already established, their existing subscription information can also be included in the CSV file. This is especially useful when migrating members from another platform.MPORTANT: These fields are not required for standard member imports. However, if importing subscription information, both subscription_start_date and billing_cycle must be included together.
Stripe Customer ID
Field Variable:
stripe_customer_idThis field is intended for members who already have an existing Stripe Customer ID, such as when migrating members from another platform that was previously connected to Stripe. Adding the existing Stripe Customer ID allows it to be associated with the imported member.
Accepted format:
cus_ followed by alphanumeric characters only (eg: cus_ABC123xyz789)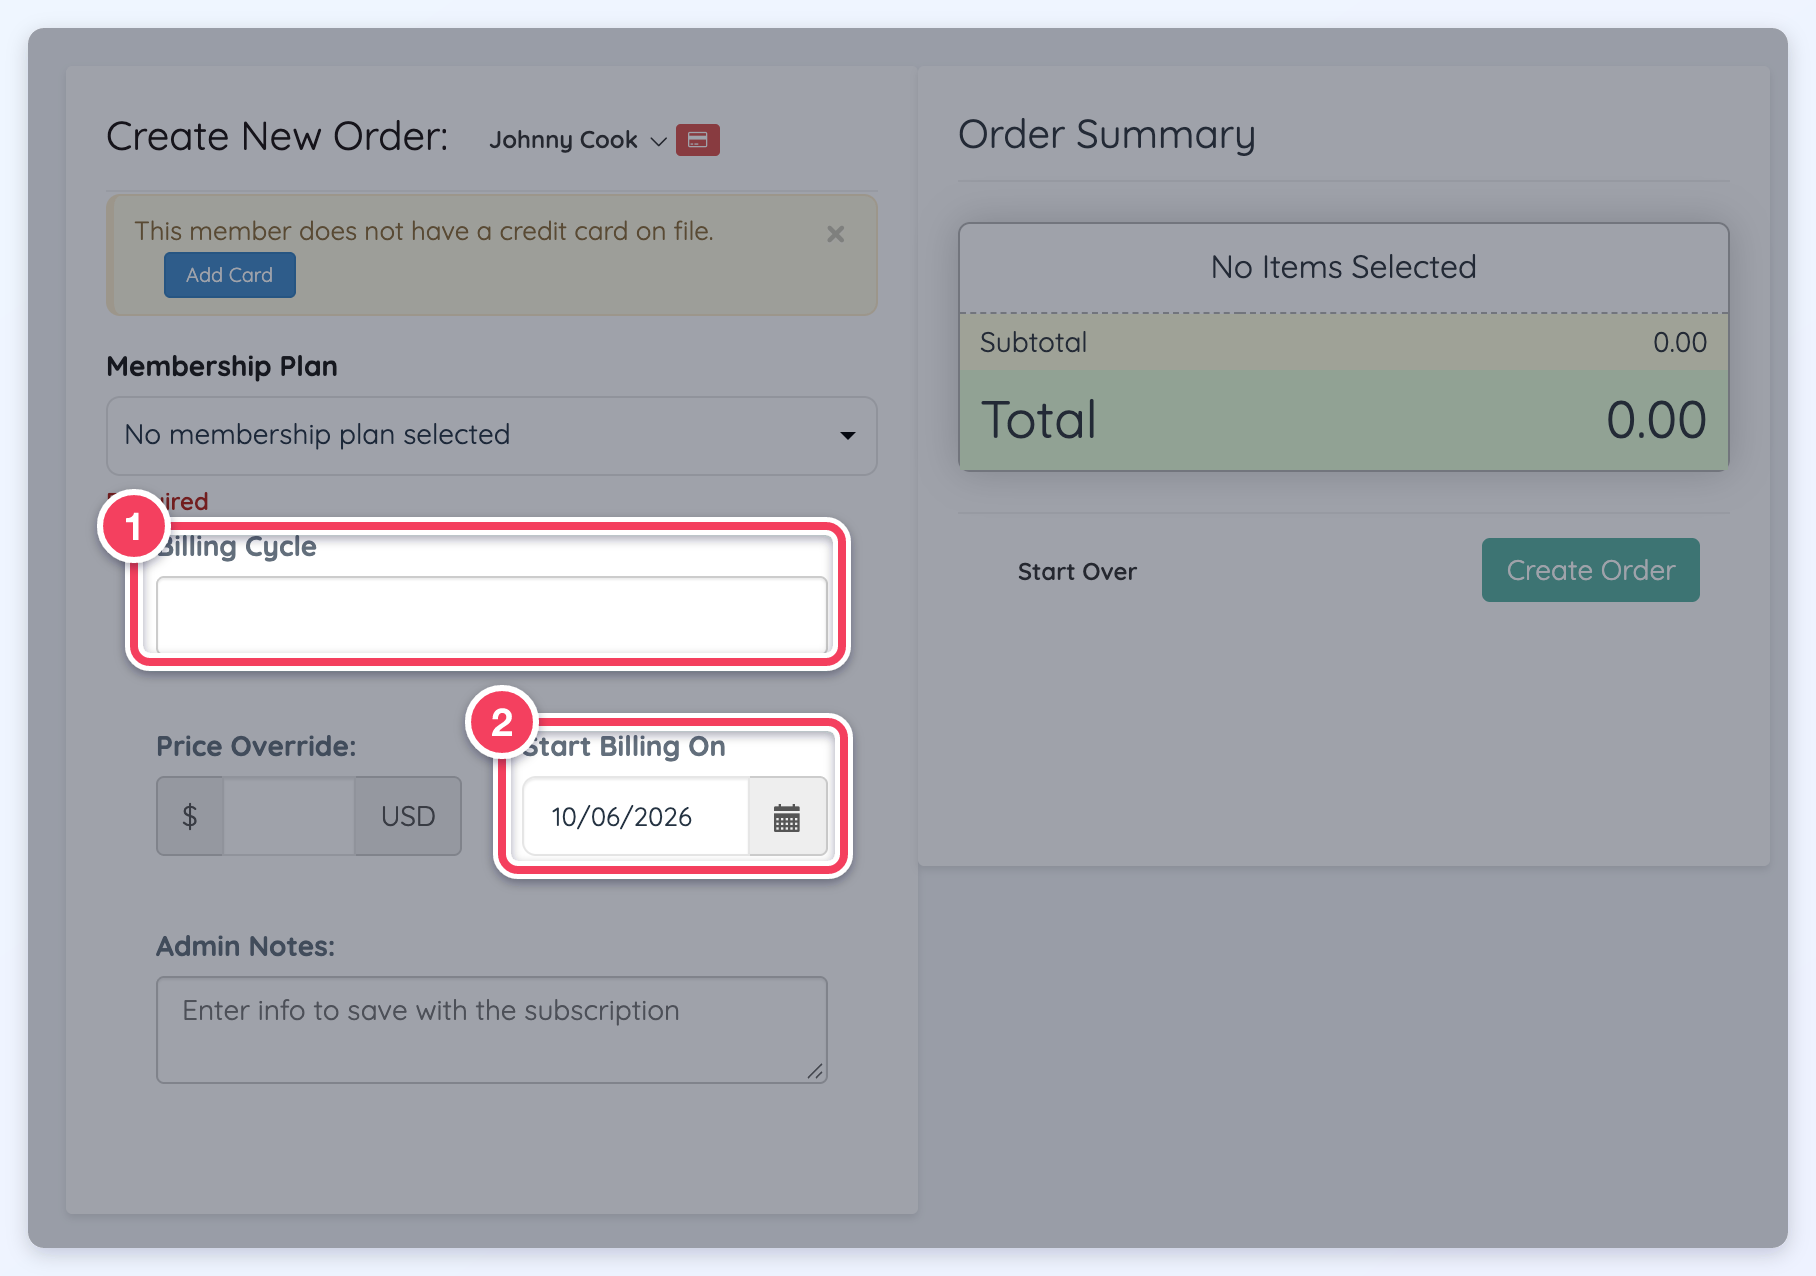
The billing_cycle and subscription_start_date fields allow the Billing Cycle and Start Billing On information to be included during the member import, removing the need to manually create this subscription information for each imported member.
Subscription Start Date
Field Variable: subscription_start_date
This field defines the subscription start date for the imported member. It is available for paid membership plans only and must be provided together with the billing_cycle field.
Accepted date formats:
- YYYY-MM-DD (example: 2024-06-15)
- YYYYMMDD (example: 20240615)
- The website's configured date format (e.g. MM/DD/YYYY or DD/MM/YYYY)
The subscription start date cannot be more than one billing cycle in the past or more than 10 years in the future.
Billing Cycle
Field Variable: billing_cycle
This field defines the billing cycle for the imported member's subscription. It is available for paid membership plans only and must be provided together with the subscription_start_date field.
The corresponding billing amount in the selected Membership Plan must be greater than 0. For example, if the billing cycle is Monthly, the plan's monthly amount must be greater than 0.
Available billing cycles depend on the billing options and prices configured for the selected Membership Plan.
Import the File
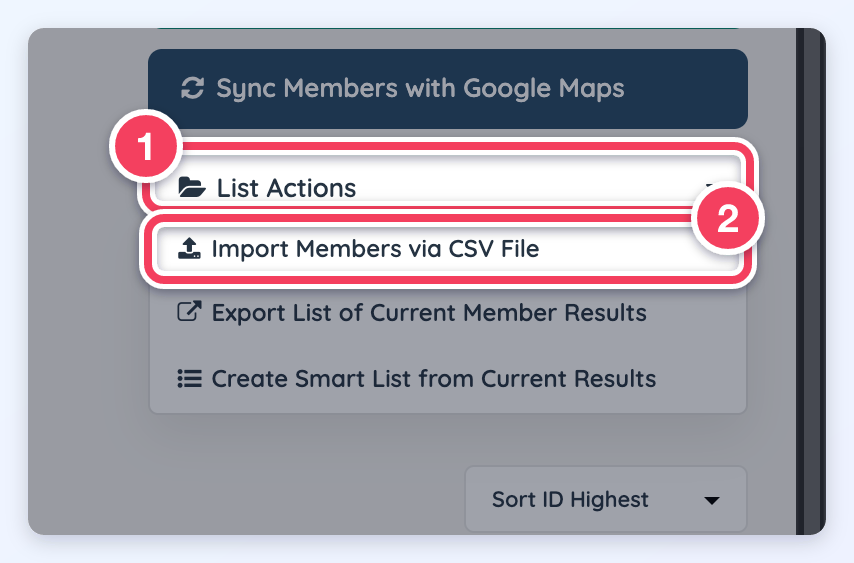
- Navigate to the Search Members section of the admin. On the right side of the page, open the List Actions menu and select Import Members via CSV File. The import page opens; the numbers in the second screenshot below match the steps that follow.
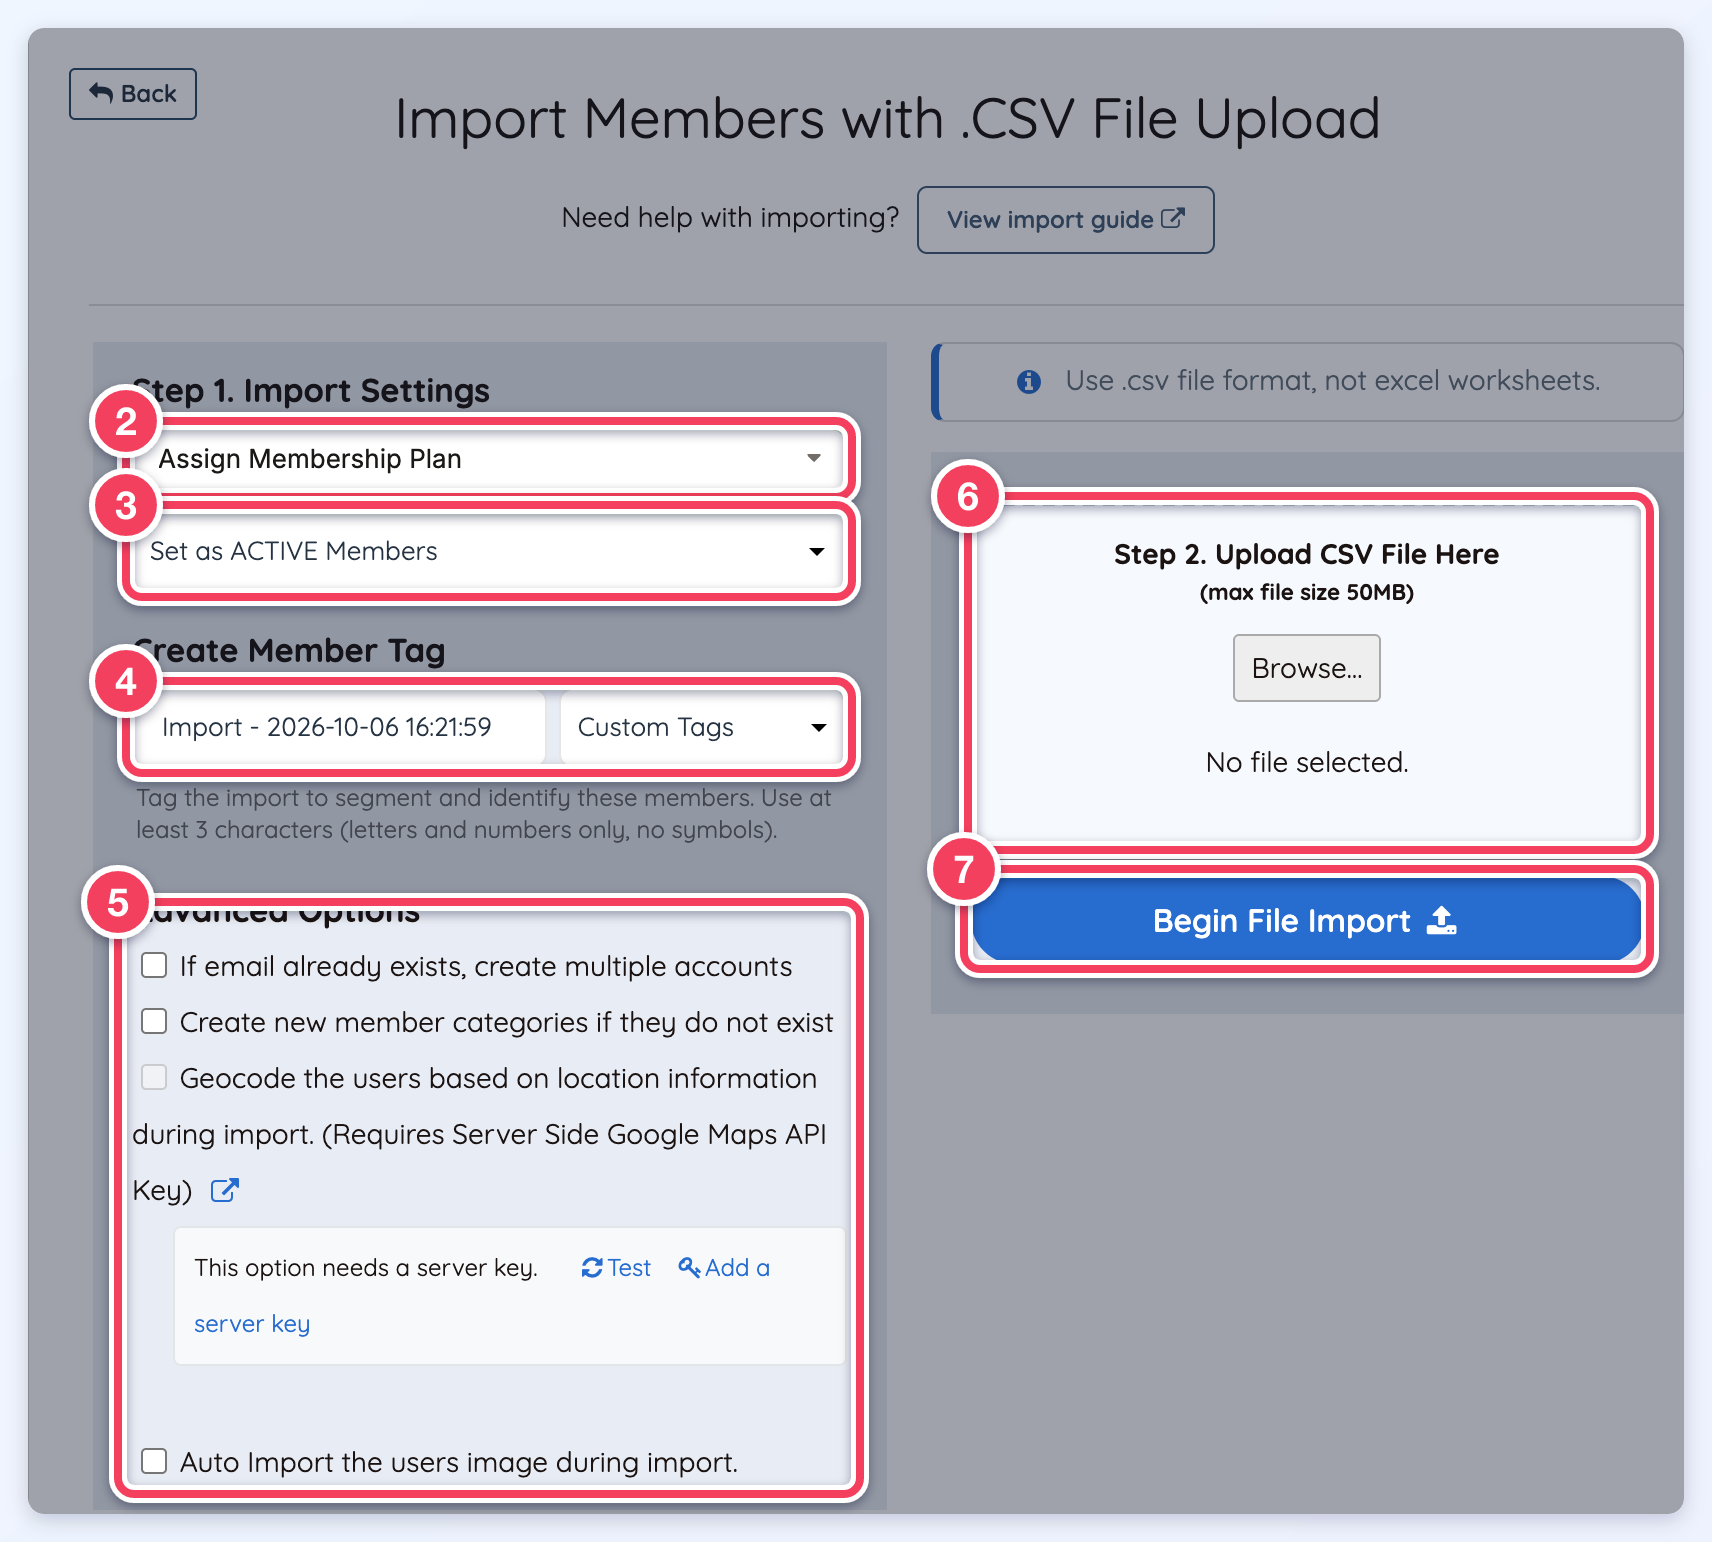
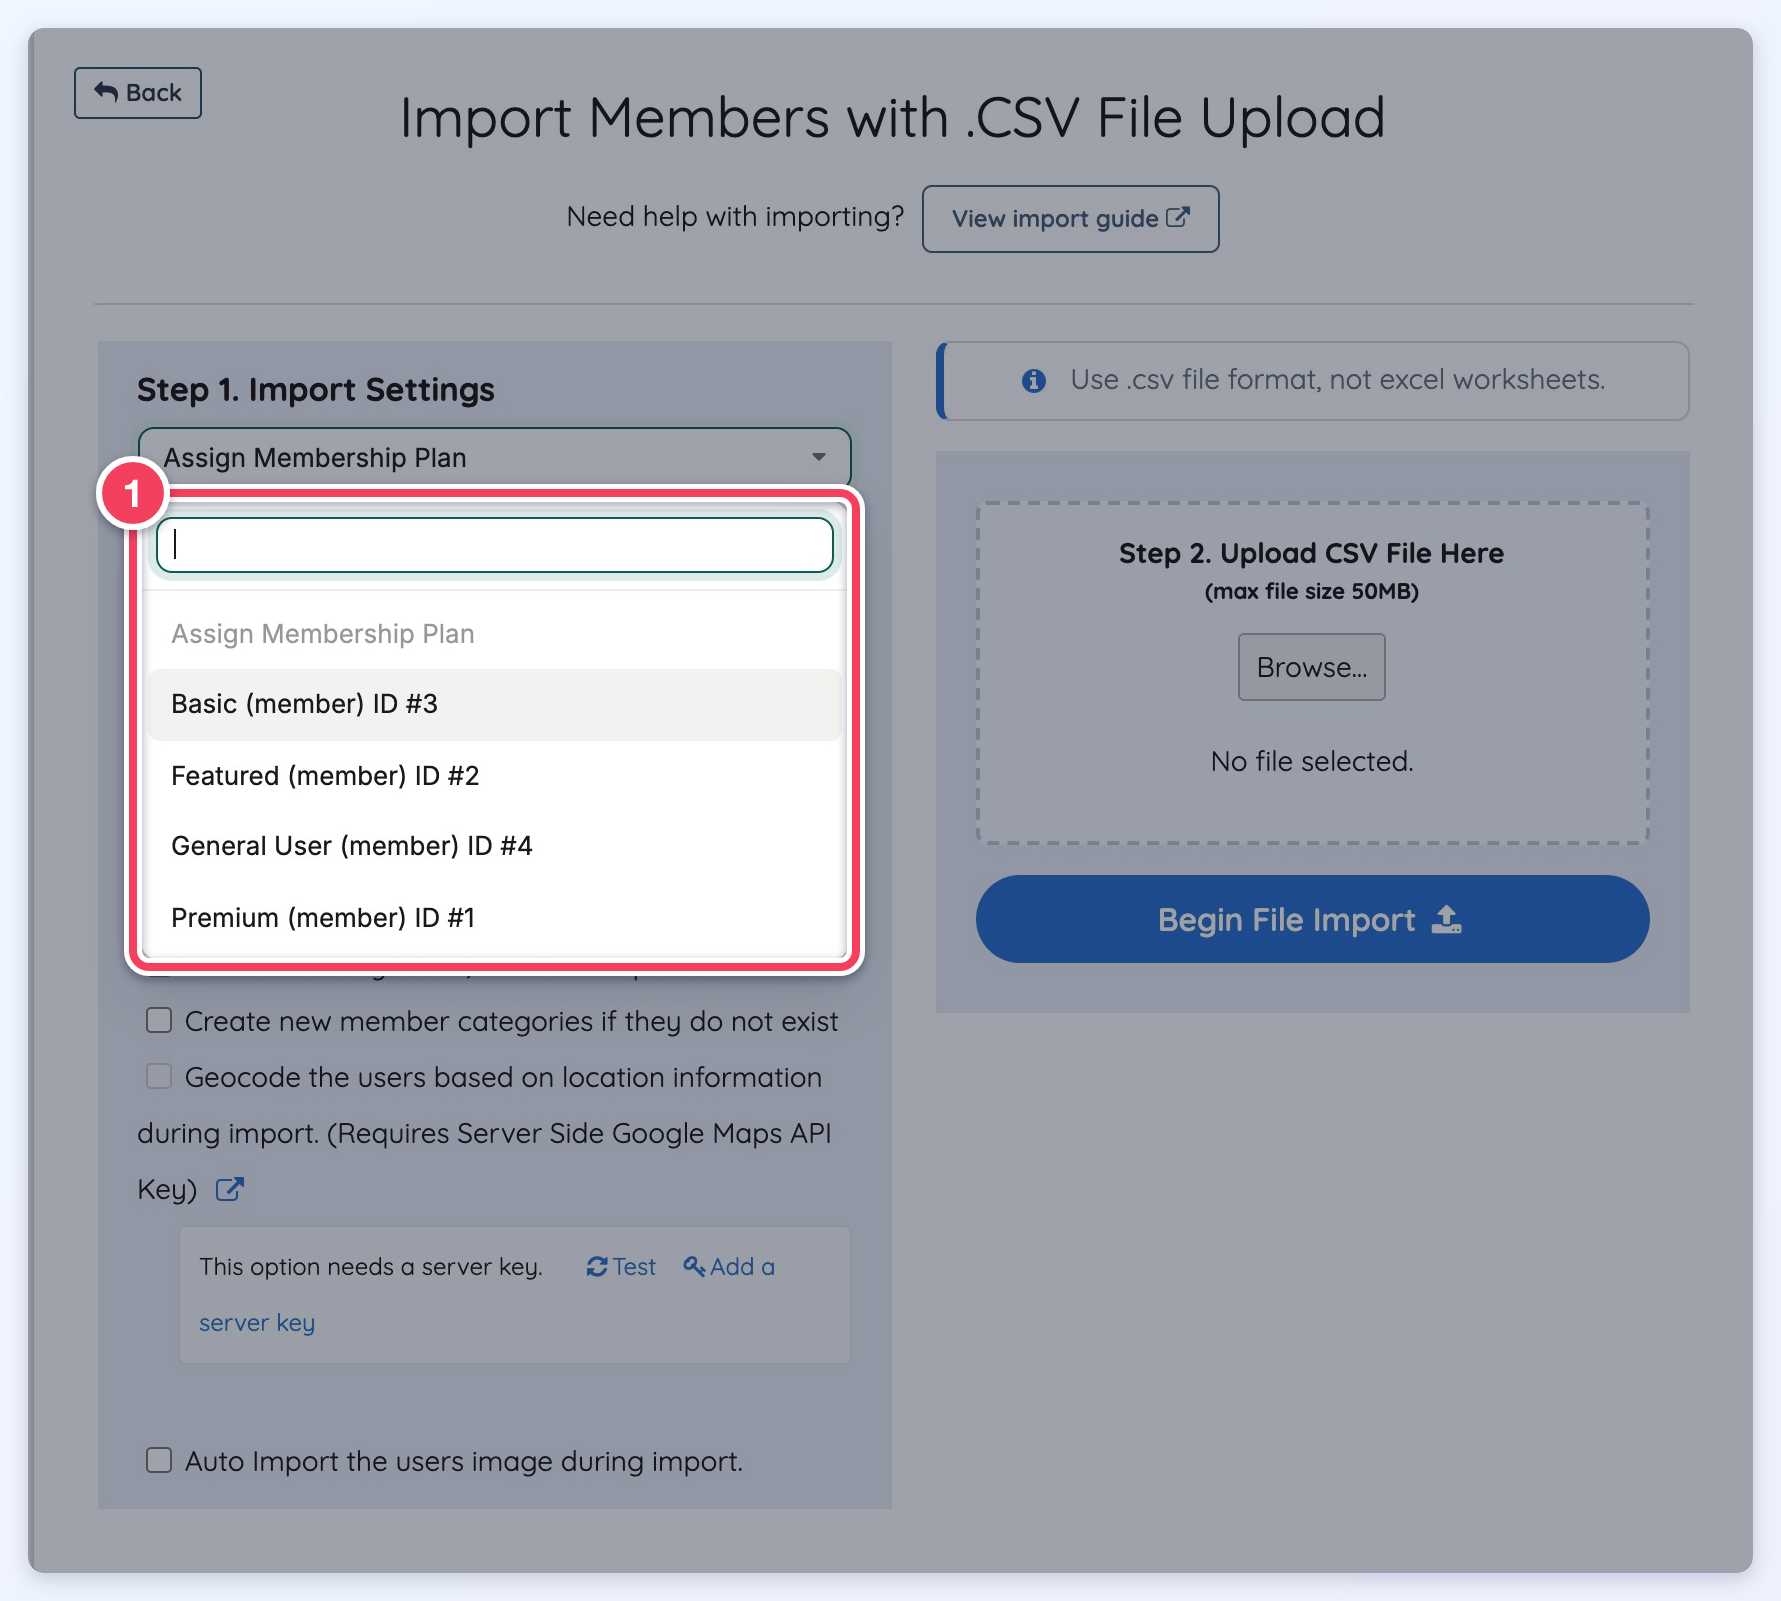
- The Import settings will allow the user to select the membership plan the new listings will belong to. This is required to begin the import.
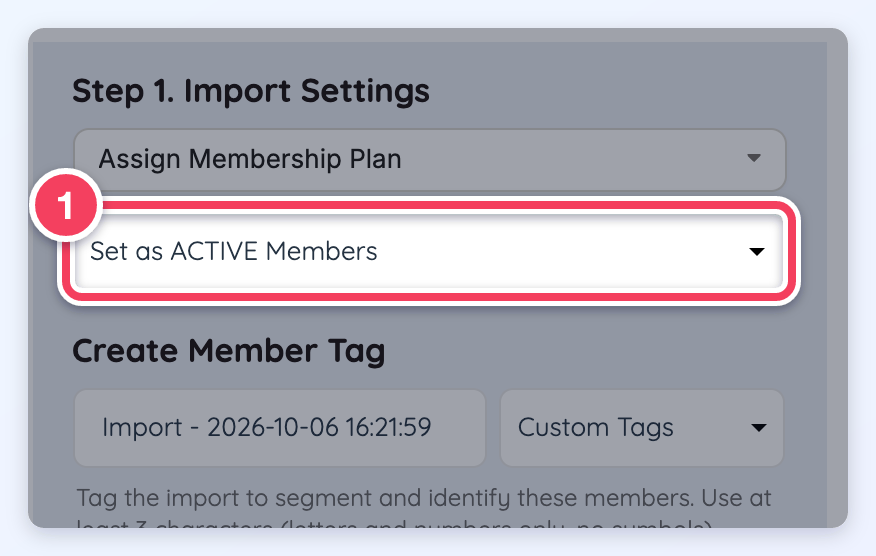
- A second option will allow the admin to determine the status of the listings upon import: Set as ACTIVE Members or Set as NOT ACTIVE Members.
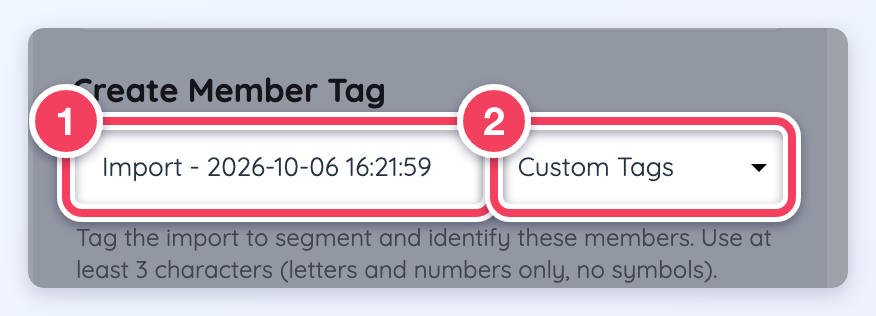
- An option to create a Member Tag and assign a Tag Group will show, the system will automatically fill out the tag name with the date and time of the import, the information can be edited and the tag can be assigned to any of the available Tag Groups:
- The Advanced Options will allow the import to:
- Pass unique email checks
- Create new categories from the file if they have not been added to the admin yet.
- Geocode the users based on the location added to the CSV file. To use this function, add the "Pretty URLS API Key": Set Up Pretty URLs with Google Maps. A status line under the Geocode option shows whether the server key works, with a Test button to check it again and a button to add or fix the key (Add a server key or Fix the server key); a key Google refuses there is not saved.
- Auto import profile photo and logo images - Member Images: Importing Members with Profile Photos, Logos & Cover Photos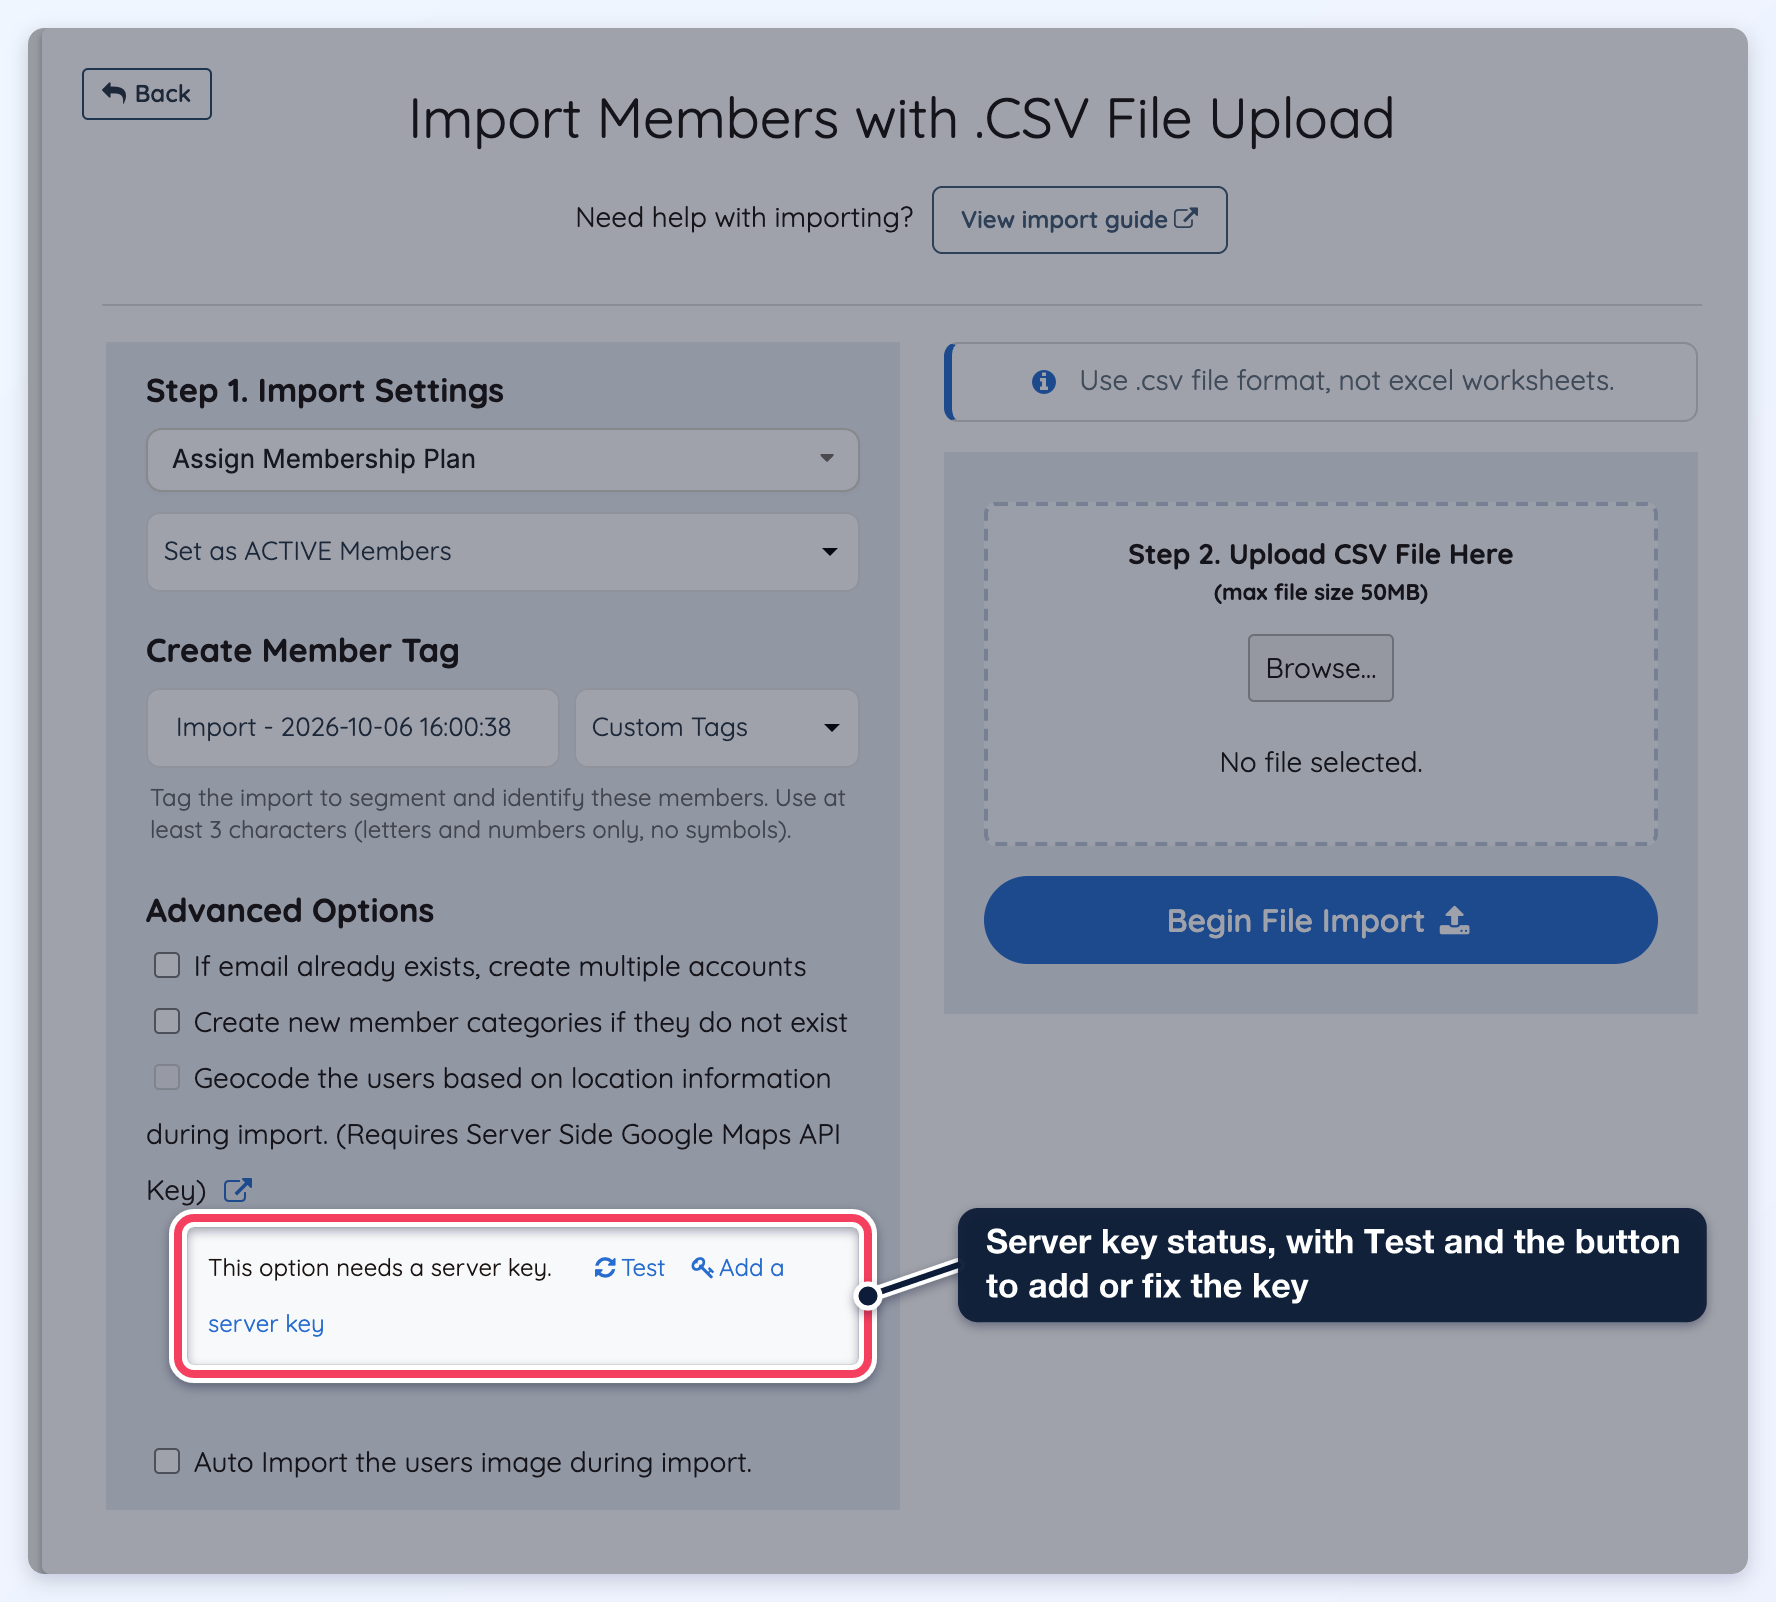
- "Step 2. Upload CSV File Here" will allow the user to select a CSV import file from the computer.
- Once the file is selected, simply select "Begin File Import" for the upload to begin.
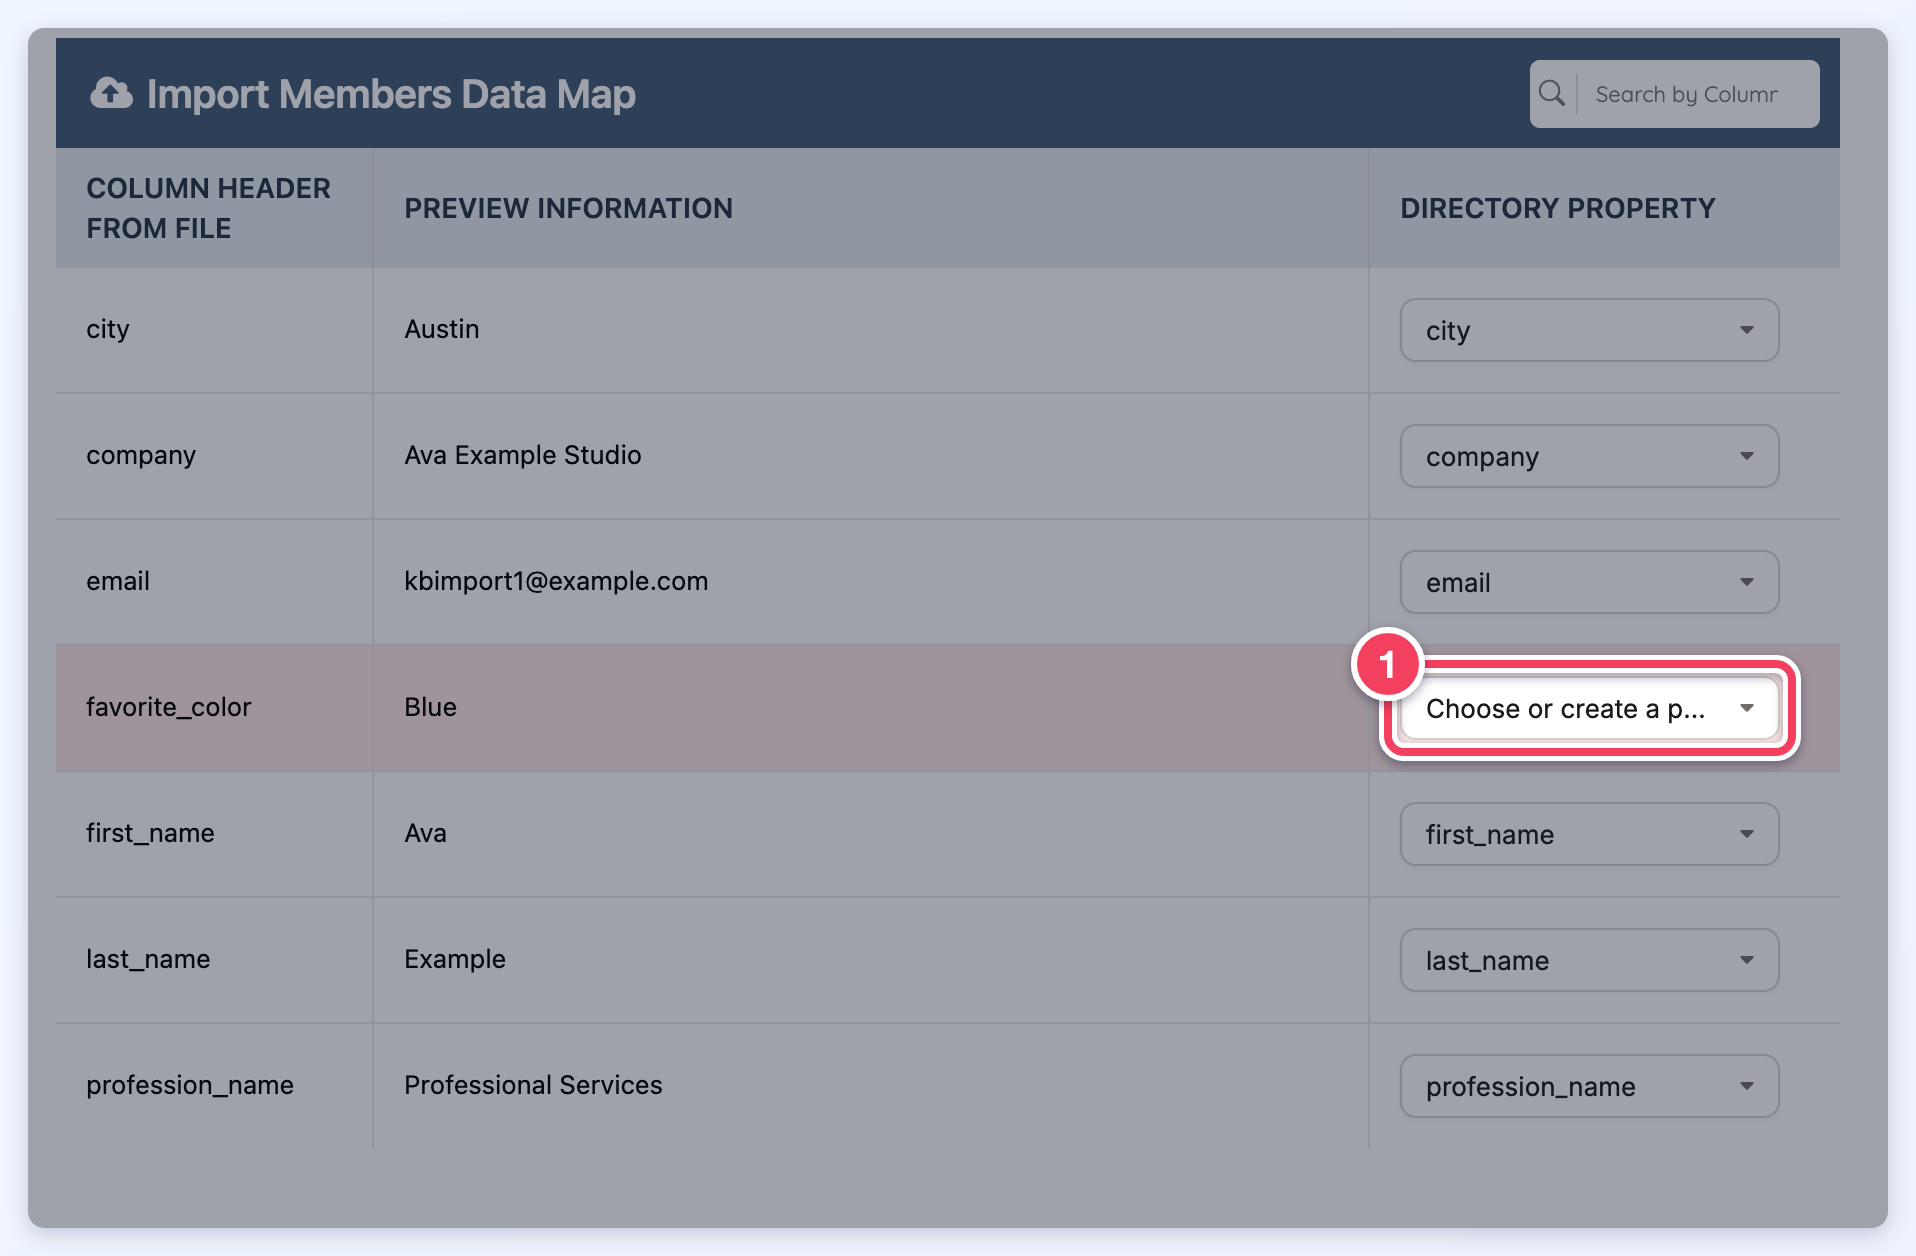
- The Import Members Data Map will display on screen, listing each column header from the file with a preview of its first value and the directory property it will be imported into (1). When using the default import templates without any type of variable modification, we recommend to perform the import as is and click Continue with Import (2).
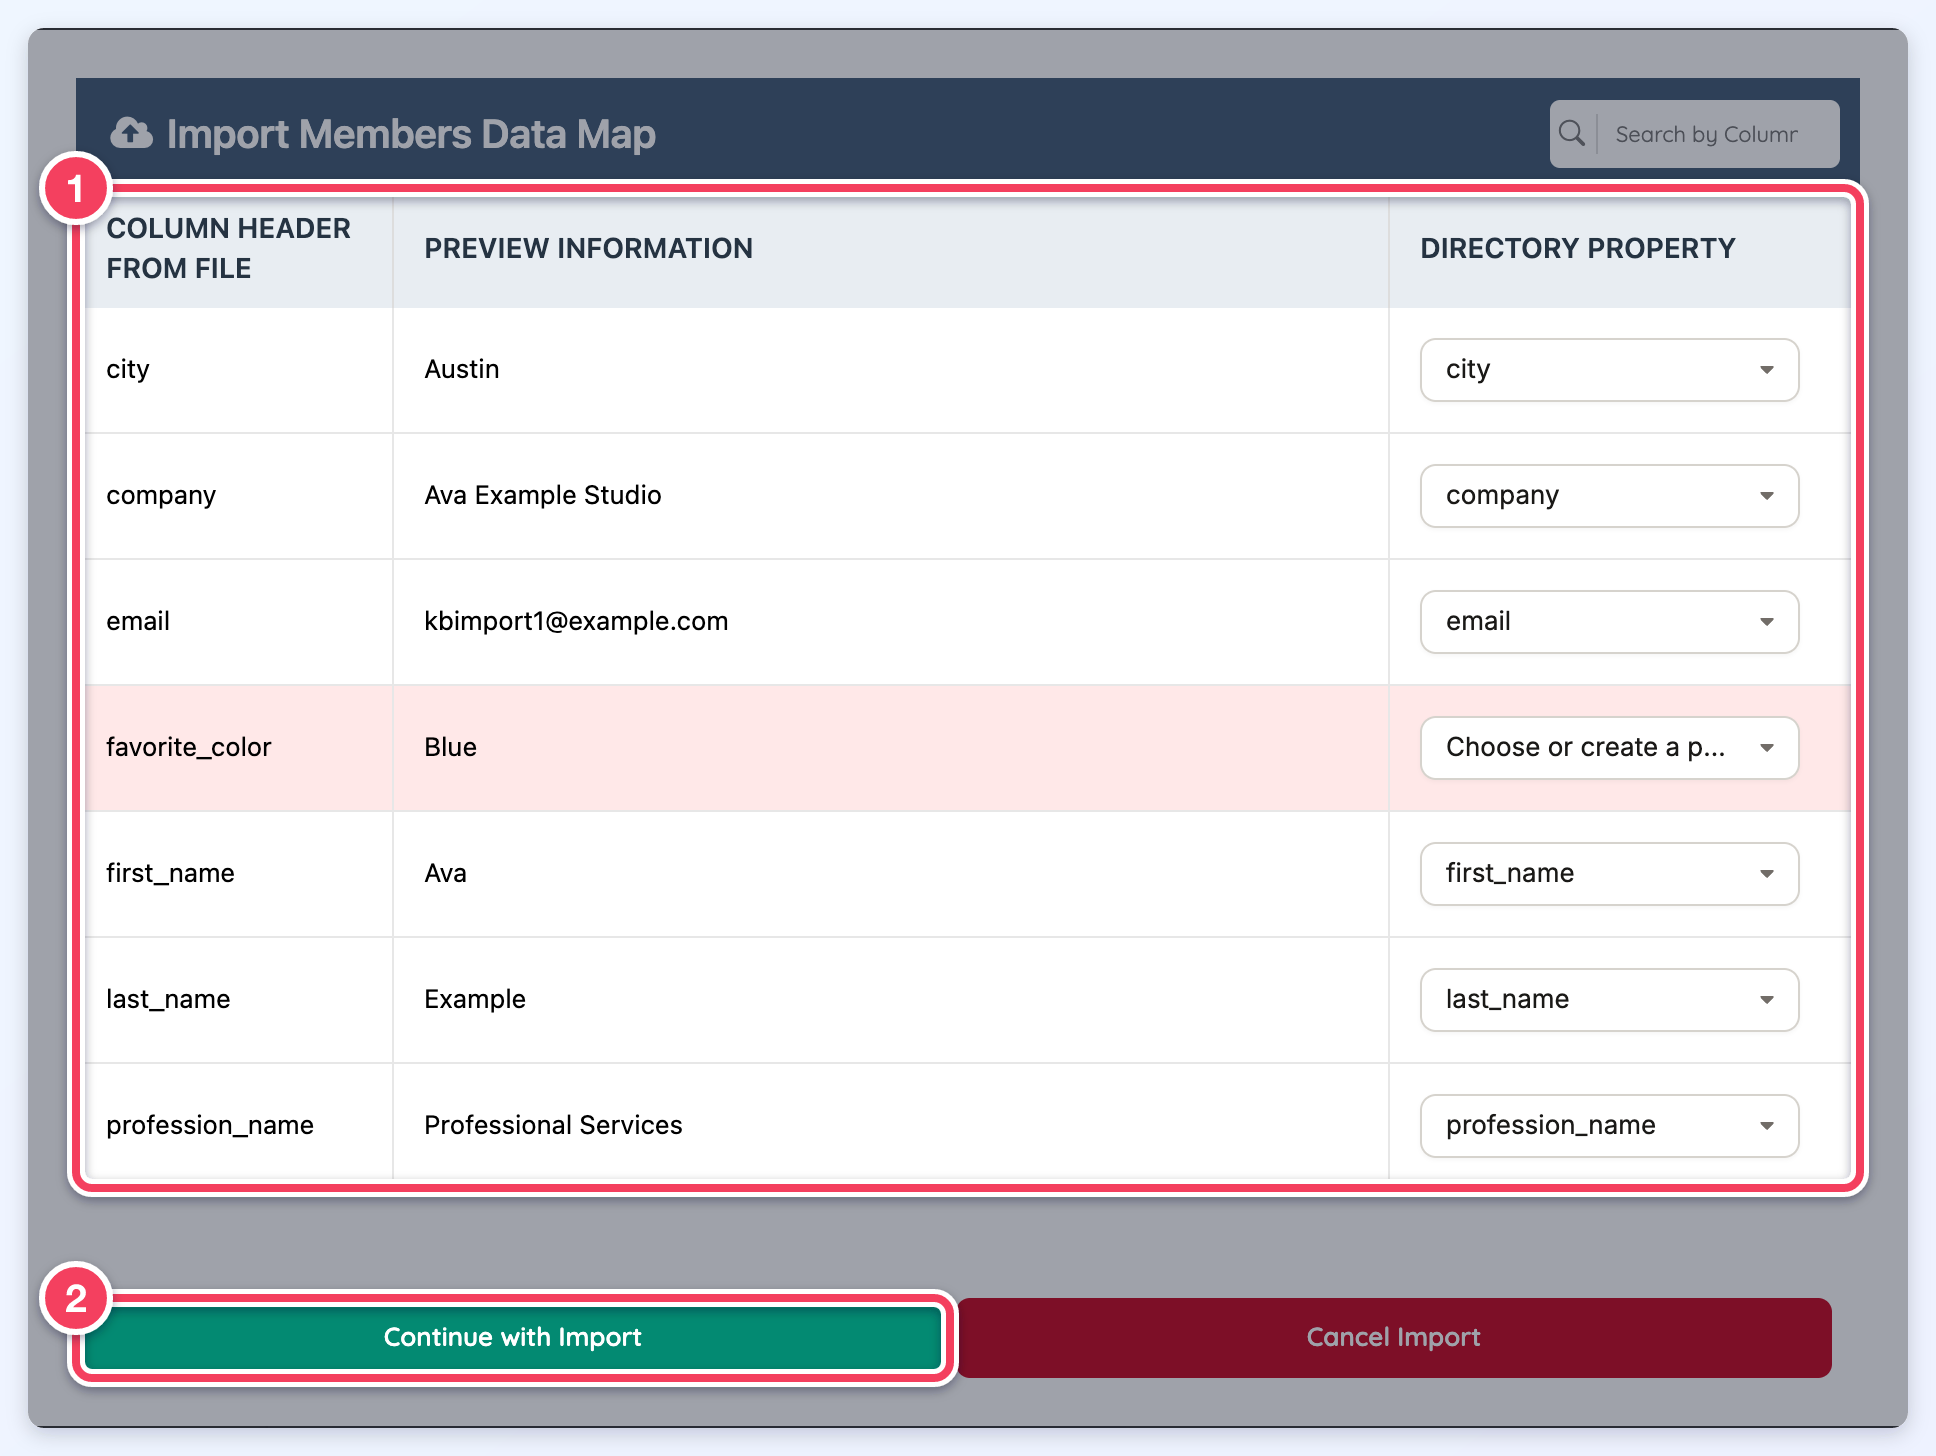
- If the import file includes custom variables which may have been added to forms prior to the import, the same module will display them on the left side of the columns with an example of a value next to it. A column that does not match an existing property shows Choose or create a property in its Directory Property dropdown (1). Click that dropdown to choose the property the column should be imported into:
The dropdown lists the existing properties (1): every standard member field, plus any custom field that already has a value saved for at least one member. Should the new variable be missing from the list, click Create new property (2) at the bottom of the dropdown to create the variable name for a successful import:
Type the new property name and click Add (1) to add it to the dropdown. Use lowercase letters, numbers, underscores or hyphens: uppercase letters are changed to lowercase and spaces to underscores, and a name with any other character, or one already in the list, is not accepted: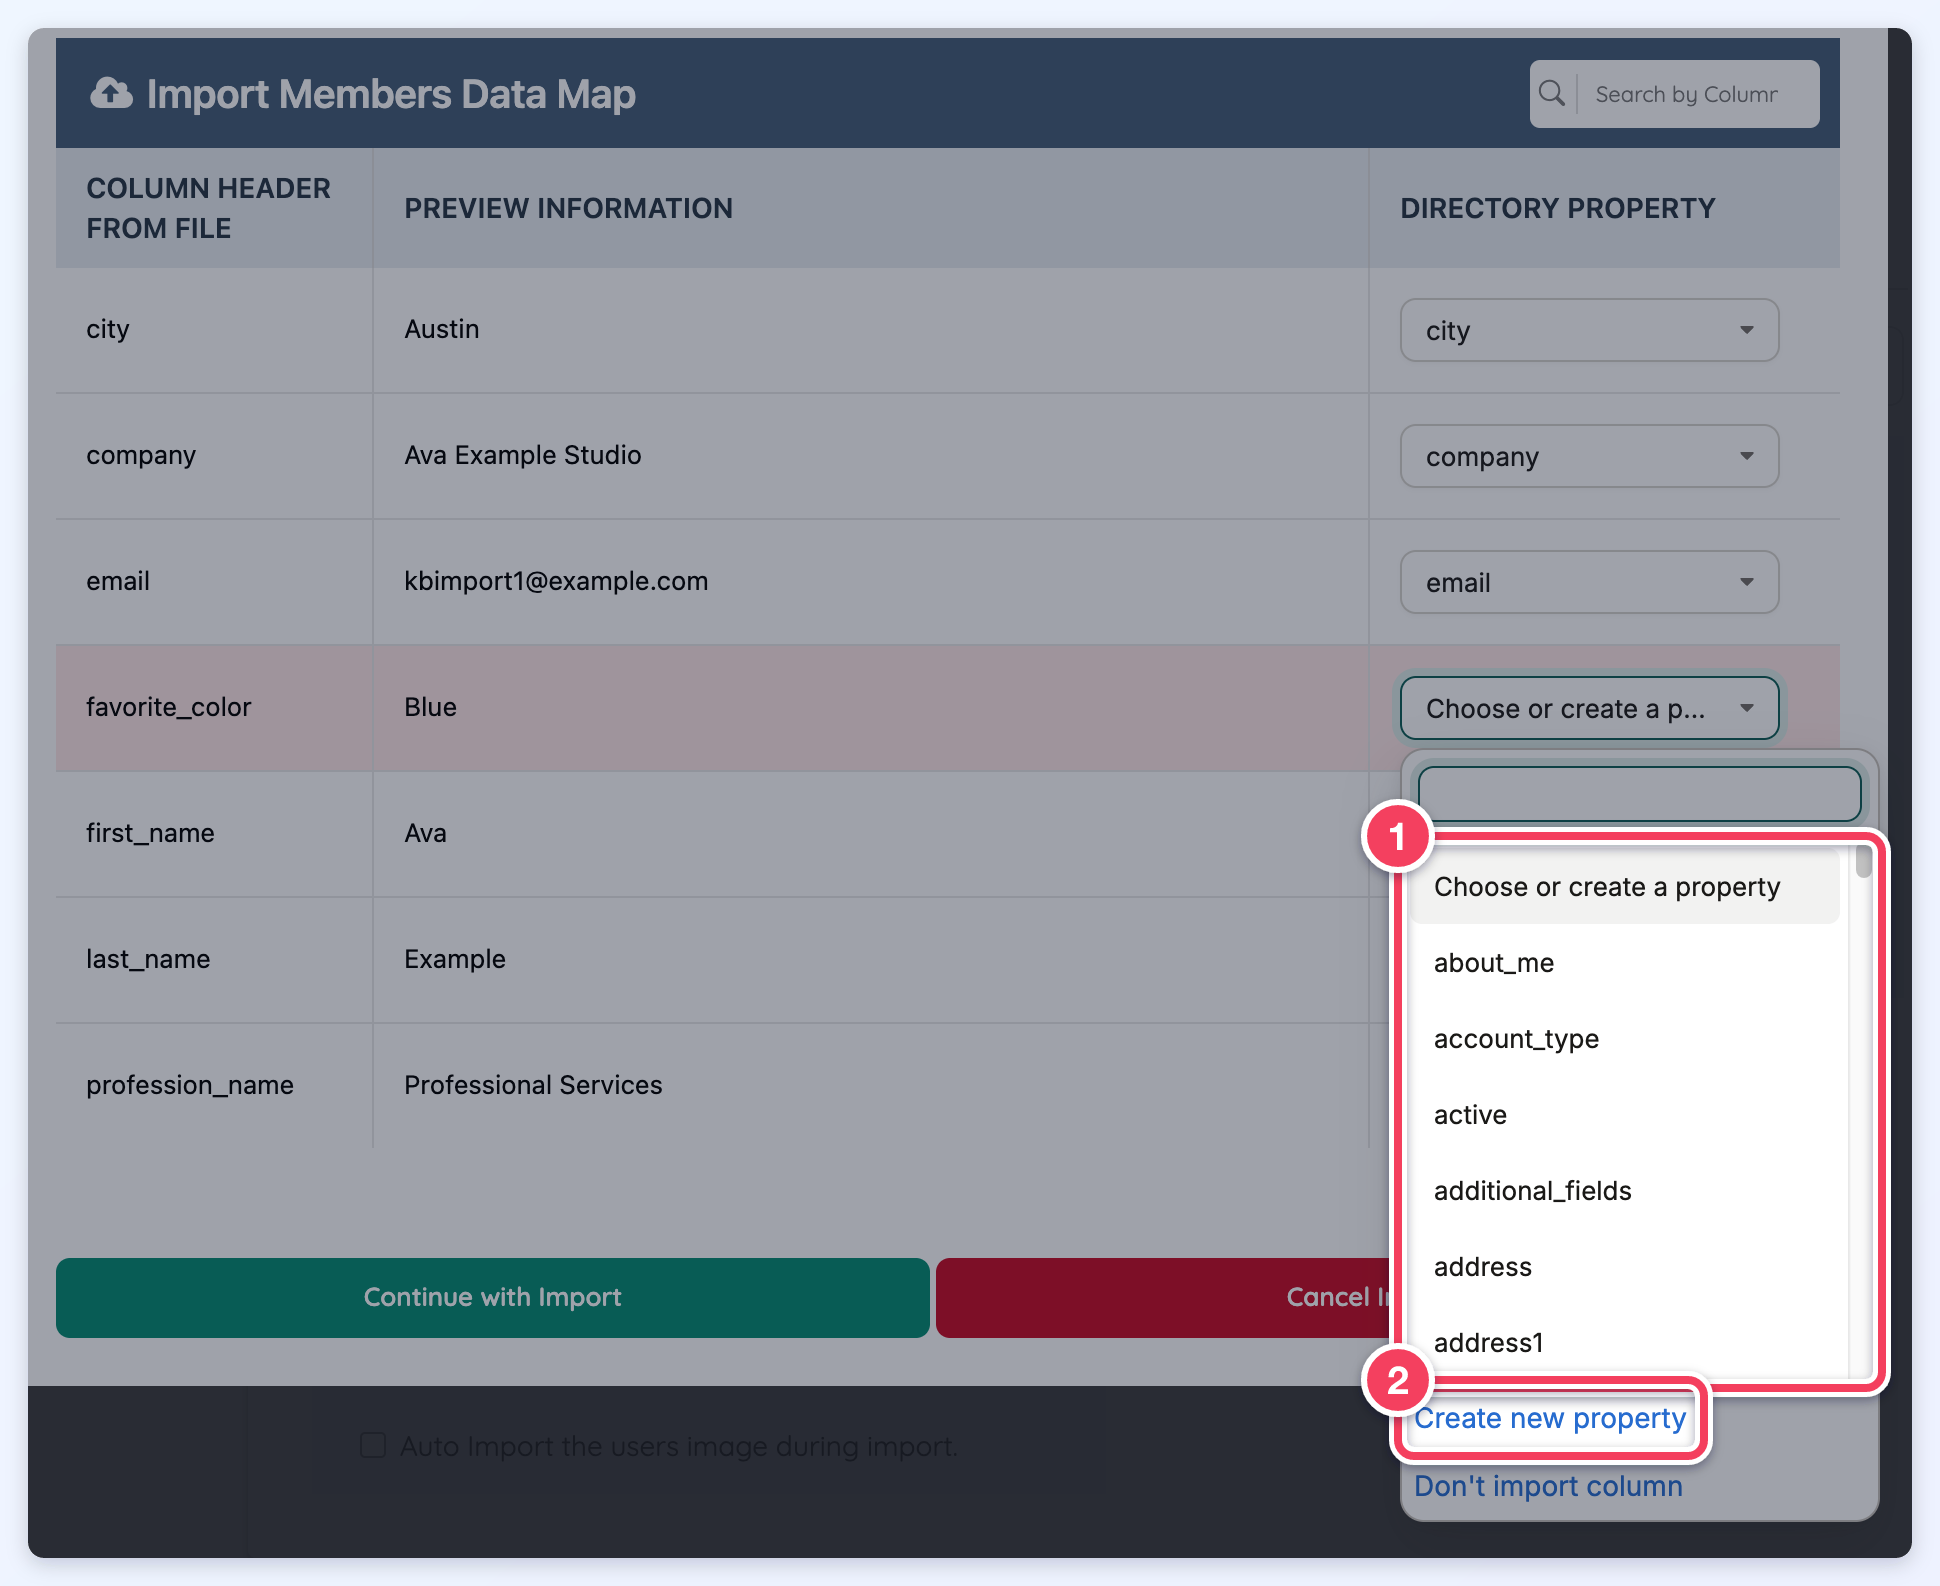
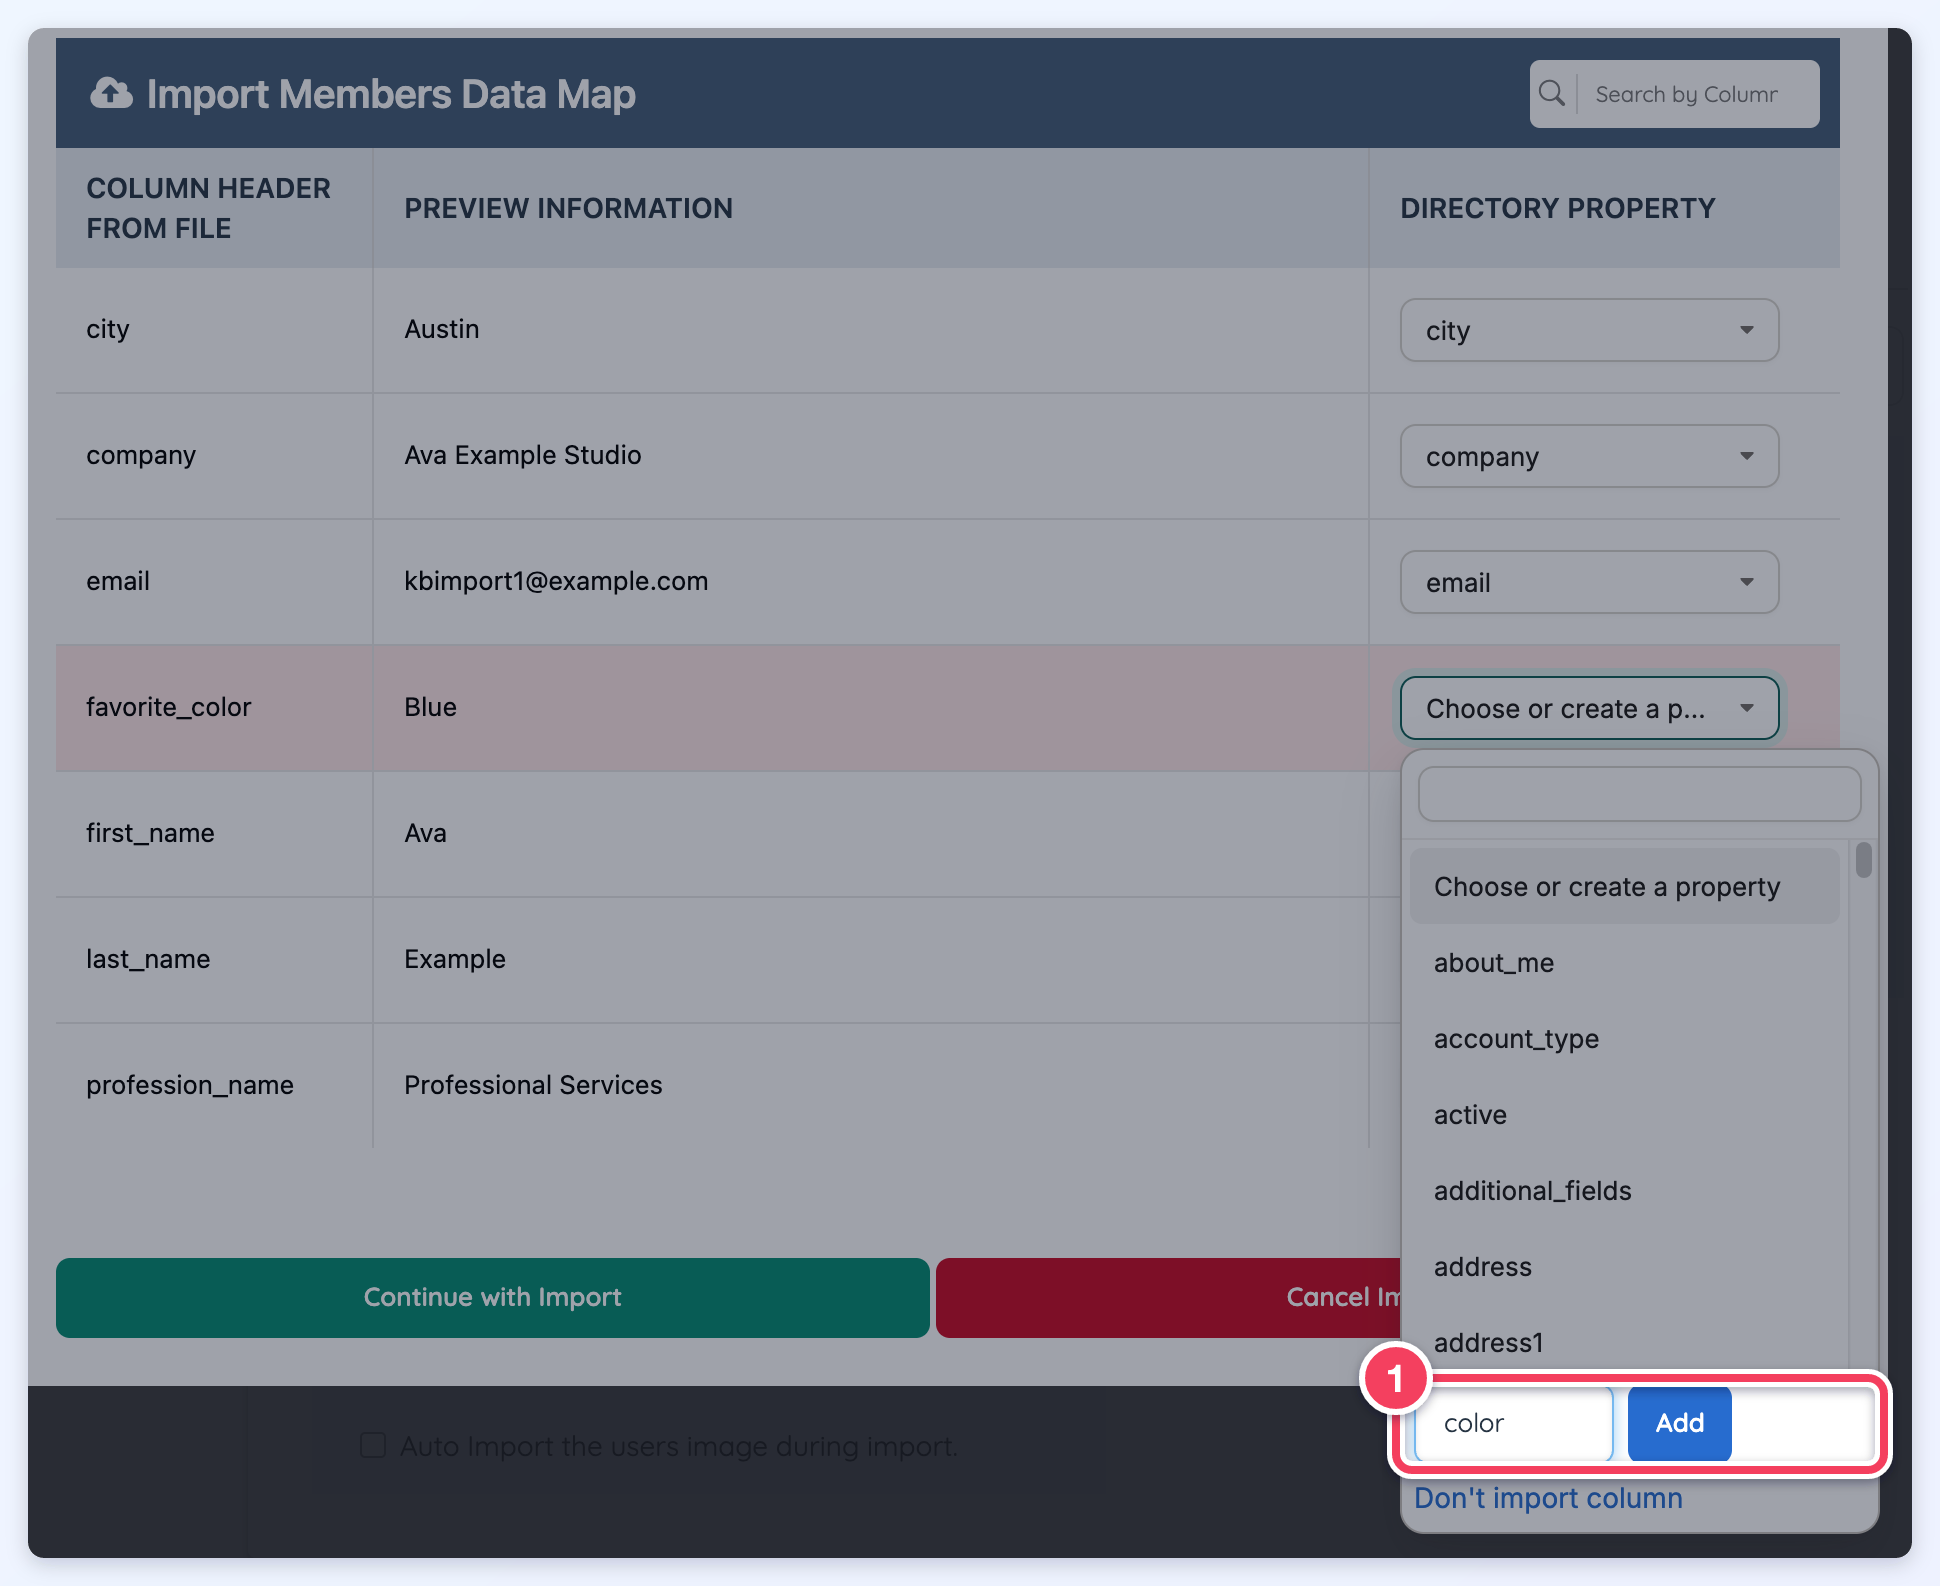
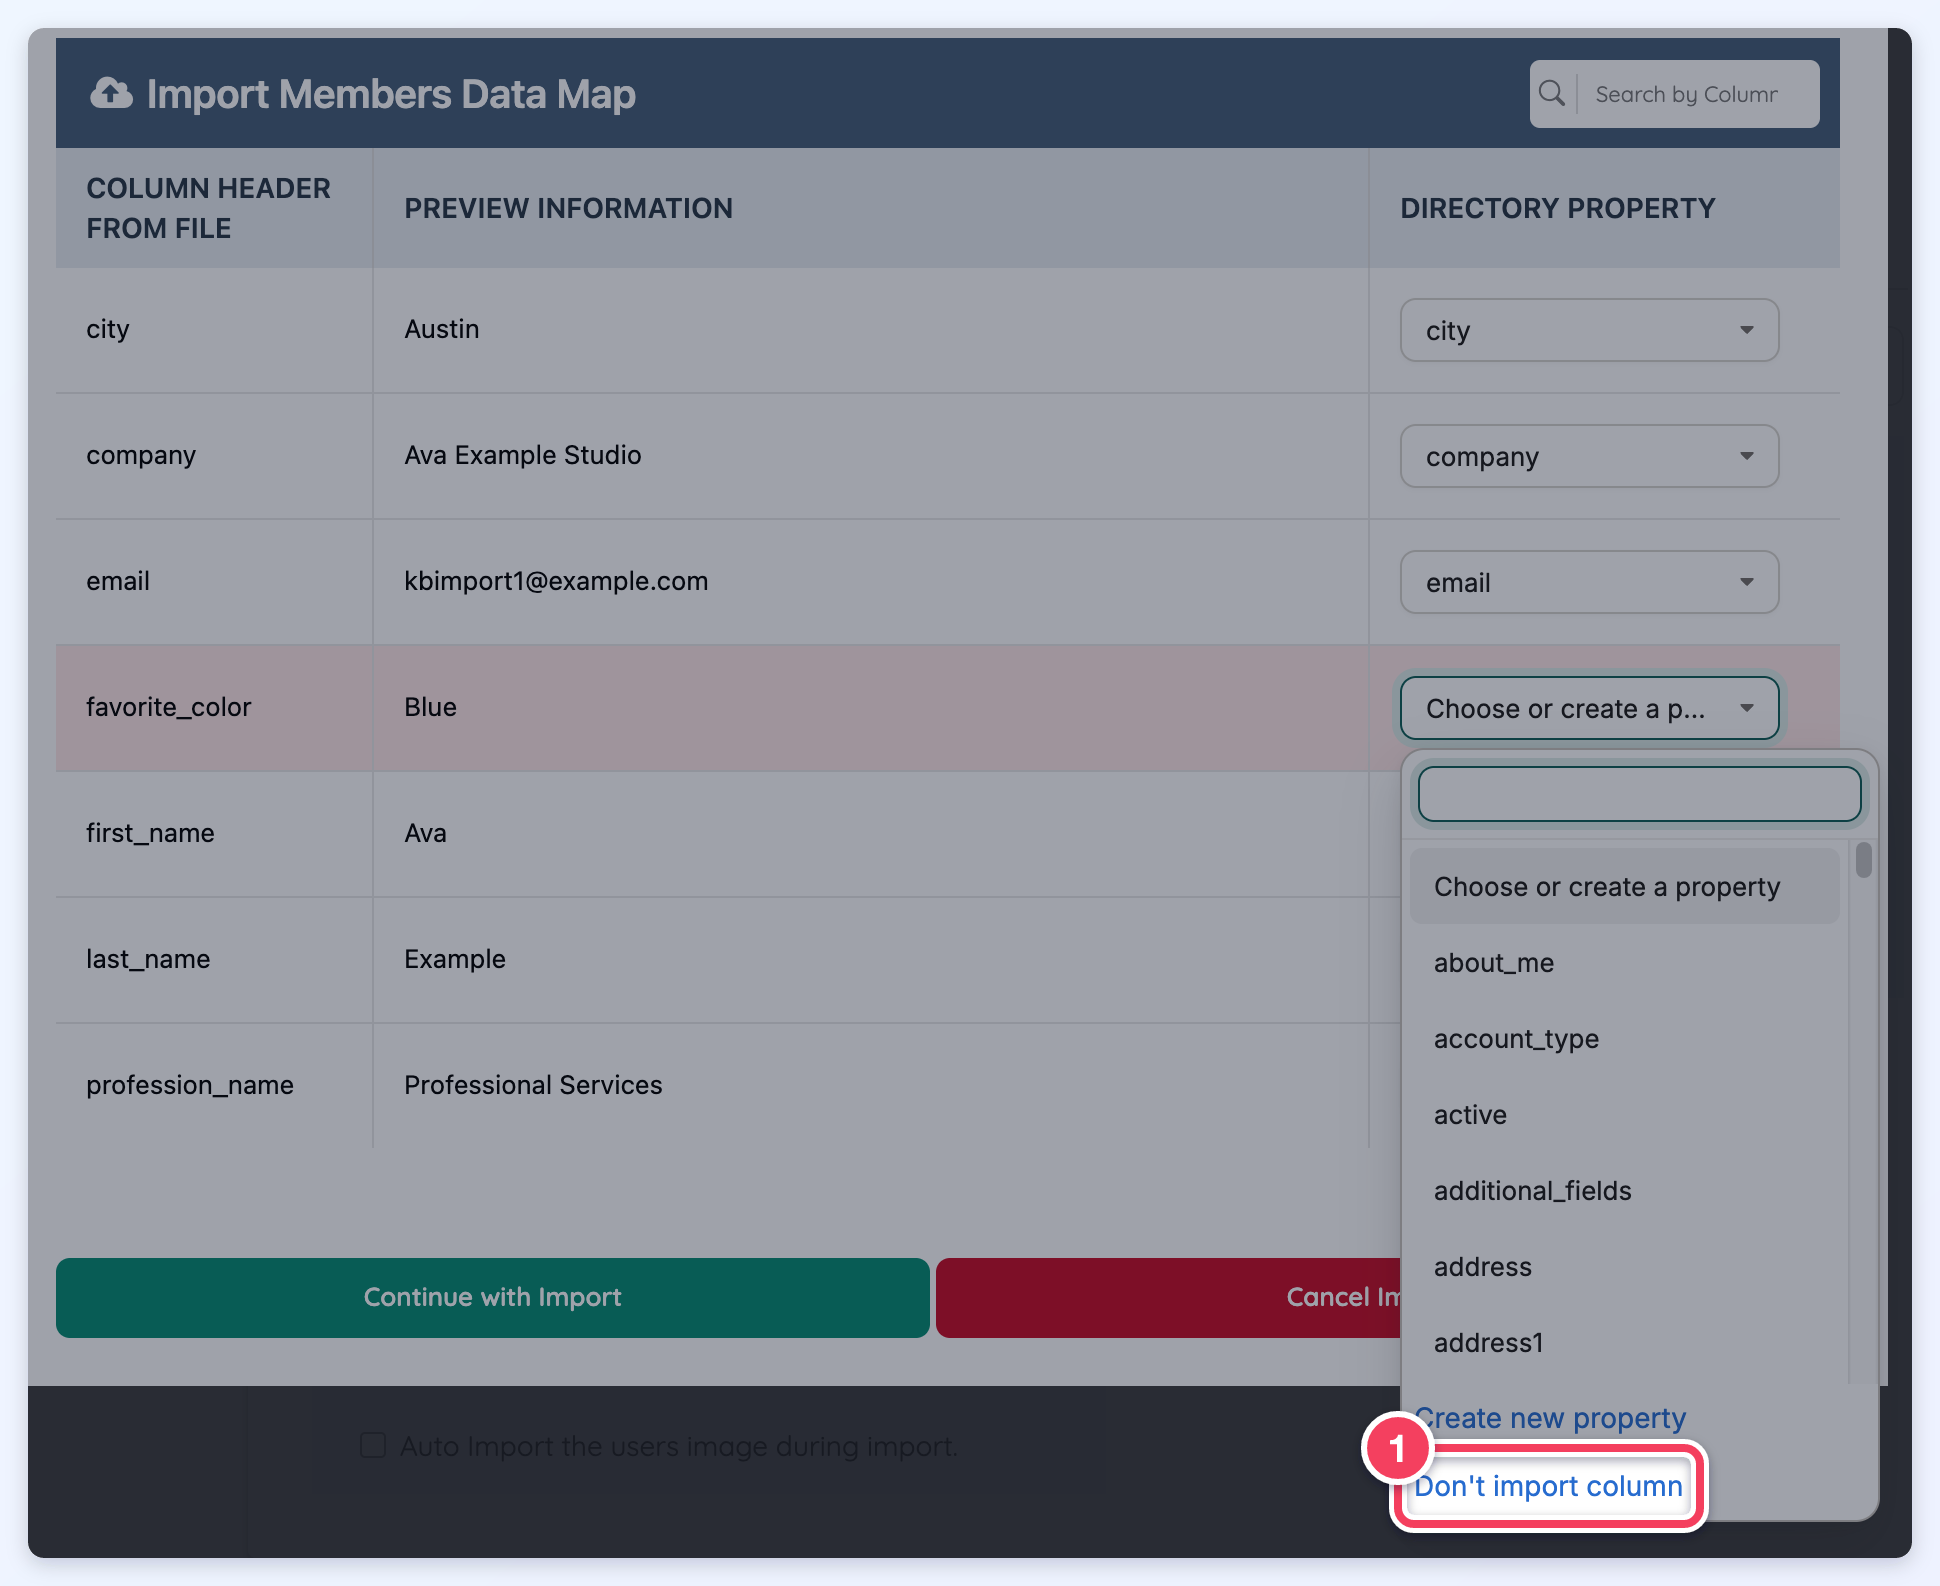
Then open the dropdown again, type the new property name in the search box at the top, and click it to choose it for the column. - To leave a column out of the import, open its dropdown and click Don't import column (1):
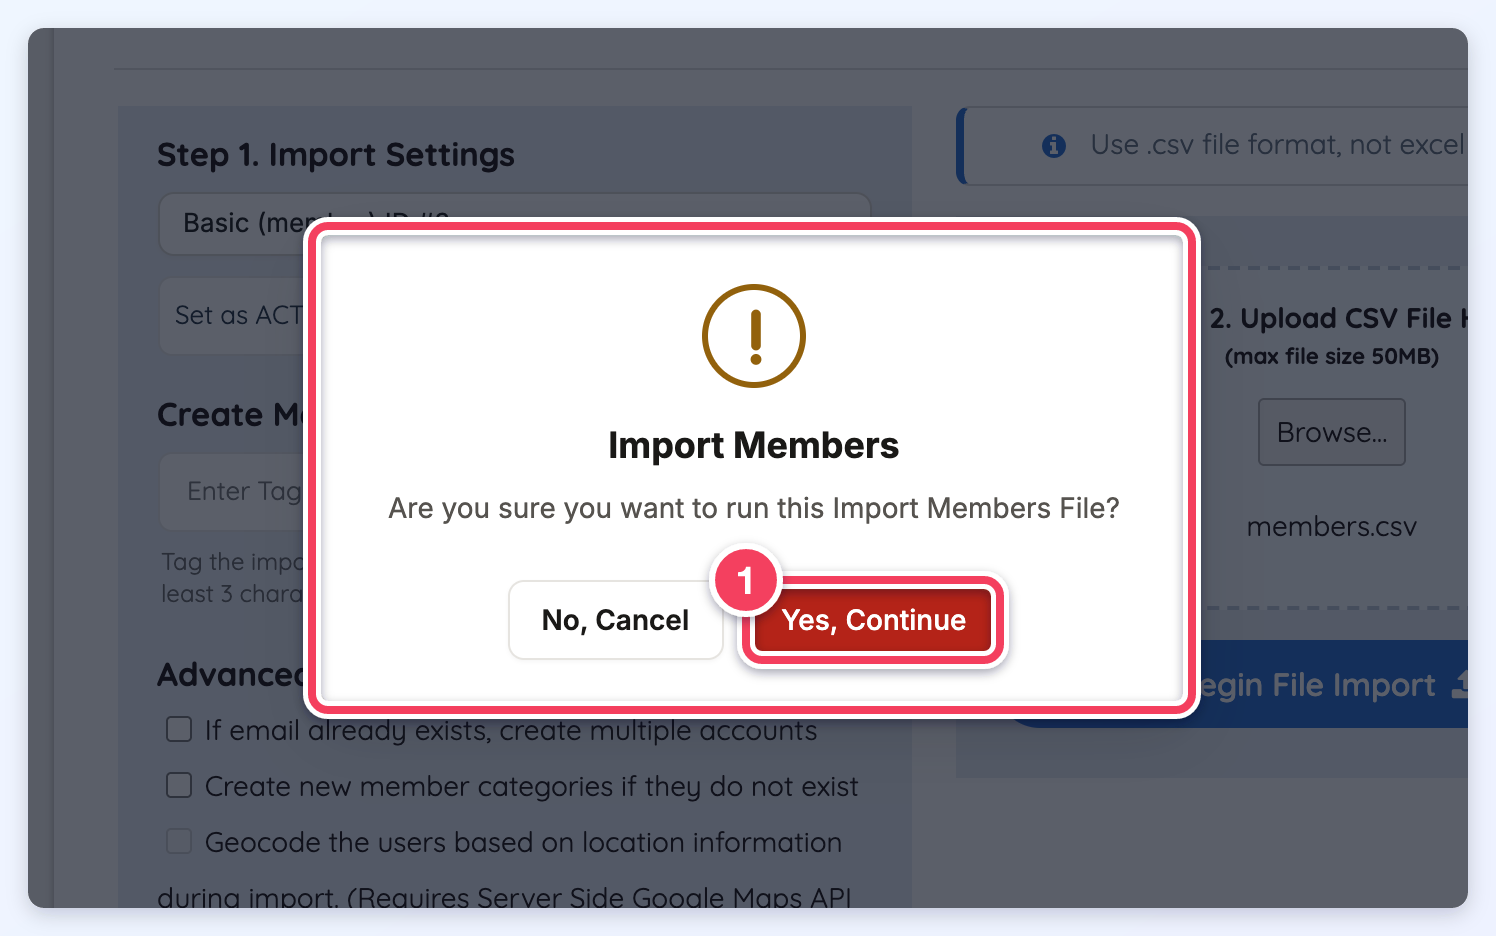
- Click Continue with Import. One last verification asks "Are you sure you want to run this Import Members File?": click Yes, Continue (1) for the file to be imported.
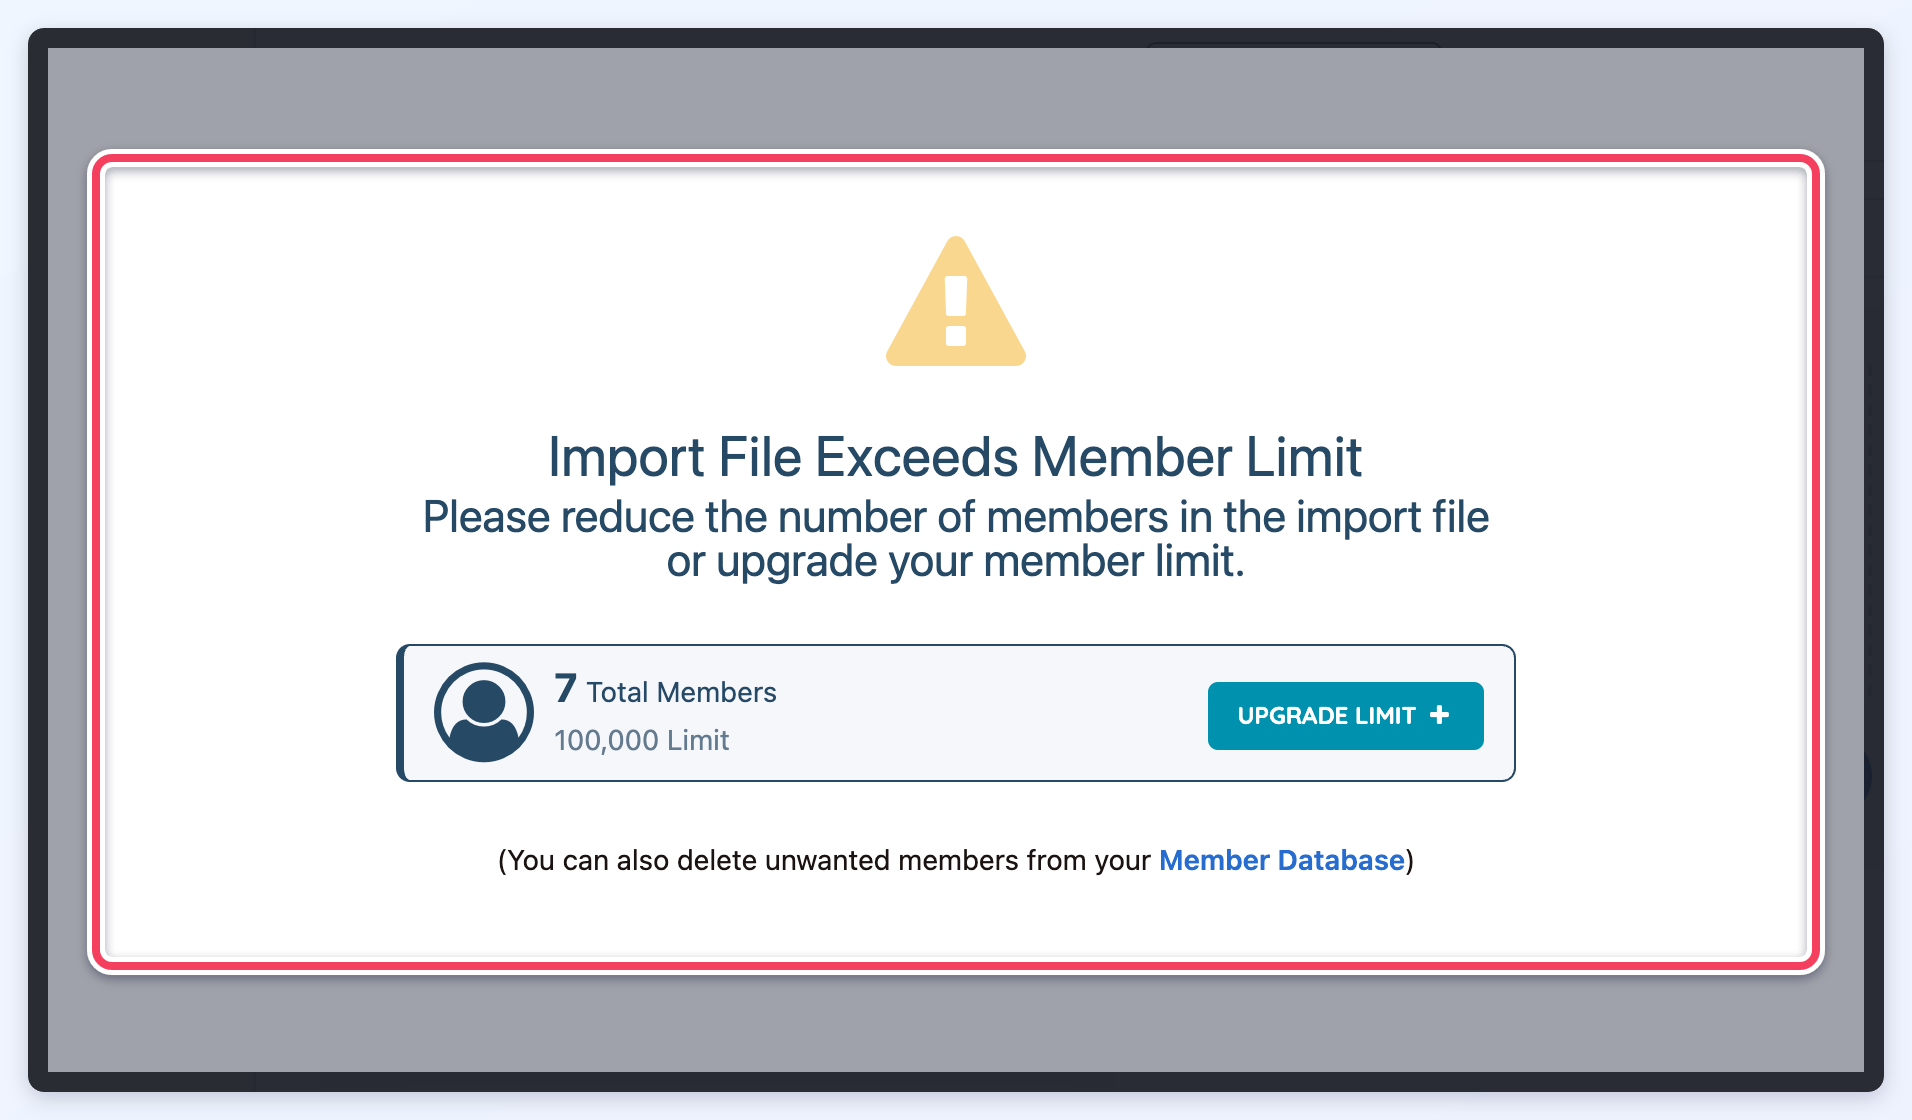
Important Note: An error message titled Import File Exceeds Member Limit will display in place of the Data Map when the number of members in the file plus the members already on the site is more than the site's member limit:
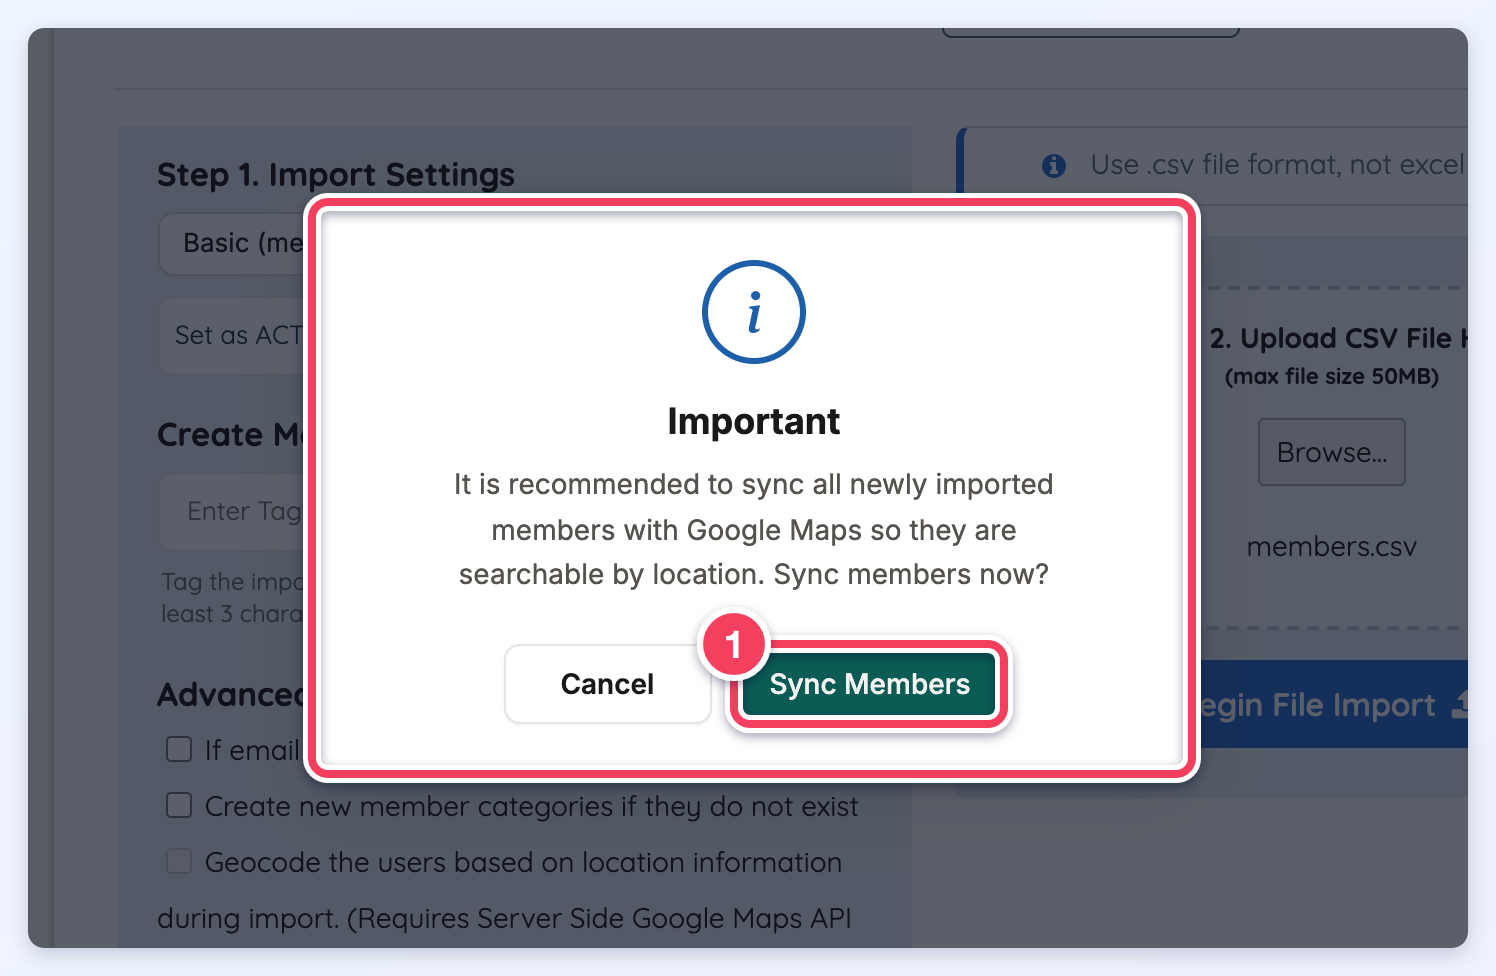
Once the import is completed a message is going to pop up to Sync the members with Google Maps:
"It is recommended to sync all newly imported members with Google Maps so they are searchable by location. Sync members now?" Click Sync Members (1) to open the geocoding page now, or Cancel to do it later.
To learn more information regarding member limits, refer to the article down below:
Geocode Members
Import Profile Images (optional)
Member Images: Importing Members With Profile Photos, Logos & Cover Photos
For the Cover Photo to appear on the profile this Add-on must be active on the website Profile Cover Photo.
Get Personal Assistance
We understand that this can be a challenging process, even for some users that are more technically inclined. If one would prefer that someone on our team assists with the import of the members, we have Training Sessions covering importing members. Use the link below to purchase this service: Training Sessions
Important Notes
- The files below should be downloaded to the computer and viewed in a spreadsheet application like Microsoft Excel, Google Sheets or another similar application.
- Service Areas can't be imported at this time, this might be something we add in the future.
- The system checks default URL fields (website, booking link, social, etc) and only imports them if they’re in a valid URL format - otherwise, they’re skipped. Valid formats are: https://website.com or https://www.website.com.
